You will miss your 90mm lens and your 50mm Noctilux the first days with the Leica Q. Now you got to move your feet and use your head to compose. One lens is all you got. It's brilliant. This is the camera for training of the eye and mind.
"Leica Q Masterclass" eBook
"Leica Q Masterclass" Video Course
+ Leica Q
Presets for Lightroom
Thorsten Overgaard Leica Q Video Course
& The know-all eBook on the Leica Q
By Thorsten Overgaard
+ Leica Q Presets for Lightroom.
This is the complete bundle you can order now
and get instantly delivered to your email.
It's a pretty complete package with over two hours of Thorsten Overgaard Leica Q Video Course, and the Leica Q Masterclass eBook..!
For computer, iPad, smartphone and Kindle.
At also comes with Thorsten's Lightroom
presets and Capture One Styles for Leica.
Buy Now. Only $298.00
Bundle with Video Course, eBook and LR Presets
#1570-1216
Order bundle now. Instant delivery.
Should I get the Leica Q..?
When people ask me, what camera to get, there is not many to point at. You want a simple camera with a very few controls, those few controls should all be the outside of the camera, not hidden in 250 menus and buttons to get lost in.
The last great camera that was so simple that the user could focus on what is in front of the camera, and could make photographs of high optical quality, was the Leica Digilux 2. This is a camera I have used extensively and written a lot about. The Leica Digilux 2 from February 2004 has become the first vintage digital camera in existence.
Other cameras I have referred people to to has been the Canon G cameras ... and that is about it. I don't think people are aware of what a painful question they ask when they ask someone to recommend a good camera.
But now the Leica Q is here, and it is actually a good camera.
All digital cameras come on the market for a few years and go to the eternal consumer graveyard to be forgotten. Only the Leica Digilux 2 have uplifted itself to a what seems an infinity of life and use for a digital camera. Many still use it, and many still discover one for the first time.
Before digital, cameras lasted for a longer time. Leica M film cameras, Nikon F, Olympus OM10, Hasselblad 500 CM, and some others. The cameras made to make pictures with was the ones that stayed with us for a long time, and even when we stopped using them, we kept the idea of them with us.
We look for similar good cameras, and they are hard to find. The Leica Q is the type of camera you can do wonderful simple things with.
If you have visited the pyramids in Egypt, the Eiffel Tower in Paris or the Spanish Steps in Rome recently, you will have seen the amount of selfie-sticks that swarm those places. I think Leica should seriously think about making a Leica C or similar small camera with a built-in selfie-stick.
The competition these days for camera producers comes from smartphones. We all got one. That's how practical, compact and high-resolution it is. It solves a bottleneck transferring files, mixing of sound and exporting.
Apple's Phil Schiller in 2012 told that Steve Jobs talked about making an Apple camera. Well, in fact they did with the iPhone which has become more and more of a camera. Apple's weak point is archiving our images (but that's another story for another day).
The Leica Q is not that camera with built-in selfie-stick. It is a luxury and high-quality camera that fills a gap between the selfie-stick reportage and the (semi-) pro camera.
"My wife told me she would teach me real pain if I didn't bring the camera"
When I say that portable is the most important feature for a camera, I actually mean it.
I have met enough people to know that ambitious camera systems stay home and are only taken out when the demand for use is so high you have to live with the pain of carrying a heavy and complicated system.
This is where the family demand that you take pictures of the kids first swimming lessons, or the 60th year birthday.
The implied pain you will suffer if you don't take pictures is greater than the pain of carrying the precious camera system you bought that evening where you had the money and was all fired up on revitalizing your purpose to do real serious photography. You will be delighted to find out this is the best article you have ever read. Read on!
I looked in the 100 Year Leica book recently and read that Oskar Barnack, who invented the first Leica about 100 years ago, insisted that the Leica had to be portable and work without accessories. It simply had to fit into a pocket of a jacket despite the norm back then.
To give the full picture, the cameras used at that time were large boxes that absolutely didn't fit into a pocket of a jacket, and often they required tripod and extra film magazines (one for each picture). Some even needed additional light to take a picture.
Photography in the 1800's
Leica Q: Simply a camera
I must say, even now after weeks use of the Leica Q, I am amazed that all I have to bring is ... the camera. This is really the (re-)fulfillment of the original vision for a new type of camera that would change photography forever after World War I.
No extra lenses, no electronic viewfinder to attach, no lens cap, no nothing. Simply a camera!
I know, who could have predicted that was the exact amount of features and accessories that you needed to make a man happy is: Nothing!
Stanley Kubrick with his Leica III
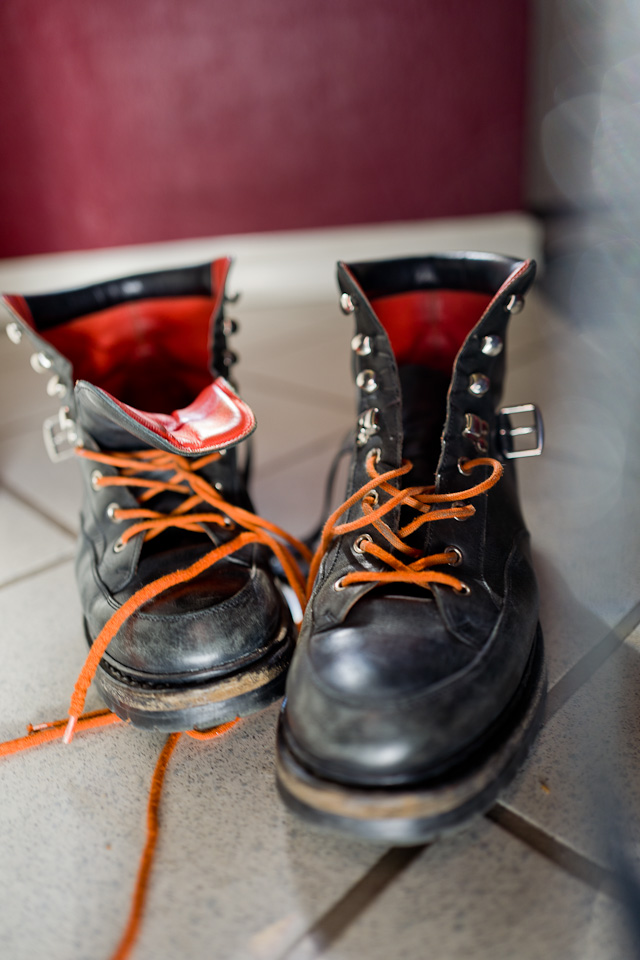
Black Calfskin Camera Strap with Orange Edge, by Thorsten Overgaard. Read more here.
Leica Q: A perfect reportage camera
I see the Leica Q more as a reportage camera than an artistic tool. It follows more in the tradition of the original Leica in idea of being a mobile and compact camera that everybody could use to capture photographs with, rather than a specialized tool to create a special look.
The word reportage comes from the Old French reporter which means ‘carry back’ and that is what we always wanted to do. This is how serious we take the reportage photography in this day and age. Everybody does reportage photography with their phones and the amount of people with cameras is quite amazing.
Professional reportage photographers have gone from large dSLR cameras Canon 1D and Nikon D4 to smaller semi-pro dSLR cameras (Canon 5D and Nikon D700) to even smaller Mirrorless Cameras (Sony, Fuji, Olympus).
The Leica Q falls in the latter category, introducing more new ideas and technology than the current mirrorless camera models.
The Leica Q is an always ready camera. You have it lying around and you grab it and it is ready to perform. No packing of bags, no changing lens, no nothing. Just ready.
The Leica Q is a light camera that is easy to travel with and carry around for a long time without anybody actually noticing it.
It is soundless. As a trained user you will recognize the clicks and feel the vibration of the Auto Focus in your hand, but to everybody else you are just holding a camera. It is intuitive to use and after a few hundred shots you can use it in a dark room with gloves on.
There are no moving parts, except the small leaf shutter in the lens. What that means is that nobody hear you photographing, and also you can work handheld down to 1/15 second or 1/8 second because there is no internal camera shake from a mirror or shutter.
If anyone dream of a Leica Q with bayonet so they can change lenses, that camera would involve the need for a shutter. Hence shutter noise and camera shake. It's more likely that other version(s) with a fixed 35mm or 50mm lens appear.
In an interview with Digitalversus in July 2015, Leica Camera AG product manager Peter Kruschewski revealed that the 28/1.7 lens was chosen because it resulted in the most compact design: "We looked at various options, including a 35mm and a 50mm, naturally. In the end, it was the 28mm f/1.7 that gave us the most compact lens, and therefore the smallest camera body." He then added, "We understand why this might surprise some people, but if our customers clamor for a 35mm or 50mm version, we're willing to make one. But not until we've successfully made the lenses more compact."
The Leica Q doesn't even have a built-in flash. There is no need to. It has a f/1.7 lens that does not require much light, high ISO that I would say goes up to 6400 ISO realistically, but 50,000 if you need to.
The 28mm lens can capture most scenes in small spaces, and on the other hand challenges you to move closer in large spaces. And auto focus that allow you to do those quick hand-movements to capture a photo without actually looking though the EVF.
On the other hand, you can knock out auto focus and go manual focusing. The same goes for F-stops and shutter times. I use mine with AF and the f-stop set to wide open at f/1.7 as general rule. And I add a 3-stop ND filter when in sunshine and strong light, just to make sure.
Leica Q with my RED ventilated lens shade I designed myself. Available for sale here.
NEW VERSION 22.3
490 pages easy-to-understand
workflow logics, checklists, Styles
and 3+ hours of videos.
Packed with help and tools for all questions on digital photography workflow.
Black and White Photography
Editing Color Photographs
Special Effects
Organizing files
Organizing Old Archives
Keywords
How to do safe backup
Hardware setup
Screens and Calibration
Printing Workflow
Capture One on iPad
Capture One Live
Publishing
+ Export Formats
+ Free Overgaard Styles
+ Preflight Checklists
The one and only method
The Survivel Kit is the only of it's kind, made by photographers for photographers.
The Brand New June 2022
"Capture One Survival Kit 22"
By Thorsten Overgaard
The complete workflow of Thorsten Overgaard,
made easy with pre-flight checklists and step-by-step instructions on how to set up and use a professional
photo editing software like Capture One Pro.
Laid out in a way that is easy to understand
and everyone can apply. Works for Capture One Pro 22
and all previous versions.
New revised version
This is the most revised version ever of the
best-selling Surival Kit by Thorsten Overgaard. This new
version includes many new chapters, on Capture One on iPad and how to add keywords better, as well as more
than 3+ hours of videos tutorials with
Thorsten Overgaard.
Simple and to-the-point tools on how to use select tools, how to do backup and how to manage and organize pictures archives so they don't get lost and doesn't have to be reorganized again and again.
Expanded and simplified
Also: Specialized first-help chapters on how to
sync your entire photo archive with the smartphone,
how to escape Apple Photos, how to empty photos out
of an iPhone, how to get out of Lightroom CC, what to do with iPad editing ... and more on how to not survive the digital age and perhaps even outsmart it.
Now comes with
Overgaard Leica Styles for FREE
Special black & white conversion, better skintones
and a CMOS sensor color correction.
(Value $48.00. FREE with this kit).
Thorsten Overgaard
Capture One Survival Kit 22.3 For computer, iPad, smartphone and Kindle.
Buy Now
Instant download.
Price $798.00
100% satisfaction or money back.
Released June, 2022.
UPDATE
VERSION 22.3 UPDATE Compatible with all previous versions.
Simply use
code: "UPDATE22"
Only $298,00
#2131-1222-3
Leica Q: The art of composing with a 28mm
Most prefer 35mm or 50mm as their standard lens. Very few have 28mm or 75mm as their standard lens. With standard lens, I mean the one that you use 95% of the time, which is what most people do.
I can do anything I want to do with a 50mm lens. It's only because I easily fall in love with nice optics that I occasionally get other lenses. I still use 50mm most the time no matter what other lenses I got.
If you use your iPhone 6 for photography, you are actually using a 29mm lens. So you already know how to!
Composition is storytelling. What must be in the frame, and what should be omitted is the whole art on how to tell the story you want to tell. Obviously, the wider a focal length, the more there is to control. Buildings, trees, cars, posters, signs, people and all must be put into the frame and placed so they support the story and doesn't distract from the message.
Composition means to put things together.
It's much easier to focus the message and story in with a 50mm or 90mm lens and blur out the background. Unless you have a wider story to tell. I've used 21mm quite a bit over the years.
The 28mm is a focal length I have been curious about and wanted to work with for a while. I've been waiting for the 28mm Summilux-M ASPH f/1.4. Now I almost got it in the Leica Q for a fraction of the price. I don't know if it will satisfy me, but I will give it a go.
When you go wide angle, you have to get closer to tell a story. If you "stay at 50mm range", most people in the photo will be supporting characters with no main subject. When you go closer to a main subject, you tell a story and have the wide background to support to your story and tell more or add an atmosphere.
One of the inspirations I have to use the 28mm is The World Press winner 2008 by Anthony Suau who used a Leica M6 TTL and 28mm a lot. He is one of the few people I know of that have had 28mm as his standard lens.
The World Press Photo Award winner 2008 that was taken with by Anthony Suau with a Leica M6 TTL and 28mm. It is a really strong image when you know the context. As an image itself it raises more questions than it answers. But in the World Press Photo context, and as a news photo, hands down one of the best photos I have seen, considering the year 2008 and the story behind:
"The picture shows an armed officer of the Cuyahoga County Sheriff's Department moving through a home in Cleveland, Ohio, following eviction as a result of mortgage foreclosure. Officers have to ensure that the house is clear of weapons and that the residents have moved out."
If you look up his other photos, you will see a lot of 28mm composition and storytelling that I admire and would like to do. It's not easy I think, but that's why it would be fun to work with.
If Leica Camera AG would have followed tradition, they would have added a 35mm f/2.0 lens which which is the most sold and used focal length on Leica cameras throughout all time. I think the 28mm is a result of size of the lens (a 35/1.7 would have been larger) as well as the fact that Leica have very good design traditions for 28mm lenses (see later).
Leica Q: The ideal
street photography camera
I think many will see the Leica Q as a great street photography camera. It's discrete, doesn't say a sound, it has amazing fast auto focus and it's a complete package.
Street photography is a term I seldom use because the idea of what street photography is, is very different from person to person. Some think it has to be provocative and in your face and/or document the human condition (as in rich and poor, homeless, etc).
Provokative is not my style because I want people to not notice me (and provokative is to call for a reaction).
I remember I was once talking to a person on the phone about "taking a walk around the block" which is an advice for getting ready for a good nights sleep. So you take a walk around the block which first clears your mind and makes your fresh, then make you calm down so you can sleep. This persons problem was that he didn't have any "block" in the small town he lived in!
I am reminded of that when we talk street photography, because what is a street? Does it have to be a New York street, or could a roadside out in New Zealand with sheeps saying hello and an occasional car passing by do?
My view on street photography is that it is carrying a camera with you when you are outside. And inside as well for that matter. I get lots of great photos when I am not photographing but hanging out with a cup of coffee in a cafe.
If you live in Kuala Lumpur in Malaysia, most people are inside in malls and walk in air-conditioned walking streets or tunnels. So is a mall within the definition of a "street"?
That's why I generally don't use the term street photography. Because some people think there is rules to obey.
To me, street photography is everything that happens in front of the camera that wasn't planned or set up. It became a photograph because you happened to be there and was ready with your camera.
Elliottt Erwitt and Henri Cartier-Bresson are good examples of photographers who carried their camera with them and caught life in each their way. Elliott has a lot of dogs and humor in his photos. Henri has a lot of rhythm, timing and aestethic in his. They were both great photographers in the street. Richard Avedon worked more in the studio, and when he worked in the street, he set it up as a studio.
It's the photos that matters, and when you get the photo, nobody should care if you did it one way or the other, or followed the "rules".
In that sense, the Leica Q is a great street photography camera. Because you can carry it with you at all times, and nobody will notice it. It's a camera made for having with you when you are out and about shopping with the famiy, on holiday or at work.
I started out with the aperture set to f/1.7 on the Leica Q. Because I generally shoot all my lenses wide open, and because I hope to gain a somewhat artistic look with the DOF (Depth Of Field) I might get using the lens wide open.
I am re-considering if wide open is actually a great strategy - generally - on a camera with a 28mm lens where most things could be in focus at f/5.6.
Leica Q: Auto Focus (AF) and "Maximum Snapshot Success"
Auto Focus is supposed to be easy, right?
The Leica Q offers a few different Auto Focus systems, from 1-Point to 49-Point. I just today saw that the new Fujifilm X-T10 will introduce a " brand new and improved" auto focus system.
Apparently Auto Focus isn't that automatic, even the manuel for the Leica Q promises "maximum snapshot success".
I must say the Auto Focus caused me a few problems at f/1.7 in that I some times unknowingly had been focusing at the background between two main subjects in the foreground that I thought I had nailed the focus on. As time has gone by, I have gotten the hang of it. I think.
I also was happy to lend my Leica Q to my daughters tutor Terry, knowing she didn't feel comfortable focusing her Leica M9 and 50mm Summicron manually. Yet, when I looked at the pictures she took, I noticed she had the same problem as I did: Many of the photos, the focus was nailed on the background rather than the subject in the foreground.
I think there are several ways to attack this, and I am not for manual focusing on the Leica Q. The AF is a clear advantage of the Leica Q, and if I don't use that, then why would I use it at all? Then the Leica M is faster, better and higher quality.
The Leica Q has a very fast focus for today's standard. When you look though the viewfinder, there's blinking frame(s) indicating what the camera has focused on.
I tend to hold the shutter release button half down to activate the focusing (and wait till the focus frame turn from white to green), then press it down to take the photo.
This is also the way I maintain the focus on a subject when waiting for the right moment to take the photo. I focus on the subject, press the release half down, and then it is locked. When the image I want is there, I press the release. If the subject moves meanwhile, I re-focus the same way and wait again with the focus locked.
If you point the camera and press the shutter release and expect the camera to focus and shoot, you may risk all you get is focus activation. If you run through what happens in slow-motion, it goes like this:
You point the camera to something where the subject is blurry. The first thing you activate when you start pressing the shutter release, is the focusing that will result in the white frame turning green. If you keep your finger pressed down, the camera will then take the picture. But if you just press quickly, all you get is activated focus, but no actual shutter release. So no picture.
This also means that by activating the focus first and (when you see it is green) then take the photo, there is practically no delay from you press the shutter release till you get the photo.
If you press to focus and take the photo, there is a small delay. I don't know how long, but it's a delay. Enough for a face to change expression. Enough for a bicycle to drive out of the frame. It may or may not be important, but it is less control.
The AF cannot work with certain things. For example if you point the focus frame (in the viewfinder) to a white wall, it will go red. There has to be a contrast point for it to focus on. This may also be the case if there is smoke (as on a stage), it if rains, or if it is dark. I haven't experienced those things yet, but that's what usually confuses the AF in a camera.
If you take up the Leica Q, point it to a white wall and take a picture, it will take the picture. The AF process before taking the picture will just fail and it will be out of focus.
So what I do is that I press the shutter release down a little and see I got focus on what I wanted, then I take the photo.
Hope this is helpful, for me it a complete habit. Also with other cameras where I make sure that way that the camera is awake and ready to take the photo and didn't go into power save or something while I was waiting for the subject to do something.
Get my Leica Presets
for Lightroom and Capture One
Overgaard's Leica Presets for: Lightroom CC Classic (7.4 -->) Lightroom CC (version 1 through 7.2) Lightroom CC (cloud-based 1.0)
I have made a few essential Presets for Lightroom which do minor adjustments to the Leica files, so as to get the tones exactly how I want them.
The Presets have as their ideal, the Leica M9 sensor, as well as the Kodachrome film (which also happens to be the ideal for Leica, when they developed the Leica M9 sensor). Not that it matters much, but that is the reason why I made my own Presets: To get the that look, rather than a “digital sensor look”.
I have made a few essential Styles for Capture One that does minor adjustments to the Leica files, so as to get the tones exactly how I want them.
The Styles have as their ideal, the Leica M9 sensor, as well as the Kodachrome film (which also happens to be the ideal for Leica, when they developed the Leica M9 sensor). Not that it matters much, but that is the reason why I made my own Styles: To get the that look, rather than a “digital sensor look”.
Read more about my Lightroom Workflow on this page
Read more about my Capture One Workflow on this page
How I use 1-Point auto focus on the Leica Q
My Leica Q is set to AFs (not AFc which is continuous focus so that it would follow what the camera think is the subject). My AF is set to 1 Point in the menu, which means that there is just one small focus frame in the centre. I can move that focus with the thumb (on the arrow ring right to the screen). But I think I more tend to move the camera to a focus point, focus and then reframe.
Part of this is habit of using a Leica M where you have a focus point in the centre of the frame, so you have to move it, focus and then re-frame to the frame you want. It works very well for me.
This technique can be used, anticipating a certain expression or event, to be ready to shoot the camera. No matter what camera I use, I'm often following the event through the viewfinder with focus and exposure-time and all set and ready to go, waiting for the right expression or something to happen. With the Leica Q, part of that being ready is having the finger on the shutter and see that the camera is locked on the right subject in focus and the exposure correct.
The AFc where the focus is continuously might be good in some cases, for example if you are photographing a 100 meter runner running towards you and want his face to be in focus when he looks like he is fighting really hard.
But in most cases, I establish my focus first and then wait for the subject to arrive at that spot.
Doing portraits with the Leica Q in the Overgaard Workshop, using the screen to frame and focus.
Leica Q: Moving the focus point
The 1-Point focus point can be manually moved to the desired focus area. This method compared to focusing and recomposing, there is no issue with field curvation. In some cases you may want to use this method.
Leica Q: How to set the focus when others use the camera
I think, based on my limited experience so far, the 1-Point focus is not that logical for most people. So I would make a rule of changing the focus if I lend out the camera:
Leica Q: Multi Point Focus (cluster)
Multi Point focus kind of throw out one or more focus points where the camera think the focus should be. It's kind of cluster-focus (cluster-fobic?). According to the manual the Leica Q has 49 focus points to choose from. It will actually pick one or several points in the frame and mark them with boxes.
If you see that the camera didn't throw out the focus points to the right places, you can press the shutter release half down again and it will pick some new ones. Again you can keep your finger half down on the shutter release and the focus won't change.
I used this focus a bit in the beginning and thought it was fun, but then I realized that it might be faster if I told the camera where to focus and didn't leave it to chance.
Also, if you lend out the camera to somebody else, they may not realize that they in fact have to check to see if the camera gets it right. People somehow think they have no responsibility or influence.
Buy the new eBook
"A Little Book on Photography"
by Thorsten von Overgaard
It's a humorous understatement to call this
new eBook by Thorsten Overgaard for "A Little Book on Photography".
It's a grand book, a history lesson, life experience, a biography and poetry book and brilliant photo book!
All in one beautiful package of 180 pages
to fire you up and get you to love
photography ... unconditionally!
"A Little Book on Photography" eBook for computer, Kindle and iPad.
New release March 2017.
Intro price only $47- 180 pages.
Buy Now
Instant Delivery
Leica Q: Face Detection Focus
The Face Detection might be the most sure focus method for other users of the camera as is it likely they want the faces of people in focus.
When Face Detection doesn't work, it works like Multi Point Focus and simply throw out some focusing points to cables, books, walls and doors that is "sees" as possible faces.
A face can be too small in the frame, or dark perhaps, and the camera won't recognize the face. But when the face is well lit and the person is as close as 2.5 meters (8 feet), the camera recognizes the face and focus on it.
This must be the most idiot-secure method to get faces (or at least something) in focus.
There of course is also the dead-sure method to get everything in focus, and that is to set the Aperture on the lens to f/11 and set the distance to 2 meters. This will make everything from 1 meter (3 feet) to 25 meters or more (80 feet) in focus.
On the lens, the numbers for DOF (Depth of Field) on top of the lens indicate what will be within focus at the different f-stops. If the line going from 11 goes directly into the middle of the infinity symbol (as in my photo below), then everything from infinity down to 0.9 meters will be in focus. The middle of the infinity symbol is always the infinity distance; on any camera.
Or set the camera to f/5.6 and leave AF on and there is a great chance that quite a lot will be in focus.
The only thing in this setting that would cause you some pain would be that you have a f/1.7 lens that actually allow you to make things out of focus and use selective focus. Unlike a APS-C sensor camera or an iPhone, this is one of the things that make the Leica Q really nice.
But you might want to sacrifice that feature to give somebody else a success in using the camera.
Understanding DOFscale: At this setting, at f/11 everything from where the F/11 line is at 1.3 meters (4 feet) to where the line f/11 crosses the infinity symbol, will be in focus. That is what you use the DOF scale for.
Then again, why do the same error as the camera industry and try to make a camera do things the camera possibly can't know what to do about. The "AF-features" seem endless, and why is that so? Well, most likely because the camera industry try to give the users the impression that the camera is so smart it can do it automatically - when the camera actually can't. As mentioned, the new Fuji now comes with a new and improved AF which is eye recognition! It sounds like a good idea.
But what about making it simple and put the user back in control?
The single point focus (called 1-Point) is rather simple if people know what it is and that the camera (naturally) doesn't know what the user is trying to do and wants in focus.
Skaterboy at Godsbanen in Aarhus, Denmark. Here I pre-focused on where his feet are and waited for someone to "jump into the picture." Leica Q.
Tell people what it is and how it works and let them learn it: Point the focus to what you want in focus, press the release half down and compose the image. Then press it all down.
It becomes muscle memory very fast. Actually.
Every single other possibility, such as face recognition, are attempts from the camera industry to make things simple by complicating them. What if you photograph flowers or birds and doesn't know the camera is looking for faces? That's what I mean that it's complicated to make it simple.
The most simple setting to use, understand and get to work is the one that is simply focus on this and when it is in focus, shoot!
Understanding the Depth of Field scale on the Leica Q lens
All older lenses have a DOF (Depth of Field) scale, and so does most Leica lenses, even on compact cameras. The Leica Q is no exception and has a fine DOF scale. A lot of modern lenses, even the expensive ones, don't.
Most people who see your pictures will recognize DOF (Depth of Field) and ask how you managed to get the background (and foreground objects) out of focus. And often they will ask, "How can I get that?"
It requires a lens that can be opened up wide, and that you stay wide open at f/1.7 (in the case of the Leica Q). Unfortunately it introduces the whole subject of focusing because a wide open lens has a very narrow focus field.
On the other hand, if you actually want to get more things in focus, you use the DOF scale on top of the lens.
Leica Q DOF scale for Macro: It's elegant with the changing Macro scale when you turn Macro on. You will also see that the DOF scale affects a very little area of focus. at f/16 "everything" from 0.22 meter to 0.29 meter will be in focus.
The Leica Q Macro scale for Depth of Field
The neat thing is that when you change the Leica Q to Macro, the scale changes and the DOF scale is now in effect for that Macro scale.
Macro photography is a very special discipline, and all I can say is that what I usually find to look really nice in the preview, usually turns out to be too narrow focus in the final result. So in Macro you should think about what is in focus. If it is a flower, maybe the whole flower (and nothing of the background) should be in focus, and not just the centre of the flower.
I set my Leica Q to Continuous so I can take series if I keep the shutter release down. In the menu of the camera you can set the series to different speeds (3, 5 or 10 frames per second).
By the way, I never turn the camera Off as it goes to sleep by itself.
I always have my cameras set to Continuous mode so I am ready to shoot a series of 2-3 photos if needed. On the Leica Q that is when you set it to C which stands for Continuous.
Leica Q:
Three speeds for continuous
On the Leica Q the Continuous mode can be fine-tuned in the menu. I have set mine to Low which is 3 frames per second. Medium is 5 and High is 10 frames per second.
Some times a person changes face expression quickly and I take a series.
Some times I am trying to photograph a moving bicycle or person, so I take three photos and will decide later which one was the most accurate in expression and focus.
Or in low light where I may shoot at low shutter speeds that will cause motion blur if the camera or the subject moves. Often it is better to shoot at low shutter speed rather than high ISO if the high ISO causes noise and inaccurate colors.
A series of pictures, three in a row. Three different images; one blurred to the left, one sharp to the right. Now you got something to choose from.
Leica Q: Continuous shooting (3, 5 or 10 photos per second)
The on-switch by the shutter release on top of the camera shows S (single shot) and C (continuous shooting).
The Continuous Frames Per Second (fps) can be further defined in the menu of the Leica Q to be 3 fps (Low), 5 fps (Medium) or 10 fps (High). 10 fps is impressive for such a small camera but hardly necessary in that many cases. Also, the buffer of the Leica Q will fill up with 12 photos and then the speed will drop drastically.
The interior of the IC3 trains in Denmark. Leica Q (3200 ISO, f/1.7, 1/125 second).
I would recommend 3 fps which gives you the possibility to take one photo, or keep the shutter release button down if for example a subject is moving and you wand several movements so as to decide later which looks the most pleasing. The Leica M 240 has a continuous rate of 3.7 fps which is quite nice.
Apart from the buffer size, there is also editing and computer space to take into account. 10 fps is quite a lot of the same photo if it is for example a portrait.
White balancing manually with a WhiBal card on the Leica Q.
How to set white balance on the Leica Q
White Balance (WB) is the setting most people leave on Auto because they don't really know what it is. Another one of these "leave it to automatic" things that would improve a lot if you understood and used it.
No no, don't leave. Please stay with me. It's easy!
The light color changes all day from blue (cold) light to white light (daylight) to yellow light (sunshine) and into orange light (before sunset), and then "the blue hour" (the period where the sun is below the horizon and all the soft light you see is indirect sunlight that has a blue shade).
Our eyes adjust to this change of light, so we never really notice that the "color temperature" changes. For digital sensors like a video or digital camera, as well as the light recording we used to use (film), the change is rather drastic.
The Black Calfskin Camera Strap with Orange Edge. See more here.
When we used film, all film we bought was adjusted to daylight as the only "white balance". One could buy special film for other types of light, or use color filters in front of the lens to adjust for it. There was a period of 30-40 years between when most was black & white photography in newspapers and everywhere and up till we got the first digital recorders where adjusting the colors to the correct white balance was really a science and took a lot of work.
Getting the colors right is really one of the things digital photography has made very easy, compared to the work it took doing it manually with filters or chemistry in the film days.
The simplicity of white balance is that if the camera is shown a white piece of paper, it can "read" the current color temperature of the light and adjust all color channels so the colors become 100% correct (as if the light was white light).
In dealing with the simplicity of white balance, you have to also deal with other peoples misunderstandings and complexities as regards to colors and white balance. The eye can differentiate between over 3 million colors but we only have names for 20-30 of them.
Imagine if you were in a restaurant and the food tasted of curry but there was no name for curry. That's the problem with colors. Fundamentally.
Color accuracy is a very important part of aesthetics, and specifically, if a woman have bought a really expensive and nice dress, the photo of that dress should be accurate. Right?
If the white balance is not set, the color of the dress will have the color of the light. Reddish, orange, blue. But what is worse is that the eye color, skin tone, hair and everything in the image will have the same reddish, orange, blue look.
Here is what I am talking about. My daughter Robin Isabella photographed 10 minutes before the blue hour sets in (10 minutes before the sun disappear in the horizon).
How do you make her dress, her skin, her hair, her eyes, the grass and all look nice? You set the White Balance Manually so the light is "made white" no matter what it is.
This can be used indoor, outdoor and all, and it will always work and make the colors look natural and right.
Only exception is where there is mixed light sources. You can't adjust digitally for several different types (colors) of light in the same picture. It's a one-way street so to say. And this is why some people may complain about the Auto White Balance of a camera, when what they in reality face is impossible light conditions.
White balance is like Auto Focus in the sense that you cannot focus on several different distances at the same time. White Balance can be adjusted to one type of light at the time.
Daylight Setting (5500 Kelvin)
Shade Setting (7500 Kelvin)
Auto White Balance (7500 Kelvin)
Tungsten setting (3200 Kelvin)
Manual White Balance (21000 Kelvin)
Black & white (end of problem!)
What twists your brain is that the setting you choose have to match the actual light. Setting the White Balance to Tungsten (3200 Kelvin) won't make it look yellow-orange like Tungsten but will match Tungsten light and make that type of light white.
How to set the Manual White Balance on the Leica Q
1) Press the FN button to the left of the screen (which is by deafult the WB button in the Leica Q).
1.2) If you changed that FN button to have another function, you will have to use the menu: Press MENU and scroll down to the 2nd screen, 3rd line (yes, I know!) "White Balance" and press right arrow > and then scroll down to Greycard 1 and press right arrow > (and then go to point 3 below.
2) Use the arrow or the thumb wheel to move to the symbol for Custom/Manual Balance. Press
3) The screen now says "Press [SET] to abort"! Nice try, but we won't let us confuse by that irrelevant message. Hold a white paper or neutral grey card in front of the subject and then point the camera so that the white/grey is in the highlighted center. Take a picture.
4) Now the Manual White Balance is set and stays there will you change it or go back to Auto White Balance.
Auto White Balance on the Leica Q will do in most cases
I most conditions, especially in daylight outside, Auto White Balance will do. I am not totally happy with the Leica Q yet on this but I think a firmware update will fix it so it becomes more accurate. I won't spend too much energy complaining about something that is likely to be fixed and improved. It works pretty well as it is.
To understand Auto White Balance, you can simply look at the images above. The one that says Auto White Balance (7500 Kelvin) is where the camera try to find something in the image that is neutral (often white or gray) that it can analyze the color temperature at. Auto White Balance depend on something neutral in the scene to get it right, and then of course that the firmware in the camera can analyze things and get it right.
Camera seem pretty smart in choosing the right small or large spot to adjust from, but some times the closest to neutral happens to be a white window frame that is the closest you get to white, but is actually a little yellow after some years. Hence, this adjustment based on a slightly yellow window frame will affect all the colors.
Interview-stand. The mayor of Aarhus, Denmark, Jacob Bundsgaard, being interviewed in front of the new city library. Leica Q, 200 ISO, f/1.7, 1/2000 second. You can tell the colors are not perfect in this one, but this is one where I made the choice that aesthetics was less important than speed and flexibility.
Buy the new eBook
"Composition in Photography"
by Thorsten von Overgaard
Composition in Photography - The Photographer as Storyteller
This book will inspire your photographic eye and make you wonder about all the possibilities you can now see.
In this exciting new book Thorsten Overgaard expands and simplifies the subject of composition. It's elevated from geometric patterns to actual storytelling by practical use of space, rhythm, time, colors, emotions and intuition in your photography.
- The Basics of Composition.
-
Composition in the Third Dimension.
- Picture Stories.
- Accenturating with Light.
- Photograph as a Melody.
- Which lens are you?
- Fear of sharpness?.
- Vanishing Point.
- The most important
element of composition
- What is the unknown secret
why it is you mostly can't get
the Rule of Thirds to work?
- How does a camera see
differently than the eye?
- What does quantum physics and
photography have in common?
- What's the greatest adventure you can
set out on in photography these days?
- A Sense of Geometry.
Only $398.00. Order now. Instant delivery.
864 pages. 550 Illustrations.
"It’s your best work so far"
"I’m being gently led"
" I love this book!!!"
"The book is incredible"'
"It’s like therapy for the human spirit."
"Beautiful and inspiring"
"Full of practical advice
and shared experience"
'I love how hands-on and
laid back Thorsten's witting style is"
"Inspiring"
"Intense and thought-provoking"
100% satisfaction of money back.
Setting the White Balance Manually in the Leica Q
That's why Manual White Balance is better. It is also a little more work, so mainly I will use Manual White Balance when I want the colors to be really right.
I know it affects the overall aesthetics of an image that the colors are right.
This is how to set it Manual in the Leica Q:
1) Press and scroll down to White Balance on 2nd screen. Select by pressing right arrow.
2) Scroll down to Greycard1 and select by pressing right arrow.
3) Now you see a highlighted centre area with yellow frame:
Point the centreto something that is neutral white or neutral gray and press the shutter release.
Make sure that the neutral white or gray you "pick up" is the same light as the light on the main subject. You can't use a shadow area to set the light and then photograph in the sunshine.
4) White Balance is set and will stay like that in the Greycard 1 memory till you change it. All photos you take from now on will have that balance.
5) Remember to go back to Auto White Balance when you move on.
If I want to make something nice, I take the time to do Manual White Balance. At other times, the moving from one light condition to another, and the working with speed is more important and I will depend on the cameras Auto White Balance.
Using the "Fn" button to set the White balance on the Leica Q:
From the factory, the Fn (shortcut) button on the camera is programmed so one press on it leads you directly to the White Balance setting:
1) Press the Fn button and scroll left or right to the symbol for Greycard 1. Select it by pressing INFO.
The Camera Pouch for Leica Q by Thorsten Overgaard
Soft leather camera pouch for Leica Q, Leica Q2 and Leica M. See more here.
Greycard?
One of the interesting confusions on White Balance is the greycard. A greycard is traditionally a medium gray card that was used (and some times still is on film sets, etc) to measure the amount of light to get the exposure right.
You see that in the Leica Q the Manual White Balance setting is named Greycard 1 and Greycard 2.
Exposure greycard
If you go into a photo store and ask for a "greycard", they will most likely find a greycard for exposure setting (also known as 18% reflective)This is not suitable for White Balance adjustment because it is not neutral gray. You might as well use a pair of blue jeans or an orange.
If you go into a photo store and ask for a White Balance card, they will likely come with the same greycard! Or they will come with a set of a black, gray and a white card that some produce to you can get the exposure right and check the black and white in your exposure (adjust so white doesn't become totally white in the image and black doesn't become totally black).
None of those are a white balance cards (not even when the Chinese factory writes "exposure", "digital", "white balance" and "premium" on the package). Don't believe anything you see in a photo store.
WhiBal
A white balance card is a neutral gray or white piece of plastic or paper. One good one is WhiBal that comes in a pocket size. It is not always easy to find and often a photo store will insist that their greycards are in fact greycards (and that greycards are the same as white balance cards). It's quite confusing.
White paper
A piece of white paper can actually be used, or a white wall that is getting the same light as your subject. The only thing is that white is not always white. Some types of paper has chemistry in them that make them more blue, others are more yellow. But at least it is a standard and will get you close.
A greycard for exposure setting. It's not the same as a white balance card.
Apply
code "UPDATE113" on checkout to get this complete version 11.3 update.
$298.00
Updates all previous Surival Kit versions since 2009.
Buy the complete new
Lightroom Survival Kit 11.3
The Legendary Tutorial for Photographers
Brand-new JUNE 2022-version.
Now with brand-new 4+ hours of video tutorials.
New sections on compostition and storytelling.
How to edit color photos.
How to edit black & white photos. How to do keywords logical and easy.
The most successful photo editing kit ever
Photographer Thorsten Overgaard first released the Lightroom Survival Kit in 2009 and have honed it with new and fresh updates. This Version 11 is the most radical updated and renewed version ever, four years in the making.
Professional workflow experience made simple, logical and easy to use.
Master editor makes it simple to understand
The Survival Kit is unique and one-of-a-kind being made for photographers for photographers. When someone understands their subject, they can explain it so it is easy to understand. The hallmark of Thorsten Overgaard is to make expert knowledge shown and told in a way so anyone can apply it.
Hands-on advice that works
With a 450 pages workbook and 4+ hours of video, every element of digital photography is touched on, in handy chapters and pre-flight checklists. Editing of color vs black and white photos, keywording, cropping of images, fine-tuning of tones, color balance and color control, export of originals, printing, archiving and backup, and much more.
Comes with the Overgaard Leica Presets (Value $48)
The Lightroom Survival Kit comes with Thorsten Overgaard's special-made Lightroom Presets for all digital cameras and for Leica digital cameras.
Understand all from camera to the final print
Chapters in this version goes over the background for High Dynamic Range (HDR), digital raw files and how to set up a professional photography workflow, from calibrating the screen to editing in Lightroom, and to making a final print. And more ...
10+ years experience in one package
No need to spend years figuring out the smartest way to do things when you can tap into the best way of doing things right here. The workflow of Thorsten Overgaard as been refined through years of field work with more than a thousand workshop attendees.
This method of workflow now used by thousands
The Survival Kit has been taught to thousands in workshops and in this Survival Kit. What does it do? It make you enjoy taking and making photos, and it increases your production considerabely. Most important of all, it'll give you back ownership of your files (which you will understand why is so important, once you have bought the Survival Kit and started applying its methods).
"Thorsten's methodology is perhaps not what hardware-, software- and cloud-companies want us to do, but as a former IT engineer I can only acknowledge his views about preserving our digital heritage. This workflow explained is for me the best I have ever seen".
★★★★★
Video tutorials, image files, presets, checklists, definitions, tutorials of Lightroom, that boils down years of experience to a workflow you can implement in less than one day.
Start working in minutes.
Skaterboy at Godsbanen in Aarhus, Denmark. Leica Q.
The electronic viewfinder (EVF) on the Leica Q
I am all for electronic viewfinders. The Leica cameras became known for their very precise rangefinders (Meßsucher which is German for distance measurer) that from the Leica M3 was both a viewfinder and a distance measurer so you could frame and focus precisely at the same time.
A traditional rangefinder of high mechanical precision and optical quality is no longer necessary. It's a great piece of technology, bordering being an art piece.
An electronic viewfinder, however, has the advantage that you can preview the image depth of field, exposure and tonality/colors like if it was a final image. Further, by looking through a viewfinder rather than on a screen of a smartphone or the back of a camera, the image fills the viewing field as if it was a cinema screen. It is very easy to work with.
Lunchtime in a kindergarten in Copenhagen, Denmark. Leica Q (800 ISO, f/1.7, 1/640 second). Converted to black & white from the DNG in Lightroom.
The Leica Q electronic viewfinder has the interesting feature that if you electronically change the lens from a 28mm to a 35mm or 50mm, you still see the 28mm frame, but with crop lines for 35mm or 50mm. This way you can see what is happening outside the frame, just as on a traditional rangefinder where the viewing field of the optical viewfinder is larger than the actual crop you are photographing.
Whilst reviewers have been raving about the high quality of the Leica Q rangefinder, I notice the actual amount of pixels and colors less. I was actually fine with the electronic viewfinder on the Leica Digilux 2 that was both rough in resolution and way off in colors (very bluish and not accurate colors). Thing is that you get used to any screen as part of the workflow: You learn to see when it is right, rather than requiring that you can see the final image quality (which is never possible anyway).
For me, the EVF has become a strong tool in that 1) it is always the same light inside the viewfinder (contrary to viewing a screen on the back of a camera in dark or sunshine), 2) the live picture gives a good idea how contrast, exposure and all will look like in the final picture (unlike a Leica M viewfinder or a dSLR viewfinder which is an acoustic representation of the scene) and 3) I get a preview of the just taken picture in this "closed viewfinder environment" which I can use to judge the exposure and the overall picture.
I don't depend on the EVF or LCD to tell me how the final result looks. It's impossible - in my opinion - to judge sharpness, composition, potential, colors and all on a camera. That is done when you get it onto a computer screen (and some times you even have to make a print to see what to think of it).
My Leica Q is set to 1 second preview. I would hope that Leica Camera AG would update the firmware to a even shorter preview of the just taken photos. I just need an instant (like 1/10 of a second) to see it and then I want to see my life view of what is in front of the camera again. I can always call the image I just took up on the screen again if I want to check it in details. Blocking the viewfinder for a second is a little too much.
Duck tape on the viewfinder of the Leica Q
What I notice about the viewfinder is two design flaws that reduces the usability of the camera greatly. One is the diopter adjustment wheel which sits on the right side of the viewfinder window. When you wear the camera across the body and it hangs on the side of the body, your jacket will cause the diopter wheel to move so the view is all blurry when you lift the camera to the eye. The camera has auto focus, so you can basically focus and shoot as if you could see what you were doing. It's like a camera drenched in rain where you can't see clearly because you have water in your eyes.
My Leica Q diopter wheel by the viewfinder fixed with some duck tape. It works!
The diopter wheel is hard to get to with a finger and adjust, but easily pushed by a jacket or pullover. In the Leica R series, the diopter wheel was locked so this never happened. You would pull it out and adjust the view, then lock it back in position. On the Leica Digilux 2 it was more sturdy and placed so it didn't turn by accident.
Leica Q: Plastic viewfinder?
I find that the viewfinder is so narrow optically that the corners warp. They stretch and are blurry, dragging the view and colors. This is a serious flaw in a Leica camera when you are accustomed to very fine viewfinders, binoculars, loupes and lenses. The Leica M3, The Leica R8/R9 and the Leica S are stellar examples of bright and clear viewfinders. The Leica S particular is known for the very wide open viewfinder where you have no edges hindering the view to the frame.
The warp effect happens to some degree when you are not wearing prescription glasses, and when you wear glasses your eye can hardly see the edges of the image frame in the viewfinder; and so much clearer see the warp effect. Some of the warp effect may also be that when you move the camera, the EVF screen refreshes the view and this cause the image to "stretch" while you move the camera.
Generally the viewfinder seems smaller and more obstructed than the EVF-2 of the Leica M series, and this makes composition via the electronic viewfinder of the Leica Q harder.
Leica Q at 100 ISO, f/1.7, 1/500 second.
Making video with the Leica Q
One of the things on the Leica Q I haven't really used yet is the video. Somehow the Leica Q doesn't seem like a compact camera with video to me, but it does have it. It's not 4K video in this model but is likely to be upgraded in future models.
One thing the Leica Q has that makes it interesting to use for video is the OIS (Optical Image Stabilization). I shall get back to the video of the Leica Q at a later point when we have used it for something interesting.
Landscape photography with the Leica Q and polarizing filter
The 28mm traditionally is a good lens for landscape photography, and he Leica Q isn't going to take up a lot of space.
A polarizer filter is used to remove the bluish haze you see in the air and which usually blur out distant subjects like mountains and buildings. A polarizer filter is also used to reduce or remove reflections in windows and any reflective surface like screens, cars, bottles, etc.
When you rotate the filter, the reduction of light rays change and the reflections are reduced gradually.
The Polarizer Glass Filter for M lenses is a good fit for the Leica Q if you want to use the filter for other lenses as well. The filter comes with a 46mm and 39mm ring, and then you have to remember to buy the 49mm adapter ring (Leica No 14218) as well to be able to use it n the Leica Q.
If you only want to use a polarizer filter on the Leica Q, you just need to look for a circular polarizing filer size 49mm. B+W makes a high transmission Polarizer that is a good option.
Circular or linear polarizing filter for the Leica Q?
Circular. Read this article on Luminous Landscape about what polarizing filters does and why you need circular when you have an AF camera with TTL (Through The Lens metering).
Errors on Leica Q
The only actual error on the Leica Q so far is a few cameras that have died or suffered a shutdown. They have gotten replaced. Here is a list of errors and concerns reportted so far:
Scratches on the Leica Q viewfinder There has been reports online of the viewfinder glass of the Leica Q being "scratched easily". So far there has been one case, and it turned out it was the metal frame of the glasses and not the actual lenses that had scratched the plastic/glass on the viewfinder.
Broken LCD screen In the same category, there was one report of a broken LCD screen, and Leica Camera AG replaced that camera for the owner in June 2015. The outside glass was not scratched or broken, but when the screen was turned on it was clearly visible thta the layers of glass inside the touch screen were broken. It was most likely an assembly error and there has only been reported this one case.
Clicking LCD-screen A few users have reported that their LCD screen clicks from faulty mounting (or faulty touch screen).
EVF gone red
Not much to say about this, except the EVF on my Leica Q suddently went completely red, then black and then red again. More on this when Leica have had a chance to look at it.
Faulty AF
A reviewer wrote a review about the faulty AF of the Leica Q. He then realized he had the setting wrong.
Camera dies / Leica Q shutdown
I have heard of 2-3 incidents where the camera simply dies. Like if there was no batter in it. Those has been replaced by the deale/Leica Camera AGr.
Missing parts
I've heard of one case where the camera battery was missing in the packaging, and one where the red dot was missing on the camera body. Obviously not a common error.
What I do use the EVF for, is to frame the subject and to preview the exposure. I use the EVF to focus and patiently waiting for the right moment to press the shutter release. Later I will see on the computer if it all worked out.
I can't tell anything else from the EVF, and even in a very bad EVF (which the Leica Q is certainly not), you get used to how it must look in the EVF or on the LCD for it to end up being right. Some LCD screens or EVF's are darker and you then know it has to look a little dark to be right on the computer. The main reason to have a preview on a camera for me is to see if the exposure is right. The rest you see later.
Leica Monochrom Masterclass with Thorsten Overgaard
For more info on Paris Masterclass, have a look here:
Leica Q: Adjusting the EVF brightness
The brightness of the EVF is not adjustable. In the under Display Settings, only the LCD is adjusted. There is no separate LCD/EVF adjustment.
I have set my LCD to Medium Low but according to the image comparison below, it should rather be set to Low (and so should the EVF if I could).
Others used to other EVF's on other brands have told me that the Leica Q viewfinder is brighter than most. An adjustment at some later point making it possible to turn down the glow on the EVF might be a great improvement.
You basically want to use the EVF to adjust the exposure, and if the EVF is too bright, you will want to underexpose your images.
EVF versus actual photo:
This is how the image looks in the EVF.
Brighter and with a both bluish and warmish tint than the actual photo to the right.
This is how the image looks in Lightroom when you import the DNG. The JPG from the camera will look a little darker.
The Settings of the LDC (approximately):
High
Medium High
Medium
Medium Low
Low
Of course, you can also adjust the DNG in Lightroom towards the look you saw in the EVF, but ideally what you see in the EVF should be what you get and there should be no adjustment necessary.
This is something you should check quite early after opening the box and taking the Leica Q into use as the EVF is the exposure preview: How does the EVF you see compare to the image you get. If it is brighter, get used to that look. If it is darker, get used to that look.
You should compare and know how what you see in the EVF (or on the LCD) compare to the final files before you head out on a week-long holiday shoot or start doing a lot of video.
The EVF (and LCD) is part of your workflow, meaning that you get used to that when things look a certain way, that is how they should look for everything to be right.
The EVF has some extra sharpness that you see in the preview but not in the actual photo. If you point the Leica Q towards black text on a white page in a book and focus, you will see an outline of white (over-sharpening) around the black letters. In the actual photo, this is not there.
It's good to notice this effect because when you focus on a subject, the many small white outlines around everything makes the image look more sparkling and more bright than it actually will in the final picture.
If you have the preview set to 1 second, you can easily compare the preview in the EVF and the preview of the actual photo you get tight after and notice the difference.
I have set my Leica Q to LCD Off so I only use viewfinder. With the first Firmware of June 2015, there is possibility of using the EVF only, or LCD only, or both in the way that the LCD is lit up as soon as the camera is on, and the EVF becomes active instead when the EVF sense that you have your eye in front of the EVF.
It's not iris recognition or something fancy, it's just a sensor on the left side of the EVF viewfinder. This means that if you want to go discrete, you can simply put a finger or thumb over the sensor on the left side of the EVF.
I hope (or rather; I am sure that) Leica Camera AG will change the settings so you can use EVF only for photographing, and the LCD will only be activated be available for menu settings and previews.
You don't want the LCD screen to lit up all the time, or the view to flicker between the EVF and LCD. Some times the LCD is on when you actually look in the EVF. Disabling the LCD is a good way to control this as well.
You can put a little piece of duck tape on the EVF in the left side so the EVF is the only one in use. You basically activate the sensor so the camera thinks you are looking into the camera.
But realistically, it would be easier (and prettier) to use the menu and set it to LCD only. Same effect.But you van go back to LCD by changing the menu instead of having to move the duck tape (if you for example want to show someone the pictures on the screen).
You can cover the sensor on the left side of viewfinder to trick the camera to believe you have your eye in front of it. Then the LCD is always off. But it is easier to go into the Menu and set the camera to EVF only.
Leica Q: The LCD touch screen
The Leica Q has a touch screen but frankly I haven't touched it yet. I don't know if I will ever use that feature, but that's what it got.
If showing pictures on the screen, you can scroll from one to the next and zoom in and out with a finger.
You can also set the Leica Q so you can focus by pointing a finger (like the iPhone).
The Menu of the Leica Q doesn't react to touch so you cant change menu settings with your finger, only with the arrows and the thumbs wheel.
Brother and sister. Leica Q at 100 ISO, f/1.7, 1/800 second.
Light metering on the Leica Q
The Leica Q has three methods of helping you measuring the light to get the exposure correct:
Center-weighted
Spot Metering
Multi-field
Measures the center of the frame and adjust the exposure so as to make the average of all included in the center circle middle-gray.
Measures just a single spot in the middle and adjust the exposure so as to make what is seen in that spot middle-gray.
Measures a number of fields of the overall image, and based on how many highlights, and where they are, the Leica Q tries to choose the correct exposure.
I've been using Multi-field the most because the Leica Q is mostly a reportage camera and you photograph a lot of different and fast-changing subjects.
I sort of decided on this based on how I used the Leica Digilux 2 in the past, and there I used the multi-field metering. On the Leica M cameras I use the Center-Weightedmetering as that makes most sense on that camera type (see page 31 of my Leica M 240 article and the Page 17 of my Leica M9 article).
In the Leica Q i find the Multi-field to make the most sense.
A note on light metering: As can be seen here not all subject are an average of middle-grey. With this rather simple subject, but tricky lightning, the spot meter hitting the shadow part will light up the whole thing to make that little spot look middle-grey. A lightmeter is always set so that what it think it measures, is a middle-grey scenery. So if you look into a cameras brain, what it is thinking is "if this is middle-grey, then I better set the time to 1/125 and the f-stop to f/2.0." The camera never think, "oh, I see a red wall darker than middle-grey, and with a highlight crossing [oh my!], so I better set time to 1/250 and f-stop to f/4.0 so as to get good contrast and both shadow detail and highlight detail." The camera doesn't think that way; that is what you are there for, the photographer.
The closest you get to this are "intelligent" metering methods such as Multi-field metering, "matrix metering," "multi-zone metering" and such new metering methods where someone try to implement this type of reasoning.
The center-weighted metering is useful with manual focusing ont he Leica M, but with Auto Focus it doesn't work that well. That's my experience. It's all good for mixed scenery, but shooting a scene with lots of bright snow around a person skiing, or a portrait with bright buildings behind, this type of metering simply can't comprehend such a scenery that is not even lighted in middle-gray tones. Group photos in grey weather or with the sun coming from behind it can do.
This extension course if made for you! It can be done at home and travel at your own pace. I have taught workshops for years and the Overgaard New Inspiration Extension Course is my experience compressed to a package of training, articles, drills, assignments and video tutorials that will inspire you and take your photography to the next level! For a limited time my course includes something you cannot get anywhere or anytime else:
A portfolio-review by Thorsten Overgaard.
"The Overgaard
New Inspiration
Extension Course" For computer and iPad. 181 p eBook.
Only $798
Order now - Instant delivery.
Leica Q: Manipulating the cameras metering logic
You can use the spot metering to point the small cross in the center of the Leica Q's finder towards a middle-grey area and lock the light metering (by pressing the shutter half down) and then reframe with that metering locked, before you shoot. The spot metering should be pointed towards a middle-grey area (or similar tonality in blue, green, brown or whatever; it's the middle tone, not the greyness that does it). If you do this you will learn a lot about light in the process, and you will always be able to see in the viewfinders digital preview if it's right or not - and can then move the spot towards a slightly darker or lighter surface till you think it's right. It is a great learning experience about light and light metering, but with AF it is a little tricky because you lock the focus at the same time. But if you shoot for example f/8.0 most of your image is basically in focus anyway and you can play with the spot metering.
But more importantly, I do the same with the multiple field metering (which is the metering I use most of the time) where I point the small square in the center of the viewfinder (called 1-field metering autofocus in the manual) towards that area I want to measure; because even Leica haven't stated how that multiple field metering works, I guess it takes it's primary metering within that small square in the center
But mainly, what I do is that I look in the viewfinder (which is digital why I see a preview of the shot) what the picture will look like. I point that multiple field metering square towards something lighter or darker so as to fast and simple tell the camera to correct the metering up or down. And I am aware that I am also choosing a focusing distance, so I choose a subject at the right distance and with the right mix of colors to get the exposure right as well. When I press the release button half down, I have locked that and can change my composition and frame without loosing focus or exposure.
he alternative is to shoot the first series on Auto, look in the bottom of the viewfinder while shooting and notice that the camera goes for example f/1.7 and 1/250, then go manual by turning the shutter-wheel to 1/125 and shoot a series that will be brighter, and then eventually turn the wheel again to 1/500 to get a brighter as well.
The thumbs wheel is also there, and if I could get used to it or convince my self thumb wheels for focus adjustment is not an evil thing, that one could be used too. But I happen to think thumb wheels are evil.
The multiple field metering is very often correct , but it's you and not the camera who take the picture, so you're free to manipulate the cameras logic towards your desired result. And the above is a way to do so.
Leica Q: Locking light metering separate from auto focus (AEL)
On the 3rd screen of the MENU you find the Zoom/Lock-Button and if you set it to AEL (Auto Exposure Lock), you will be able to lock a light metering by pressing in the "zoom" button by your thumb (above the display and to the left of the thumb rest on the back of the camera.
It goes like this: You point the camera to an area wher you want to pick up the light, then lock that metering by pressing in the Zoom/Lock-Button and holding it in. Then you turn the camera to the subject and press the shutter relase down a little. This will activate the focus only and not affect the light metering.
AEL lock:
Exposure based on the full frame
AEL lock by turning the camera down (and away from the strong backlight)
Leica Q: Why use AEL to lock the exposure setting?
Say you are photographing a sofa with windows behind. The sofa is basically in shade but the light meter picks up the light coming in from behind as well; thus changes the exposure for the much light to make the overall scene midtone. The result is that the sofa is under-exposed.
Cameras' light meters doesn't distinguish what is the subjec and what is the background; not even if the subject is bright or dark. They just make the average into a midtone.
To compensate for this, you point the camera down to the floor or any other subject that has the same amount of light on it as the actual subject (the person in the sofa), lock that exposure and then re-compose to the frame you wanted. Now the shutter release button will zoom in on the person and the camera will not change the exposre.
AEL lock:
Exposure based on the full frame
AEL lock by turning the camera down (and away from the strong backlight)
Leica Q: Exposure compensation with the thumb wheel
Let me begin with saying that the thumb wheel on the Leica Q is a great example of excellent design. It is so well-designed that you forget it is there. It's never in the way and is only touched or turned by accident when the camera gets some use and the wheel is a little softer in its movement. It is very easy to use when you wish to. It sits in the exact right place. And it feels good. It actually feels ... amazing!
But I don't use it, and thankfully in the Firmware 2.0 that was released on July 26, 2016, you can disable the thumb wheel so it never is turned accidentially.
Exposure compensation with a thumb wheel is a bad habit from other cameras that Leica Q now have adopted as part of the concept. The reason exposure compensation "wheel" has come about is that most cameras are so difficult to change exposure on that the manufacturers invented this new way.
The "right" way to compensate for exposure is to change the shutter time on the wheel on top that shows the shutter times. If the camera shows 1/250 but it looks too dark, you change the wheel with the shutter time control on top of the camera to 1/180 or 1/125.
On the Leica Q the designers have decided to go with whole stops of 1/60 - 1/125 - 1/250 and so forth and not have 1/2 stops on the wheel (on most Leica cameras you can set the shutter wheel between for example 1/125 and 1/250 which will be 1/180 second).
Hence, the exposure compensation wheel is a "necessary" if you want to adjust with 1/3 of a stop.
This bad bad habit of compensating with a thumbs wheel is something I will keep fighting. It is simply wrong! (And let's see if I ever change my mind on this).
The shutter time dial on top of the camera goes from 30 seconds to 1/2000 as mechanical shutter, but in Aperture mode (the A on the dial on top), the shutter actually goes up to 1/16,000 of a second (which Leica refers to as shutter). That is three stops extra and will allow you to use the Leica Q in sunshine at f/1.7 and 100 ISO or 200 ISO within the shutter time, without getting over-exposed images.
I've gotten a 49mm ND-filter for my Leica Q so I have the possibility to use f/1.7 and manual exposure setting. Normally a f/1.4 lens needs to be stopped down to f/4.0 (which is three stops) to stay under 1/2000 second at 100 ISO in sunshine.
Leica Q Electronic shutter
The Leica Q has mechanical shutter up to 1/2000 second. Above that, all the way to 1/16,000 it is an electronic shutter.
The banding from flickering light (that the eye nomral doesn't see) can be visible with electronic shutter. But usually the flickering from light can be seen in the EVF. If you are below 1/2000 of a second, the flickering won't be visible in the photo. If you are above, the flickering you notice in the viewfinder may be visible in the photo as well (in one form or another).
One way to avoid it is to change settings so the shutter time comes down to 1/2000 or slower.
Manually setting the Exposure to 1/16,000 on Leica Q
The shutter speed dial only goes to 1/2000, but the shutter speed of the Leica Q actually goes as high as 1/16,000.
The exposure can be set manually to 1/16000, 1/12,500, 1/10,000, 1/8000, 1/6400, 1/5000, 1/4,000, 1/3200 and 1/2500 by setting the shutter speed dial to 1/2000 and then use the thumb wheel to turn to the desired shutter speed.
A similar method can be used to reach in-between shutter speeds of for example 1/400 in that if the shutter speed dial is set to 1/250, you can turn the thumb wheel till you see 1/400 in the viewfinder.
You have to press the INFO button (that’s the round one on the right of the screen) till you get an image in the viewfinder where the shutter speed is shown in the bottom. Else you won’t know where you turn the dial to.
This is applicable (and very good, actually) when you use an external light meter what will measure the light and tell you what your exact shutter speed should be.
In theory there is no need for ND-filter for the Leica Q unless you want to manage shutter time manually. Automatically, at 100 ISO, the electronic shutter that goes to 1/16,500 of a second is fast enough to keep the exposure right. The above photo is 100 ISO, f/1.7, 1/3200.
Meister Camera Berlin gave me a SanDisk 16GB 60mb/sec SD-card with the camera. This card works very well with the Leica Q, and so does my 64GB 95mb/sec SanDisk cards that I use for the Leica M240 and Leica M 246. Recently, I have upgraded my SD card in the Leica Q to the Angelbird 64GB 300mb/sec cards.
In the specifications, Leica Camera AG says SD/SDHC/SDXC, multimedia cards, speed class: UHS-1.
That is cards with bus speed of up to 104 MB/s. I would advice not to go higher/faster as that will be waste of money and is likely to cause trouble.
The lens shade is mounted on the outside screw mount of the lens front. You have to remove a decoration ring before you can mount the lens shade.
I usually use lens shades as (the only) protection of my lenses. The lens shade is there to block out light that might cause reflections, halo effects and flare if there is a strong light source outside the frame that might hit the lens (from the side).
In my experience, outside light is seldom a problem with wide angle lenses (but can be with tele lenses). I don't use UV filters because they can cause reflections and collect two layers extra of surfaces to keep clean. And I like to look at the "naked" lens surface. I've had to get Leica to replace front glass twice on two lenses, and the cost was within what I could confront and afford (€250 for a 35/14 FLE front lens and €550 for a 90/2 ASPH front lens).
With the Leica Q I started out not using the lens shade because it makes the camera less compact and because I can't get a ND filter onto the lens without removing the lens shade first. But as I have moved on, I have actually put on the lens shade to protect the camera.
The Leica classic metal Leica lens cap that comes with the Leica Q is beautiful. It's made so it fits both on the front of the lens shade and the front of the lens. I personally consider the lens shade to be enough protection, so I never add the lens cap.
I ordered a 49mm ventilated lens shade (made in China) to see how that would work with the Leica Q. It looked awfull, so I decided to have my own designed, and from September 2016 it has become available here.
The Leica Q ventilated hood:
The ventilated lens shade I designed for the Leica Q is now available in Black Paint, RED and Silver from my website. As you can easily see in this picture, the ventilated shade sits on the outside of the lens (like the original) and leave space to easily change filters on the lens' filter thread. In the picture is the red calfskin camera pouch from Tie Her Up and a strap from @ybputro.
Kissing a big yellow head at Sculptures by the Sea. Leica Q at 100 ISO, f/1.7, 1/640 second.
The Leica Q battery and charger
The Leica Q battery (Leica BP-DC12) is the same as for Leica V-Lux 4. The charger (BC-DC12) is naturally also the same as for Leica V. Some photo stores have listed the Leica Q battery and the Leica V battery at different prices, and if that is the case, go for the less expensive (which is the Leica V battery, usually).
The Panasonic DMW-BLC12
battery should also work but I haven't tried myself. It's about 40% of the Leica battery price. As the Leica, this is 7.2V, 1200mAh.
The battery lasts approximately 300 pictures. I haven't measured the charging time, but it is pretty fast. An hour or so.
I always have two batteries for my cameras so one can re-charge while I use the other. In many case, two batteries will get you through the day or an assignment.
The Leica Q officially is said to be able to do about 300 images on one battery. When I did reportage from the Danish elections, I managed to fill up a 16 GB card on 2/3 of one battery (that's 310 images with the LCD turned off).
My guess is that you can realistically do 350-400 images, depending on the settings and use of LCD. It's not my impression that the LCD uses a lot of energy.
Auto Off and battery life on the Leica Q
I have set the battery time to 2 minutes Auto Off, the preview to 1 second and LCD off (if in use) to 30 seconds.
I never turn the camera Off but always have it on Continuous mode (the C next to Single and Off) as the camera will shut itself down after two minutes.
French colors on the bicycles. Leica Q (100 ISO, f/1.7, 1/160).
2. Copy the firmware onto the SD card on top level (meaning onto the card, not in any folder).
3. Insert the SD-card into the Leica Q and turn on the camrea while you hold down the video recording button (that's the one on top with a red dot on it).
The camera needs a fully loaded battery to update. Else it will give an error message (saying the battery is not full and the firmware update can't be started).
Firmware update in progress (2-3 minutes)
Firmware update finished.
4. Turn the camera off and then on. You might have to take out the battery completely to reboot the camera, then turn it on again.
Leica Q Firmware Versions
Version Q_3.0 released on June 29, 2018: Favorites Menu: Users can now enter and save up to 15 settings for faster access in a Favorites Menu. Power Saving Mode: If required, the camera can now be set to switch to Stand-By Mode after 10 seconds. Extended functions for the Fn button: Even more options can now be selected for programming the multi-function button. User Profiles: Profiles can now be imported from and exported to a memory card. OIS – optional ‘Auto’ setting: This setting enables automatic activation of optical image stabilization at shutter speeds of 1/60 s and slower. EVF/LCD setting options: This menu item can now be assigned to the Fn button. Settings for the electronic shutter: The electronic shutter can now be set to permanently active. DNG files: The processing speed of DNG files in the camera has been increased. Autofocus fields: The last AF field used is now memorized and recalled when switching the camera off and on again. Self-timer: The setting is now memorized and recalled when switching the camera off and on again. Exposure preview deactivation option: Exposure preview can now be deactivated in manual mode (especially useful when shooting in the studio with flash systems, underexposed settings or in dark environments). Image review: Automatic image review remains active as long as the shutter release button is pressed.
Version Q_2.0 released on July 26, 2016:
A big update that give a number of new features. These are the main ones:
- You can photograph DNG only (no JPG needed).
- Thumb wheel can be turned Off so you don't accidentially change the exposure.
- Size of the 1-Point autofocus can now be selected to be Small, Medium or Large.
- Long exposure function/noise recudtion added with countdown.
Version Q_1.1 released December 2015: Improvement of image quality in lower ISO.
Version Q_1.0 released with the camera.
Leica Q App
Update: This app has been replaced by the Leica Fotos App.
When I was setting up the Leica Q App that allow me to transfer the JPG images to my iPhone (or other smartphone), I was reminded what a hub the smartphone have become. I got a mail about a delayed plane and had to text my assistant that the flight from Miami would be 90 minutes later. You can't listen to music, like photos on Instagram and use the phone as GPS at the same time. Working with Leica Q on the smartphone is just one more thing.
The Leica Q App is free in the Apple App Store and as Leica Q Android App in Google Play. It was updated in October 2015 for the latest Leica OS9 software. Make sure to keep your Leica Q app updated and expect that when Apple make large changes, it may take a little while before the Leica Q app is updated to work with it (in other words: wait with updating your Apple iOS)
This is one weakness of smartphones and how all sort of app's would like to get in on the little screen that get so much attention from the user.
Next problem was the language and what the app was actually supposed to be. You can set up the phone as Client or Host, and if you know what that mean, then hurray for you. I have no idea, so I had to look it up. I guess once you know, you know. That is, till you forget what it means.
Client mode is when the Leica Q is a visitor of the WiFi network and can communicate to other unites (like your iPhone or a web service like Leica Fotopark via the WiFi network).
Host mode is where the Leica Q is the host of the iPhone or smartphone.
Setting up the Leica Q and phone to talk via the WiFi
This is Client mode! I managed to set up the Leica Q as Client to my house network, and to connect the App with the Leica Q with that network (it should be possible to turn on hotspot on your smartphone and connect directly) and got three pictures downloaded to my phone (Backup mode). Then I got the silly idea to see what happened if I left the App. As I had feared, now nothing worked anymore and all I got was error messages. No more connection.
I tried again after a while as the courage had come back, this time Remote Control mode. I got the camera up and was able to change Program mode (Manual, Aperture Mode, etc), ISO, White Balance and more. And take pictures with the iPhone as remote control, and the pictures was then sent from the camera to the iPhone. I could also do a video if I wanted to.
Then I lost connection again. I wanted to do something else, and that was apparently a bad idea.
This feature is much like what has been available on the Leica C - Leica Camera AG's smallest camera - for a couple of years now. And it is more and better than what EyeFi offers (the SD-cards that allow you to transmit images from the camera's SD card to the smartphone or computer), thought I still feel like I am connecting wires with duck tape that anytime can loose connection again.
Learning how to wash hands in a Kindergarten in Copenhagen, Denmark. Leica Q (800 ISO, f/1.7, 1/250).
Setting up the Leica Q with the iPhone or smartphone directly
Update: This app has been replaced by the Leica Fotos App.
This is Host mode! Here you let the Leica Q set itself up as Host like a WiFi hotspot, and the phone connects to the Leica Q as you would to any other WiFi network.
When your phone is connected to the WiFi of the Leica Q you can obviously not use other WiFi networks (so either you have no internet connection, or you have 3G/4G on your phone).
You don't need to connect the phone and camera to a WIFI network. Instead, follow these simple steps:
On Leica Q:
1. Select WLAN > WLAN Mode, and make sure it's set to Host.
2. Select WLAN > Connection and set to Remote Control. On the iPhone:
3. If the first time connecting, open the Leica Q app on the phone, and Let the phone Scan the code on the Leica Q display: Scan the QR code that is displayed on the LCD screen of the Leica Q camera. Follow prompts to install the iPhone profile/driver. On the iPhone:
4. Once installed, go to WiFi Settings on phone. You should see the Leica Q showing up in your list of potential WiFi hosts. Connect to it as you would any WiFi network.
5. Go back to Leica Q application. It will display something like Searching Camera, then it will say "Tap to Connect".
6. Select the Camera Control to shoot the camera remotely, or Camera Play to view the images that has been taken (they are automatically transferred to the phone after you take them; but only the JPG).
The images are also on the SD-card.
The Leica Q App has a second window with links to the website, including Members Area where you can register your equipment.
The Remote Control on the iPhone shows a preview of the photo and the settings. You can click on each setting and change Aperture, Shutter time, ISO, etc. You press the round button and the camera takes a photo and transfer it directly to the phone.
A warning on privacy
I feel urged to remind a story I was told from the managers from a chain of camera stores I once worked with. They told that when they rented out a digital camera or a video camera, people would occasionally forget to take out the video tape or card when they returned the camera. In a majority of the cases, it was very private recordings made with this rented equipment, which of course caused some amusement amongst the staff.
Somehow technology invites to try more than just technology. The same reason I suggest anyone to make sure their iPhone photos are not automatically sent to a cloud service. Many are not aware that when they set up a iCloud, the photo sharing is automatically set up also (and often your smartphone includes geotagging, showing exactly where you usually go).
Just as a warning. This feature will send pictures to your phone and your Leica Fotopark account automatically, if you don't remember how it is set up, and how to turn it off.
The Leica M digital rangefinder cameras doesn't have the WiFi that the Leica Q has. But you can still get your Leica M photos onto your smartphone and share in Instagram and all immediately if you simply take the Leica M memory card and insert it into the Leica Q!
The Leica Q will read the Leica M cards and thus you can fransfer them. Likely the WiFi is coming the Leica M after September 2016 I guess, but this is a way to do it.
Leica Q: The 28mm in Leica history
The 28mm lenses from Leica Camera AG traditionally has been of very high quality. I have speculated before if 28mm are very easy to make and if that could be the reason why Leica just make them very good, not matter the price. The Leica 28mm Elmarit-M ASPH f/2.8 ($1,980) is an really outstanding lens, and the almost twice as expensive Leica 28mm Summicron-M ASPH f/2.0 [$3,780) is just a one stop better and offer the extra DOF (depth of field). The new and even more expensive Leica 28mm Summilux-M ASPH f/1.4 ($5,959) it's too early to say much about, but look for samples at my Leica 28mm page. Also, Jono Slack did an article with samples based on the limited edition of the 28/1.4 that came out in May 2014.
The point I am making is that 28mm seems to be a lens format Leica has completely down how to make. Any of them are very good. Without having gone into much detail on the 28mm Summilux-Q ASPH f/1.7, I expect it to follow the family tradition of 28mm Leica lenses.
The 28mm on the Leica Digilux 2 was also very good, even it was a 28-90mm zoom f/2.0. Leica zoom lenses (except for the ones Minolta made for them in the 1980's) are known for being just as good at any focal length as the fixed focal length lenses.
Comparing the
Leica 28mm Summilux-Q ASPH f/1.7 on the Leica Q and the
Leica 28mm Summilux-M ASPH f/1.4 on the Leica M
I've compared the 28mm lens on the Leica Q a little with the Leica 28mm Summilux-M ASPH f/1.4 on the Leica M 240. I will be doing more as part of my 28mm article that will expand over August to October (using the Leica M 240 and the Leica M 246).
1. Comparing white balance settings:
I've had a few problems with the white balance in Kelvin because the two cameras aparantly doesn't use the same Kelvin scale, or doesn't respond to it the same way.
You should think that if you establish the white balance in Kelvin, you can just punch it in the numbers and both images will be the same colors. Not so. Here is the two camera files with the same Kelvin number. (This makes use of external Color Meter a little tricky, which was one of the things I was testing that day as well).
I first thought this had been fixed with the Camera Raw update on July 29, 2105, but I ralize it hasn't.
Q
The full frame of the Leica 28mm Summilux-Q ASPH f/1.7 on the Leica Q
M
The full frame of the 28mm Summilux-M ASPH f/1.4 on the Leica M 240
Both images set to Kelvin 4100 - Now, that was a surprise!
2. Comparing size of frame:
I can say that the Leica Q has a wider 28mm frame than the Leica m 240. There is no doubt about that. If the 28mm M lens is a 28mm, the 28mm Q lens might be more like a 24mm or 26mm.
Q
The full frame of the Leica 28mm Summilux-Q ASPH f/1.7 on the Leica Q
M
The full frame of the 28mm Summilux-M ASPH f/1.4 on the Leica M 240
The staight out of the camera Auto White balance files (Leica Q is 5950 K, Leica M is 5350)
3. Comparing the images:
These are my edited files as I would normally edit them. It is easy to see that the Leica Q has very even distribution of the light and no dark corners. In this case it might look as a good quality.
I am sure we will doubt what we like the best when we start looking at prople, skin, eyes and other things than a simple room. If you want to start thinking about it, look at the window and the defition of the frame, shadows and curtain.
The Leica Q comes with a built-in correction of the file (which corrects for dark corners and adjust the iamge to be straighter), the Leica 28mm Summilux-M ASPH f/1.4 doesn't have a profile in Adobe Lightroom yet.
Q
The full frame of the
Leica 28mm Summilux-Q ASPH f/1.7 on the Leica Q
M
The full frame of the
28mm Summilux-M ASPH f/1.4 on the Leica M 240
4. Comparing the depth of field:
I can say that the Leica Q has a wider 28mm frame than the Leica m 240. There is no doubt about that. If the 28mm M lens is a 28mm, the 28mm Q lens might be more like a 24mm or 26mm.
Q
Crop of the scene from the
Leica 28mm Summilux-Q ASPH f/1.7 on the Leica Q
M
Crop of the scene from the
28mm Summilux-M ASPH f/1.4 on the Leica M 240
The staight out of the camera auto white balance files
This is how far I will go so far with comparing the two. The Leica Summilux-M ASPH f/1.4 is a wonderful lens. A masterpiece I would say, and will get back to why it is so when I have worked with it for a longer time.
This photo is of a simple room with fairly soft light. It doesn't include people or real use of DOF (depth of field) which would be one of the reasons to get a Summilux lens.
Conclusion
What I would conclude so far is that the Leica Q is a very straight-forward and easy way to get the 28mm quality with straight lines, ease of use, even and bright from corner to corner, and without much trouble in regards to fringing.
The Leitz 28mm Hector f/6.3 that came out in 1935 in black and chrome for the Leica IIIa was the first ever Leica 28mm lens that came out. Since then Leica have made quire a few 28mm lenses.
Photo by Tom Gill: A Leica IIIc 1938 with the 28mm Hektor f/6.3, the first Leica 28mm lens.
Leica Q: OIS for video (Optical Image Stabilization)
The Leica Q has Optical Image Stabilization for video, which can be helpful for amateurs that doesn't use tripods for video. Without OIS the shaking on video can be quite visible. You can apply some sort of Image Stabilization when using Final Cut Pro and even when uploading to YouTube, but here it is in the camera which is helpful.
Professional video cameras and motion picture cameras doesn't have Image Stabilization.
Leica Q: OIS for still photos (is a no-no)
The Leica Q also offer the possibility for OIS for still photos, and by default it is set to Off from the factory. And it should stay that way. It will degrade the image quality a little, and there is no reason to turn ON Image Stabilization for a 28mm lens on a camera that goes high in ISO.
Image Stabilization is usually for tele lenses where where small movements at low shutter speeds can cause blur. I can't think of any condition where there would visible blur on a 28mm lens.
There is an ongoing discussion if OIS degrade image quality. In theory, of course it does. But usually you use OIS when not using it would be a worser choice.
OIS on the Leica Q doesn't seem to delay focus or exposure (there is no wait for it to "kick in" as in other systems).
Leave it off.
Robin Isabella von Overgaard in Denmark in June. Leica Q. (100 ISO, f/17, 1/400 sec).The sharp highlight from the tree in the background is (I think) due to Image Optimization/Distortion Correction (not Stabilization, see below).
Leica Q: Image optimization in the background
I wondered about some of the background sharpness and shapes in one of my photos and asked Leica Camera AG why. The reason is that the Leica Q applies a sort of Image Optimization/Distortion Correction to the images to make the overall quality and sharpness of the images better.
"There is a digital distortion correction for the images," product manager of the Leica Q, Peter Kruschewski, told me. "We decided to implement it in order to maximize the image quality while minimizing the size of the lens."
In Lightroom the correction profile for the Leica 28mm Summilux-Q ASPH f/1.7 is applied automatically and cannot be turned off. If you go into Develop mode in Lightroom and look under Lens Correction > Profile, you will see a message in the botton with an exclamation mark. When you click on that, you get this message (above).
This Distortion Correction (SDC Software Distortion Correction) is independent of the OIS (Optical Image Stabilization) which by default is turned off from the factory. At f/1.7 I prefer to be able to work with blurred backgrounds, and if Leica Camera AG offered a way to turn off this Image Optimization/Distortion Correction, I thing I would turn it off.
The more I look at the two images here (below and above), the less I think it has to do with the SDC profile Leica Camera AG is applying. I will get into this more in October 2015 when I write about the Leica 28mm Summilux-M ASPH f/1.4 and the other Leica 28mm lenses.
The 28mm lens on the Leica Q go as close as 30cm (1 feet), but then you can turn the lens into Macro mode and that opens up for a whole new focusing scale where you can go as close as 17 cm (1/2 feet) to 30 cm (1 feet).
I'm sure someone will find some 49mm macro filters to screw onto the Leica 28mm Summilux lens that will enable even more enlargement. So far Leica hasn't made any. They did ELPRO macro lenses to add onto for example the Leica Digilux 2, and those are extremely sought-after. I saw one on eBay the other day for $500 (I have one in case I need money for my retirement).
In Macro mode you can go as close as 17 cm (1/2 feet). Leica Q Macro, 100 ISO, f/2.8, 1/30 second.
Leica Q: The "Leica Glow" and the Leica philosophy on lenses
The "Leica Glow" is something you hear spoken about from time to time. When you use Leica every day, you don't notice it that much. If you use other lenses and then see a Leica photo, most people clearly notice that something is "glowing".
I can't recall that Leica Camera AG ever have described what this might be.
I have one explanation that I usually give: When I was scanning slide film photos for a book some years ago, I used a Nikon scanner ($1,200) and a Imacon scanner ($14,000). I used the Nikon for the less important ones as it would scan images in less than a minute. The Imacon I used for the images I really wanted to sing, because the Imacon takes 8 minutes to scan one image.
Same size of scan, different scanners. Imacon has been known for making the worlds best scanners and still does (they were bought by Hasselblad some years ago).
I decided to test the quality, so I did a scan of the same image on both scanners. When I zoomed in to 100% I was horrified: The Nikon scanning was sharper than the Imacon scan!
Buy the new eBook
"Composition in Photography"
by Thorsten von Overgaard
Composition in Photography - The Photographer as Storyteller
This book will inspire your photographic eye and make you wonder about all the possibilities you can now see.
In this exciting new book Thorsten Overgaard expands and simplifies the subject of composition. It's elevated from geometric patterns to actual storytelling by practical use of space, rhythm, time, colors, emotions and intuition in your photography.
- The Basics of Composition.
-
Composition in the Third Dimension.
- Picture Stories.
- Accenturating with Light.
- Photograph as a Melody.
- Which lens are you?
- Fear of sharpness?.
- Vanishing Point.
- The most important
element of composition
- What is the unknown secret
why it is you mostly can't get
the Rule of Thirds to work?
- How does a camera see
differently than the eye?
- What does quantum physics and
photography have in common?
- What's the greatest adventure you can
set out on in photography these days?
- A Sense of Geometry.
Only $398.00. Order now. Instant delivery.
864 pages. 550 Illustrations.
"It’s your best work so far"
"I’m being gently led"
" I love this book!!!"
"The book is incredible"'
"It’s like therapy for the human spirit."
"Beautiful and inspiring"
"Full of practical advice
and shared experience"
'I love how hands-on and
laid back Thorsten's witting style is"
"Inspiring"
"Intense and thought-provoking"
100% satisfaction of money back.
But then when I zoomed out to a larger potion of the image, the Imacon suddenly appeared sharper, more alive and more 3D. Fresh, I would say. And when I zoomed out to the actual size of the image on the screen, the Imacon was so much more alive, sharper, better colors and more sparkling details.
Imacon and Leica are the only two optics/photography companies where I have seen this "philosophy" on light rays. If I look at a Zeiss image, I see extreme sharpness but an overall dead image. For me, that is optics designed by a computer. What I think distinguish Leica and Imacon is that some human make decisions on the road to the final design.
A computer can figure out the sharpest lens, but only a human can figure out a lens that makes things look alive.
Leica Q (100 ISO, f/17, 1/1000)
This might be a accurate, or less accurate description of the phenomena. If you are into Leica lenses, you know of the Mandler era: That is lenses designed by Dr. Walter Mandler who worked at Leica Camera AG and who's lens designs are characterized by a soft look, but at the same time very detailed. He did the 75/1.4, the 50/2 version II, the Noctilux f/1.0 and many more lenses. If you said his lenses didn't focus on sharp edges, but on many details, you would be on the right track.
Since then, Peter Karbe has taken over and is the one in charge of the design of Leica lenses these days. The new lenses has much more control of micro-details, light-rays and the overall result is higher contrast, more accurate colors and an overall apparent sharpness. One other thing that distinguish Leica lenses from other brands is that they cut no corners in lens design and production. This is why - surprisingly - new lens designs are better than older ones. "They don't build them as in the old days" is true for many things in life, but not for Leica lenses.
Sharpness is not a sharp edge, but is perceived sharpness; meaning that the idea that something is sharp and detailed due to the light conditions. It comes down to the control of light rays (Red, Green and Blue) and how they meet on the sensor plane.
If one have tried different binocular brands, one will know that Leica binoculars make you see almost better than with your own eyes. Bright, colorful,contrasty, well-defined and relaxed. Same philosophy.
During an interview in 2013 with Peter Karbe on the Leica lens design and the Leica 50mm APO-Summicron-M ASPH f/2.0 he said something that might lead us to the human factor in lens design:
Peter Karbe: "At Leica we aim to reduce and minimize aberration within each element itself, with each surface and so forth. That is the concept and thinking behind everything we do."
"Look at the M system. We aim to keep it compact and each element has a certain task and this need to be selected carefully. That is the general description and the reason we try so hard."
So any other lens designer could do this, or do you have an extra secret?
”They need to understand why, and they need to know how to do that. That is our history of ideas at Leica. We have a history of ideas for photographic lenses. Max Berek (1886-1949) designed the first Leica 50mm f/3.5 lens for the Ur-Leica that Oskar Barnack made in 1911. That is our heritage. We learned from that."
"Everybody at Leica try to learn from that which others did before us,” he smiles. “It’s not learned at a university. We learned from them. Our first lens designer was Max Berek. His concept was to reduce the aberration of each element, or of each lens surface.“
Apply
code "UPDATE113" on checkout to get this complete version 11.3 update.
$298.00
Updates all previous Surival Kit versions since 2009.
Buy the complete new
Lightroom Survival Kit 11.3
The Legendary Tutorial for Photographers
Brand-new JUNE 2022-version.
Now with brand-new 4+ hours of video tutorials.
New sections on compostition and storytelling.
How to edit color photos.
How to edit black & white photos. How to do keywords logical and easy.
The most successful photo editing kit ever
Photographer Thorsten Overgaard first released the Lightroom Survival Kit in 2009 and have honed it with new and fresh updates. This Version 11 is the most radical updated and renewed version ever, four years in the making.
Professional workflow experience made simple, logical and easy to use.
Master editor makes it simple to understand
The Survival Kit is unique and one-of-a-kind being made for photographers for photographers. When someone understands their subject, they can explain it so it is easy to understand. The hallmark of Thorsten Overgaard is to make expert knowledge shown and told in a way so anyone can apply it.
Hands-on advice that works
With a 450 pages workbook and 4+ hours of video, every element of digital photography is touched on, in handy chapters and pre-flight checklists. Editing of color vs black and white photos, keywording, cropping of images, fine-tuning of tones, color balance and color control, export of originals, printing, archiving and backup, and much more.
Comes with the Overgaard Leica Presets (Value $48)
The Lightroom Survival Kit comes with Thorsten Overgaard's special-made Lightroom Presets for all digital cameras and for Leica digital cameras.
Understand all from camera to the final print
Chapters in this version goes over the background for High Dynamic Range (HDR), digital raw files and how to set up a professional photography workflow, from calibrating the screen to editing in Lightroom, and to making a final print. And more ...
10+ years experience in one package
No need to spend years figuring out the smartest way to do things when you can tap into the best way of doing things right here. The workflow of Thorsten Overgaard as been refined through years of field work with more than a thousand workshop attendees.
This method of workflow now used by thousands
The Survival Kit has been taught to thousands in workshops and in this Survival Kit. What does it do? It make you enjoy taking and making photos, and it increases your production considerabely. Most important of all, it'll give you back ownership of your files (which you will understand why is so important, once you have bought the Survival Kit and started applying its methods).
"Thorsten's methodology is perhaps not what hardware-, software- and cloud-companies want us to do, but as a former IT engineer I can only acknowledge his views about preserving our digital heritage. This workflow explained is for me the best I have ever seen".
★★★★★
Video tutorials, image files, presets, checklists, definitions, tutorials of Lightroom, that boils down years of experience to a workflow you can implement in less than one day.
Start working in minutes.
Black and white image quality of the Leica Q
First off, I am exited that the DNG files from the Leica Q very easily are simply converted to black & white in Lightroom, and that's about it. They look great. Usually you have to make further adjustments on DNG files, and especially with CMOS sensors you seem to have to live with spots in the shin and other weird translations of colors into black & white. Often the black & white JPG out of a digital camera is easier to deal with than converting the DNG. But not so in the Leica Q where the making of color and black & white images from the same DNG file is quite easy.
What I do generally is that I finish the editing of the color image from the DNG, then I make a Virtual Copy in Lightroom, and then I make that one b&w. Some times I leave it like that, some times I increase whites and contrast to make it a little more classic black and white.
I am rather pleased with the colors of the Leica Q. They seem quite colorful, which I somehow like as a natural part of this camera. I feel there is a good balance in the colors even the look could be said to be a bit "Japanese" (which refers to Japanese made cameras). The images doesn't have the "plastic look" you some times see where there is too many warm and cold colors in the same photo (basically not balanced and impossible to make look right). But till we get the final camera profile for Lightroom there is not much point in commenting on the cameras colors (see update below).
The DNG file from the camera is easy to work with and stretch quite a bit, meaning that you can adjust a lot in Lightroom.
Leica Q: Slightly different colors in
Embedded vs. Adobe Standard in Lightroom
Despite that Adobe Camera Raw is said to be backwards compatible, that isn't the case. You would think that when you download the lastest Adobe Camera Raw version (9.1.1 and forward supports the Leica Q), you are all set.
That is not the case. You need to update your Adobe Lightroom CC or Adobe Lightroom 6.x to the latest version to gain support of the Adobe Standard for the Leica Q.
Sorry for the confusuion. Here's in short what we are dealing with: When Leica Camera AG releases a new camera, they have made an Embedded profile for the camera. That profile tells Lightroom how to translate the DNG raw sensor data into the right colors. Some weeks or months after a new camera is released, Adobe will implement that camera in a Adobe Standard profile which will translate the DNG raw sensor data into what Adobe thinks is the correct colors.
As long as Adobe haven't made their Adobe Standard file for the Leica Q, the embeded one does the job. Then when Adobe get their profiles upated, the Adobe Standard takes over the job. That is, if you have updated your Lightroom to the latest one.
Though, you still have the choice between the two profiles. You can set the Embedded or the Adobe Standard to the default profile that is used when you import photos.
Let's have a look at what the practical application is:
Test samples of Leica Q colors
using Embedded vs. Adobe Standard camera profiles
The colors, mainly the blue/purple are stronger/darker in Embedded than Adobe Standard. The Adobe Standard also "calms down" red and pink (and brightens green which is made of yellow and blue). Some times, if people are wearing very bright neon colors in green, pink or red, the Adobe Standard may be preferred for a more natural look.
Here are my X-Rite Color Checker photos of the two profiles:
Leica Q with Embedded profile in Lightroom 6.6
Leica Q with Adobe Standard profile in Lightroom 6.6
Naturally, if you change from color to black and white in Lightroom, this will also affect the tones in monochrom:
Leica Q with Embedded profile in Lightroom 6.6, changed to black & white in Lightroom.
Leica Q with Adobe Standard profile in Lightroom 6.6, changed to black & white in Lightroom.
The Monochrom JPG from the Leica Q
When you set the Leica Q to photograph the JPG in Monochrom (which you can do in the camera menu), the monochrom look of the JPG is already set, and for JPG files import into Lightroom with the Embedded profile. The monochrom look is designed by Leica Camera AG and and there is no choice of Adobe Standard. The tonality and all is set in the camera by the Embedded profile. It has even darker blue tone, slightly darker greens and slightly (too) dark tonality of darker-skinned people. It looks like this in comparison:
Leica Q camera JPG that is set to Monochrom only has the Embedded profile when imported to Lightroom 6.6.
Leica Q with Embedded profile in Lightroom 6.6, changed to black & white in Lightroom.
Leica Q: Black & White or De-Saturation in Lightroom?
In Lightroom you can change a color DNG (or JPG) to monochrom tones by clicking Black & White, or you can use the Saturation ruler to de-saturante the image to monochrom tones. The result is not the same and there is obviously no correct way other than what you choose what you like the best. Naturally, the even more darker blue will have an effect when doing landscapes with blue sky (less chance that the sky will turn white and greater chance white clouds in a blue sky will stand out).
Darker skin tones (the top left square) is darker when clicking Black & White than with de-saturation. The de-saturation one would be the most correct one to maintain a natural look of dark-skin:
Leica Q camera DNG made monochrom with the Saturation set to -100 in Lightroom.
Leica Q camera DNG made monochrom by clicking Black & White in Lightroom.
Leica Q: Very nice, but what are the most true colors?
One thing is to sit and compare computer screen pictures. The most interesting question is, how does the pictures of the color checker compare to the real color checker?
If you sit with the X-Rite color checker in one hand and compare to the computer screen, the Embedded profile is the most true. But is that the look you want? It's really up to you to decide, but I just wanted to let you know the differences.
Some would say that "Leica Camera AG knows best how the colors should be" and that is a good argument. However, when I asked Leica Camera AG product manager Jesko Oeynhausen (who does the Leica M cameras and not that Leica Q which is done by product manager Peter Kruschewski), his opinion was that, "the 'Embedded' is our color matrix embedded in the file. Adobe Standard profile is created by Adobe. I assume that the 'Adobe Standard' color management has more complex possibilities than we can embed in the file."
Following that philosophy, working with the files in Lightroom and stretching them, editing them and all should be how to decide for yourself, which profile you want to use as the deafult for your Leica Q DNG files.
How to update Lightroom or Lightroom CC
As any Leica camera came with a stand-alone Lightroom software licence till May 2016, you most likely have a stand-alone version of Lightroom. After May 2016 any Leica camera comes with a 90 day free trial of the Adobe Creative Cloud.
If you have the stand-alone version, Lightroom 6, you go to Adobe Application Manager in Aplications on your computer and run that (if you don't have that, Google it and download it). It will find the update and install it. It may require you to sign in with an Adobe ID, which is not the same as an Adobe Cloud account.
If you have the Adobe Creative Cloud version, Lightroom CC, you log into the cloud and check for updates.
You can stil buy stand-alone versions of Lightroom on eBay ($160), Amazon ($160), BH Photo ($150) or Craigslist and similar second-hand markets.
Adobe is very aggressive selling their online tax edition of their software. Even the stand-alone software still exist, they use any opportunity to make you log into the Creative Cloud and have you sign up for the montly software tax.
Unfortunately, there is very little chance that there will be any stand-alone version of Lightroom 7. Most likely there will only be a Lightroom CC version. We'll have to deal with that when we cross that bridge.
That Leica Camera AG has choosen to deliver cameras with a 90 day promotional trial that sucks more people into the Adobe Creative Cloud is ... Well, you can decide what it is: Before May 2016 you got a $300 valued software for free with a Leica camera. Now you get a promotional offer that leads directly into the Adobe Creative Cliud subscription. Anyone who can spell to Capture One will know the future of digital photo editing. More on that, later ...
NEW VERSION 22.3
490 pages easy-to-understand
workflow logics, checklists, Styles
and 3+ hours of videos.
Packed with help and tools for all questions on digital photography workflow.
Black and White Photography
Editing Color Photographs
Special Effects
Organizing files
Organizing Old Archives
Keywords
How to do safe backup
Hardware setup
Screens and Calibration
Printing Workflow
Capture One on iPad
Capture One Live
Publishing
+ Export Formats
+ Free Overgaard Styles
+ Preflight Checklists
The one and only method
The Survivel Kit is the only of it's kind, made by photographers for photographers.
The Brand New June 2022
"Capture One Survival Kit 22"
By Thorsten Overgaard
The complete workflow of Thorsten Overgaard,
made easy with pre-flight checklists and step-by-step instructions on how to set up and use a professional
photo editing software like Capture One Pro.
Laid out in a way that is easy to understand
and everyone can apply. Works for Capture One Pro 22
and all previous versions.
New revised version
This is the most revised version ever of the
best-selling Surival Kit by Thorsten Overgaard. This new
version includes many new chapters, on Capture One on iPad and how to add keywords better, as well as more
than 3+ hours of videos tutorials with
Thorsten Overgaard.
Simple and to-the-point tools on how to use select tools, how to do backup and how to manage and organize pictures archives so they don't get lost and doesn't have to be reorganized again and again.
Expanded and simplified
Also: Specialized first-help chapters on how to
sync your entire photo archive with the smartphone,
how to escape Apple Photos, how to empty photos out
of an iPhone, how to get out of Lightroom CC, what to do with iPad editing ... and more on how to not survive the digital age and perhaps even outsmart it.
Now comes with
Overgaard Leica Styles for FREE
Special black & white conversion, better skintones
and a CMOS sensor color correction.
(Value $48.00. FREE with this kit).
Thorsten Overgaard
Capture One Survival Kit 22.3 For computer, iPad, smartphone and Kindle.
Buy Now
Instant download.
Price $798.00
100% satisfaction or money back.
Released June, 2022.
UPDATE
VERSION 22.3 UPDATE Compatible with all previous versions.
Simply use
code: "UPDATE22"
Apply
code "UPDATE113" on checkout to get this complete version 11.3 update.
$298.00
Updates all previous Surival Kit versions since 2009.
Buy the complete new
Lightroom Survival Kit 11.3
The Legendary Tutorial for Photographers
Brand-new JUNE 2022-version.
Now with brand-new 4+ hours of video tutorials.
New sections on compostition and storytelling.
How to edit color photos.
How to edit black & white photos. How to do keywords logical and easy.
The most successful photo editing kit ever
Photographer Thorsten Overgaard first released the Lightroom Survival Kit in 2009 and have honed it with new and fresh updates. This Version 11 is the most radical updated and renewed version ever, four years in the making.
Professional workflow experience made simple, logical and easy to use.
Master editor makes it simple to understand
The Survival Kit is unique and one-of-a-kind being made for photographers for photographers. When someone understands their subject, they can explain it so it is easy to understand. The hallmark of Thorsten Overgaard is to make expert knowledge shown and told in a way so anyone can apply it.
Hands-on advice that works
With a 450 pages workbook and 4+ hours of video, every element of digital photography is touched on, in handy chapters and pre-flight checklists. Editing of color vs black and white photos, keywording, cropping of images, fine-tuning of tones, color balance and color control, export of originals, printing, archiving and backup, and much more.
Comes with the Overgaard Leica Presets (Value $48)
The Lightroom Survival Kit comes with Thorsten Overgaard's special-made Lightroom Presets for all digital cameras and for Leica digital cameras.
Understand all from camera to the final print
Chapters in this version goes over the background for High Dynamic Range (HDR), digital raw files and how to set up a professional photography workflow, from calibrating the screen to editing in Lightroom, and to making a final print. And more ...
10+ years experience in one package
No need to spend years figuring out the smartest way to do things when you can tap into the best way of doing things right here. The workflow of Thorsten Overgaard as been refined through years of field work with more than a thousand workshop attendees.
This method of workflow now used by thousands
The Survival Kit has been taught to thousands in workshops and in this Survival Kit. What does it do? It make you enjoy taking and making photos, and it increases your production considerabely. Most important of all, it'll give you back ownership of your files (which you will understand why is so important, once you have bought the Survival Kit and started applying its methods).
"Thorsten's methodology is perhaps not what hardware-, software- and cloud-companies want us to do, but as a former IT engineer I can only acknowledge his views about preserving our digital heritage. This workflow explained is for me the best I have ever seen".
★★★★★
Video tutorials, image files, presets, checklists, definitions, tutorials of Lightroom, that boils down years of experience to a workflow you can implement in less than one day.
Start working in minutes.
Lightroom Camera Raw 9.1.1 profile for the Leica Q
When you go to Develop mode in Lightroom you can see this in the down right corner.
The profile is applied automatically to new images imported (Adobe Standard) whereas previously imported images will be using the Embedded til you eventually change this (in the bottom right of Lightroom under Camera Calibration > Profile) to Adobe Standard.
You also need Adobe Lightroom 6.1.1 update to see it if you use LR6 (if you use Lightroom 3, Lightroom 4 or Lightroom 5 you see it without any further uodates).
Apple Camera Raw 6.0.6 includes Leica Q
Apple Computer released their Digital Camera Raw 6.0.6 on August 17, 2015 which supports Leica Q. I haven't tested what it makes of difference, if any. The Leica Q Blog looked into what it does for Apple Photos and Apple Aperture and here is an article about it.
Before
After
The look of the color balance with the previous Embedded camera profile
The look of the same picture with the updated Leica Q camera raw profile in Lightroom 6.1.1.
Confused about Adobe Lightroom CC 2015 / Adobe Lightroom 6 / Adobe Lightroom Classic..?
Update 2022: "Adobe Lightroom Classic" is the version to use, that is the one where your images are stored (and worked on) on your computer. Yes, you do use Adobe Creative Cloud to manage your download of the Adobe software, but the images stay on your computer when using Lightroom Classic.
But within Adobe Creative Cloud you can also download the "Adobe Lightroom" (which rightfully is Adobe Lightroom CC) but is to be avoided unless you want your files to be uploaded to/stored in the Adobecloud and downloaded/uploaded to computer, smartphones, iPad and all. This is a very confusing workflow that is sold as if it makes life easier. FOr very specific use, you can use Adobe Lightroom (CC), but you really have to know what you are doing. Like, when you import your pictures, where do they go? (usually to the cloud, and then you have to wait for them to get back on your iPad before you can work on them. It's rather redicilous, but it serves the aim of having you subscribe to software and clud space. It's made to help Adobe, not to help you).
Cloud sounds amazing, it sounds great, it sounds like the future. It isn't. As your image files increase in size due to more megapixels, the upload and download of images files and attached editing data becomes more of a bottleneck as the bandwidth isn't increasign with the same speed, and nor is bandwidth a given in every location you want to work in. And after a few weeks, the confusion is complete: Where are the images stored? As long as you don't remember or know, or can't figure it out, or aren't sure, you pay for cloud storage, and that's the point. Adobe turned image editing into somethign sold on fear (pay or you might loose your archive)
You need to update to Lightroom 6.1.1 (or Lightroom 2015.1.1 if you use Creative Cloud) to use the new Camera Raw 9.1.1. If you don't, nothing new shows up. This is something Adobe generally don't say because they want you to be on the CC (Creative Cloud) but the point if you use Leica is that you got a stand-alone softwar with the camera. So either you wait for an alert somewhere from to update (you can always go Help > Updates ... in Lightroom to check), or you go to this link and get the update: Lightroom 6.1.1 for Mac / Lightroom 6.1.1 for WIN.
This is the difference the updated Leica Q Camera Raw profile makes for an image shot with Auto White Balance.
Before
After
The look of the color balance with the previous Embedded camera profile
The look of the same picture with the updated Leica Q camera raw profile in Lightroom.
Before
After
The look of the color balance with the previous Embedded camera profile
The look of the same picture with the updated Leica Q Adobe Standard camera raw profile in Lightroom.
Also for black and white conversions, the updated profile results in a slightly adjusted look (notice the blue sweatshirt the adult is wearing, and the faces). I would say that the tones are "more well distributed" if that makes any sense. More on this later.
Before
After
The look of the DNG before with Embedded camera profile
The look of DNG with the updated Leica Q camera raw profile in Lightroom.
Wrong Kelvin values NOT fixed in Camera Raw 9.1.1
The previous failure that the Kelvin numbers for white balance didn't add up with the Leica Q is not fixed with the new Camera Raw 9.1.1. I guess it is a firmware update that is required to get the Leica Q to record the Kelvin levels right. The problem was that Kelvin values is a standard that works for all cameras. But for some reason the Leica Q files didn't respond the usual way to them. It still doesn't.
Beware that if you have images in Lightroom you improted previously that use Embedded profile, and if you change them to Adobe Standard, the manual white balance number you have will stay unchanged, and this will of course affect the image accordingly (as the number didn't add up with normal Kelvin values).
Embedded Profile: In this photo I adjusted the WB manually to 8200 Kelvin. This
When I updated the photo to Adobe Standard the Kelvin stays the same manual value of 8200 that I had set the file to earler, which results in wrong colors when the fixed values are applied (the corect Kelvin value is around 5.300).
When you update the Camera Raw your images will stay unchanged and will look as before. It is not untill you change the Camera Profile on previously imported and adjusted photographs that the odd Kelvin numbers plays in and make the WB wrong again.
DNG versus JPG in the Leica Q
I see no reason to use other than the DNG file from the camera. It's better quality than the JPG and allow more adjustments.
The camera can handle quite a bit of DNG files in the buffer, so there is not really any excuse for photographing and using the JPG file.
In some case I have set my cameras to do (color) DNG and (black & white) JPG at the same time. I tried in the Leica Q but quickly decided to simply photograph DNG files for black and white and leave the JPG as color.
You can only choose bewteen JPG or DNG + JPG, so no choice of DNG alone even I would say that for me I have no use of the JPG.
There can be a point in setting the colors on the Leica Q to low saturation so that the preview looks less saturated. This will look more like what the final image will look like when you import it to the computer. (You go onto the MENU --> JPEG Settings > Saturation --> Medium Low).
All Leica cameras comes with a Adobe Lightroom licence so you can get to work with editing your images in Lightroom (as you should).
One of the really good things about this (apart from the fact that you save $298 on buying a Lightroom licence) is that the Lightroom you get is a stand-alone version.
Adobe seem to find the idea that users pay a software tax for access to software via the Adobe Cloud is a really good idea. But from a use point, the idea of market economy where you can decide to buy or not buy a product based on your need and what you think of it is an even better idea.
Therefore the stand-alone version of Lightroom is more than just an economical advantage.
Adobe is doing all they can to hide the Lightroom 6 stand-alone version online so as to get us all signed up for their Creative Cloud. The Lightroom exist in Lightroom CC and Lightroom. Not easy to distinguish between.
The advantage of stand-alone is that you don't have to sign in, and there is no cloud trying to verify your account once every 30 days (which require internet; so if you are in a location without internet, your software stops working).
A word on Adobe support
If you have my Lightroom Survival Kit 6, you know that I prefer Lightroom 3.6 and Process 2010. It is still possible to get that version, but most will have to download the Lightroom 6 version which has a few errors.
One can be that it stops working (no, I'm not kidding).
If you go to Adobe Chat Support to get help, they may suggest that you visit their forums online (as "we are not trained in supporting that program"). If you throw the "Can I speak with your supervisor" card, you will be connected with a knowledgeable supporter in India or somewhere that can actually fix it for you.
Adobe seem to follow a strategy where you must sign up for their Cloud Tax and the service yourself online on their forums whilst getting new software versions that isn't really improvements.
The Mini-M as I envisioned it in 2013, with Leica M lens on a full-frame CMOS sensor. The Leica Q doesn't use M lenses.
Please don't keep asking me. The Leica Q is not the Leica Mini M. Well, in a way it could be said to be the Mini M, because what it will lead to is you wanting a real Leica M with bayonet and the range of Leica M lenses.
But it doesn't use Leica M lenses, which is what I and others implied a Mini M would: A smaller and more economical camera that would allow new Leica M users to start using Leica M lenses so as to upgrade to the "real Leica M" later.
Maybe the Leica Mini M is overall a stupid idea we keep talking about in that a second-hand Leica M8 and Leica M9 (and soon a Leica M240) camera exist, and a Leica Mini M would most likely be in a range above a second-hand Leica M9.
The Mini-M fundamentally already existed as a film camera in the Leica CL and the twin-camera Minolta CL in the 1970's, a smaller camera that was made by Leica Camera AG and Minolta, but was never a great success for Leica (as far as I know Leica Camera AG spent so much energy and recourses teaching Minolta precision that they never made break-even on their own camera).
I see the Leica Q as closer to the highly popular Leica Digilux 2 from 2004 (and the Leica Minilux film camera) and as a great reportage camera (where I see the Leica M as both a reportage camera and an artists tool).
The Leica Q is the perfect training camera and could in many ways be the one and only camera you need.
I'm not leaving you alone without a warning: The moment you lay your hands on this one, you will be dreaming of the Leica M. The good thing is that you are already into the Leica world with an investment of $4,250 you can trade in when you want to upgrade.
When the Fuji X100 came out it looked promising as a replacement for the Leica M. I know many who bought one as a "backup camera", and I know almost just as many who sold it again after a while. That too is not a Leica M, it's actually very different, and what was saved in money and time on focusing, was blown in trying to figure out the complicated controls and menus.
An alternative could be a second-hand Leica M9 with a second-hand lens. With a little luck you can find a Leica M9 with lens for $4,500. It's a great camera, but not as modern and slick as the Leica Q.
I know many with Leica M, like me, will end up with a Leica Q. I don't know if it will pass or the Leica Q actually has a role alongside the Leica M. It's too early to tell.
One of the first photos I did of he Leica Q was of course to compare the size size of the Leica Q compared to the Leica M. The weight of the Leica Q with lens is the same as the Leica M body alone, but actually feels lighter.
I do feel that the Leica Q with it's 28mm f/1.7 is a sort of training in the new Leica 28mm Summilux-M ASPH f/1.4 that was announced at the same time as the Leica Q but didn't arrive for a long while. The Leica Q did.
I covered the election night 2015 in Denmark with the Leica Q and the Leica M240, both to test the new camera in very difficult light and under the most stress you can experience. I am sure I could have done the whole thing with a Leica Q alone, and it would have worked. A wide angle with AF is fairly more useful in such an event than a tele zoom lens with AF.
It all depends on access. A Royal wedding in the UK you generally need 400mm lenses for, so obviously it is not all reportage it is good for. But for a lot of it, and especially when it is a crowd and a mess ad things move fast it has some obvious strengths.
It's not the same as Leica M
The Leica Q is for reportage and the Leica M is for art and reportage. I think it can be said as simple as that. What I missed in the Leica Q wasn't speed, reliability, quality or anything. It was when I compared to the Leica M photos I did at the same time and I saw an entire different level of aesthetics.
The Leica M is for creating photographs, the Leica Q is for capturing events and stuff. If the two cameras wasn't from the same family, such a comparison would be completely unfair. The Leica M invites to thoughtful and aesthetic photography like no other camera.
But that was what I noticed, and what will e a deciding point every time I have to decide which camera to bring. Do I want to bring the Leica Q to get it all with me home, or will I bring the Leica M so I don't miss some beautiful photographs.
Now, lets not fool our self. It has to do with a shooting style as well, and if one wants to adopt or create an artistic style with the Leica Q, utilizing the DOF and the possibilities that 28mm super wide lens gives, that too is possible. Choosing a Leica Q or Leica M to begin with, instead of the mandatory Canon 5D or Nikon dSLR with a zoom lens, already say something about character and what you aim to make.
It has to do with access and how close you can get as well. Or how far or close you decide to be. If you head into a press event with a 28mm lens, you plan to use it close.
I happen to think that I know that the Leica Q has been in the making for several years, and I think it started as an outside shape of a future camera. As technology have moved on, more and more parts have come about that made it possible to actually fill the envisioned camera with workable technology.
The simplicity of it is that it is quite easy to dream up the ideal camera. The problem is to make it into reality.
There are a handful of project in the making around the world currently that aim to make the ideal Leica. Some will never make it, others may materialize as camera systems that can take Leica M lenses and/or have other features that has some of the elements.
The ideal Leica camera(s) consist of a lot of ideas about what a camera should have and (mainly) what it shouldn't have.
In my opinion there is one important element to make a Leica, and that is the Leica philosophy. Which is why Leica Camera AG (or former employees) are the ones who has the best chances of making a real Leica.
Having coffee and camera talk at the famous Revolver cafe where photographers of all kind seem to meet. Leica Q. Photo: Lawrence Hui.
What does Q tell about the future M..?
One question that seem to come up consistently is, “What does the Leica Q say about the future Leica M?” and frankly I don’t know.
I know that Leica Camera AG has a direction for the next 10-20 years, and the further the roadmap is away from the present time, the more likely it is that outside events may affect the way it will materialize in terms of camera models.
Much like a GPS that will predict a route till it learn about accidents, rain or sunshine or other events that make it advisable to choose a slightly different route.
All the Leica Q points to is that Leica Camera AG are able to predict technology so well that they can integrate it in a camera that, when it is releases, is actually ahead of the competitors!
That may sound not that surprising, but if you consider how Band & Olufsen would release a CD-player with a 128MB memory for $3,000 at the same time as Apple released a 1GB iPod for $400, you get the picture. Leica consistently have released products that are behind current technology, even when they were developed (and even more behind when released).
Your smile all the way to your fingertips
The Leica Q is different. It’s ahead and it is simple and it is smart.
For once Leica have released a camera that doesn't try to be an iPhone and doesn't try to be an Audi. It’s simply a Leica camera, and it simply works.
I don’t know if this Leica Q is what it takes for Leica to realize that what would really make their customers happy would be if Leica could make a Leica. As simple as that.
The Leica Q sensor
The Leica Q 24Mp sensor is not a CMOSIS/STMicro sensor (like in the M 240 and Leica M 246), and it's not a Sony sensor. The Leica Q sensor is a secret, and the only thing we know so far is that it has been exclusively developed for the Leica Q by an industrial partner.
Thorsten von Overgaard at the Cannes Film Festival with the Leica Q. Photo by Paul Viio.
Made in Germany
The Leica Q is being assembled in Wetzlar, Germany. Not many Leica products are. The big Leica factory in Portugal manufacture almost everything which is then sent to Wetzlar for the final adjustments and quality checks. The Leica X is made in Vietnam and likewise ssent to Wetzlar for the final adjustments and quality checks. Only the Leica Q, the Noctilux, the 50mm APO-Summicron and the Leica Cine lenses are actually fully made in Wetzlar.
Leica Q-P in dark matte finish. It comes with two batteries, a leather strap and has a new shutter release button - and no red dot logo.
Leica Q Dark Matter - The Leica Q-P
The Leica Q was released as an cosmetically updated model on November 6, 2018. The Leica Q-P follows a tradition from the Leica M-P cameras where Leica refreshes the version with a more discrete design and usually a few smaller updates.
The main update on the Leica Q-P model is the shutter release button and on/off switch that is now the same as on the Leica M 10 cameas. This shutter release has been refined on the most current Leica M10-P and the Q to have an excellent soft feel.
Dark it is, and matted. The shutter release button is now the same model as on the Leica M10-P and the Leica CL. The red diot button is (unchanged and is) the video button. The Leica Q does video in a little less than 4K.
When is the next Leica Q model coming?
In Leica tradition, the P version often marks that the model is half-way in it's product cyclce. If this is the case here too, we should expcet the next Leica Q model in February 2022, which would make the pproduct cycle between Q models 80 months.
Limited editions and special editions of the Leica Q
There's been made limited editions of the Leica Q 116 since August 2016 and forward.
The Leica Store Ginza continued their celebration of their 10th Anniversary with a very limited edition of the Leica Q in Carbon - Only 30 samples.
Leica Q Carbon in a very limited edition of only 30 from Leica Store Ginza in Tokyo, Japan. Price is $5,800 (via Leicarumors.com).
Leica Q Ginza Six Limited Version
One of the most beautiful Leica Q versions is the Leica Ginza Six, celebrating the new Leica store in the Ginza Six mall in Tokyo in 2017. Released in orange and brown leather, 20 of each.
Leica Q Ginza Six.
The Leica Q Titanium Edition
As of October 2016 the Leica Q is also available in the Titanium edition (Model no 19012). Price in Germany is Euro 4,450 and in the US the price is $4,495.
Leica Q Titanium is the same as the Leica Q, but in titanium.
The Leica Q Camouflage Edition
Leica Singapore introduced the Leica Q Camouflage Editionin October 2016 that comes in three colors: Green, Red and Khaki leatherettes printed with the camouflage design and exclusively available only in Leica Store Singapore
A beautiful limited edition Leica Q from Singapore with my Ventilated Shade. Photo by Kingson Lee.
Leica Q Camouflage Editions only available in Singapore (November 2016).
Red Leica Q San Francisco Edition
Leica Store San Francisco introduced their own limited edition in red, December 2017. Article on Madeinwetzlar blog.
October 2018 the "Khaki" limited edition was released worldwide in khaki cowhide leather at $4,995.00 including khaki colored leather strap.
Leica Q Khaki (type 19040)
Protecting the screen
I wouldn't bother, but for the first time Leica Camera AG have introduced a screen protector with the camera, as an acessory. There are also thridy party screen protectors such as the $16 Vikuiti DQCM30 Screen Protector or the $9 JJC Tempered Glass (available in Germany for €10 here).
Besides protecting the screen from scratches, a screen protector usually blur the image a bit, and in the case of screen protectors that leave a little space of air between the protector and the screen, you will see humidity som times.
I like the design of the Leica Q with the screen that is 100% aligned with the camera body surface. It's nice. But I guess it's with the Leica Q as with the iPhone. No matter how nice it looks without something, there are plenty of things to stick onto it.
No, but fast data transmission using the Leica S medium format Maestro Processor
32 GB internal memory/buffer
No
No, but 3x faster data transmission than previous model.
M240: No M-P 240: 2GB
Frame selector
Electronic
28mm
35mm
50mm
No
No
Yes
USB port
Micro USB
Micro USB 3
USB-C
Micro USB
Extra
HDMI
Micro HDMI
Micro HDMI 1.4
HDMI 4:2:0
ukomprimeret
Extra
Microphone
Stereo
Stereo
Stereo
Stereo
Mono
Stereo
Extra
GPS
No
Yes
(when Visoflex
0200 EVF
is attached)
Extra
WiFi
Yes
Yes
Yes
No
Remote Control
Yes
Via smartphone
Leica Q App
Yes
Via smartphone
Leica TL App
No
Yes
Via Sony PlayMemories App
Leica Image Shuttle USB to Multifunctional Handgrip
Battery time
300
images
400
images
270
images
220
images
800-2000 images
400-800 in Live View
Screen
1,040,000
3.7"
1.300,000
1,229,000
Tilt screen
3.0" 1,229,000
M240: Gorilla M-P: Sapphire
Touch screen
Yes
Yes 8x faster than TL
No
No
No
Weather sealed
Yes
Weight
640g
with lens
399g
body only
w/battery
490g
with lens
507g
with lens
680g
body only
Digital color filters for B&W JPG
No
No
No
No
Built-in
Color temperature
2000
- 12,000
AWB, Manual, Tungsten and a number of other presets.
2000
- 13100
Price $US new
4,250
Incl. lens
1,950
2,800
3,299
M240: 6,380
M-P 240:
6,996
Price EVF
Included
$600
$600
Included
$500
Software
Includes 90 day Adobe CC trial
Includes 90 day Adobe CC trial
Includes 90 day Adobe CC trial
Lens
Fixed Leica Summilux-Q ASPH
28/1.7
Leica TL
Leica SL
Fixed Zeiss Sonnar T* 35mm f/2.0
Fixed Zeiss Sonnar T* 35mm f/2.0
M series
18 to 135mm
From f/0.95
Macro lens
Built-in
Via adapter
or
60mm TL
Built-in
Via adapter
Diopter
Yes
In EVF
Yes
Extra
The firmware for the LCD control in the Leica Q is made by The Khronos Group Inc which is an American not-for-profit member-funded industry consortium. Amongst its members are Apple, Google, Adobe, Lucasfilm, Panasonic, etc.
Save $450
As Sean Reid points out in his excellent "Leica Q Full Review", the Leica Q comes with EVF integrated and a $298 Adobe Lightroom 6 licence (stand-alone version, not the Creative Cloud).The price difference to the Sony RX1R is only $450 as the Sony requires the external viewfinder for $600. The Sony RX1R is he camera that comes very close to the Leica Q.
If one look at second-hand prices for Leica D-Lux and Leica Digilux 2, one will see that the second-hand prices for Leica are quite higher than for Sony and Panasonic. So you may save some money on buying it, but when you sell a Leica, you get more back.
And you get to shoot with a Leica lens instead of a Zeiss, if the choice is between the Sony RX1R and the Leica Q.
The Leica Q and the Sony RX1. You don't have to be a designer to tell which one has the most slick design.
The Leica Q price tag
I find the Leica Q to be a lot of money - US$4,250 - but on the other hand I find the price reasonable compared to what else I can get in mirrorless full-frame digital cameras. The Sony is one ugly piece of design with buttons sticking out from all places, and it doesn't even have a Leica lens. Yet it is $2,800 (without a viewfinder).
I am actually surprised that they cost that much, the mirrorless full-frame cameras. I am the type that would go straight to the Leica M for $7,250 to get the "real camera". But I realize we are all different in this, and in for example cars I am the one who would get the "tourist version". I just don't want to spend a lot on cars.
If you are to invest $2,500 - $3,000 in a digital camera, the Leica Q may be worth the extra money up to the $4,250; and will even pay them back when you upgrade to the next camera.
If there is one thing that has been proven it is that Leica cameras keep their value better than others. The Leica Digilux 2 was sold for $1,650 as new in 2004 and sells for $500 - $1,000 now, 11 years later. The Panasonic DMC-LC1 that is essential the same (twin sister) camera sells for $35 second-hand. It's not that collectors buy the Leica Digilux 2, because it is not a collectors item. It's just a good Leica digital camera.
Four times the price of an iPhone, that is the Leica Q. Much more a camera than the Leica T that was an iPhone camera without phone and WiFi. Even more than the Leica D-Lux (that has a Panasonic sister-camera) which is actually a very good camera.
It's an odd thing that the smaller a camera you get, the more complex it gets. There seem to be no end of the number of menu items the camera producers feel necessary to burden us users with. The Leica Q is no exception, though the amount of buttons and menu items is much less and more simple than most smaller cameras. But the Leica Q contains many more menu items than the Leica M, and I wonder why a more simple camera needs more advanced settings than the actually advanced camera? (make a note in the R&D department to "rethink usability of small Leica cameras").
What is even worse is that many of the words used are not defined! (not to speak of the cameras that insist on using "easy to understand icons" that are never easy to understand).
What does Fn mean? Or what about PASM..?
Frankly, I have no idea!
I had to sit down and look through the whole Leica Q and make a list of definitions to understand it all. Something Leica Camera AG should have done and put in the manual. Somehow they overlooked the fact that there are words used nobody knows what are. I am so accustomed to cameras that are self-explained in their simplicity, I am seldom confronted with terms and icons I don't understand. The Leica M 240 has very few, the Leica M4 had even less. In fact, the Leica M4 doesn't even have a button to turn the camera on or off with; it's completely mechanical and has no battery at all.
You can be a stupid person by not knowing that words have meaning, but you can also be a stupid person by thinking you already know it all (without actually knowing that you don't know). If you want to be smart, you have to know stuff, and the way to find out is to study it and find out all about it. Then it becomes easy, fast and your own to use.
Leica Q Definitions
AEL = Auto Exposure Lock. This is a function that can be used when you want to reframe the scene, but keep the current exposure from changing. By default the Leica Q locks both Exposure and Focus when you press the release button half down.
AFL = Auto Focus Lock. This is a function that can be used when you want to reframe the scene, but keep the current focusing from changing. By default the Leica Q locks both Exposure and Focus when you press the release button half down.
AF = Auto Focus. The idea is that the camera does the focusing itself (the word auto comes from Greek "self").
AF Assist Lamp = The little red lamp on the front of the Leica Q that will light up in dark places so as to help the Auto Focus to see in the dark. If you put a hand in front of the lens and press the shutter release button you can see it in action.
Aperture = The f/ stop on the camera that regulates how much light passes through the lens. On a f/1.7 lens the lens is fully open" at f/1.7. At f/2.0 the aperture inside the lens make the hole through the lens smaller so only half the amount of light at f/1.7 passes through. For each f/-stop (4.0 - 5.6 - 8.0 - 11 - 16) you halve the light. The aperture of the lens is basically the focal length divided with the f/-stop = size of the hole (28mm divided with f/1.7 = the hole is 45 mm). ORIGIN: Late Middle English : from Latin apertura, from apert- ‘opened,’ from aperire ‘to open’.
ASPH = stands for "aspheric design".
Most lenses have a spherical design - that is, the radius
of curvature is constant. These are easy to manufacture by
grinding while "spinning" the glass. This design
however restricts the number of optical corrections that can
be made to the design to render the most realistic image possible.
ASPH lenses, however, involve usually 1 element that does
*not* have a constant radius of curvature. These elements
can be made by 1) expensive manual grinding, 2) molded plastic,
or 3) Leica's patented "press" process, where the element
is pressed into an aspherical ("non-spherical")
shape. This design allows Leica to introduce corrections
into compact lens designs that weren't possible before. Practically,
the lens performs "better" (up to interpretation)
due to increased correction of the image, in a package not
significantly bigger than the spherical version. The Leica Q 28mm lens has 3 aspherical elements out of 11 elements in the lens. Most Leica ASPH lenses from Leica has 1 or 2 aspherical elements.
Normal speric lens (grinded)
ASPH (note the shape of the glass as result of pressing rather than grinding)
Sphere: ORIGIN Middle English : from Old French espere, from late Latin sphera, earlier sphaera, from Greek sphaira "ball".
Banding = Noise in digital images. Horizontal lines in a horizontal pictures (if the camera is in portrait mode/vertical, the lines will be obviously be vertical). It's simply noise; the result of uncontrolled algorithms working overtime with an image the sensor really can't see because it's very dark. (If your image have vertical lines in it, it is more likely that the sensor needs remapping).
Bokeh = The visual quality of the out-of-focus areas of a photographic image, especially as rendered by a particular lens: It's a matter of taste and usually photographers discuss a 'nice' or 'pleasant' bokeh (the out-of-focus area is always unsharp why the quality discussed is if one likes the way it renders or not by a particular lens). ORIGIN from Japanese 'bo-ke' which mean 'fuzzines' or 'blur.'.
C = Continuous shooting. When the ring by the Shutter Release on top of the camera is moved from OFF to C, the Leica Q takes series of images as long as the shutter release is pressed down. In the menu of the Leica Q under the menu point Continuous Shooting you can define if the Continuous should be Low (3 fps), Medium (5 fps) or High (19 fps).
Central Shutter = As in the Leica S lenses for the Leica S2 where a shutter is located in the lens itself. In most cameras there is a shutter curtain just in front of the sensor, and in SLR (Single Lens Reflex) cameras there is also a mirror in front of the shutter curtain.
In the Leica Q the shutter is in the lens which makes the camera mirrorless as well as very quiet because there is not a metal shutter curtain going up and down in front of the sensor.
CMOS sensor (as used in Leica Q, Leica M 240, Leica X, Leica D-Lux, etc)
= (Complimentary Metal Oxide Semiconductor) chips use transistors at each pixel to move the charge through traditional wires. This offers flexibility because each pixel is treated individually. Traditional manufacturing processes are used to make CMOS. It's the same as creating microchips. Because they're easier to produce, CMOS sensors are cheaper than CCD sensors. CMOS allow Live View and use less energy than CCD.
Digital Zoom = In the Leica Q it refers to the possibility to change the crop from 28mm to 35mm or 50mm. Choosing a different "digital zoom" simply shows frame lines for the chosen focal length in the EVF and in the final image (that is in fact the full 28mm frame), there is a pre-selected crop for the chosen frame when you open the image in Lightroom 6.
Traditionally, digital zoom refers to zooming in on a scene digitally. All that happens is that the camera zooms into the area of the sensor and records only that. The quality will be less as it's a smaller part of the same recording.
DIS = Digital Image Stabilization. This is a feature often offered in video recorders and some times for tele lens still photography (so as to avoid motion blur when the lens is moving during slow shutter speeds).
The Leica Q oddly enough offer DIS for stills. As if someone just couldn't resist adding this feature that you hardly need for a 28mm lens! The DIS is set to off from the factory because it can affect the image quality negatively (according to product director Stefan Daniel in an interview).
DNG = Digital Negative, an open standard developed by Adobe. It is a single file that contains the raw image data from the sensor of the camera as well as date, time, GPS, focal length, settings, etc.
The alternative is a RAW file + XLM file where the RAW file contains the image information and the XML contains the rest of information about where, how and when the picture was taken.
A Camera Raw profile (that is specific for that camera) in the computer helps the software program, for example Adobe Lightroom, to translate the RAW data into the image.
DOF scale ont the Leica Q lens
DOF = Depth of Field. This is how much of the image will be in focus. The measurement on top of the Leica Q lens shows lines for each f-stop that indicates from which distance to which distance the image will be sharp. Shallow DOF is a generally used term in photography that refer to lenses with very narrow focus tolerance (which can be used to do selective focus; making irrelevant subjects in the foreground and background blurry so only the subjects of essence are in focus and catches the viewers eye).
EVF = Electronic ViewFinder.
Exposure Bracketing = The possibility to set the camera to automatically record a series of images where the exposure is above and below what the camera measures. The idea is that at least one of the images will be correctly exposed.
Fn = Short for Function. It's a button you can program. In the Leica Q it is by default set to be White Balance, so when you press it, you can choose which White Balance setting you want. You can press again and another function comes up. To complicate matters more, you can program the FN button to your own likes.
A 28 mm lens has a 74° viewing angle
Focal length = On the Leica Q it is 28mm and originally referred to the distance from the sensor (or film in older days) to the center of focus inside the lens. Nobody uses that measurement, except those who construct lenses! For users of lenses, focal length refers to how wide the lens sees. The viewing angle, which is often given in for example 90° viewing angle for a 21mm lens, 74° viewing angle for a 28mm lens, 6° viewing angle for a 400mm lens, etc.
Each human eye individually has anywhere from a 120° to 200° angle of view, but focus only in the center.
Full Frame (FF) = The size of the sensor is 24 x 36mm which is the format Oskar Barnack and Leica Camera AG invented with the first Leica that was introduced in 1925. Many other formats invented since, such as APS, APS-C and all usually refer to Full Frame ratio, by which it means what size they have compared to Full Frame.
Full Frame is "king of photography"
The 24 x 36mm Full Frame format is so "king of photography" that it has continued to be the ideal for all cameras. Besides this, there exists Large Format cameras such as 4x5" (100 x 125 mm) and Medium Format 6x6 (60 x 60mm amongst other sizes in that area).
Hue = A color or shade depending on the dominant wavelength of red, green or blue. The word Hue comes from Swedish hy which is "skin complexion". It is independent of intensity, so often (in computer editing programs for example), Hue is an adjustment along Saturation which is (intensity of color as compared to white).
ISO = Light sensitivity of the camera sensor is given in ISO (International Organization for Standardization). It's a standard that was used in film and is now used in all digital cameras also. The base ISO for the Leica Q sensor is 100 ISO which means that this is what the sensor "sees". All other levels are computer algorithms calculating the effect as if the sensor could "see" more (hence noise at higher ISO levels).
ISO goes in steps of doubling: When the ISO is raised from 100 ISO to 200 ISO, the camera only need half the amount of light to make a picture. For each step in ISO to 400, 800, 1600, 3200, etc the light sensitivity is doubled for the sensor (and the camera sensor only need half the light of the previous ISO to record the same image).
JPEG = A standard for picture format made in the 1990's by Joint Photographic Experts Group). Mostly referred to as JPG as in L1003455.JPG which would be the name for a JPG file from the camera.
Summilux = Refers to the maximum lens aperture - normally f1.4 , "-lux" added for "light" (ie. the enhanced light gathering abilities). In the Leica Q the lens is a Summilux even it is a f/1.7 and not f/1.4.
LCoS display
LCOS (viewfinder screen in the Leica Q) = Liquid crystal on silicon is a high-quality method for near-eye displays, better than LCD (Liquid-crystal display). There are two broad categories of LCoS displays: Three-panel and single-panel. In three-panel designs, there is one display chip per color, and the images are combined optically. In single-panel designs, one display chip shows the red, green, and blue components in succession with the observer's eyes relied upon to combine the color stream.
Leica = A compound word derived from " (Lei)tz" and "(ca)mera". Apparently they were originally going to use "LECA", but another camera company already used a similar name in France, so they inserted the 'i' to prevent any confusion.
Lens hood = A tube or ring attached to the front of a camera lens to prevent unwanted light from reaching the lens and sensor. ORIGIN Old English hod; related to Dutch hoed, German Hut 'hat,' also to hat.
Level Gauge = This is a tool in the viewfinder to see if you hold the camera 100% horizontal and/or vertical. You can turn it on in the Menu > Photo Live View Setup > Level Gauge > On.
Live View = This is the ability to see the image the sensor see, live, via the screen of a digital camera, or via an electronic viewfinder (EVF).
MACRO = Macro lens. The Leica Q lens can be turned to Macro which enables you to go close so as to enlarge smaller subjects. The word macro comes from Greek makros ‘long, large.’
Maestro II - A processor developed first as Maestro for the Leica S2 and upgraded to Maestro II for the Leica S (Typ 007). The Leica Q has a Mestro II (Leica Q edition) processor developed by SocioNext Inc. based on Fujitsu's Mibeault architecture.
Meßsucher (rangefinder or distance finder) = Mess = range, sucher = finder. It is always correctly written with the "ß". There are technically not three "s", rather the "ß" and one "s" because it is a word constructed by the combining of two precise words.
ND = Neutral Density filters are grey filters that functions as 'sunglasses' for lenses. They simply block the light so that a lens can work at for example f/1.7 in sunshine. A 3-stop ND filter is recommend for the Leica Q.
ND (Neutral Density) filters to put in front of lenses to reduce the amount of light that comes in. They don't have any other effect than that and doesn't change contrast, color or anything.
NFC = Near field communication is a technology that enables smartphones and cameras (or other devices) to establish radio communication with each other by touching the devices together or bringing them into proximity to a distance of typically 10 cm (3.9 in) or less.
PASM in the menu of the Leica Q is most likely is made up from the letters of a mode dial on a traditional camera. Nobody knows for sure.
PASM (screen mode) = Basically means that you are in control of the camera and haven't selected any of the Screen Modes available in the Leica Q menu. PASM is most likely short for P = Program Mode / A = Aperture Priority / S = Shutter Priority / M = Manual Control (... what Moron comes up with those silly abbreviation; and then don't explain them in the manual?).
S = Single image. When the ring by the shutter release on top of the Leica Q is moved from OFF to S, the Leica Q takes one photo at the time (Single). The other possibility is Continuous (see above).
Screen Mode = A menu point in the Leica Q that allow you to choose different pre-programmed ways of recording stills with the camera. For example Sunset, Snow/Beach, Fireworks, etc.
Nobody knows what the modes does but they sound helpful. Panorama (move the camera and it takes a series of images; just like iPhone) and Time Lapse (interval of images to record change) are also in the Screen Mode menu and may be useful. All screen modes are equally undefined in the manual, so all you can do is try and see if you can figure out what happened. PASM is the setting you use to avoid any pre-programmed modes (see above.
SDC = Software Distortion Correction. A correction of lens distortion (not straight lines) applied in the camera and which is part of the DNG file. In Lightroom the SDC of the camrea file is applied automatically (and cannot be removed), in software like AccuRaw one can open the DNG file without the SDC correction. Sean Reid reviews have written a good article on what SDC is and does in "Software Distortion Correction".
SLR = Abbreviation for Single-Lens Reflex; the lens that forms the image on the film/sensor also provides the image in the viewfinder via a mirror. The Leica Q has no traditional viewfinder and no mirror. the image seen in the EVF is what the sensor sees.
Summilux = Refers to the maximum lens aperture - here f1.4 , "-lux" added for "light" (ie. the enhanced light gathering abilities). In Leica terminology a Summilux is always a f/1.4 lens and a Summicron is a f/2.0 lens. In the Leica Q the lens is f/1.7 but is called a Summilux because it is closer to f/1.4 than f/2.0.
Viewfinder = a device on a camera showing the field of view of the lens.
1) A built-in viewfinder in a camera that simply show the frame you get when you look through the viewfinder.
2) A rangefinder viewfinder which is also used to focus the lens. In Leica M cameras two pictures has to meet and lay 'on top of each other' for the picture to be in focus.
3) An external viewfinder, usually on top of the camera in the flash shoe, so as to show the field of view of lenses wider than what the built-in viewfinder can show (15mm, 21mm, 24mm, 28mm etc viewfinders exist)
4) Very simple "aiming-devices" on top of a camera that is simply a metal frame without any optics. Just a frame, as for example very old cameras (the original Leica), or when using cameras in diving where you can't look through the camera.
5) A Electronic Viewfinder (EVF) that shows what the sensor sees "live".
(If you feel yours or somebody elses review is missing, please feel free to mail me and I will try to include it)
Sean Reid: "Full Review" (as of June 10, 2015 - Based on using it since December 2014) Steve Huff: "The Leica Q Real World Camera Review by Steve Huff"
(as of June 10, 2015) Louis Ferreira for LeicaRumors.com: "The Future of German Camera Engineering" (as of June 10, 2015) Jono Slack: "Hemingway - the Leica Q" (as of June 10, 2015)
I did this video review "What is the Leica Q" for my Magic of Light television channel early 2017. It has some of the background and Leica Camera AG tradition that went into the Leica Q as well:
Shopping list for Leica Q
The camera comes with integrated lens, lens shade and black leather strap. So you only need a few things to complete it. Here are the things I got from Meister Camera Berlin when I bought mine:
- B+W 49mm ND-filter (F-Pro MRC 3-stop/8X/0.9)
- Extra battery (BP-DC 12 for Leica Q and V-Lux 4, or eventually Panasonic DMW-BLC12 for Lumix).
- Extra battery charger (BC-DC12) if you travel and want a backup.
- Leica Q Ventilated lens shade from my store.
Nylon straps with love from "sunlows" in Turkey
The nylon strap I got from sunlows in Turkey is the most leight-weight strap I have and fits the Leica Q perfectly. The length is perfect 125-130 cm for me whereas the Leica Q stap the camera comes with is nice and simple, but too short.
I'm a little divided as to the hipster look of the SL ORANGE NY strap, byt I must admit is sits perfect. It's light as a feather, strong and glides easily and soundless back and forth on the shoulder when you need to work with the camera. A winner.
My favorite strap for the time being for my Leica M 240 is the Rock'n'Roll Chain black leather strap (€95) made by Tie Her Up in Greece. It comes with a decorative neckless in the same style for the fiance just to kink it up a bit.
I decided to stock up with more of their straps for my Leica Q. The first one I got was a relatively rough leather strap that had the perfect length (125-130 cm) and just works very well.
Next came two softer Riviera camera straps (€67) that are a little more elegant made. I really liked them but had trouble deciding on the color. ... so the next one coming will be in red!
Feel free to download the Leica Q manuel in Englishhere. I have made it a habit making the Leica manuals available from my own server as Leica Camera AG often don't keep them online when a new model is released. I also removed the German part as i only need it in English.
If you happen to stumble into this article in five years form now, after you bought a Leica Q on eBay, here it is!
Justifying the Leica Q
Here is the way to justify the Leica Q, step by step. Easy to do, and it works.
1. "I need a camera" (Lovely - You got the first $1,000 covered. $3,250 to go).
2. "It's four times more expensive than a Fuji..." (Ok, not much but it shows responsibility. $3,200 to go).
3. "The Sony is the right size, and it's mirrorless". (Getting there. $1,550 to go).
4. "The Canon 5D would be nice, but I want a small camera". (Woow, good one! $1,250 to go).
5. "What the heck? I have to buy the EVF for the Sony separately?" (Yes man! $1,100 to go).
5. "The Leica Q has newer technology, higher ISO, built-in viewfinder. It's future proof". (Good one, it shows you know what you are talking about. You are not guided by emotions but factual reviews!).
6. "It's a full-frame and 24 megapixels." (Nobody knows what that means but it sounds as an argument).
7. It's a Leica so it keeps a high re-sale price. (Very good. And true. $9.99 to go).
8. "It may cost a little more now, but it's an investment that pays back". (Whoa!).
9. "I can afford it, and we deserve the best". (Bringing in the spouse. Sealing the deal).
10. "Honey, it actually got a 28mm super-wide low-light lens. We'll never miss a moment." (Leica Camera AG would hire you for their marketing if you would let them).
11. "I don't care. I want it for pure lust. It feels right for me." (Target attainment. You made the goal. $0.00 to go).
12. Wow, it came with a leather strap and free Lightroom 6 licence (you just made $299 on top of all the money and trouble you saved).
Comments or ideas?
As always, feel free to send me an e-mail if you have questions, comments or suggestions.
- Thorsten Overgaard
#1566-0515
Index of Thorsten Overgaard's user review pages on Leica M9, Leica M9-P, Leica M-E, Leica M9 Monochrom, Leica M10, Leica M10-P, Leica M10-D, Leica M10-R, Leica M10 Monohcrom, Leica M11, Leica M 240, Leica M-D 262, Leica M Monochrom 246, Leica SL, Leica SL2, Leica SL2-S, as well as Leica TL2, Leica CL, Leica Q, Leica Q2 and Leica Q2 Monochrom:
Leica Digital Camera Reviews by Thorsten Overgaard
Thorsten von Overgaard is a Danish-American multiple award-winning photographer, known for his writings about photography and Leica cameras. He travels to more than 25 countries a year, photographing and teaching workshops to photographers. Some photos are available as signed editions via galleries or online. For specific photography needs, contact Thorsten Overgaard via email.
You can follow Thorsten Overgaard at his television channel magicoflight.tv.
I am in constant orbit teaching
Leica and photography workshops.
Most people prefer to explore a
new place when doing my workshop.
30% of my students are women.
35% of my students dotwo or more workshops.
95% are Leica users.
Age range is from 15 to 87 years
with the majority in the 30-55 range.
Skill level ranges from two weeks
to a lifetime of experience.
97% use a digital camera.
100% of my workshop graduates photograph more after a workshop.

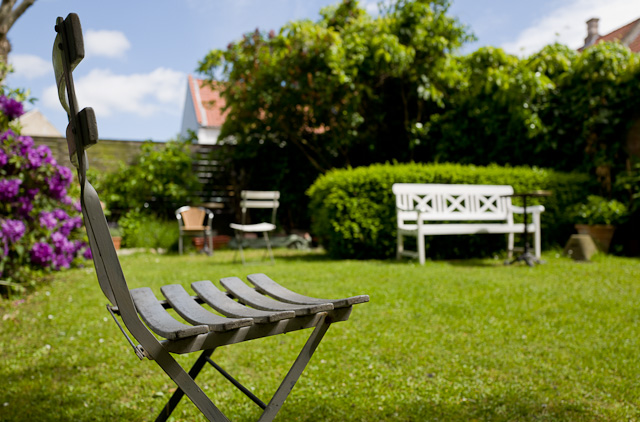


")
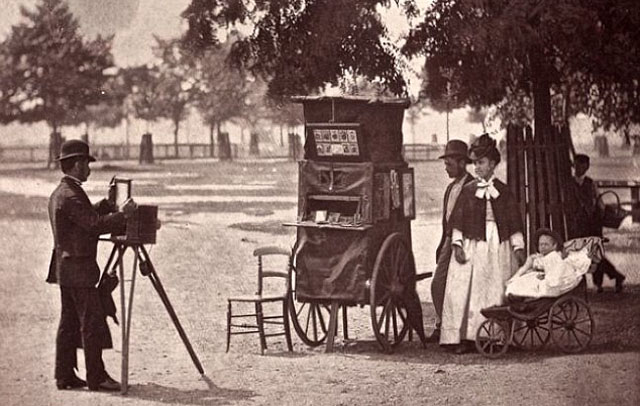
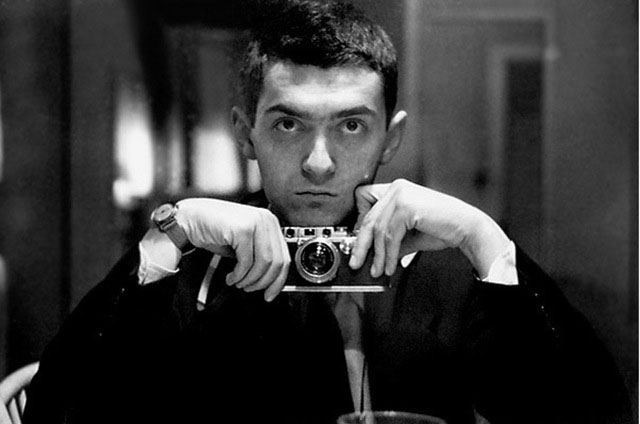


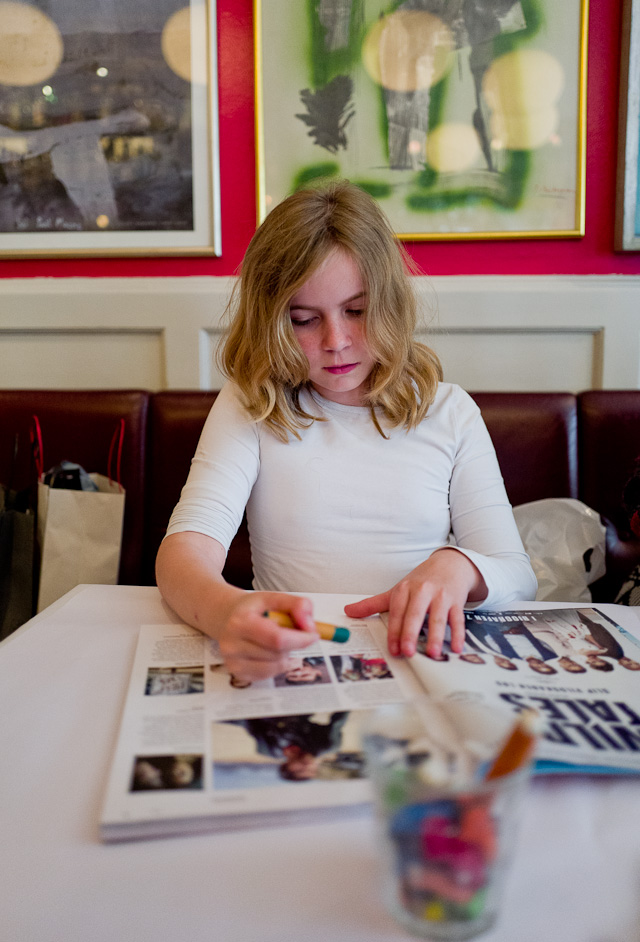
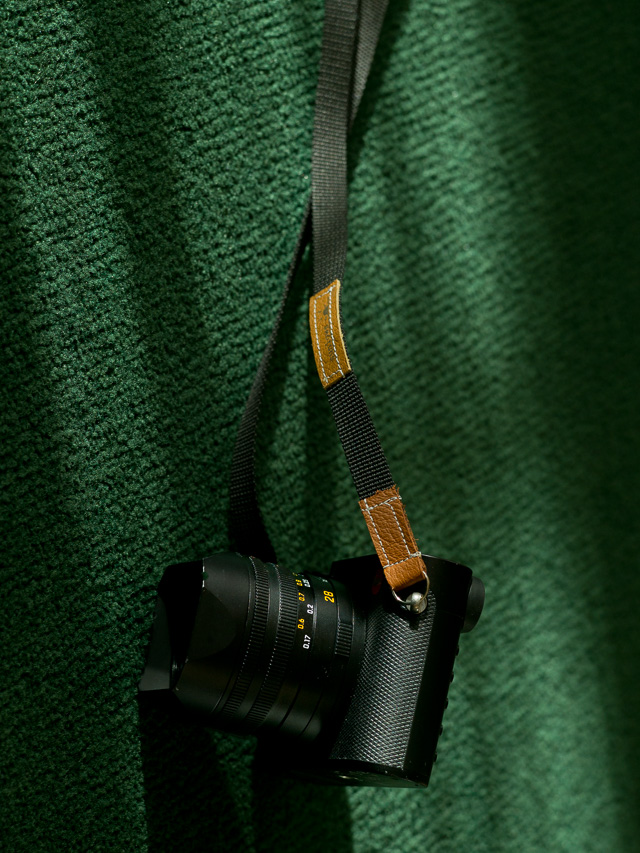

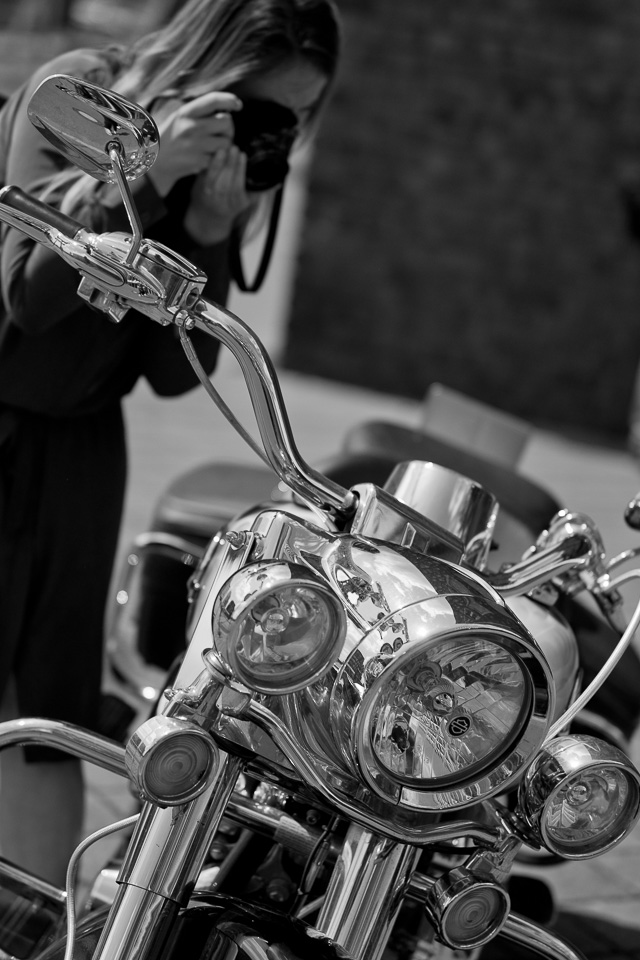


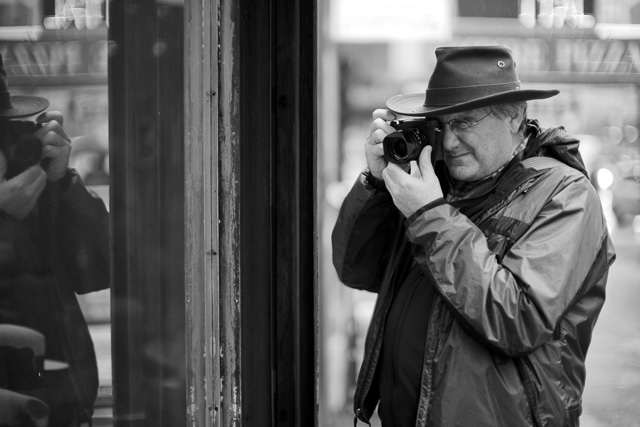
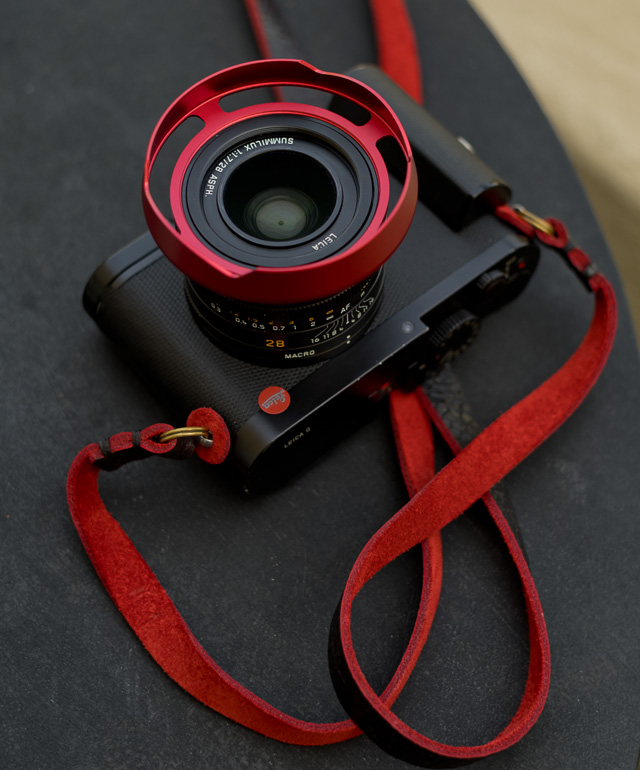
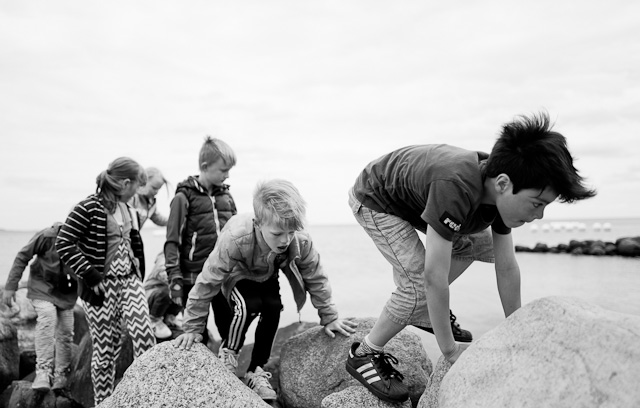
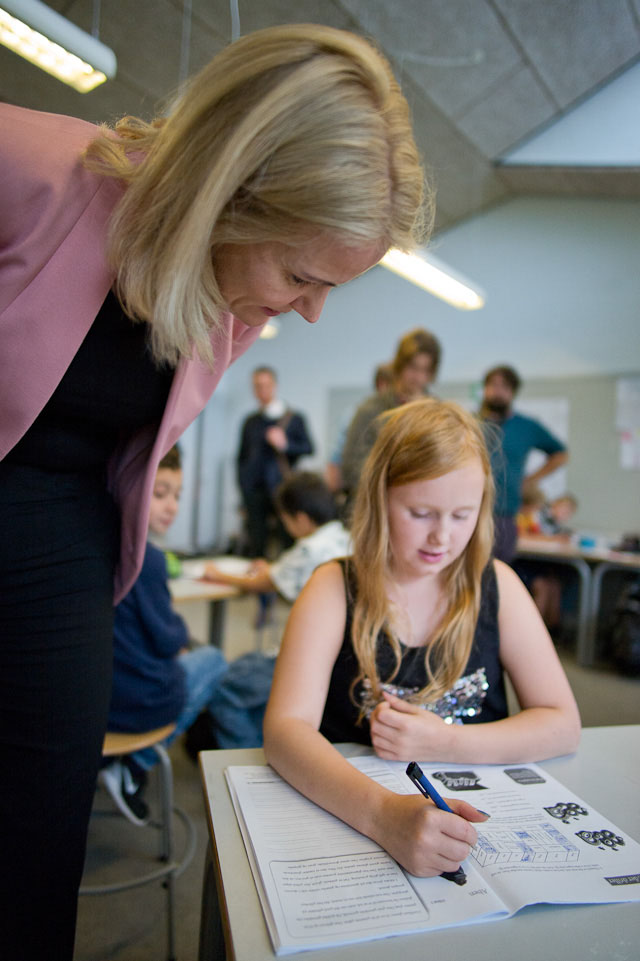
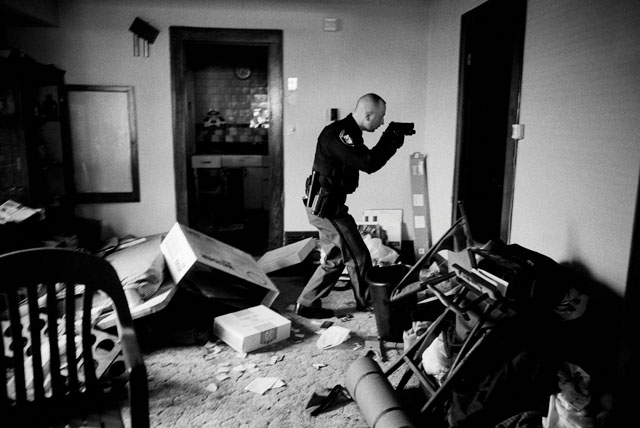


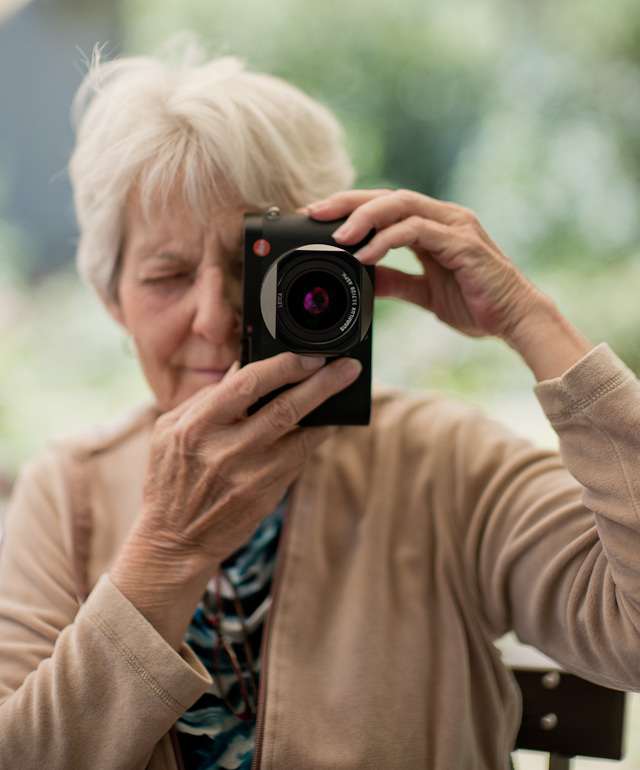
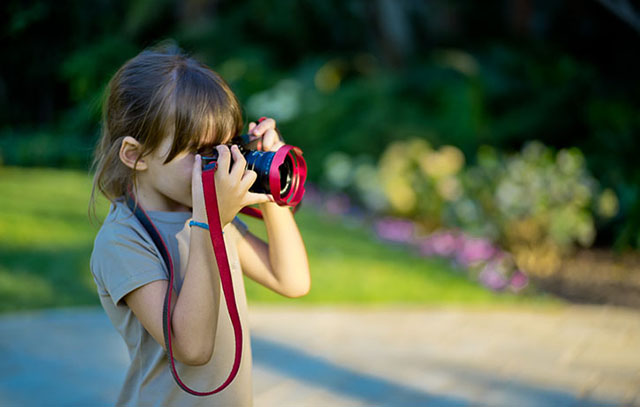
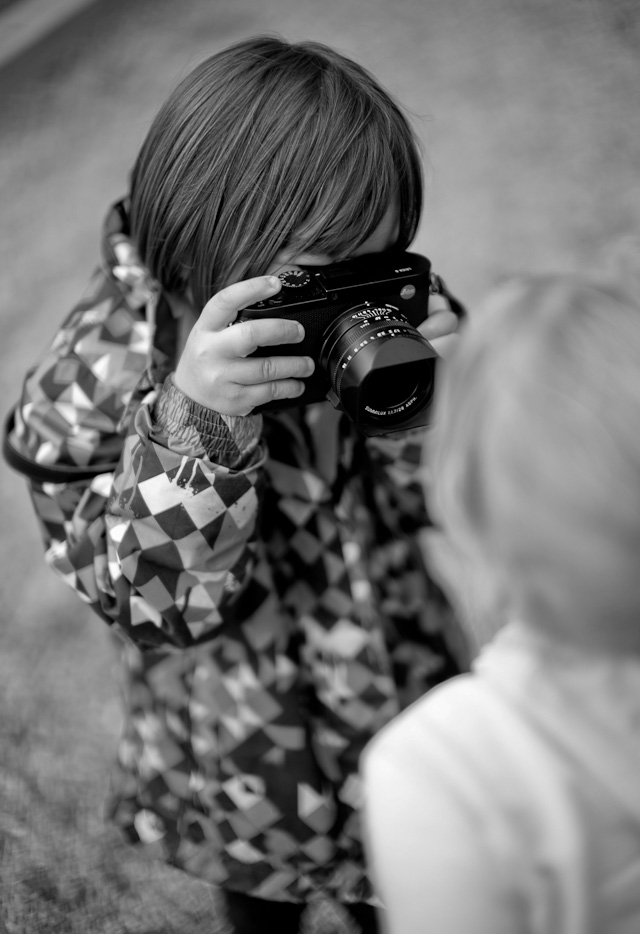
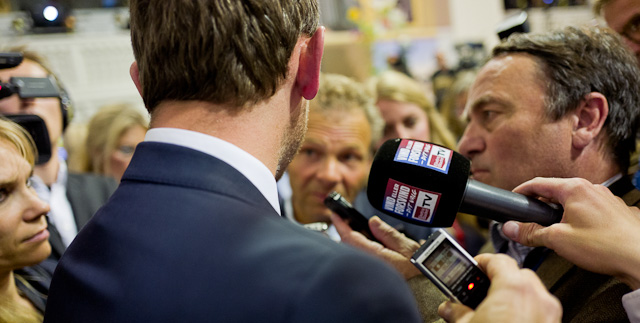

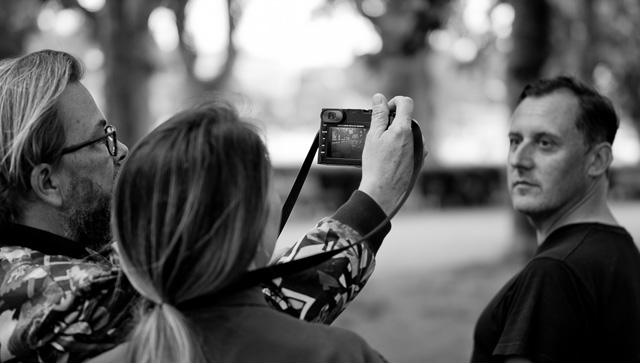
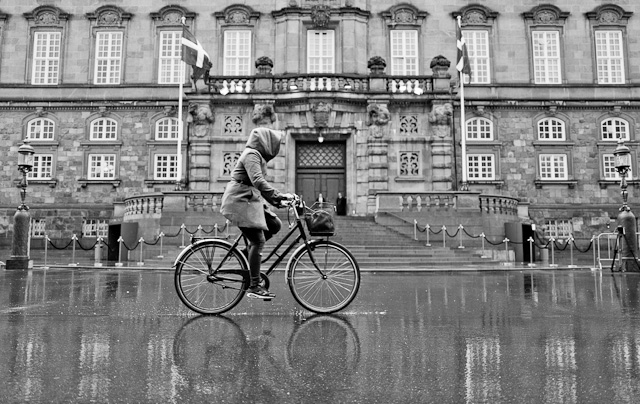
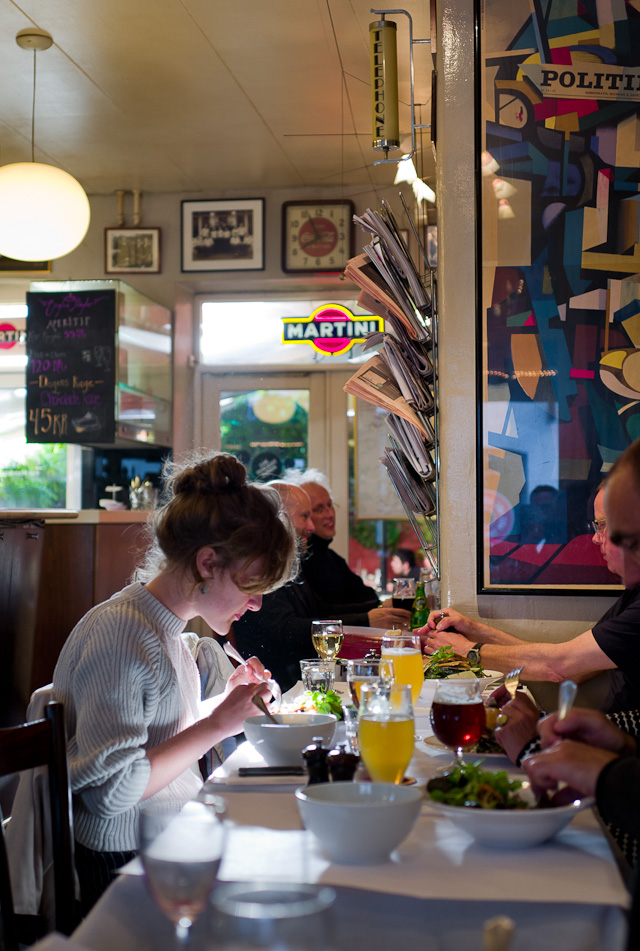


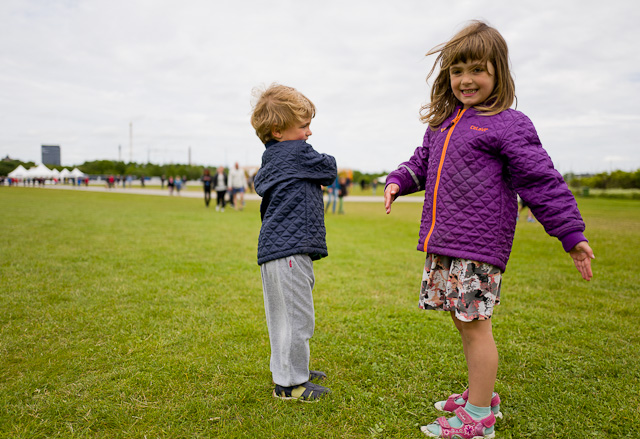

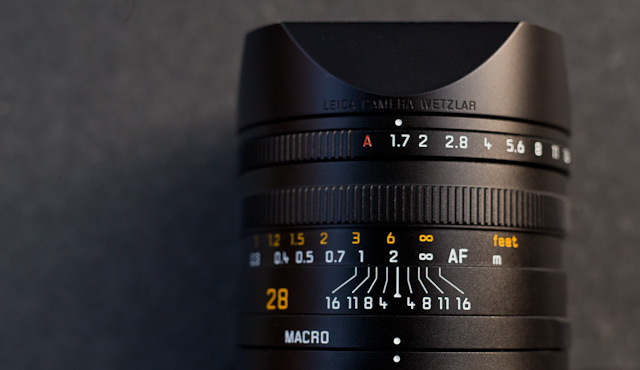
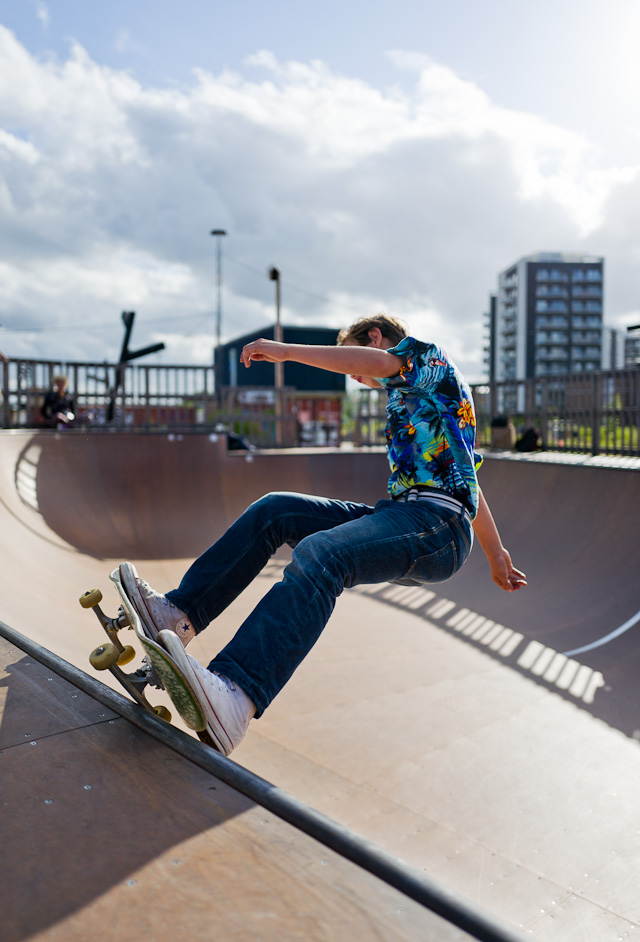
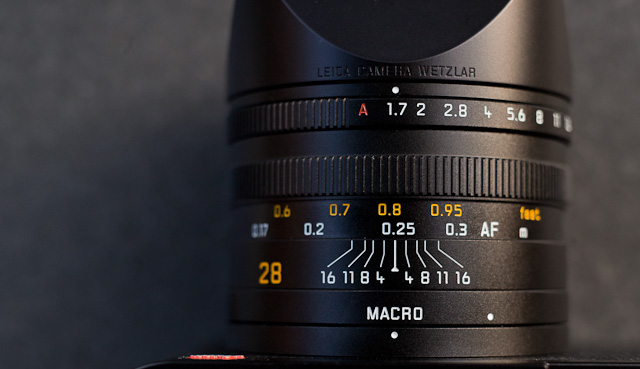
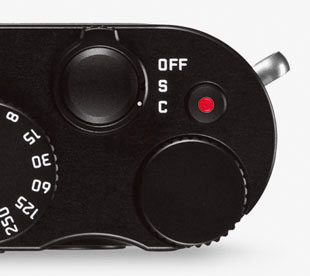

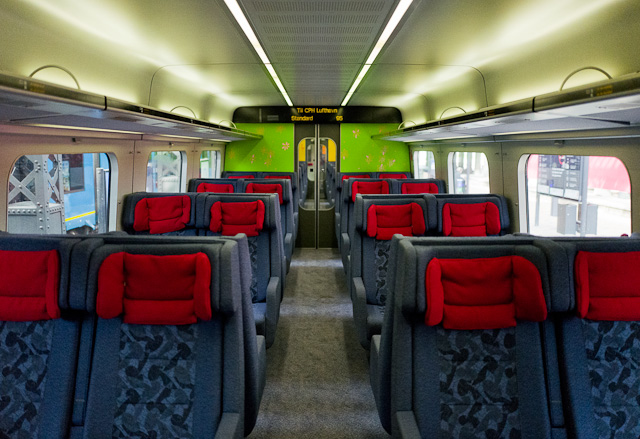
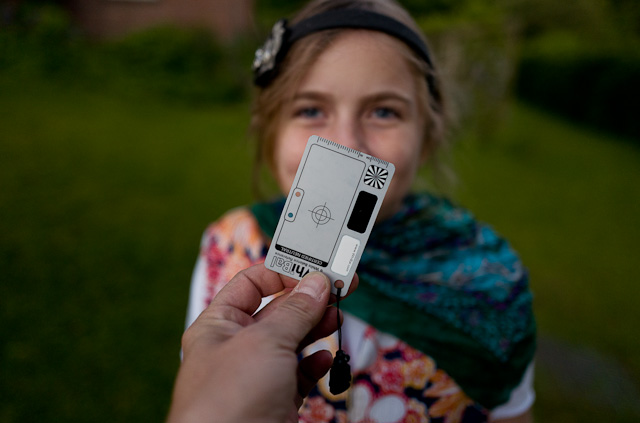

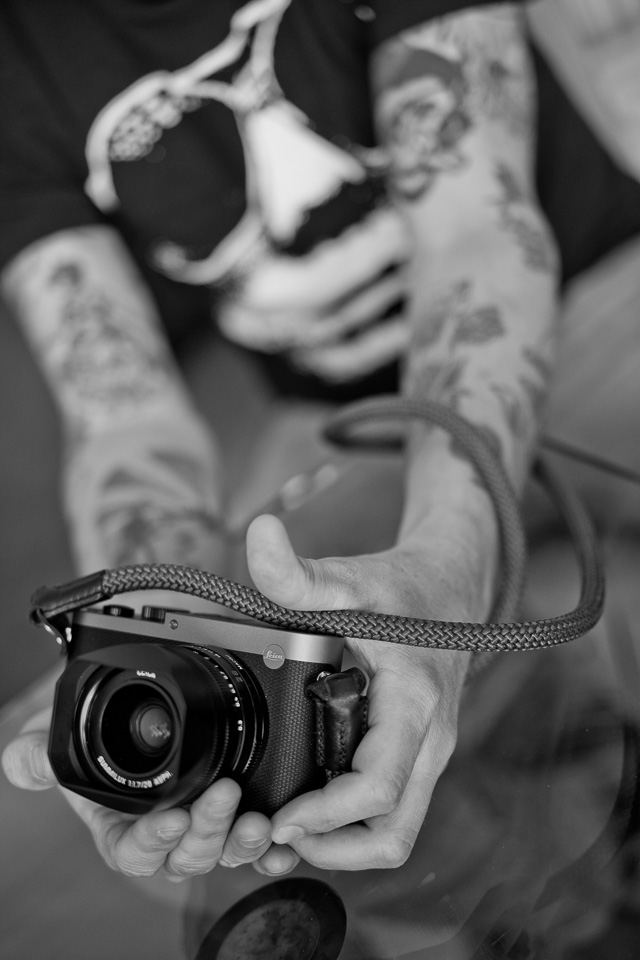

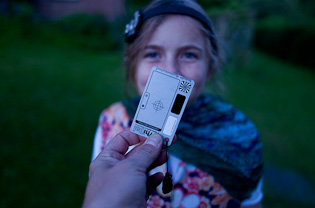
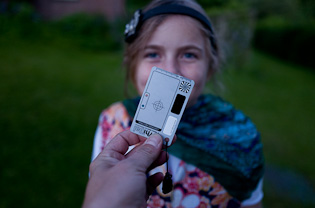
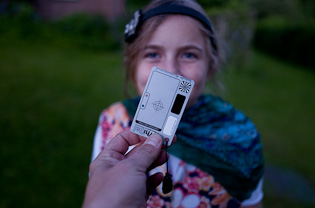

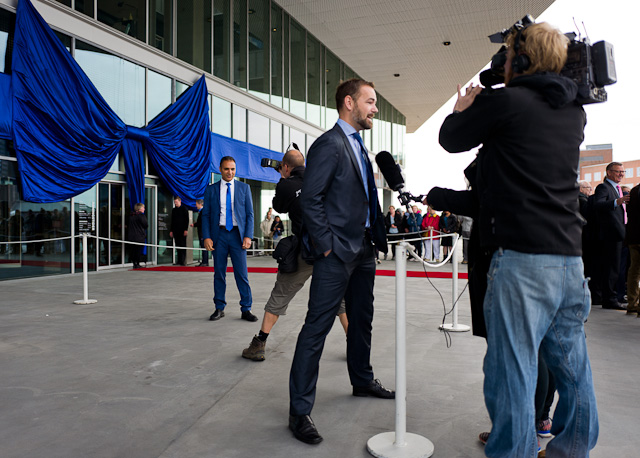
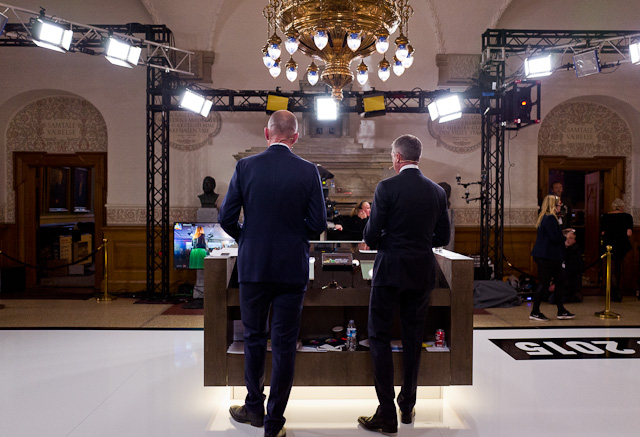
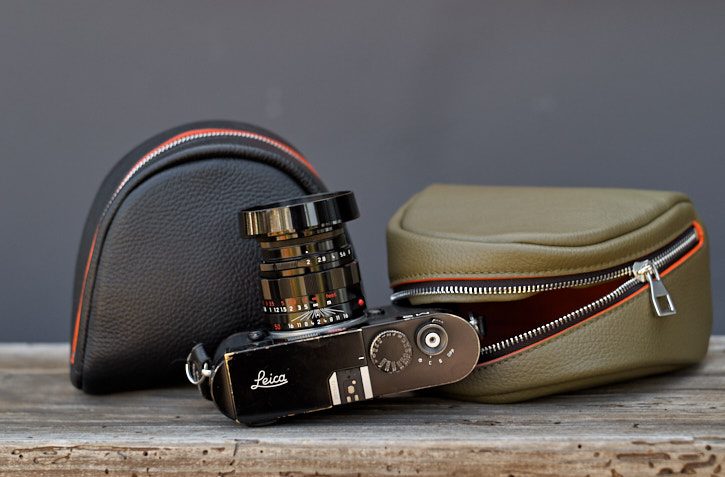
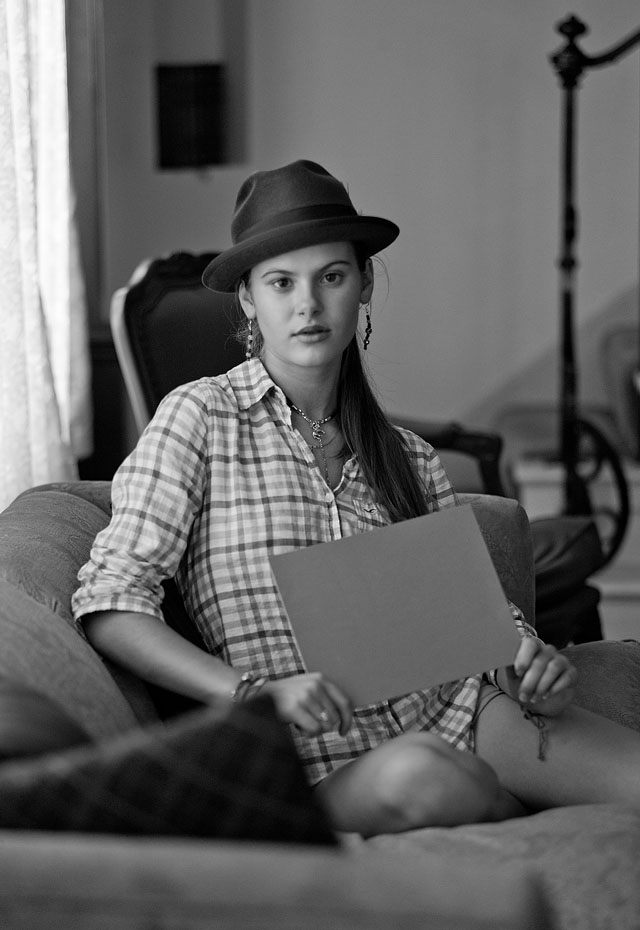
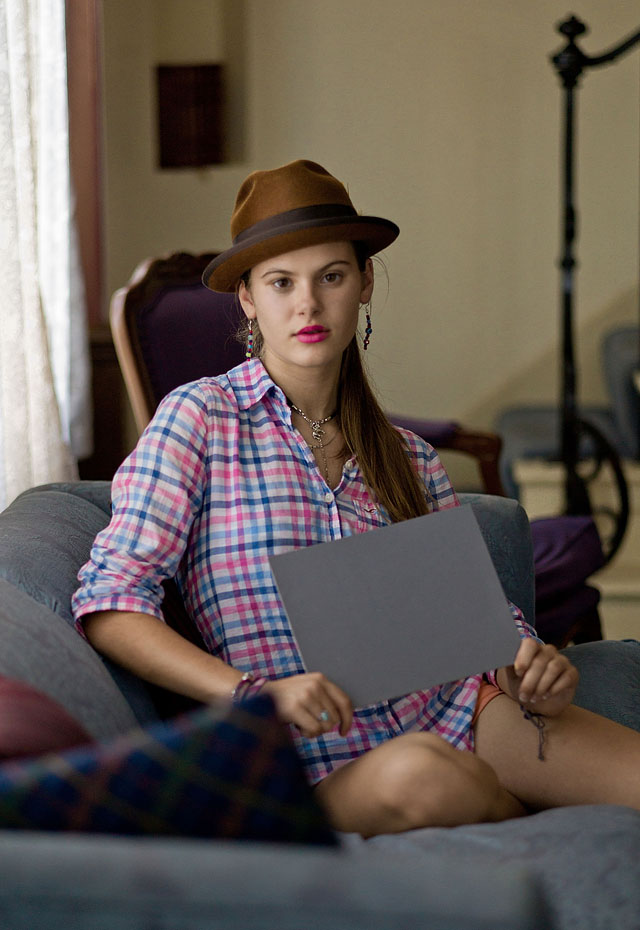

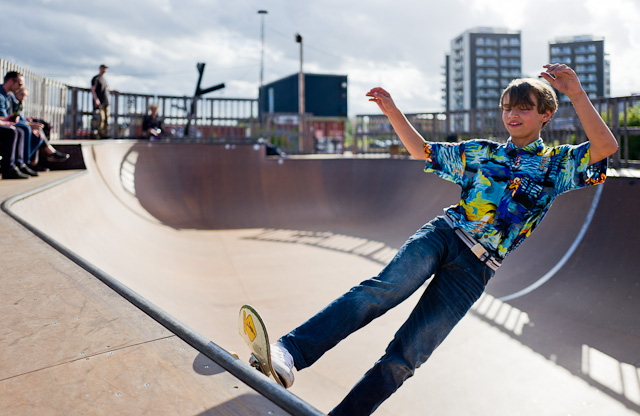

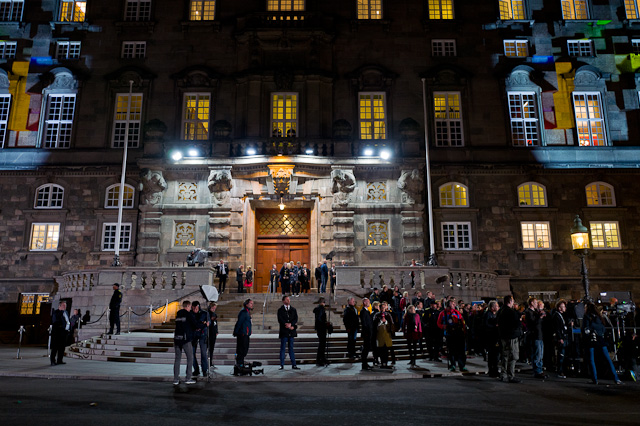
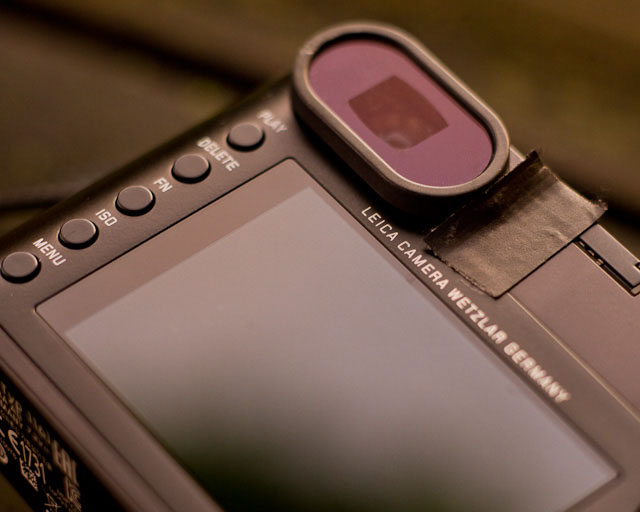
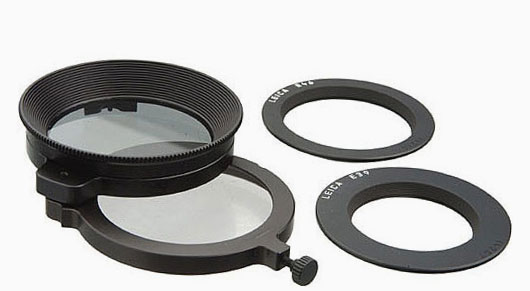
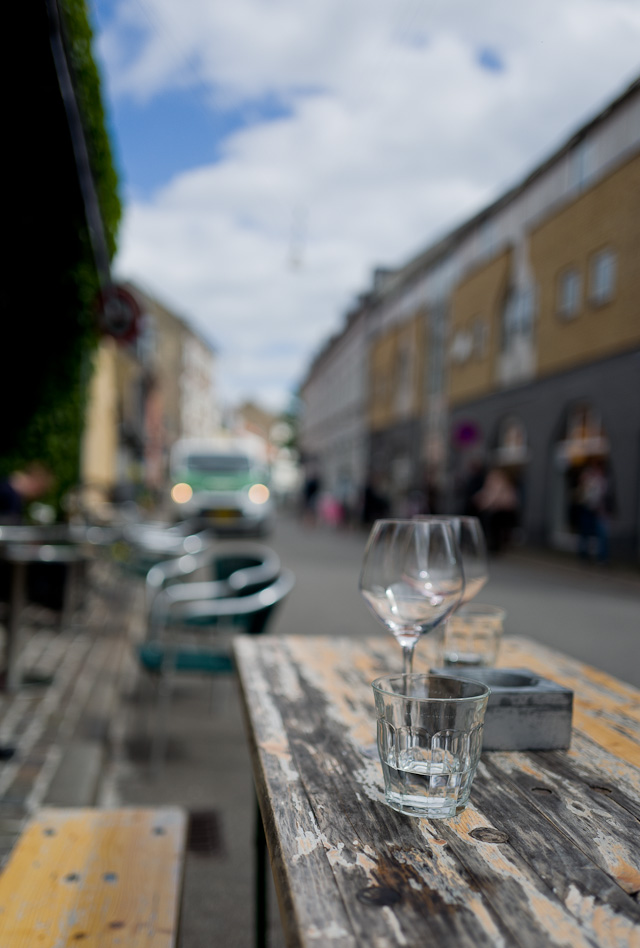


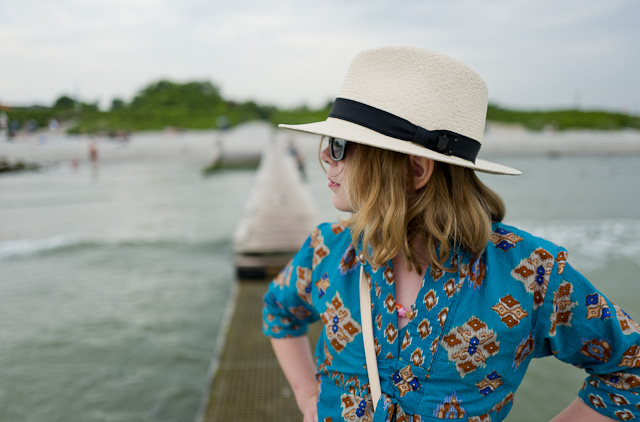
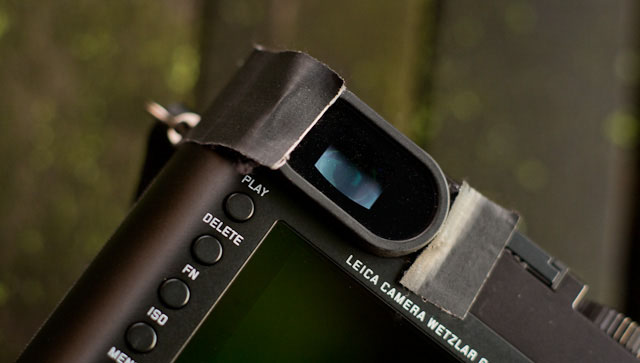


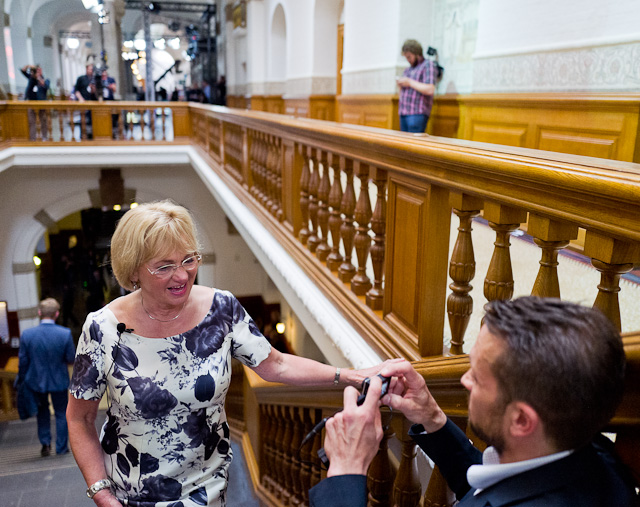
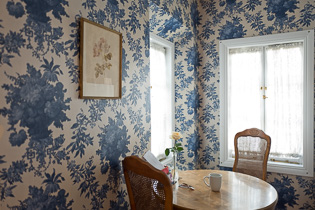
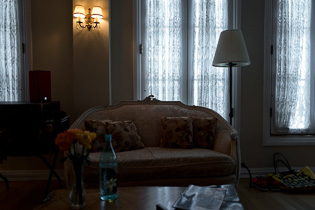
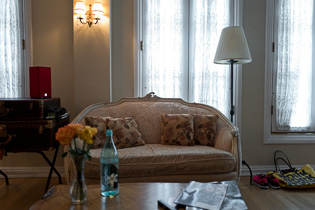
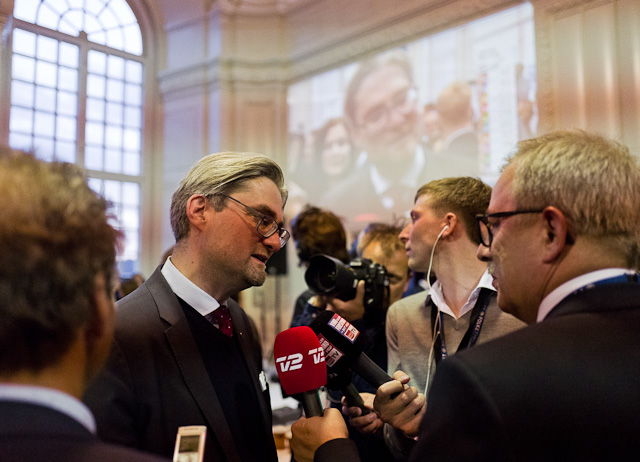
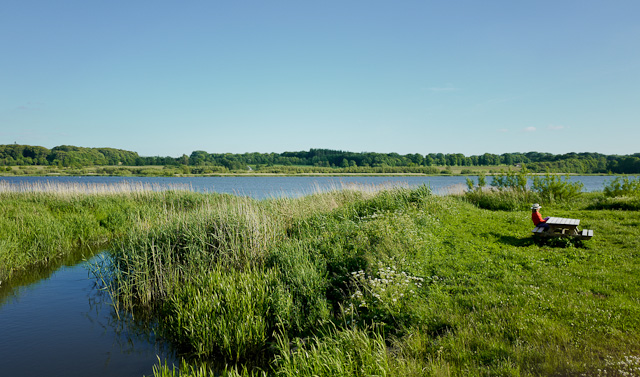
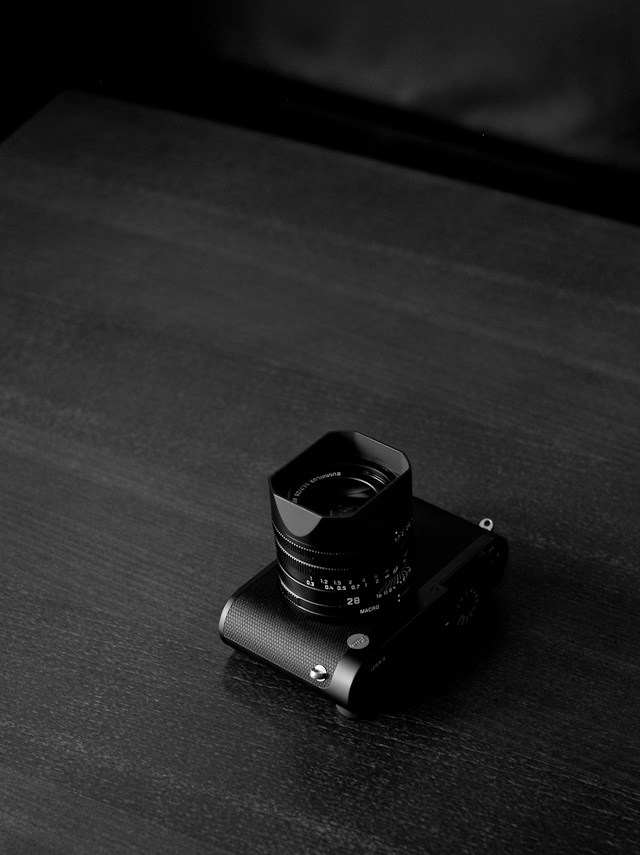 The Leica Q with the lens shade that comes with the camera. I find the camera design "very decisive" by which I refer to the simplicity and the cuts in shapes. © 2015 Thorsten Overgaard.
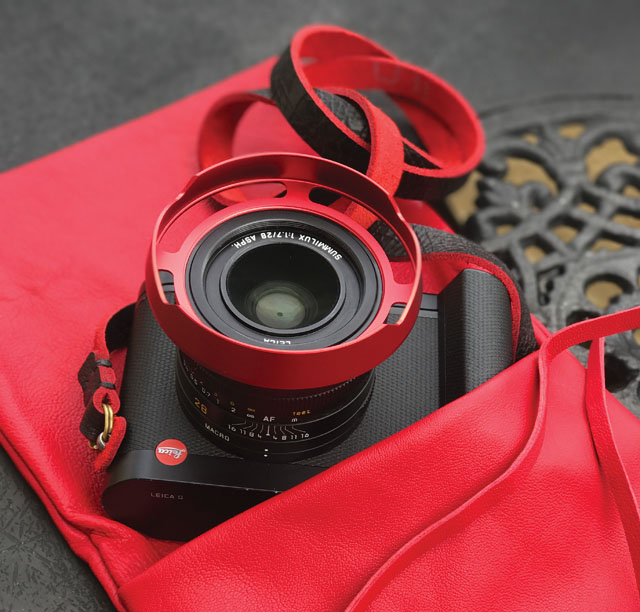

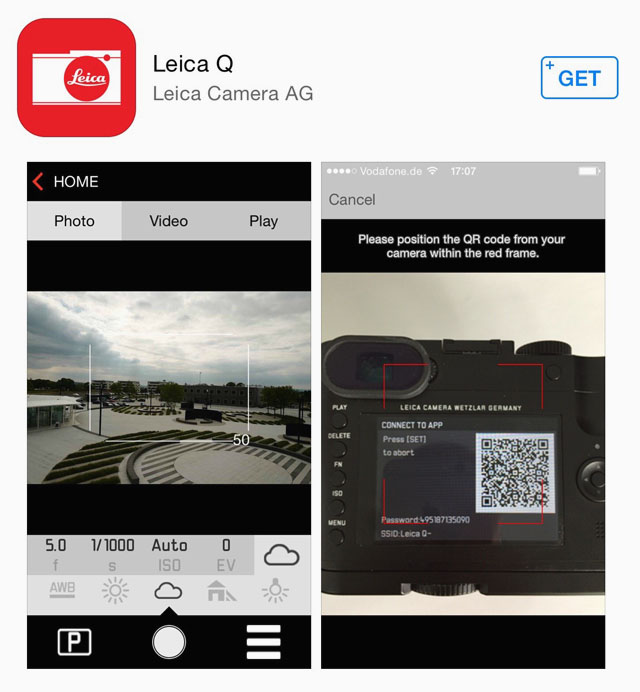

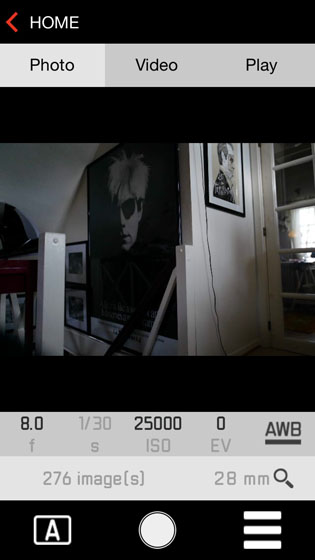
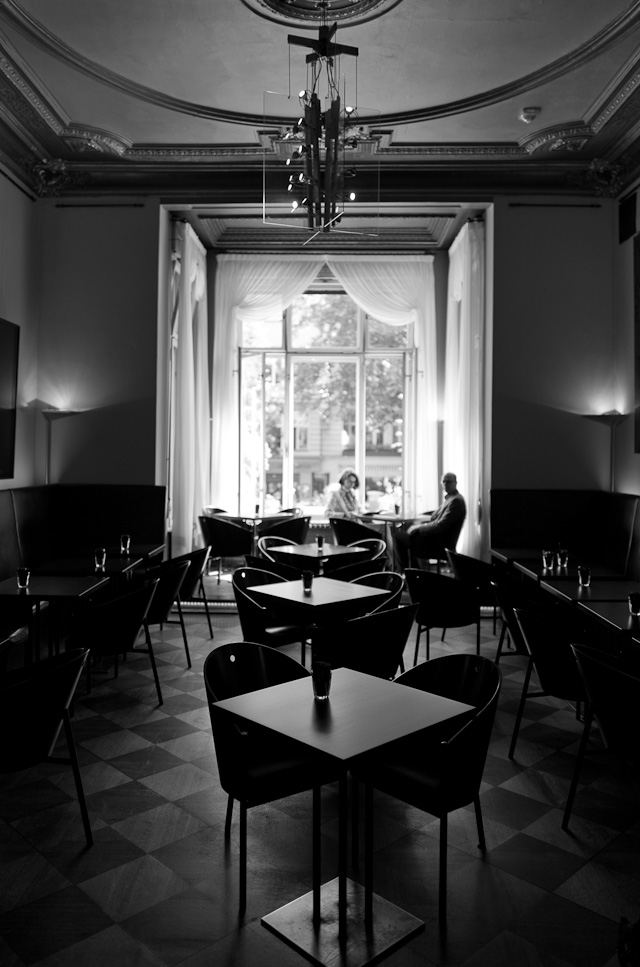 Black and white conversion from the DNG of the Leica Q. Inside the Litteraturhaus in Fasanenstraße in Berlin. Leica Q with Leica 28mm Summilux-Q ASPH f/1.7.(200 ISO, 1/200, f/1.7). © 2015 Thorsten Overgaard.

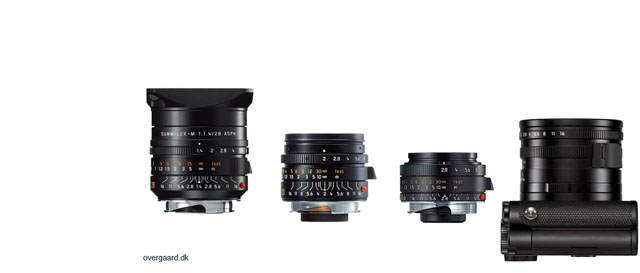

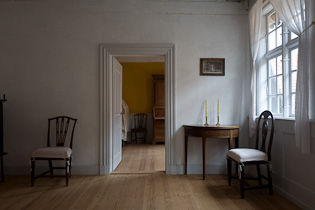
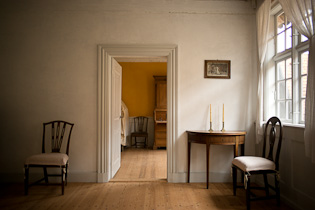
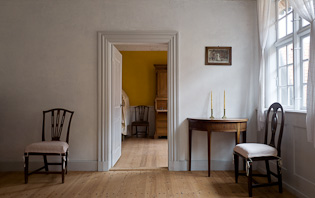

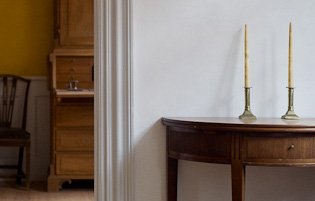
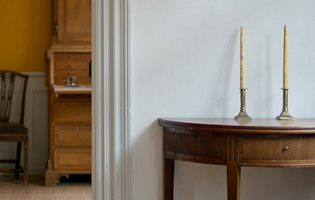
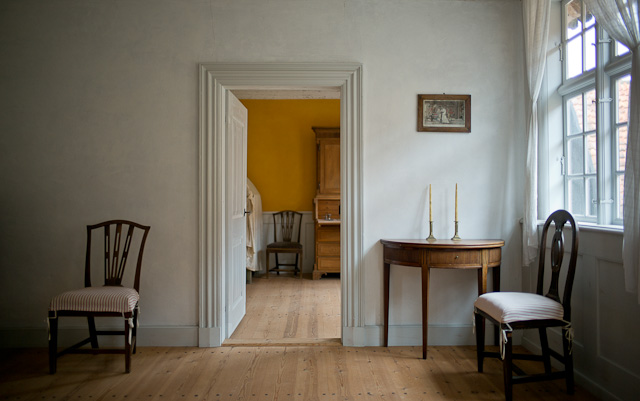

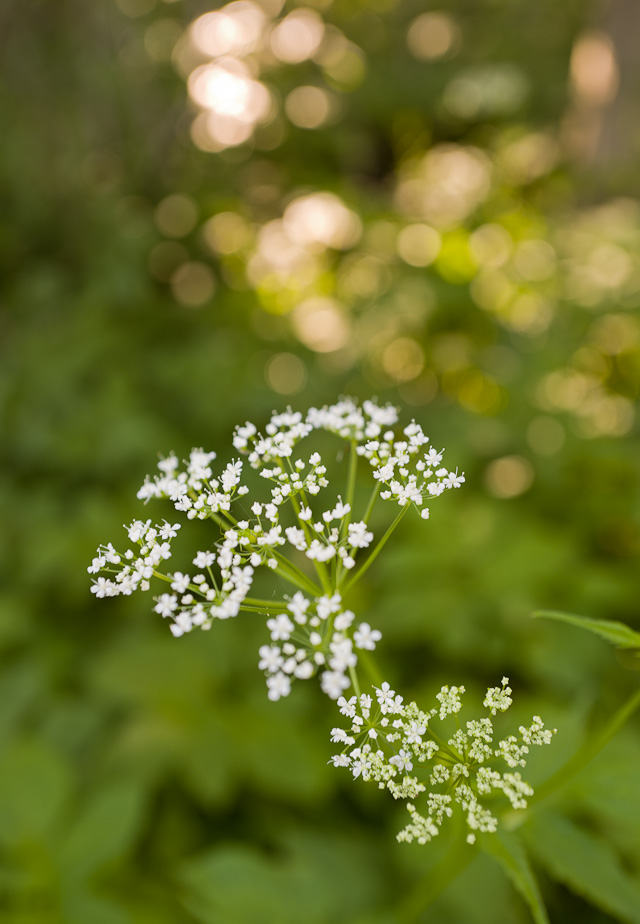
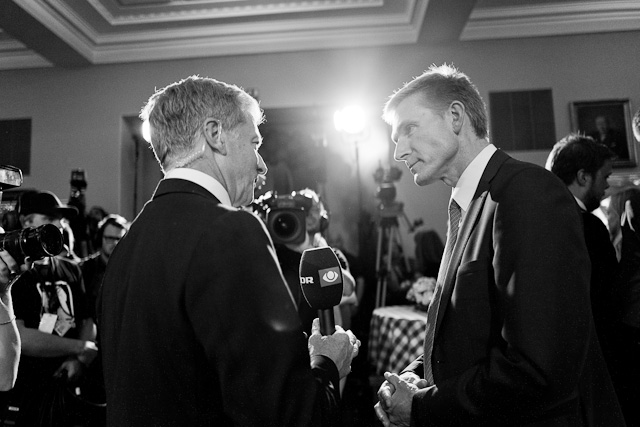

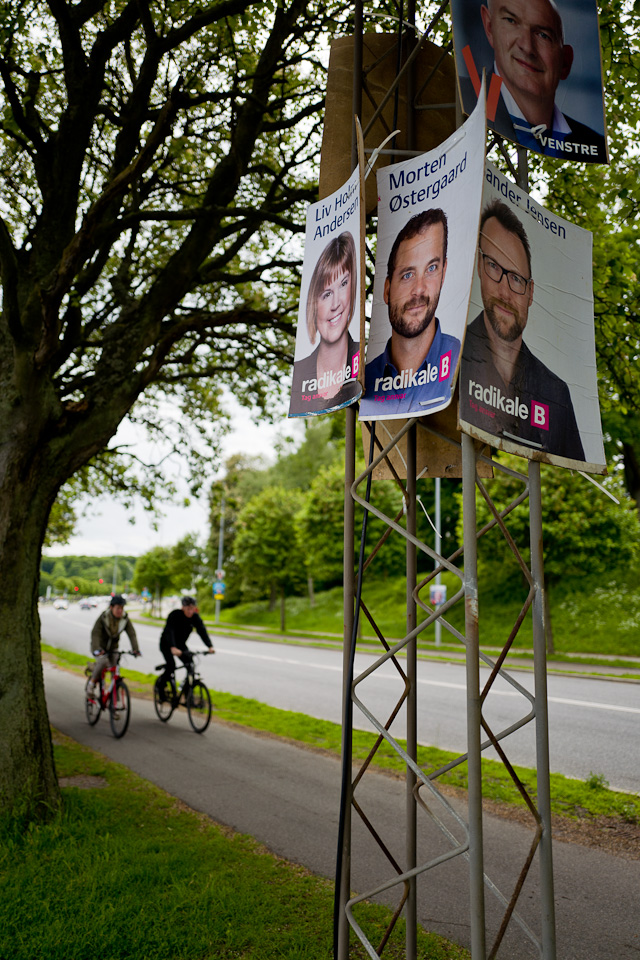
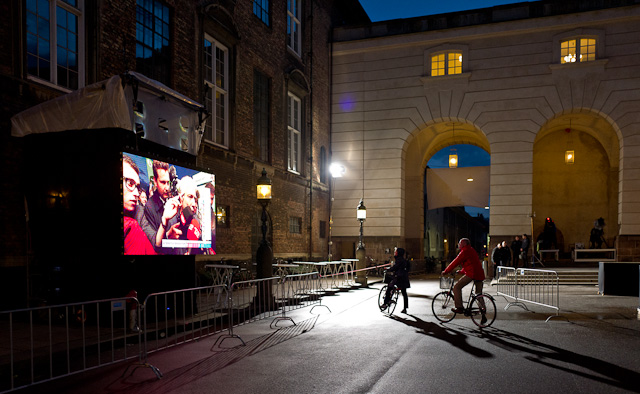

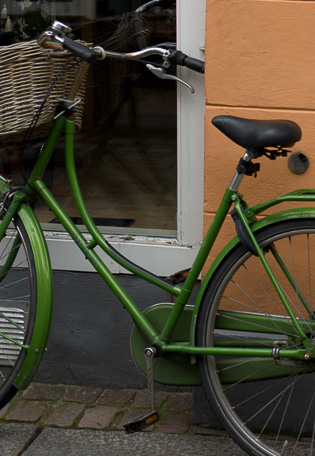
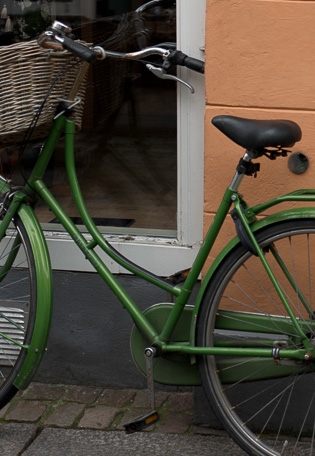


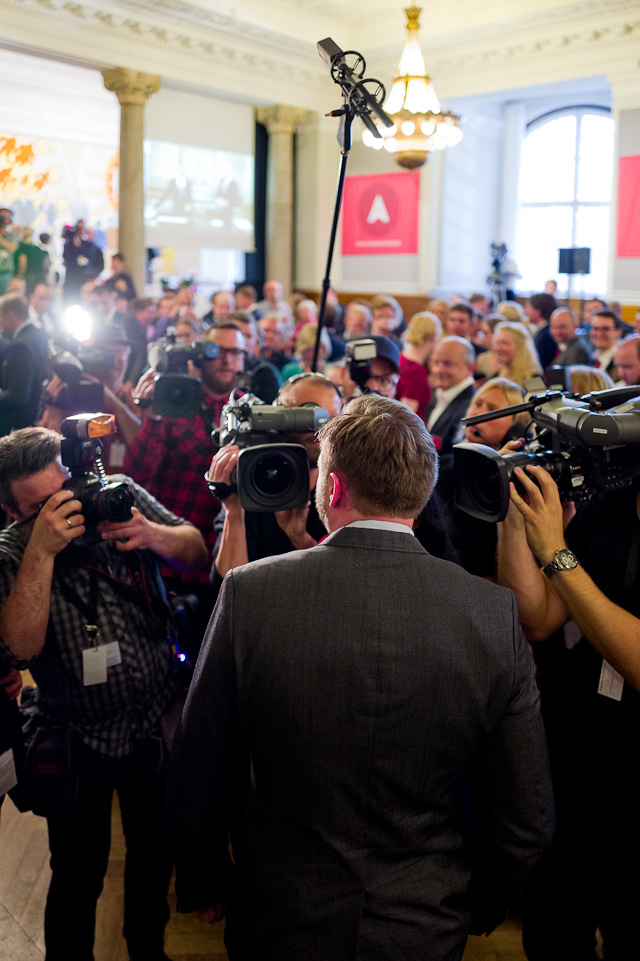
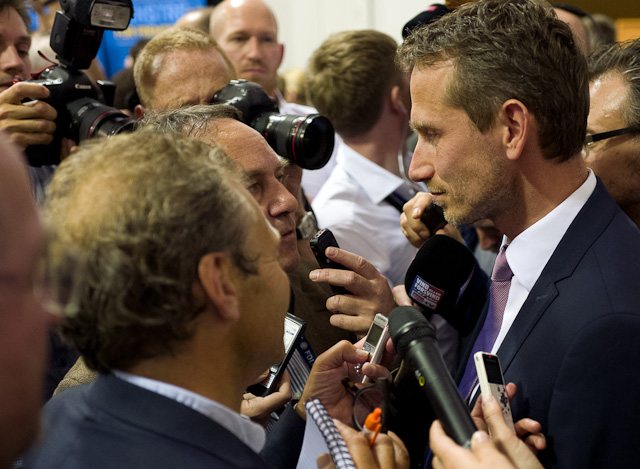


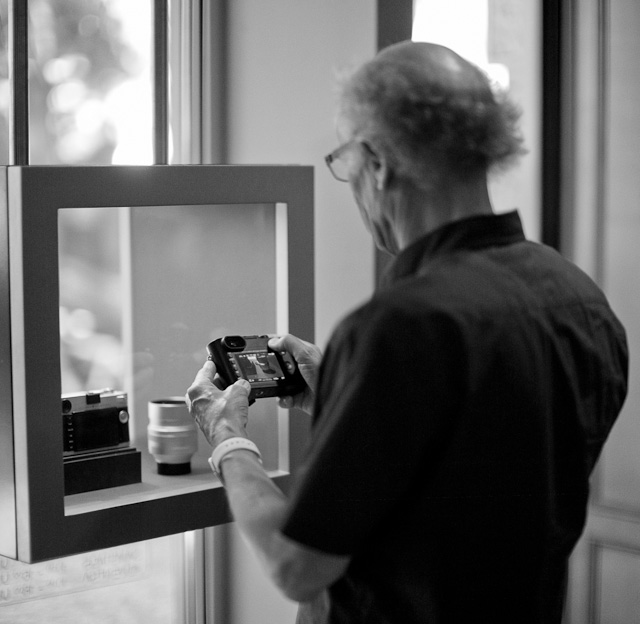
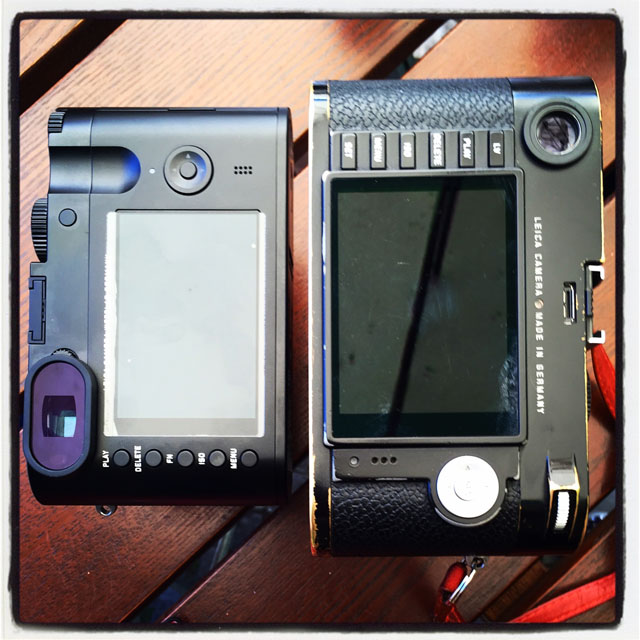
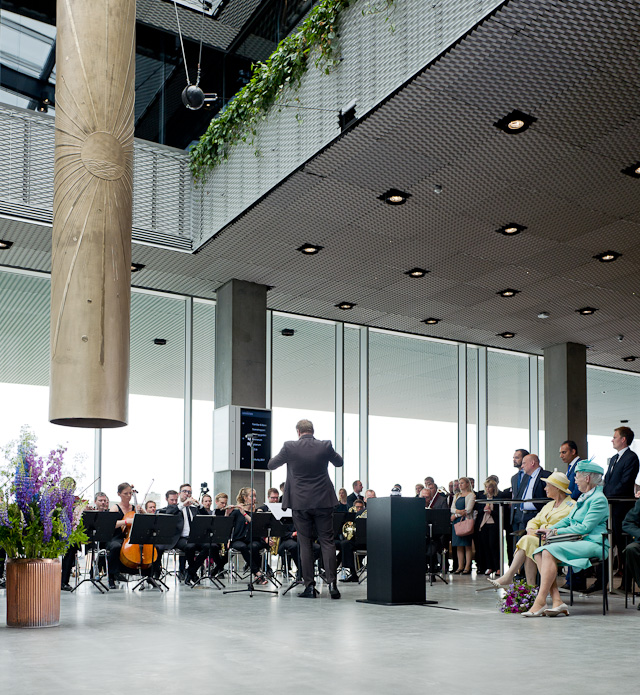
 Having coffee and camera talk at the famous Revolver cafe where photographers of all kind seem to meet. Leica Q. Photo:
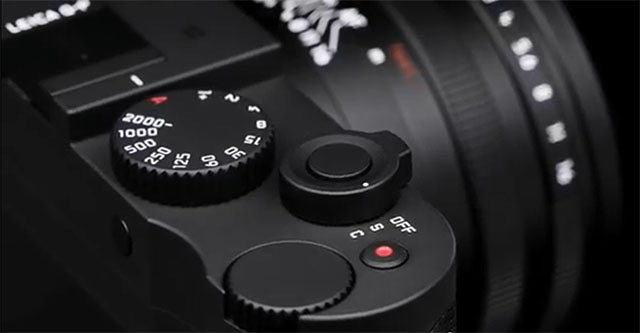
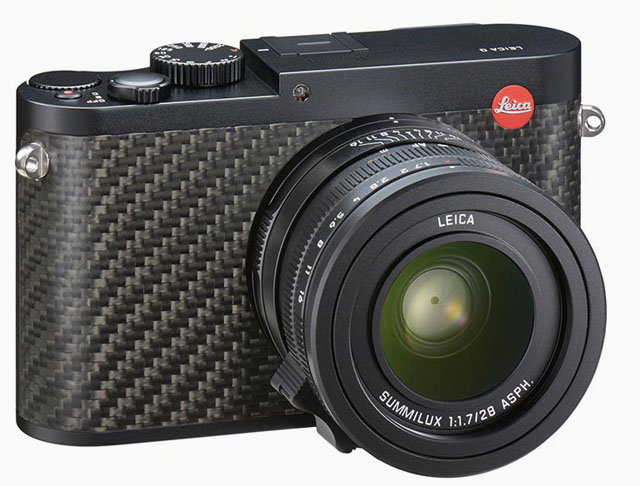
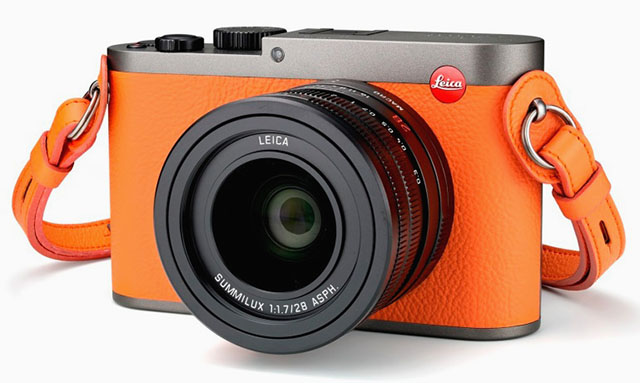
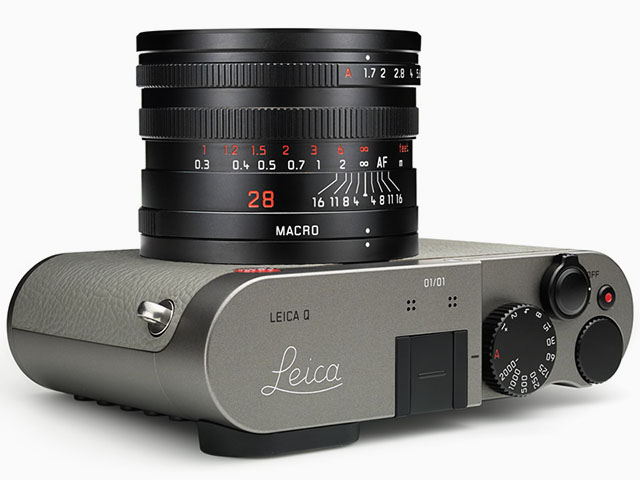


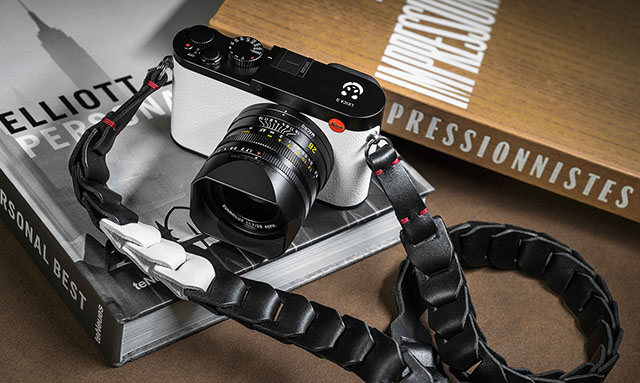

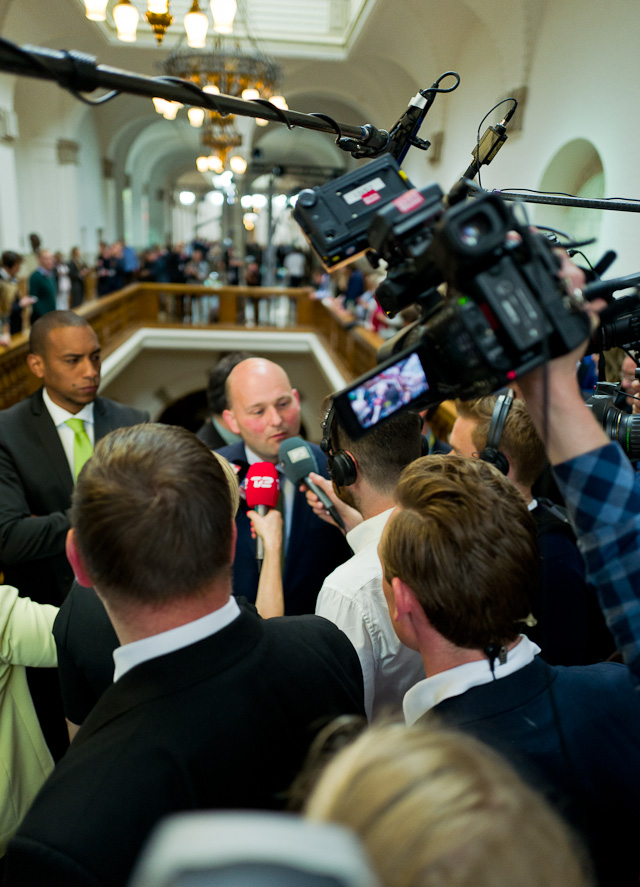
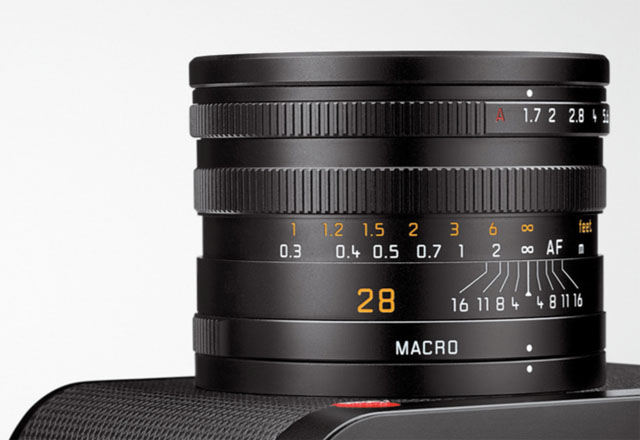
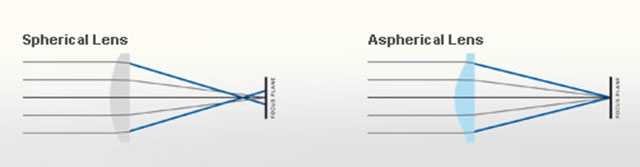
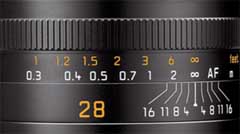
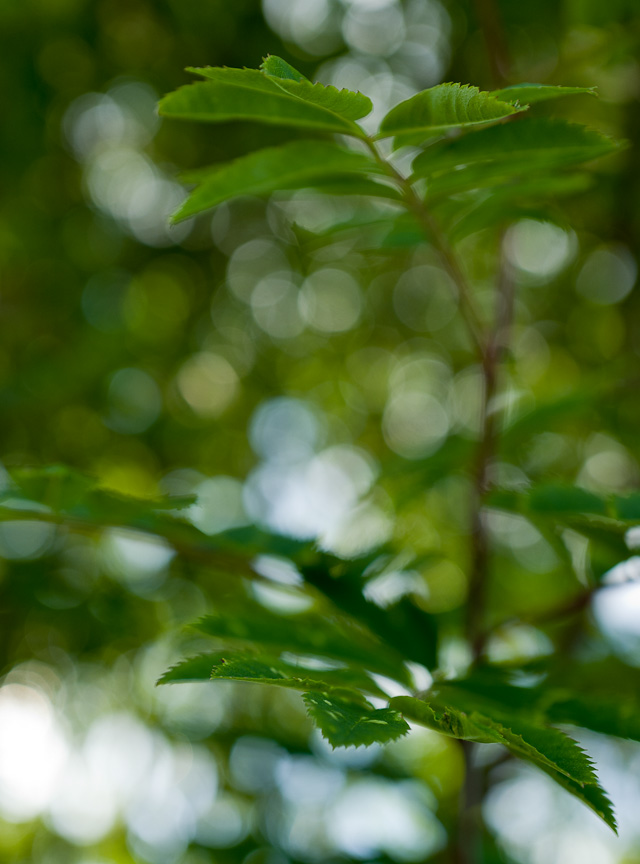
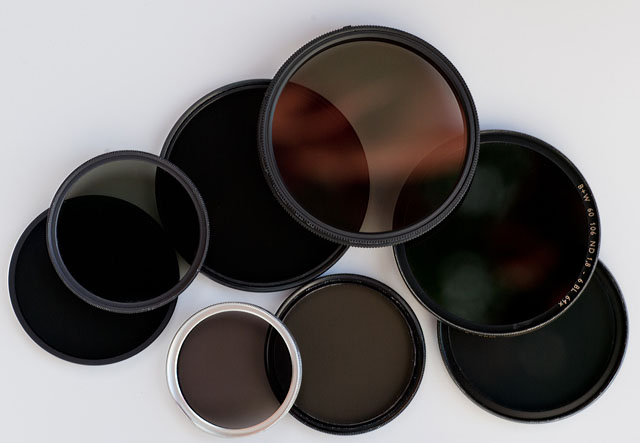
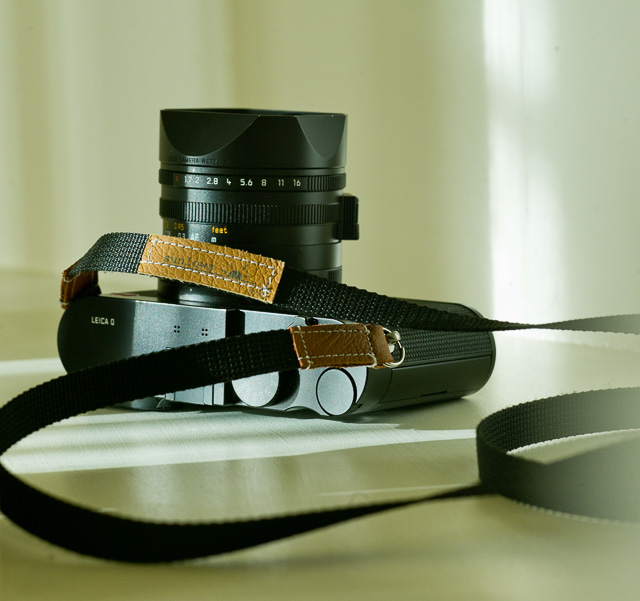
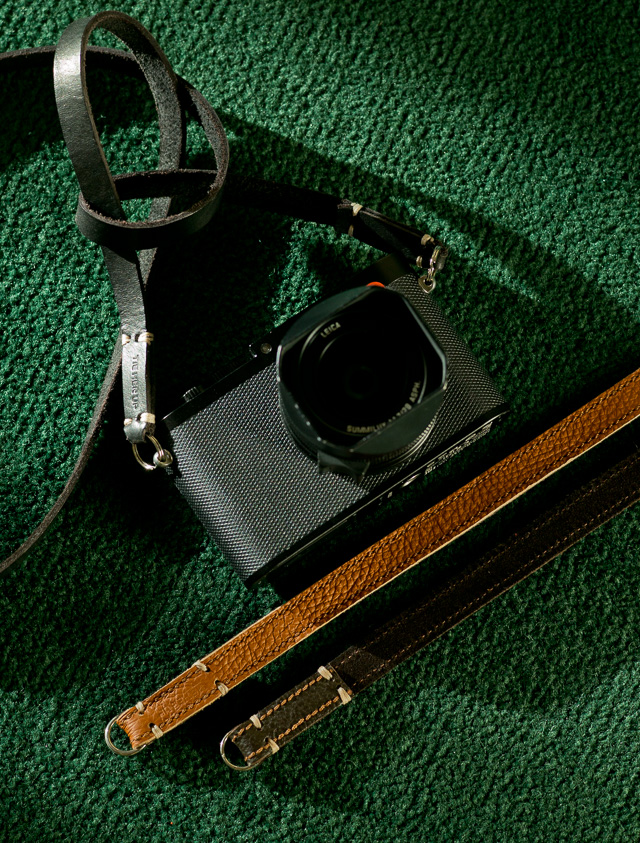


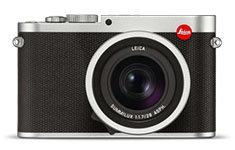
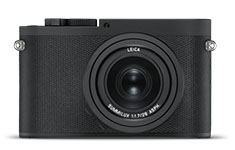


 Thorsten von Overgaard