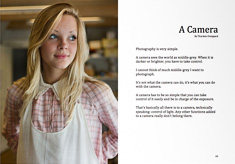
| Leica Digilux 2 Pages |
1 |
2 |
3 |
4 |
5 |
|
|
|

Leica Digilux 2 Definitions:
AF = Auto Focus. The idea is that the camera does the focusing itself (the word auto comes from Greek "self").
AF Assist Lamp = The little lamp on the front of the Leica Digilux 2, between the red dot and the LEICA engraving (and above the holes for microphone) will light up in dark places so as to help the Auto Focus to see in the dark. If you put a hand in front of the lens and press the shutter release button, you can see it in action. The AF assist lamp can be turned off in the menu.
Aperture = The same function as the iris and pupil has in the eye. The pupil in the eye is the dark circular opening in the center of the iris of the eye, varying in size to regulate the amount of light reaching the retina (the sensor area inside the eye).
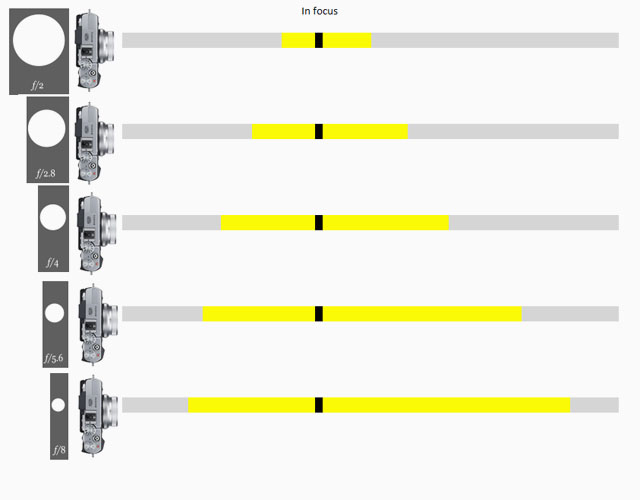
Aperture on a camera is the f/ stop on the camera that regulates how much light passes through the lens by increasing or decreasing the hole through the lens. On a f/2.0 lens the lens is fully open" at f/2.0. At f/2.8 the aperture inside the lens make the hole through the lens smaller so only half the amount of light at f/2.0 passes through. For each f/-stop (4.0 - 5.6 - 8.0 - 11 - 16) you halve the light. The aperture of the lens is basically the focal length divided with the f/-stop = size of the hole (50mm divided with f/2.0 = the hole is 25 mm in diameter).
Besides regulating the amount of light (so as to match the correct exposure), the aperture also affects the dept of field: , which is how deep the sharpness is. To get the sough-after photos with narrow depth of field where the background is blurry, the lens has to be wide open at f/2.0 or so. Stopping the lens down to f/8 or f/16 will result on more depth of field, meaning the background will start becoming in focus. To maintain narrow depth of field, one can use the ISO sensitivity and/or the shutter speed to match the correct exposure (as aperture is only one of three ways to control the exposure; the correct amount of light).
ORIGIN: Late Middle English : from Latin apertura, from apert- ‘opened,’ from aperire ‘to open’.
The aperture blades inside the consist of a number of blades that - as the aperture ring on the lens is rotated - narrow into a smaller and smaller hole. © Thorsten Overgaard.
| |
 |
| |
The camera in Aperture Priority Mode |
| |
|
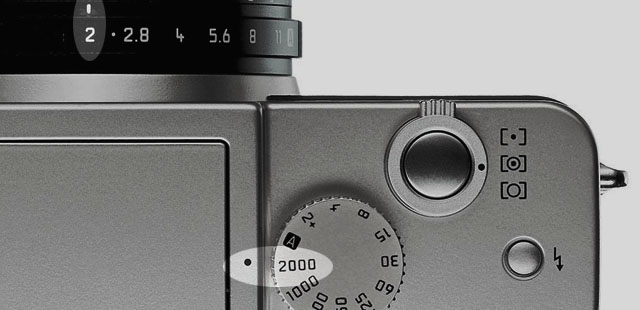
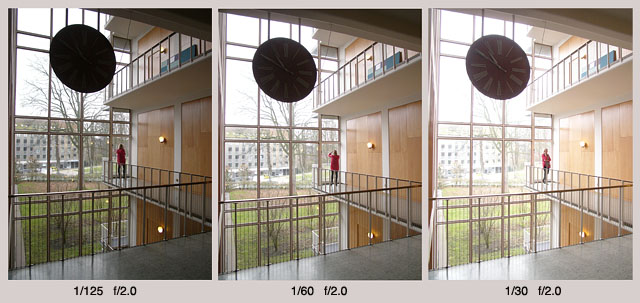
Aperture Priority Mode. When the shutter speed dial on top of a Leica camera is set to A, it is short for “Aperture Priority” and allows the user to set a specific aperture value (f-number) while the camera selects a shutter speed to match it that will result in proper exposure based on the lighting conditions as measured by the camera's light meter. In other words, you set the aperture as priority (f/1.4 for example), and the camera calculates a shutter speed (1/250 of a second) that matches that. If you change the aperture to f/2.0 by changing the aperture ring on the lens, the camera will re-calculate the speed to 1/125 so as to get the same amount of light to hit the sensor (f/2.0 is half the light through the lens as f/1.4 and 1/125 if twice the amount of light on the sensor as 1/250).
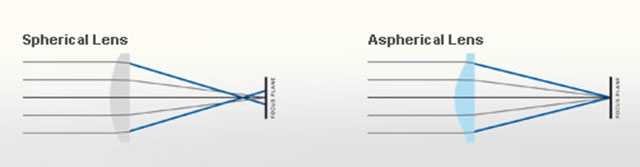
ASPH = (Aspherical lens) stands for "aspheric design".
Most lenses have a spherical design - that is, the radius
of curvature is constant. These are easy to manufacture by
grinding while "spinning" the glass. This design
however restricts the number of optical corrections that can
be made to the design to render the most realistic image possible.
ASPH lenses (a-spherical, meaning non-spherical), however, involve usually 1 element that does
*not* have a constant radius of curvature. These elements
can be made by 1) expensive manual grinding, 2) molded plastic,
or 3) Leica's patented "press" process, where the element
is pressed into an aspherical ("non-spherical")
shape. This design allows Leica to introduce corrections
into compact lens designs that weren't possible before. Practically,
the lens performs "better" (up to interpretation)
due to increased correction of the image, in a package not
significantly bigger than the spherical version.
There is another Aspherical lens manufacture technique: an uneven coating layer is applied to a spherical lens. The coating is thicker on the edges (or on the center, depending). Canon "Lens Work II" calls these "simulated" aspherical lenses. Simulated and Glass-Molded (GMo) asphericals show up in non-L Canon lenses, while the L lenses have actual ground aspheric elements.
A- means non, or without. From Latin, ex.
Sphere: ORIGIN Middle English : from Old French espere, from late Latin sphera, earlier sphaera, from Greek sphaira "ball".
| |
|
|
 |
| Normal spheric lens (grinded) |
|
ASPH (note the shape of the glass as result of pressing rather than grinding) |
Auto- means “self”. The idea is that when a camera has auto-(something), it does that (something) by itself.
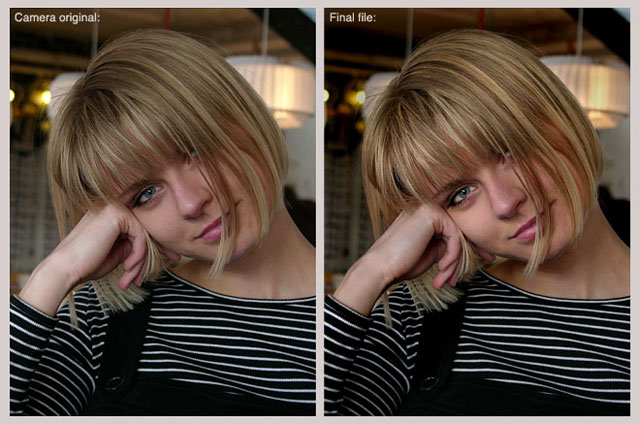
Banding = Noise in digital images. Horizontal lines in a horizontal picture (if the camera is in portrait mode/vertical, the lines will obviously be vertical). It's simply noise; the result of uncontrolled algorithms working overtime with an image the sensor really can't see because it's very dark. (If your image has vertical lines in it, it is more likely that the sensor needs remapping).
This image at 6400 ISO, underexposed and then brought up to correct exposure in Lightroom, displays banding: Horizontal lines in the image. Leica M-D 262 with Leica 50mm APO-Summicron-M ASPH f/2.0.
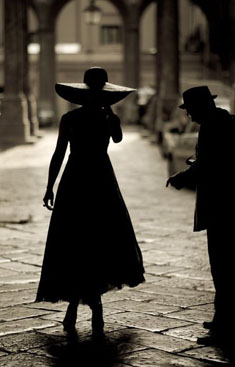
Bokeh = The visual quality of the out-of-focus areas of a photographic image, especially as rendered by a particular lens: It's a matter of taste and usually photographers discuss a 'nice' or 'pleasant' bokeh (the out-of-focus area is always unsharp, which is why the quality discussed is if one likes the way it renders or not by a particular lens). The closer you get to something, the 'more' bokeh' you get (in that the focus becomes less for the background and foreground at close distances than at long distances). ORIGIN from Japanese 'bo-ke' which mean 'fuzzines' or 'blur.'.
 Bokeh: The visual quality of the out-of-focus areas of a photographic image. Photo at Bar del Fico in Rome. Leica TL2 with Leica 35mm Summilux-TL ASPH f/1.4. © 2017 Thorsten Overgaard. Bokeh: The visual quality of the out-of-focus areas of a photographic image. Photo at Bar del Fico in Rome. Leica TL2 with Leica 35mm Summilux-TL ASPH f/1.4. © 2017 Thorsten Overgaard.
C = Continuous shooting.
Camera - is today’s short name for Camera Obscura (meaning “a dark room”). Camera means Chambre and was used only as a Latin or alien word, actually only for Spanish soldiers’ rooms, until popularized in connection with photography in 1727: “Camera Obscura”. In 1793 the slang term “camera” was used by Sterne Tr. Shandy: “Will make drawings of you in the camera” and by Foster (1878), “The eye is a camera”. Camera Obscura was described by Iraqi scientist Ibn-al-Haytham in his book, “Book of Optics” (1021) and by Leonardo da Vinci in 1500; popularized and made widely known in 1589 by Baptista Porta when he mentioned the principle in his book “Natural Magic”. Johannes Kepler mentions Camera Obscura in 1604.
Camera = chambre (room), Obscura = dark (or cover).
| |
|
|
| |
Why is it called a "camera"..?
The word Camera is today's short name for Camera Obscura (which originally means “a dark room”).
Origin of the word Obscura means "dark" or "covered", and the word Camera means Chambre and was used originally only as a Latin or alien word, actually only for Spanish soldiers' rooms, until popularized in connection with photography in 1727: “Camera Obscura”.
In 1793 the slang term “camera” was used by Sterne Tr. Shandy: “Will make drawings of you in the camera” and by Foster (1878), “The eye is a camera”.

Ibn-al-Haytham mentioned Camera Obscura in his "Book of Optics" in 1021.
The concept of Camera Obscura was described by Iraqi scientist Ibn-al-Haytham in his book, “Book of Optics” (1021) and by Leonardo da Vinci in 1500; popularized and made widely known in 1589 by Baptista Porta when he mentioned the principle in his book “Natural Magic”. Johannes Kepler mentions Camera Obscura in 1604.
Camera = chambre (room), Obscura = dark (or cover). |
|
| |
|
|
CCD sensor (as used in Leica M8, M9, Leica S) = (Charged Coupling Devices) - The first digital cameras used CCD to turn images from analog light signals into digital pixels. They're made through a special manufacturing process that allows the conversion to take place in the chip without distortion. This creates high quality sensors that produce excellent images. But, because they require special manufacturing, they are more expensive than their newer CMOS counter parts.
Central Shutter = Some lenses, for example the Leica S lenses and the Leica Q where a shutter is located in the lens itself. In most cameras there is a shutter curtain just in front of the sensor, and in SLR (Single Lens Reflex) cameras there is also a mirror in front of the shutter curtain.
In the Leica T/TL/TL2 the shutter is in front of the sensor, but only acts to "refresh" the sensor. In the Leica TL2, there is a mechanical shutter curtain from 30 sec. to 1/4000 shutter times, and digital shutter from 1/4100 to 1/40,000 shutter times. A digital shutter is simply "turning on/off the recording of the sensor.
Contrast - The degree of difference between tones in a picture. Latin contra- ‘against’ + stare ‘stand.’
 |
|
 |
| Normal to low contrast |
|
High contrast |
| |
|
|
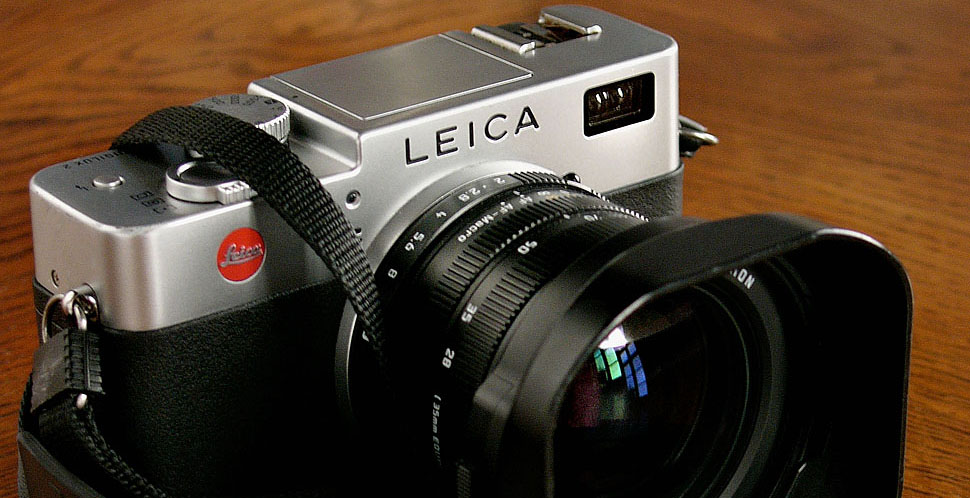
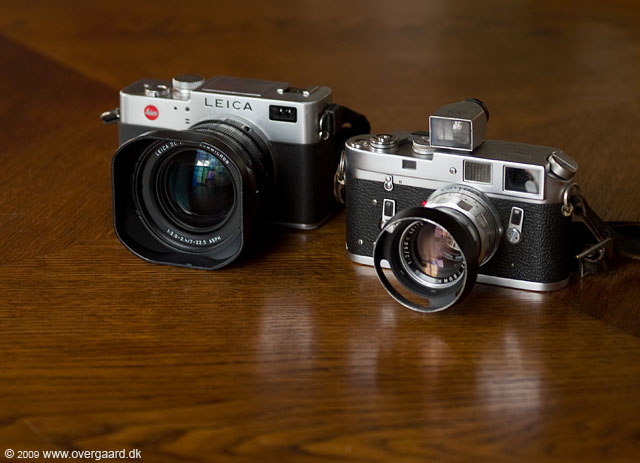
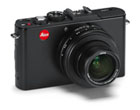
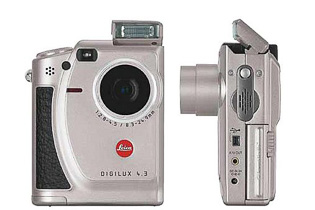
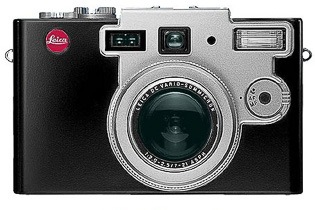
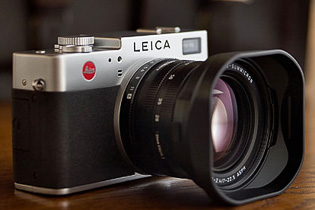
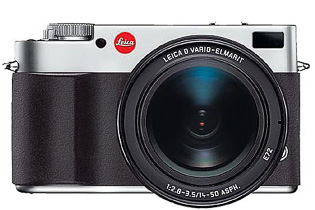
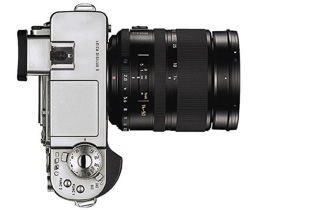
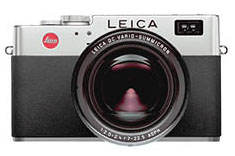
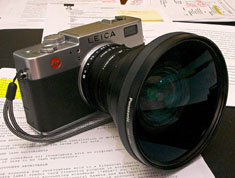
Digilux (Digital Lux) = A series of compact digital cameras by Leica Camera AG developed with Fuji from 1998, and then with Panasonic since 2002. The first models, Leica Digilux (1998) and Leica Digilux Zoom (2000) and Leica Digilux 4.3 (2000). With Panasonic, Leica Camera AG made the Leica Digilux 1 (2002), Digilux 2 (2004) and Leica Digilux 3 (2006). See my article Leica Digital Compact Cameras for more. Lux comes from Latin and means Light.
Graphic designer Charles Grant with his Leica Digilux 2 in 2009. © Thorsten Overgaard.
Digital Zoom = Refers to zooming in on a scene digitally. All that happens is that the camera zooms into the area of the sensor and records only that. The quality will be less as it's a smaller part of the same recording. Zoom is originally used for an optical zoom lens where optics move inside the lens so as to enlarge the subject optically. This does not reduce the image quality/resolution the same way as digital zoom does. Generally, digital zoom can be performed on any picture later in the computer as it's in essence simply a crop.
In the Leica Q Digital Zoom refers to the possibility to change the crop from 28mm to 35mm or 50mm (and for the Leica Q2, 75mm as well). Choosing a different "digital zoom" simply shows frame lines for the chosen focal length in the EVF and in the final image (that is in fact the full 28mm frame), there is a pre-selected crop for the chosen frame when you open the image in Lightroom or Capture One Prom.
Digital zoom is in essence a crop of the image to make the scene appear closer. © 2017 Thorsten Overgaard.
Narrow Dept Of Field in use: The face is in focus, the hand in front is slightly out of focus, the background is much out of focus and blurry, reduced to an atmosphere. Leica 50mm Noctilux f/1.0 at f/1.0 and 2.5 meters distance to subject in focus. © Thorsten Overgaard.
 |
|
 |
| 50mm f/1.4 lens at f/1.4. |
|
50mm f/1.4 lens at f/5.6 |
| |
|
|
| |
 |
| |
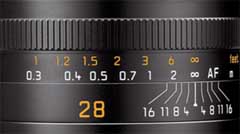
The lines on this 28mm lens indicates the DOF. Here the focus is on infinity, and if the lens is stopped down to f/1.6, objects from 1.8 meter to ininity will be 'acceptable sharp'. |
| |
|
DOF = Depth of Field (or Depth of Focus), an expression for how deep the focus is, or (more often use to express) how narrow the area of focus is. This is how much of the image, measured in depth or ditance, will be in focus or "acceptable sharp".
The appearance of the DOF is determined by:
1) aperture (the smaller the aperture hole is, the deeper is the depth of field, and opposite, the wider open a lens you se, the more narrow will the DOF be) and
2) distance to the subject (the farther away, the larger area is sharp; the closer the subject in focus is, the more narrow the DOF gets)..
The DOF scale measurement on top of the Leica lenses shows lines for each f-stop that indicates from which distance to which distance the image will be sharp. Shallow DOF is a generally used term in photography that refer to lenses with very narrow focus tolerance, like f/1.4 and f/0.95 lenses, which can be used to do selective focus; making irrelevant subjects in the foreground and background blurry so only the subjects of essence are in focus and catches the viewers eye).
in modern cameras like the Leica SL2, the camera has a DOF scale inside the viewfinder. As DOF is the same for all lens brands and designs, only depending on focal length, distance and aperture f-stop, the camera can calculate it and show a 'digital DOF scale" in the viewfinder.
Depth Of Field scale from Fujifilm, same lens with different aperture settings from f/2.0 to f/8.0.

Depth of Field: Focus is on the flowers and the photograph on the desk and the foreground and background is blurred as the depth of field is narrow. If one stop down the aperture of the lens from f/1.4 to f/5.6, more will be in focus. If one stop down the lens to f/16 even more (if not all) will be in forcus. Another rule: The closer you go to a subject (the less focusing range), the more narrow the Depth of Field will be. © Thorsten Overgaard.
DIS = Digital Image Stabilization. This is a feature often offered in video recorders and sometimes for tele lens still photography (so as to avoid motion blur when the lens is moving during slow shutter speeds).
| |
 |
| |
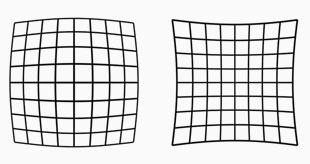
Lens distortion looks like this. The lines are not straight. Our eye uses distortion correction. Lens designers can design lenses so they have very little distortion, or they can make less complicated lens designs and "fix" the distortion in software. |
| |
|
Distortion = In photo optics/lenses: When straight lines in a scene don't remain straight because of optical aberration.
Lens designers can correct for distortion to a degree so the whole image field is perfect corrected and all lines remain straight. In modern lens design many designs rely on Software Distortion Correction (SDC).
The eye adjusts for distortion so we always see vertical and horizontal lines straight when we look at things. Even when you get new prescription glasses (if you use such), you will often experience distortion in your new glasses. After a few days they eyes have adjusted for the glasses and the distortion you saw to begin with is now gone. Software Distortion Correction (SDC) is far behind what the human eye can perform of adjustments. (Also see my definition on Perspective for more on the eye and optics)
DNG = Digital Negative, an open standard developed by Adobe. It is a single file that contains the raw image data from the sensor of the camera as well as date, time, GPS, focal length, settings, etc.
The alternative is a RAW file + XLM file where the RAW file contains the image information and the XML contains the rest of information about where, how and when the picture was taken.
A Camera Raw profile (that is specific for that camera) in the computer helps the software program, for example Adobe Lightroom, to translate the RAW data into the image.
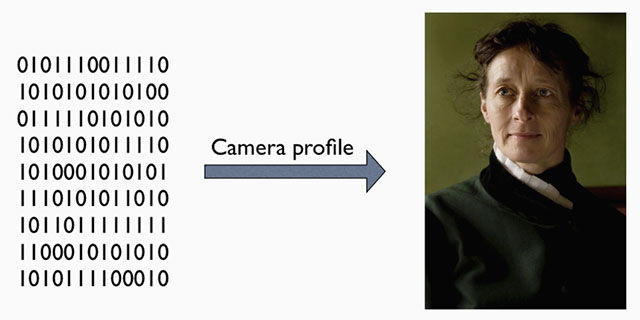
A raw file (or DNG) is simply the full recording of digital data (1's and 0's) from the sensor. In the computer, the sensor data is translated into the exact colors, via a camera profile.
Depth - Distance between front and back. Distance from viewer and object.
Dynamic range. The grade of ‘contrast range’ (or number of tones) a film or sensor, or simply a photograph, possess between bright and dark tones. The human eye is said to have a dynamic range of 10-14 ‘stops’ (but because we scan area by area and compile a concept of the overall scene, they eye is often thought to have a much higher dynamic range), Film used to have 7-13 ‘stops’ and some modern sensors have up to 15-17 ‘stops’.
Elmarit = Refers to the maximum lens aperture - here f2.8 . The name is obviously derived from the earlier (and slower) "Elmar" designation. Not every f/2.8 lens is called an "Elmarit" though, the most obvious current exception being the 50mm f2.8 Elmar-M collapsible lens which for nostalgia and marketing reasons has kept the original 1930's Elmar name (the 50mm f3.5 collapsible Elmar, manufactured 1930-59, was one of Leica's most famous and popular lenses). Vario-Elmarit is Leica Camera AG's name for zoom lenses.
EVF = Electronic ViewFinder. The Leica T/TL/TL2 uses the Leica Visoflex model 0020.
Exposure Bracketing = The possibility to set the camera to automatically record a series of images where the exposure is above and below what the camera measures. The idea is that at least one of the images will be correctly exposed.
Fn = Short for Function. It's a button or wheel you can program. The Leica Digilux 2 has no Fn buttons.
Focus, in - Sharp and clear in appearance. Focus - “The burning point (of a lens or mirror)”. In Latin the word focus meant fireplace or hearth. The word was probably first employed outside of its Latin literal use as “the burning point of a lens or mirror” in optics, and then came to mean any central point. The German astronomer Johannes Kepler first recorded the word in this sense in 1604.
| |
 |
| |
A 28 mm lens has a 74° viewing angle |
| |
|
Focal length = (also written as f-) = On the Leica 35mm Summilux-TL ASPH f/1.4 it is 35mm and originally referred to the distance from the sensor (or film in older days) to the center of focus inside the lens. Nobody uses that measurement, except those who construct lenses! For users of lenses, focal length refers to how wide the lens sees. The viewing angle, which is often given in for example 90° viewing angle for a 21mm lens, 74° viewing angle for a 28mm lens, 6° viewing angle for a 400mm lens, etc.
Each human eye individually has anywhere from a 120° to 200° angle of view, but focuses only in the center.
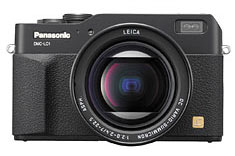
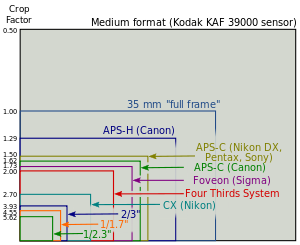
The Leica Digilux 2 has a sensor (a 2/3" type), which "crops" the traditional full-frame focal lengths with 4.0X. The Leica Digilux lens is 7mm - 22.5mm, but in "full frame term" it's a 28-90mm zoom.
Four Thirds - Also known as "4/3" - The Four Thirds System is a standard created by Olympus and Kodak for digital SLR camera design and development.
The system provides a standard which, with digital cameras and lenses available from multiple manufacturers, allows for the interchange of lenses and bodies from different manufacturers. Companies developing 4:3 cameras and/or lenses are Fuji, Kodak, Leica, Olympus, Panasonic, Sanyo, Sigma. See www.4-3system.com
A further development in this was Micro Four Thirds Systems.
Full Frame (FF) = The size of the sensor is 24 x 36mm which is the format Oskar Barnack and Leica Camera AG invented with the first Leica that was introduced in 1925. Many other formats invented since, such as APS, APS-C and all usually refer to Full Frame ratio, by which it means what size they have compared to Full Frame.
| |
 |
| |
Full Frame is "king of photography" |
| |
|
The 24 x 36mm Full Frame format is so "king of photography" that it has continued to be the ideal for all cameras. Besides this, there exists Large Format cameras such as 4x5" (100 x 125 mm) and Medium Format 6x6 (60 x 60mm amongst other sizes in that area).
ISO = Light sensitivity of the camera sensor is given in ISO (International Organization for Standardization). It's a standard that was used in film and is now used in all digital cameras also. The base ISO for the Leica TL2 sensor is around 100-150 which means that this is what the sensor "sees". All other levels are computer algorithms calculating the effect as if the sensor could "see" more (hence noise at higher ISO levels).
ISO goes in steps of doubling: When the ISO is raised from 100 ISO to 200 ISO, the camera only need half the amount of light to make the same picture. For each step in ISO to 400, 800, 1600, 3200, etc. the light sensitivity is doubled for the sensor (and the camera sensor only need half the light of the previous ISO to record the same image).

6400 ISO indoor photo. With modern cameras the ISO can go to 3200, 6400, 12,800 and even higher without loss of dynamic range and without digital noise. Leica M10 with Leica 50mm Noctilux-M ASPH f/0.95. © 2017 Thorsten Overgaard.
JPEG = A standard for picture format made in the 1990's by Joint Photographic Experts Group). Mostly referred to as JPG as in L1003455.JPG which would be the name for a JPG file from the camera.
Leica = A compound word derived from " (Lei)tz" and "(ca)mera". Apparently they were originally going to use "LECA", but another camera company already used a similar name in France, so they inserted the 'i' to prevent any confusion.

The word lens derives from lentil, because of the similar shape.
Lens - A piece of glass or similarly transparent material (like water or plastic). It has a shape so that it can direct light rays. The word “Lens” is used both for single piece of glass as well as a camera lens with several lenses that works together. The word lens if often used to refer to the entire camea lens, which is usually compose of seberal lens elements. From ‘lentil’ because similar in shape.
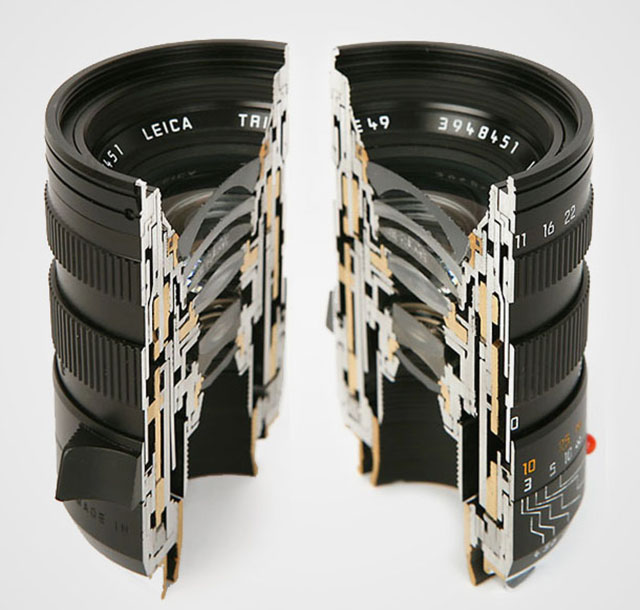
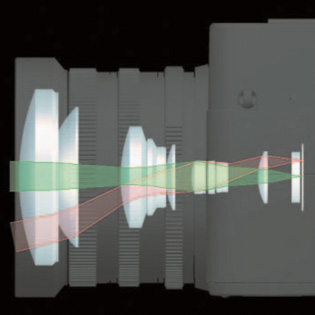
A camera lens consists of several shaped lens elements of glass. The lenses can also be made of simple cheap plastic as in "kit lenses" (sold with a camera as a kit to make a workable cheap package), but it is mostly very exotic glass (that can be heavy or light in weight, very hard or very soft in surface (esay to scratch or very resistant) with each optical glass recipe made to develop very specific qualities in how the glass and final lens treats light. As a general rule, high quality glass is soft, which is why some lenses has as their front and back element, a non-optical lens element that is there to protect the actual optical glass from scratches. As a side noite, Leica made their own glass laboraty, The Leitz Glass Laboratory, from 1949-1989, which deveopled 35 new glass types and took out more than 2,000 patents of glass recipes from more than 50,000 experimental melts of glass. These designs, or recipes, are still used today by the lens designers to obtain very specific optical results. Other lens manufacturers in the world of course have had their glass laboratories, and today one will find an interchange of glass patents amongst production facilities that service Leica, Nikon,, Fuji and so on with optical lens elements.
Lens hood = (also called a Lens shade or Ventilated Shade). A tube or ring attached to the front of a camera lens to prevent unwanted light from reaching the lens and sensor. In the past where lenses were not coated to prevent internal reflections inside the lens, the lens hood was often essential. These days where lenses are coated, the shade serves just as much as decoration and protection (bumper) as well.
ORIGIN Old English hod; related to Dutch hoed, German Hut 'hat,' also to hat.
Lens hood or Lens shade or ventilated shade. In the picture is a ventilated shade with clip-on mount to a 50mm f/2.0 lens. Ventilated means it has openings that allow for view from the viewfinder.
Light = Tiny particles called photons that behaves like both waves and particles. Light makes objects visible by reflecting off of them, and in photography that reflecting off of subjects is what creates textures, shapes, colors and luminance. Light in its natural form (emanating from the sun) also gives life to plants and living things, and makes (most) people happier. So far, nobody has been able to determine exactly what light is. The word photography means “writing with light” (photo = light, -graphy = writing). Read more about light in my book Finding the Magic of Light.
Live View = This is the ability to see the image the sensor see, live, via the screen, or via an electronic viewfinder (EVF).
MACRO = Macro lens. The Leica 60mm APO-Elmarit-Macro ASPH f/2.8 is both a 60mm lens for portraits, landscapes, etc. as well as a near focus macro. The Leica Digilux 2 also works as a Macro lens. The word macro comes from Greek makros ‘long, large.’

The word macro comes from Greek makros ‘long, large.’ The Leica 60mm APO-Elmarit-Macro ASPH f/2.8 is both a 60mm lens for portraits, landscapes, etc. as well as a near focus macro. © Thorsten Overgaard.
mm = millimeter(s), as in a 50mm lens. (Earlier in lens history lenses focal length was given in cm = centimeters; as in a 5 cm lens). For anyone used to centimeters and millimeters, it’s no wonder. But if you grew up with inches, feet and yards, you may have had a hard time grasping what a 50mm lens was. But as lenses were designed first in Europe, the metric system with centimeters and millimeters was used to describe lenses.
The reason a 50mm lens is a 50mm lens is that there is 50mm from the focus plane (the film or sensor) to the center of focus inside the lens. When photography was a young subject, it was engineers who made it all, and the users were expected to understand. The engineers were so into the making of the lenses, that it apparently never dawned upon them that today’s users would think of a 21mm lens as a wide angle lens rather than a lens where there is 21mm from the sensor to the center of focus inside the optics.
Noctilux = Also known as "King of the Night" because "Nocti" means Night and "Lux" means Light. The f/1.0 lenes from Leica are named "Noctilux". The first Leica Noctilux lens was the 50mm Noctilux f/1.2 which shortly after it's introduction was improved to the 50mm Noctilux f/1.0. In the current model the f-stop has been improved further to f/0.95.
"Noctilux" refers to the maximum lens aperture - here f1.0 . "Nocti" for nocturnal (occurring or happening at night; ORIGIN late 15th cent.: from late Latin nocturnalis, from Latin nocturnus ‘of the night,’ from nox, noct- ‘night.), "lux" for light. The Leica Noctilux 50mm f1.0 is famous for enabling the photographer to take photos even there is only candleligts to lit the scene. See the article "Noctilux - King of the Night"
OIS = Optical Image Stabilization. This is used in tele lenses where blurring motion of the camera from inevitable vibrations are adjusted by the lens. At low shutter speeds and/or with long lenses, any slight movement would result in a picture with "motion blur" unsharpness. The Leica TL2 supports optical image stabilization when A) OIS is turned on in the camera menu, and B) when you use lenses with OIS (the Leica SL longer lenses has OIS). An alternative is EIS = Electronic Image Stabilization, which the Leica T has. Here the problem of "motion blur" is corrected electronically after, which might lead to image degradation. However, the larger the sensor resolution, the less one will notice small 'degradation'.
Optic = Eye or vision. From French optique or medieval Latin opticus, from Greek optikos, from optos ‘seen.’
Perspective - The way objects appear to the eye; their relative position and distance. Also, selective focus (foreground and background out of focus) can change the perception of perspective (also see Three-dimensional). A wide angle “widens” the perspective and makes objects further away appear smaller than they are to the eye, and objects nearer, relatively larger than they are to the eye. A tele lens will “flatten” the perspective and often objects further away will appear relatively larger than nearer objects, compared to sizes in real life. A 50mm lens is the one closest to the perspective and enlargement ratio of the human eye.
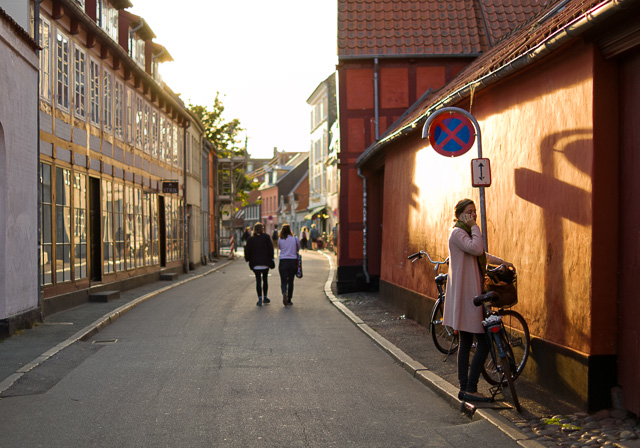
Perspective is relative position and distance. As here where the girl in front is more than two times taller than the people walking, and 8 times taller than the people in the far background. Also, the parts of the buildings closer to the viewer are "taller" than the parts of the same building further away. Late afternoon sun in Denmark. Leica TL2 with Leica 35mm Summilux-TL ASPH f/1.4. © 2017 Thorsten Overgaard.
ROM = Digital code on Leica R lenses. It was made for the latest of the Leica R lenses in the 1990's so the Leica R8 and Leica R9 could recognize the lens; and each lens was fine-tuned with digital information for the camera to adjust exposure and other very exact. ROM contact could also be added to older R-lenses. In the Leica CL, if you have the R to L adapter and you are using ROM lenses then the camera will recognize the lens.
S = Single image. In the menu of the Leica TL2 you can choose between single image at the time, or Continuous where the Leica TL2 will shoot series of 20-29 pictures per second as long as you hold down the shutter release. In Single mode it takes only one photo, no matter how long you hold down the shutter release.
SDC = Software Distortion Correction. A correction of lens distortion (not straight lines) applied in the camera and which is part of the DNG file. In Lightroom the SDC of the camera file is applied automatically (and cannot be removed), in software like AccuRaw one can open the DNG file without the SDC correction. Sean Reid Reviews have written a good article on what SDC is and does in "Software Distortion Correction".
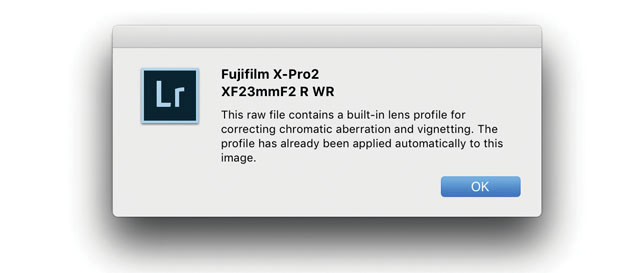
SDC (Software Distortion Correction): In Lightroom the correction profile for the Fujinon 23mm is applied automatically and cannot be turned off. If you go into Develop mode in Lightroom and look under Lens Correction > Profile, you will see a message in the bottom with an exclamation mark. When you click on that, you get the message above.
Sensor = A device that detects a physical property (like light) and records it. A camera sensor is a plane plate with thousands of small “eyes” with a lens in front of each, which each individually records the amount of red, green and blue light rays that comes through the lens. together Red, Green and Blue form all colors of the spectrum. From Latin sens- ‘perceived’
Saturation: How colorful, intense or pure the color is. Less saturation would be less colorful, more saturation would be more colorful. In today’s photography, desaturating a photo on the computer will gradually make it less and less colorful; and full desaturation would make it into a black and white photo.
Sharpness - See “Focus”
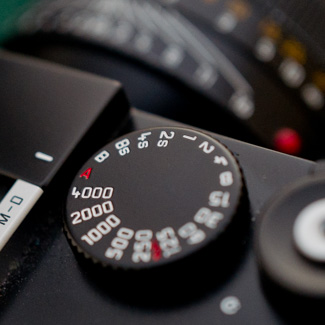
Shutter speed dial - The dial on top of the Leica M where you can set the shutter speed manually. It can also be set to A which stands for Aperture Priority (where the camera suggests a shutter speed; or when you move the dial away from A, the camera will show arrows in the viewfinder, suggesting which direction to change the Aperture to, to get the correct exposure).
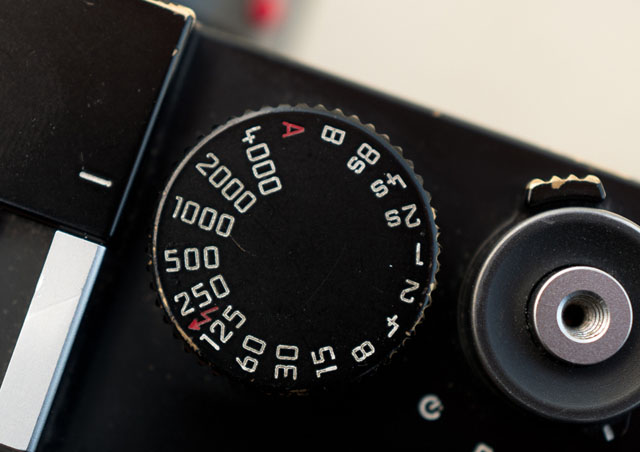
Shutter speed dial set to 1/1000 of a second.
SLR = Abbreviation for Single-Lens Reflex; the lens that forms the image on the film/sensor also provides the image in the viewfinder via a mirror. The Leica Q has no traditional viewfinder and no mirror. the image seen in the EVF is what the sensor sees.
Summicron - Refers to the maximum lens aperture - here f2.0 . There are many guesses how this name came about, a popular one eing that the "summi" came from "summit" (summit means the highest point of a hill or mountain; the highest attainable level of achievement) while the "cron" came from "chroma" (ie. for colour). Not so: The name (Summi)cron was used because the lens used Crown glass for the first time, which Leitz bought from Chance Brothers in England. The first batch of lenses were named Summikron (Crown = Krone in Deutsch). The Summi(cron) is a development from the orignal Summar (the 50mm f2.0 lens anno 1933)
Summilux = Refers to the maximum lens aperture - here f1.4 , "-lux" added for "light" (ie. the enhanced light gathering abilities). In Leica terminology a Summilux is always a f/1.4 lens and a Summicron is a f/2.0 lens.
Three-dimensional = Having the three dimensions of height, width and depth. In photography and lens design, three-dimensional effect is also the perception of even small micro-details; the texture of skin can appear flat and dead or three-dimensional and alive. Also, selective focus (foreground and background out of focus) can change the perception of depth. Also see Perspective.
Three-dimensional = Having the three dimensions of height, width and depth. Melrose Avenue in Los Angeles. Leica TL2 with Leica 35mm Summilux-TL ASPH f/1.4. © 2017 Thorsten Overgaard.
Vario- is the Leica Camera AG name for zoom lenses. Vario-Elmarit and Vario-Summicron and so on.
Viewfinder a device on a camera showing the field of view of the lens. Also known as the German word "Messucher" (or Meßsucher).
1) A built-in viewfinder in a camera that simply show the frame you get when you look through the viewfinder.
2) A rangefinder viewfinder which is also used to focus the lens. In Leica M cameras two pictures has to meet and lay 'on top of each other' for the picture to be in focus.
3) An external viewfinder, usually on top of the camera in the flash shoe, so as to show the field of view of lenses vider than what the built-in viewfinder can show (15mm, 21mm, 24mm, 28mm etc viewfinders exist)
4) Very simple "aiming-devices" on top of a camera that is simply a metal frame without any optics. Just a frame, as for example very old cameras (the original Leica), or when using cameras in diving where you can't look through the camera.
|