Leica M Type 240 Digital Rangefinder Camera - Page 39
Index of Thorsten Overgaard's user review pages on Leica M9, Leica M9-P, Leica M-E, Leica M9 Monochrom, Leica M10, Leica M10-P, Leica M10-D, Leica M10-R, Leica M10 Monohcrom, Leica M11, Leica M 240, Leica M-D 262, Leica M Monochrom 246, Leica SL, Leica SL2, Leica SL2-S, as well as Leica TL2, Leica CL, Leica Q, Leica Q2 and Leica Q2 Monochrom:
By: Thorsten Overgaard. October 12, 2014. Edited December 30, 2023.
Add to Flipboard Magazine.
The Ideal Menu Settings of the Leica M 240
This is the basic setup I recommend. If you just opened the box and are eager to get going, this is how to set the menu. When you set your camera like this it will work. You can basically scroll fast throughout the page and copy the settings, and then return later for more in-depth understanding of the choices.
With the Leica Firmware Version 2.0.1.5 that came out on July 1st, 2014 I have changed my basic settings of the Leica M 240 compared to what I described on Page 30. For how to install the update, see further down.
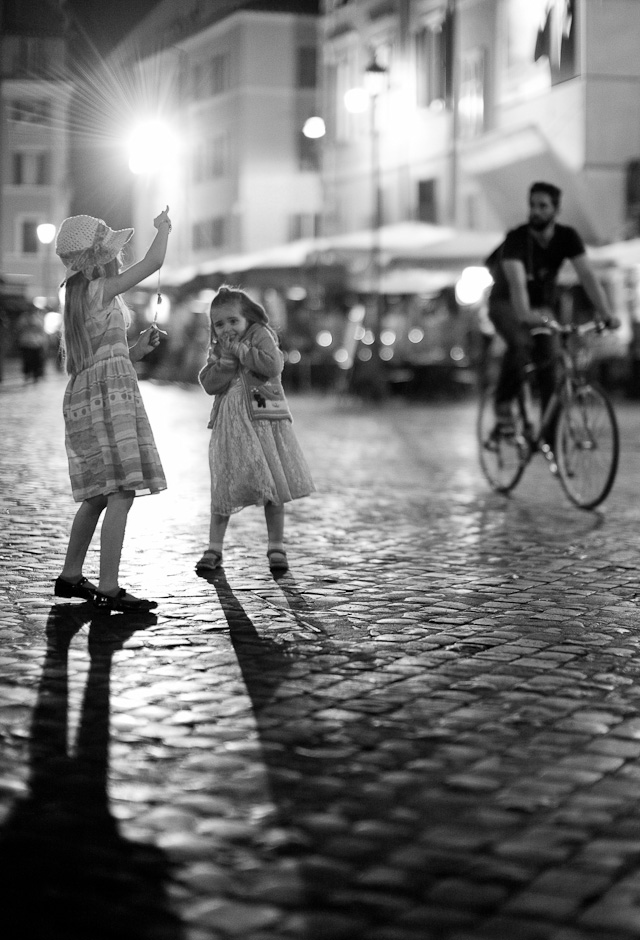
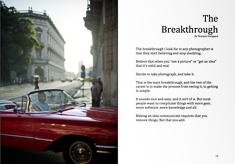
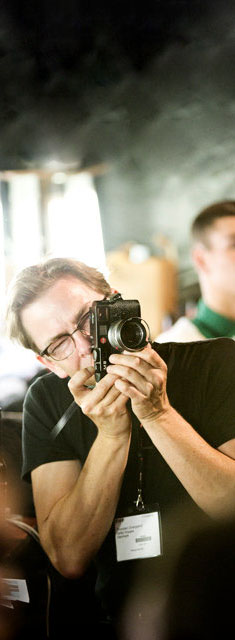
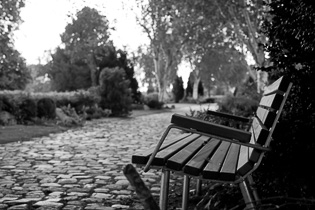
"Lightmakers", Rome, May 2014. Leica M 240 with Leica 50mm Noctilux-M ASPH f/0.95 at f/0.95. 3200 ISO.
| |
|
|
|
|
| |
Buy the new eBook
"The Freedom of Photographic Expression"
by Thorsten Overgaard |
|
| |
|
|
|
|
| |

"The Freedom of
Photographic Expression"
eBook for computer, Kindle and iPad
October 2016 (268 pages) |
|
In this easy to read and apply eBook,
Thorsten Overgaard takes beginners and experienced photographers through the basics of controlling the light and the camera.
This book covers the technical side of photography from beginners level to semi-pro, features a number of photographs by Thorsten Overgaard and chapters on his philosophy on photography.
Only $148
| |
|
|
| |
Buy Now

Instant Delivery |
|
| |
|
|

|
|
| |
"I've bought the new book - made a start reading it - it is really interesting.
I know it’s basic at the beginning but it isn't written in a patronizing way. I have been taking photographs for many years and have been lucky enough to be paid to take them for the last seven years; but it's always good to be taken back to the start"
P. S. (UK) |
|
""Really enjoy your writing and teaching"
D. K. (USA)
"I love your insights on photography."
D.B. (USA)
★
★
★
★
★
★ |
|
|
The system in my website is that I write more as I move on, but leave what I wrote before as is. That way anyone can pick up from any level, and always find what I originally wote in the same place as when I first wrote it. If you have been eagerly reading everything since this M article started in September 2009 you may not appreciate it as much as the new Leica M9 user who just bought his first Leica M9 on eBay and now has to go through the learning curve you spent the last five years climbing. But I just wanted to let you know how it works, and why.
I just noticed today that with the launch of the new Leica Camera AG website in May 2014, all links have again changed and nobody can revisit reference pages they knew well. And the Leica M9 information, as well as Leica M9 manuals had simply been deleted, as if the camera had never existed. I maintain links to Leica firmware and manuals on my Leica Camera Compendium page.
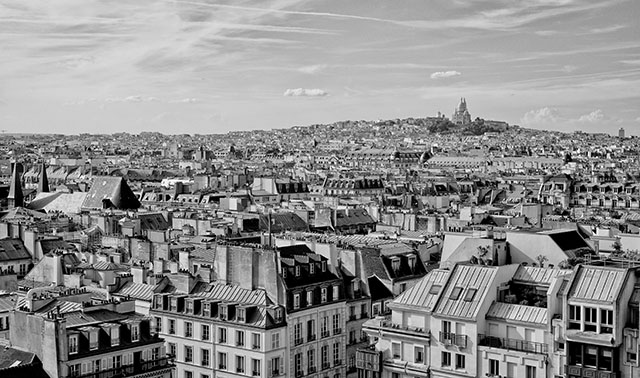
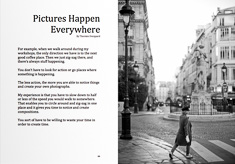
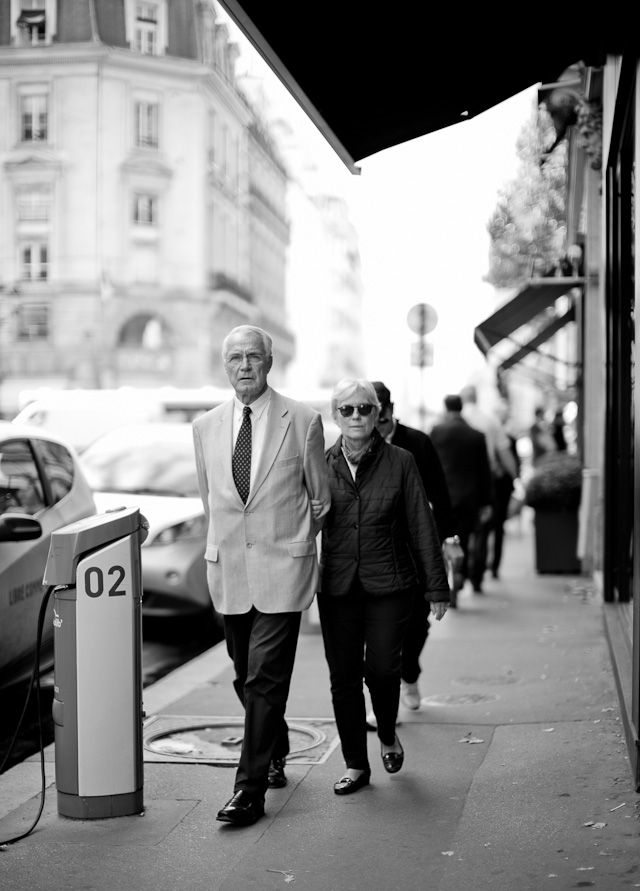
One of the great things about Paris is that they left all the old buildings, statues and paintings and don't rebuild the city every two years when some schmuck thinks he knows a better way of doing it. It's called cultural heritage. Leica M 240 with Leica 50mm Summicron-M f/2.0 II.
| |
|
|
|
|
| |
 |
|
| |
|
|
|
|
| |
Full Leica M240 Pack:
Video Masterclass
+
Street Photography Masterclass
All about the Leica M240 video instruction masterclass (17 videos)
+ Street photography video masterclass
filmed in New York (11 videos).
+ 8 Bonus videos
+ Styles for Capture One for Leica M240
+ Lightroom Presets. for Leica M240
Normal price $1,192.00
Save 60%
Only $476.00
USE CODE: "ILOVEM240"
Order now. Instant delivery.
100% satisfaction or money back.
Item #1844-1848-0823 |
|
Leica M240
Video Masterclass
Two hours of video class
with Thorsten von Overgaard
+
20-page checklist for learning
every corner of the Leica M240.
For Computer, iPad or smartphone.
More info
Only $398.00
Order now. Instant delivery.
100% satisfaction or money back.
Item #1844-1017 |
|
| |
|
|
|
|
The Leica M 240 Menu Explained
Firmware Version 2.0.2.5
(You can download the latest firmware edition for Leica M240, Leica M-E, Leica M246 Monochrom and other firmwares from the Leica Camera website > Service > Downloads, or from my backup downloads at Leica Camera compendium site).
This is the basic setup I recommend. If you just opened the box and are eager to get going, this is how to set the menu. When you set your camera like this it will work. You can basically scroll fast throughout the page and copy the settings, and then return later for more in-depth understanding of the choices.
The battery time will be long, the preview will be black and white, and your camera will store both a color DNG and a black & white JPG of each image.
(For basic video settings, see page 36 of this article).
Look: There is a  and a and a  button on the back of the camera, down in the left side. As well as the INFO (the silver button by your right thumb). button on the back of the camera, down in the left side. As well as the INFO (the silver button by your right thumb).
The SET screen is quite simply one screen:
The DNG + JPF Fine is how I get both a DNG color file and a JPG black & white file of the same photo. There is also a JPG basic setting but that is simply a JPG file that is about 1/3 the resolution of the JPG fine. I cannot see any reason whatsoever to use other than JPG fine.
The JPG fine has the same resolution as the DNG in terms of pixel resolution and print size. The print quality is the same, so to say.
The difference is that a DNG (Digital NeGative) is the entire raw data set from the sensor, whereas the JPG fine is one flat layer of data.
The JPG is a "final file" whereas the DNG is all the raw data the sensor recorder, enabling you to change the exposure, colors, etc based on actual recording data. One could say that the DNG is a tower of eight or more JPGs on top of each other, with different exposures, and with Lightroom you can adjust the final image by using the bits and parts from each stacked image that you find works the best.
You can actually also adjust the JPG in Lightroom, but then it is done based on just that single layer of image data, using computer algorithms to calculate how it should look when you change exposure and such. All this is described more in my Lightroom Survival Kit and Capture One Survival Kit.
 |
SET screen 1 of 1 |
|
|
|
|
|
200 |
|
White Balance |
Automatic |
|
File Format |
DNG + JPG fine |
|
JPEG Resolution |
24 MP |
|
Video Resolution |
1080p@25fps |
|
Exposure Compensation |
Off |
|
Exposure Metering |
Center-weighted |
|
User Profile |
--- |
|
|
|
|
|
|
|
|
|
|
* If you live in the US or Japan, the Video Resolution should be 1080p@24fps.
I generally would advice against setting and using User Profile. A User Profile is simply that you save all the current settings in the camera as a profile.
I find it is a thing for nerds: Unless you are very organized, using User Profiles will eventually get you into trouble. Because how was it the profile was set? And did you remember to change profile when you should?
What I find better is to have no User Profile and simply always have the same settings till you change for example ISO.
This gives certainty that nothing changed that you didn't change, and it is easy to remember and know what the settings are. One of the prime qualities of a Leica, in my opinion, is that you manage the camera and it doesn't start to outsmart you with choices and settings.
However, what some people who use User Profiles may do with this, is store the entire set of settings they have choosen for one lens as a user profile. Some people will also store a user profile defining all the settings for evening, another user profile for day, one for sunshine, etc. And of course a user profile for every family member or staff that uses the camera.
Leica M240: High and low ISO
The basic ISO of the Leica M 240 is 200, which in theory should be the optimum quality. The highest ISO I recommend is 3200 ISO which should maintain correct colors and very limited noise. My setting is very simple in that I set it to 200 ISO outdoor and 3200 ISO indoor and in the evenings.
It's a good habit to stay in control and in the know of what your camera settings are. That is why AUTO ISO is a bad habit to get into. Don't.
Set your ISO yourself and know what it is. 200 ISO in daylight, 3200 ISO when it gets dark.
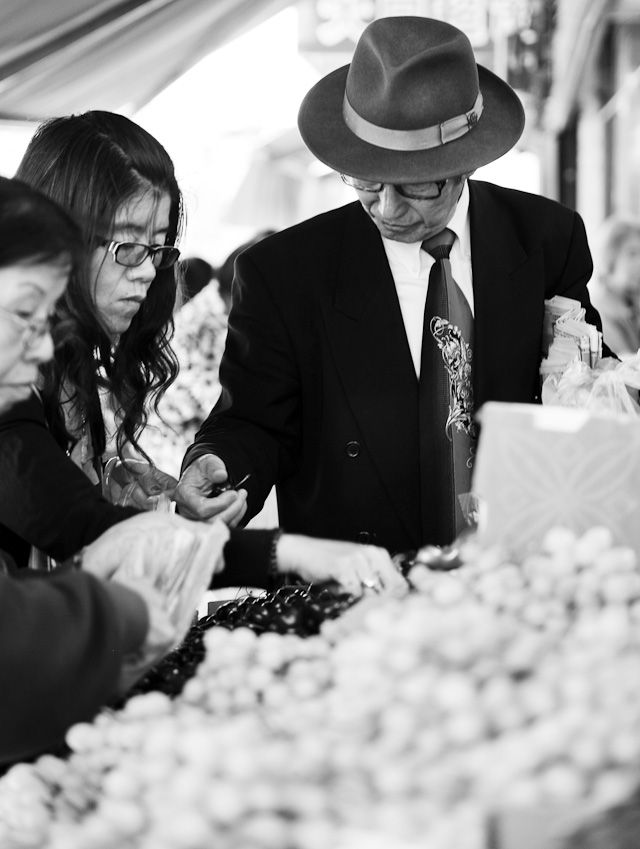 Chinatown in San Francisco. The fruit market on Stockton Street. Leica M 240 with Leica 50mm APO-Summicron-M ASPH f/2.0 Chinatown in San Francisco. The fruit market on Stockton Street. Leica M 240 with Leica 50mm APO-Summicron-M ASPH f/2.0
Does your Leica M 240 take JPG only?
When you opened up the box the first time, or after you got your Leica M 240 back form Leica service (or after you installed a new firmware), the camera has been set to factory settings again.
1) There is one important setting you need to change, and that is that the camera from the factory (and when reset), only takes JPG photos. You should be taking DNG photos as a minimum, and preferable DNG + JPEG Fine photos at the same time (with the JPG set to black & white).
From time to time, especially after the camera may have reset itself, check this setting. I have experienced people who was unaware of this taking JPG pictures a while day when they thought they were photographing in DNG. It's not the end of the world, but DNG is better than JPG for any color photos.
The MENU screen consists of five screens:
Notice that as you scroll down the menu using the thumb wheel or the arrows up/down. The page indicator on the left changes (yellow here to make it more visible, but white on the camera), and the subject/title on the top of the page changes.
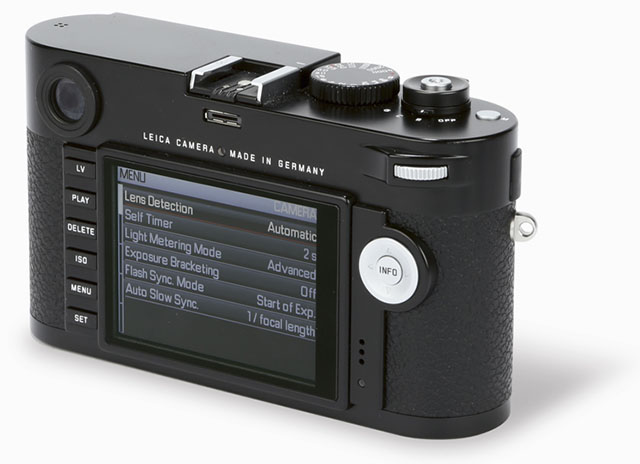
Menu screen 1 of 5
|
Menu screen 1/5 "Camera" |
|
|
|
|
|
Automatic |
|
Self Timer |
2 s |
|
Light Metering Mode |
Classic |
|
Exposure Bracketing |
Off |
|
Flash Sync. Mode |
Start of Exp. |
|
Auto Slow Sync. |
1 / focal length |
|
|
|
|
|
|
|
|
|
|
|
|
|
|
|
|
When Lens Detection is set to Automatic the camera will write which lens was used into the EXIF file (EXchangeable Image File format) in the image, as long as the lens has the 6-bit code engraved on the bayonet.
| |
 |
| |
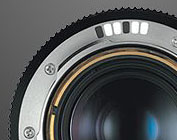
A 6-bit code on a Leica M lens |
| |
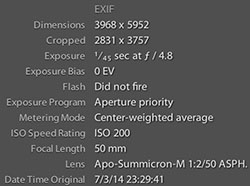
EXIF information
|
All new lenses have the 6-bit code engraved, and most older lenses can get engraved by Leica Camera AG or by a third party. Only some older lenses which have screws where the code should be engraved cannot be engraved by Leica Camera AG (such as for example the 50mm Summicron-M f/2.0 Version II from the 1960's).
Which lens used is nice information to have for later review of images. I usually put the lens and camera in the keywords of my images because I like to know. I don't trust that the EXIF information will always be available across all software.
The lens code will also activate corrections of the lens digitally, if there is any corrections to do. This is not a feature I find very usabe or nesessary: The lens has a look, and most Leica lenses are quite well corrected as a final piece of optical work.
I find it unnecessary to correct digitally, and in my opinion Leica Camera AG should leave such tricks to those lens producers who are unable or unwilling to make near-perfect lenses but want to rely on correction in software (as for example Hasselblad with their wide angle lenses).
Leica Camera AG introduced so-called ROM contacts on Leica R lenses back in 1990 so the camera had adjustment-information for each lens (the aperture was fine-tuned for each lens individually, and the ROM contact told the camera how much to adjust). Considering all the work to get the ROM contacts, not to mention the reader on the camera and the electronics to adjust this ... it wasn't worth the effort.
The 6-bit codes are the same in the way that users tend to put too much significance into this little feature that doesn't do much other than ... telling the camera and the user which lens was used. In my opinion a very useful information and one I want for all my lenses.
Leica 6-bit coding on older Leica M lenses
In my Leica Lens Compendium is a complete overview of all Leica lenese ever made. The lenses marked with 6* are the lenses that can be updated with 6-bit code. Contact Leica Camera AG Customer Care for price and shipping.

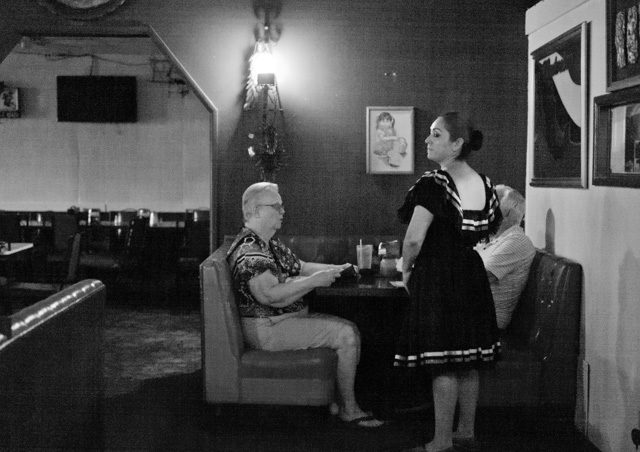
The American diner experience on 4th of July 2014. San Francisco. Leica M 240 with Leica 50mm APO-Summicron-M ASPH f/2.0
| |
 |
| |
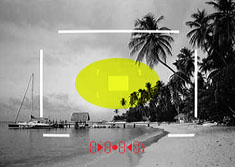
Above: The lightmeter measures an area of 1/3 of the sensor.
It is not 1/3 of the full viewfinder (below) but 1/3 of the focal length used; in this example a 35mm (the white frame lines indicates the area covered by the focal length) |
|
|
Light Metering Mode should be set to Classic to have the light meter perform as the Leica M9 and Leica MM - which is an oval in the center of the image the size of 1/3 of the frame.
The metering modes seem to confuse even Leica Camera AG to a degree that not even their manual can explain. When you have read the manual, you have no idea what metering modes the camera has.
Very simply explained, the Leica M has a Classic mode and a
Mode. In Classic there is only one method, in Live View you get the choice of three methods.
My opinion is to disregard Live View overall. That leaves just Classic. Nice and simple, and it works.
The curious thing is that when you use the EVF-2 Electronic Viewfinder, you see a realtime (Live View) image of the exposure, which is fine.
In short, Classic is the way I prefer and recommend and have written about in the light metering section of Page 31. Classic aligns with the idea that you are in control of the camera and know everything that is going on.
However, in Firmware version 2.0.1.5 Leica added a Classic/Live View Off mode as well in this menu. Users can make sure not to have Live View. I would not use that. If the SET menu is set to Classic, it is classic (meaning no Live View), except of course when you use EVF-2 and (naturally) have Live View turned on and want to see the realtime exposure of the image (if you turn off Live View that won't work and you have to change settings to use the EVF-2).
If one sets the metering mode to Advanced one turn on the Live View for light metering (using the image on the sensor rather than the built-in light metering in the body). And then one has to go back to the SET menu to tell if one prefer Spot (Live View) metering or Multifield (Live View).
The Leica M Type 240 has three light metering methods. The Classic Center-weighted, intelligent metering called Multi-field and a Spot metering.
Classic
Center-weighted: |
|
Advanced
Center-weighted: |
|
Advanced
Spot: |
|
Advanced
Multi-field: |
 |
|
|
|
 |
|
|
| Classic |
|
Live View |
|
Live View |
|
Live View |
Does your Leica M 240 make noises?
If your Leica M 240 makes noises after you opened up the box the first time, or after you got it back form Leica service (or after you installed a new firmware), what most likely happens is this type of noise:
1) When you turn on the camera, it sounds like the camera takes a picture, and
2) When you take one picture it sounds like the camera takes two. Of if you take three pictures, it sounds like the camea takes four pictures.
The resason for this is that the light metering in the Leica M 240 has been set to Advanced. This means that when you turn on the camera, the shutter curtrain goes up so the light meter can read the light from the sensor. The noise you hear is the curtain going up.
And again, when you take a picture, the shutter goes down after the iamge, but then in the end of a shooting series, the shutter opens up once more to read the image.
Handling: What you have to do is to set the camera to Classic metering in the SET menu, and to Center-Weighted in the MENU (screen 2).
This mechanism (and the "noise" or shutter sound) is the same in Live View, but here you see the image in the EVF-2 or on the screen, so you are aware that the cameras shutter curtain had to go up. With Live View off and the "noise" or sound continuing, it may seem like the camera is taking pictures without actually doing so.
Advertisement:
Menu screen 2 of 5
|
Menu screen 2/5 "Image" |
|
|
|
|
|
Standard |
|
Saturation |
Standard |
|
Contrast |
Standard |
|
Film Mode |
Black-and-white |
|
Color Space |
sRGB |
|
DNG Compression |
On |
|
|
|
|
|
|
|
|
|
|
|
|
|
|
|
|
Sharpness, Saturation and Contrast only applies to the JPG file. They should be set to Standard. The DNG is always the raw, unaltered data from the sensor. No matter what you change in the settings, it will stay the same DNG file: A complete recording of all the sensor saw.
My philosophy is to leave original files as original as possible. You can add sharpness later, and the right step to add sharpness is actually just before you print an image, put it on a website or they print it in a magazine. You can't generalize which sharpness would apply the best to future use. So you leave the original file from the camera as untouched as possible. Hence you choose Standard.
I set Film Mode to Black-and-white here in Menu screen 2 because I set the camera to DNG + JPG Fine in the SET menu above. This setting (Film Mode) is where you decide how the JPG file (and video recordings) will be. The DNG will always contain all information recorded by the sensor, hence it will always be in color.
The Film Mode can also be set to Vivid Colors which can be quite nice and make the video from the beach more sparkling and colorful. There is also Smooth color film setting which will produce a muted color JPG file that may be closer to how the colors will look on a computer screeen (the display of the Leica M 240 tends to have warmer and more saturated colors, along with an annoying blue tint on some screens).
Color and black & white side by side
When Lightroom imports the images, it will always import both the DNG and any JPG files. You can set Lightroom to either show or not show the JPG next to the DNG. So if you set it to not, you will never see the JPGs, but they will be stored in the same folder as the DNG files on your computer when you import the images from the SD-card.
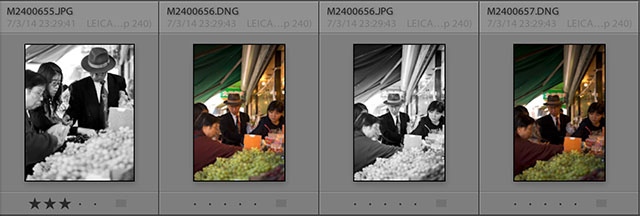
In Lightroom the JPG Fine in black & white is side-by-side with the same color image in DNG
Digital Color Filters in the Leica M 240
I met product manager of Leica Camera AG, Stefan Daniel back in January 2013 at the factory and mentioned that so many Lecia M Monochrom users like to use color filters in front of their lenses. I shared an idea with him that they might look into making electronic color filters. Simply profiles that would tweak the cameras into adjusting the overall image as if there was a red filter or green or yellow filter in front of the lens. Same technology as when you adjust the white balance.
Stefan Daniel said it couldn't be done because the MM doesn't see colors. The separation of colors in front of the sensor of the Leica M Monochrom has been removed. But he would mention it to the guys.
So imagine my surprise when a few months later I saw this feature of digital color filters in the Leica M 240. Whether or not I inspired this or Stefan Daniel more likely didn't reveal what they were working on, I should be happy to test this feature.
| |
 |
| |
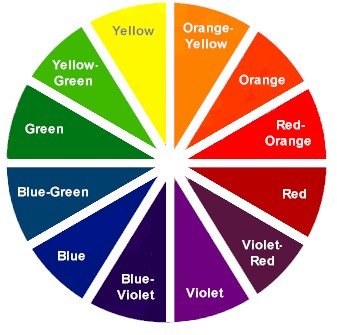
A color wheel. Complementary colors are the opposite on the wheel. The filter you choose makes the same color as the filter brighter and the complemtntary darker and of course affects all other colors as well. |
| |
|
For many reasons I actually haven't gotten into using the digital color filters (or contrast filters) in the Leica M 240.
But here is how it works: When the setting is set to Black-and-white, the sub-menu contrast filters appear, and inside that you may choose between Yellow, Orange, Red, Green or Blue filters.
|
The sub-menu for Contrast Filters: |
|
|
| BLACK-AND-WHITE |
CONTRAST FILTER |
|
|
|
|
Yellow |
|
Orange |
|
Red |
|
Green |
|
Blue |
|
|
|
|
|
|
|
|
|
|
|
|
|
|
|
|
This will work just as if you put a piece of colored glass in front of the camera lens:
Red filter will make red colors brighter and darken the complementary color green.
Yellow filter makes yellow colors brigher and darken the complementary color violet (and blue-violet). And so on.
If you photograph light-skin people in black & white with a red filter their skin will appear milky and white. I know because when I was a teenager I had a red-filter on my Nikon 50mm lens most of the time so I could see the world as close to monochrom as possible. Today I wouldn't recommend it because it washes skintones out a bit.
Amongst Leica M Monochrom users who have invested in color filters, the Green, Yellow and Orange filters seem to be the most popular.
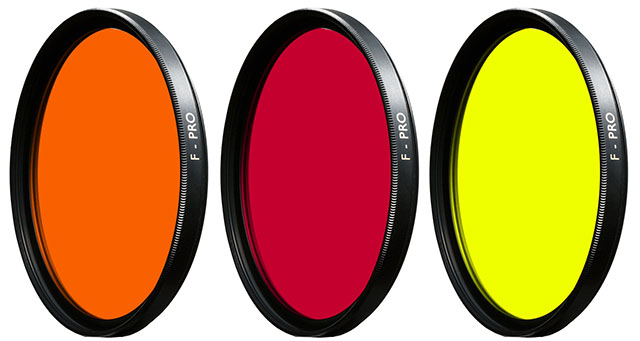
A normal color filter in front of the lens will normally take 2 to 4 stop of light away. Digital filters doesn't reduce the amount fo light. It's pretty cool.
Overview of the tones, contrasts and filters in the Leica M 240
Here is a short overview as to how the black & white tones change in the Leica M 240 black & white images when the contrast filters are applied:
 |
|
 |
| Color image from the DNG |
|
JPG Fine: Black-and-white (also called Neutral) |
| |
|
|
 |
|
 |
| JPG Fine: Vivid color film setting |
|
JPG Fine: Smooth color film setting |
| |
|
|
 |
|
 |
| JPG Fine black-and-white: Contrast Filter as Yellow |
|
JPG Fine black-and-white: Contrast Filter as Orange |
| |
|
|
 |
|
 |
| JPG Fine black-and-white: Contrast Filter as Red |
|
JPG Fine black-and-white: Contrast Filter as Green |
| |
|
|
 |
|
 |
JPG Fine black-and-white: Contrast Filter as Blue
This one was made black & white in LR (see the image to the right) |
|
JPG Fine black-and-white: Contrast Filter as Blue
This one has a blue tint out of the camera for some reason. That's why I changed the setting to black & white in Lightroom to compare it to the others (see the photo left). |
| |
|
|
 |
|
 |
| JPG Fine black-and-white: Vintage Tone |
|
JPG Fine black-and-white: Blue Tone |
Additional digital filters for Vintage look and Blue look
The menu activated when you choose Black-and-white also offers Tone where you may choose to make the black & white JPG Blue (blueish) or Vintage (brownish). For my use where I more often than not use the JPG Fine black and white file as original for exhibition prints, web and all, I wouldn't use any "effect-filters" to get a vintage or bluish look. I would stay as close to original as possible and add other looks in editing in Lightroom. It's easier to add a special look than removing it.
|
The sub-menu for Contrast Filters |
|
|
|
|
|
|
|

San Francisco. Leica M 240 with Leica 50mm APO-Summicron-M ASPH f/2.0.
Menu Screen 3 of 5
|
Menu screen 3/5 "Setup" |
|
|
|
|
|
Medium |
|
EVF Brightness |
Medium low |
|
Frameline Color |
Red |
|
Focus Peaking |
Red |
|
Focus Aid |
Automatic |
|
Histogram |
Standard |
|
Clipping Definition |
2 / 253 |
|
Auto Review |
1 s |
|
|
|
|
|
|
|
|
|
|
The Monitor Brightness is set to automatic when you take the camera out of the box. There is a small round sensor over the preview screen on the back of the Leica M 240 that mesures the ambient light and adjusts the screen so that the screen will be darker inside than in the sunshine outside (much like a computer screen or smartphone screen does). However, a screen should always be the same so that you can judge the exposure. You don't want the screen to change, which is why the setting should be Medium.
The EVF Brightness must be set to Medium low as the EVF-2 is usually a little brighter than the preview screen. You want to be able to judge the exposure of the image and preview the final image in the EVF. You may want to compare your screen and EVF yourself to set this, but my experience is that the EVF-2 is brighter than the preview screen. Set it to Medium low.
Antiqua, May 2014. Leica M 240 with Leica 50mm Noctilux-M ASPH f/0.95.
The Frameline Color inside the classic M viewfinder has traditionally been White (as the center window on the Leica M is what illuminates the frame lines in the rangefinder window using ambient light. In the Leica M240 the frame lines are lit up with LED, so you can set the frame lines to Red for the first time, which is the reason to do so. Sex it up!
Focus peaking
| Electronic Viewfinder EVF-2 manual focusing |
|
|
 |
|
 |
| Out of focus |
|
Focused with red Focus Peaking outlines |
Focus Peaking is the red outlines that show sharp edges of contrast in an image. Hence, a help to find focus. If there is no high contrast, there will be no Focus Peaking visible. In the Leica M 240 the outlines can be set to Red, Blue or Green. I prefer Red as it is easily visible in my black & white image preview. Blue or Green might work better for others, especially if the image preview is in color. See more about the EVF on the next page 40.
Focus Aid
Focus Aid is the button on front of the Leica M 240. You press the button and the camera will zoom in on the image to make it easier to focus. But it's easier to simply set the Focus Aid to Automatic becaues then the camera automatically focus in as soon as you touch the focus ring on the lens. You don't need to press the button on the front of the camera anymore.

Robin Isabella in Caribbean, April 2014. Leica M 240 with Leica 50mm Noctilux-M ASPH f/0.95.
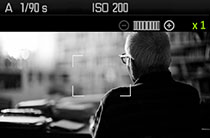
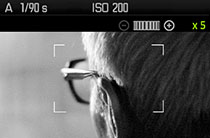
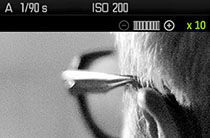
Enlarging the Focus Aid preview
While focusing with Focus Aid you can scroll the thumb wheel to choose between 1X, 5X or 10X enlargment. From the factory the camera comes with 1X which is a little confusing as there is no zooming in on the picture, so you might not be aware you are actually in the Focus Aid mode: There is a X1 in the upper right corner for the screen, and by using the thumb scroll wheel you can change it to 5X or 10X.
I recommend 5X as that is enlarged enough to see focus. 10X may be helpful to see minor details, for example when using a 21mm super wide lens. For 50mm and 90mm lenses 10X zooms tends to show a too small part of the image (you lose orientation as to what you are focusing on).
The Focus Aid menu should be set to Automatic so that you don't have to press the button on the front of the camera anymore. The focus mechanism on Leica M lenses automatically activates the focus aid. When you gently press the shutter release, the EVF-2 goes from 5X enlargment to 1X so you see the full image you are composing. Don't press the shutter release at the same time.
The way to use it is 1) turn the focus barrel on the lens and focus on the main subject in the image, then 2) press the shutter release gently (less than half-way) to get the full image (which now is in focus).
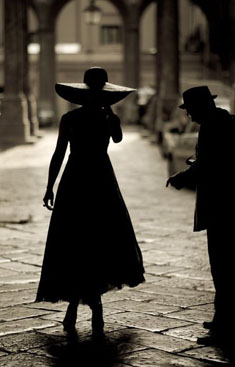
The Gambler. Leica M 240 with Leica 50mm APO-Summicron-M ASPH f/2.0.
Clipping definition is not affecting the actual image. It is only your definition of when you want to see red (bright areas) or blue (dark areas) blinking areas in the photo on the preview screen, telling you if the images tonality is wider than what you have defined.
Now, what is all this about?
Traditionally, an image should not go from total white to total black. Back in the printing days, when an image went over in total white, there would be a distinct break between the grey tones to the white. So the image would "float into" the white paper where there is no tones. Likewise, in the print days, if an image went all the way to black, it would sort of seem out of control and clash together in the dark areas.

Tones should go from almost white to almost black, not from full white to full black.
Hence, the rule for prepress for print was and is that one stay away from complete white and complete black.
In screen work the same rule should be applied as an image will else float together a white background on the screen. So keeping the bright tones a little defined maintain the illusion of a frame.
The scale goes from 0 to 255 as it is the RGB scale (Red Green Blue). Generally one should define an images range to 2/253 so that you avoid the image going to total white and total black, but remaining almost white and almost black as the extremes. That is the right way to do it.
This is done in Photoshop.
The setting of clipping definition in the Leica M 240 does not do this. It merely alerts you when your exposure (in camera) is crossing that defined line.
I don't find the blinking blue and red helpful at all. Editing and correcting images is something one does on a computer, not on the street.
But mainly the Clipping definition gives you the idea that the camera adjusts it. I thought so for a long while, but it does not. That's all I wanted to say with this!

The Barber Shop in San Francisco. Leica M 240 with Leica 50mm APO-Summicron-M ASPH f/2.0.
Auto Review shoud be 1 second or nothing. But if you use the EVF-2 and set preview to Off, the viewfinder will go black after you take a photo, so you see nothing but but black for a second! Hence you might as well look at a preview of the image you just did so as to see if the exposure and all was ok. Therefore, when you use the EVF-2, always set the preview to 1 second.
This is actually quite a nice way to check your image without having to look at the screen or press any buttons. You can stay concentrated with your framing and focus, review the image and decide if you want to do more. Without having to change position or remove your eye from the EVF-2 electronic viewfinder.
| |
|
|
|
|
| |
Buy the new eBook
"A Little Book on Photography"
by Thorsten von Overgaard |
|
| |
|
|
|
|
| |

Order now - Instant delivery.
More info
★
★
★
★
★
★ |
|
It's a humorous understatement to call this
new eBook by Thorsten Overgaard for
"A Little Book on Photography".
It's a grand book, a history lesson, life experience, a biography and poetry book and brilliant photo book!
All in one beautiful package of 180 pages
to fire you up and get you to love
photography ... unconditionally!
"A Little Book on Photography"
eBook for computer, Kindle and iPad.
New release March 2017.
Intro price only $47 - 180 pages.
| |
|
|
| |
Buy Now
Instant Delivery |
|
| |
|
|
|
|
| |
|
|

Antiqua, May 2014.Leica M 240 with Leica 50mm Noctilux-M ASPH f/0.95
The disadvantage of using the EVF-2 of course is that you can't see what is in front of you for a whole second. When you use the traditional rangefinder you see everything all the time; which is one of the advantages of a rangefinder compared to a dSLR where the mirror blocks the view the instant the image is being taken. I will get more into the advantages of using the EVF-2 in the next page. There is a lot of help in terms of focusing, exposure and previewing the image. Both for first-time rangefinder users, but also everybody else.
One can hope that Leica Camera AG will speed up the camera in the next version so one can choose between no pause/preview after a photo, or a 1/10 second preview or something less obstructive. All the disadvantages of the EVF-2 are basically something that future design updates and firmware updates could take care of.
Menu Screen 4 of 5
|
Menu screen 4/5 "Setup" |
|
|
|
|
|
Off |
|
Image Numbering |
LEICA / M240 |
|
Horizon |
On |
|
Sensor Cleaning |
|
|
GPS |
On |
|
Audio |
Standard / Off |
|
Exposure Simultation |
Rel. half pressed |
|
|
|
|
|
|
|
|
|
|
|
|
|
I gave up on adding Copyright Information to my files in the camera. I set it up, but then it was reset. And if someone else uses the camera, your copyright information shouldn't be in their images anyways. So I set it to Off.
When I import images into Lightroom the program is set up so it always adds copyright information to all files being imported. That way I make sure no file is left out there with no info about who owns it. Because you do own anything you create, the instant you made it!

The Street Poet in San Francisco. $4 for a poem. He wrote me one about vikings.
Leica M 240 with Leica 50mm APO-Summicron-M ASPH f/2.0
File number M240
Image Numbering goes rather automatically, but in the Leica M 240 you can actually change not only the sequence (numbering it starts from), but also the letter it begins with!
I started to get problems with images having the same file numbers which would result that I would overwrite older images with new ones when I uploaded images to my website.
So to make sure all images (possibly) have a unique number, I changed one camera to M240 and another camera to J240 instead of the default L100 that the camera comes with. When I use more than one camera this also allows me to see which camera was used. It's pretty damn smart!
Built-in gyroscope
Horizon can be turned to On as this gives the possibility to have a leveler - or actually a gyroscope - in the viewfinder.
This is helpful when using wide angle lenses where you want to make sure the camera is balanced in level, as well as in a complete upright position (to ensure straight vertical lines as well as horizontal lines). When set to On the actual gyroscope in the viewfinder is turned on and off by pressing the INFO by your thumb on the back of the camera.
If not for anything else, you can check if the image frames on the wall are hung straight (they rarely are which is a bit depressing to realize).

My daughter Robin Isabella enjoying the perks of home schooling ... here in San Francisco. Leica M 240 with Leica 50mm APO-Summicron-M ASPH f/2.0
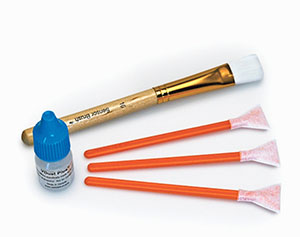
Sensor Cleaning is a function that will actually not clean your sensor. You hoped so, but instead it gives you a possibility for:
1) To have the camera scan they sensor for dust and show you a preview. But more importantly:
2)
To open the shutter so that you can clean the sensor without the shutter closing while you have tools on the sensor. The reason this function may be seen as important is that if you opened the shutter curtain by using the B mode for endless exposure, you might risk that your finger slips adn the shutter closes while you are cleaning the sensor. Which might ruin the shutter curtain. But even more surprising you would discover that there is a maximum "endless" exposure, so the shutter curtain would close after some seconds. So if you want to clean the sensor yourself, use the Sensor Cleaning mode!

Michele Henderson singing at the 45th Anniversary Gala at Celebrity Centre August 9th 2014. Leica M 240 with Leica 50mm Noctilux-M ASPH f/0.95
Sensor dust is seldom visible when you shoot with the lenses wide open at f/2.0 or wider. When you go f/5.6 and f/8 and so on, sensor dust begisn to be very apparant in the images. This will explain why I seldom have problems with sensor dust - I almost always shoot my lenses wide open. I leave the cleaning of sensors to the folks in Wetzlar whenever they get the camera in for something. Thought I do carry a $30 Visble Dust cleaning kit from BH Photo just in case there is a big dustball that show itself (which is a problem especially for using the Leica M 240 for video).
Sensor dust and video
Sensor dust can be a pain when you use the Leica M 240 for video. Unlike stills where you can remove a spot in Lightroom rather easily, there is no way to remove that dust spot that remains in the exact same position throughout a video.
It is also often the case for video that you use the aperture for exposure adjustment (because the shutter time for video is always 1/50 sec). The smaller aperture, the more visitble dust.
GPS can be set to On as it will then be active if you attach the Leica Multidysfunctional handgrip that contains a possibility to get your GPS position and store it in the DNG file. I have written about the handgrip on Page 34. The great improvement in this firmware is that the information will now also be stored in the JPG file.
Audio should be set for Standard/Off. It is a video feature only, see more about video sound at Page 37.
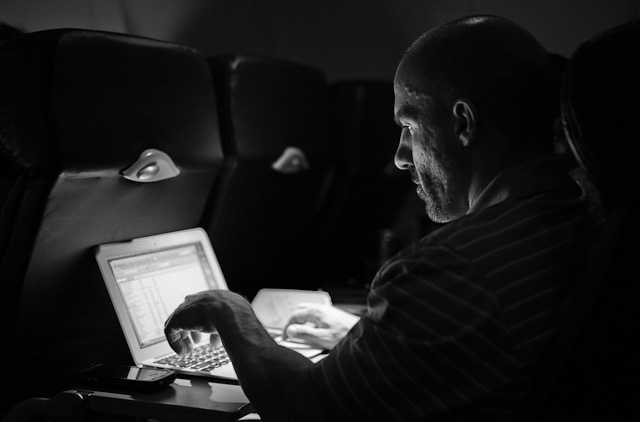
Working on the airplane from Denver to Tampa. Cozy and effective. Leica M 240 with Leica 50mm APO-Summicron-M ASPH f/2.0
Exposure Simulation can be set to (Shutter-) Release half pressed which is what I do. This means that when you focus and preview the image, it is bright and clear. And when you press the shutter release half down, you preview the actual exposure. I remember it confused me a little why the look of the image would change when I pressed the shutter release half down. But then I figured it out and got so used to it that I don't want to implement the change that came with the July 2014 firmware release version 2.0.1.5.
The new alternative is to set it to Permanent which will make you see the actual preview of the actual exposure all the time. If I had just gotten the camera, that would be my choice as it is the most logical way to look. But I have become old school now, so I stayed with Release half pressed.
Menu screen 5 of 5
|
Menu screen 5/5 "Setup" |
|
|
|
|
|
2 minutes |
|
Date / Time |
|
|
Acoustic Signal |
Off |
|
Language |
English |
|
USB Mode |
PTP |
|
Reset |
|
|
Format SD Card |
|
|
Firmware |
2.0.1.5 |
|
|
|
|
|
|
|
|
|
|
Auto Power Off shoud be set to 2 minutes. This will make the camera turn off by itself 2 minutes after you last used it or touched the shutter release. I have had the Leica M9 and the Leica MM and the Leica M 240 on 2 minutes power off always. It has turned out to be a good way to have a battery last for almost a day using the EVF-2, and several days without the EVF-2.
Date/Time you usually only set once. I never change for time zone and generally don't worry much about it. Though, if you use two or more cameras for the same event or on the same trip, make sure their time is exactly the same: When importing images from two or more cameras you want them to be in the correct sequence.
If one camera is two minutes off, images of the same moment will be scattered all over the timeline. Usually when you edit, you try to find the best from a moment or event. So when you have decided and think that's it, 30 images later you see another series of that event or moment. That's why you want the time to be rather exact on both cameras: so it makes sense when you scroll through them in Lightroom.

Saturday morning inside Charlie's Sandwich Shoppe in Boston: This place was just around the corner of where I stayed in Boston and had become part of my morning ritual. The chef there has three old Leica M3, M2, IIIf cameras and 15 old school lenses that he said he would send me more info on. I think I can get him upgraded to Leica M9, at least. The place features great food, resulting in a waiting line outside on Saturdays. Obama was here, and so was Al Gore and Sammy Davis Jr. (not at the same time, though). Charlie's is also known for serving Afro-American musicians when nobody else would, back when. Leica M 240 with Leica 21mm Summilux-M ASPH f/1.4. Thorsten Overgaard © 2014
Date/Time correction in GPS mode
If you set the GPS to On and mount the Leica Multidysfunctional Handgrip, the handgrip will "correct" your Date/Time automatically according to your time zone location.
But only when it has a valid GPS signal, which in reality it only has less than half the time (probably less than 10% truth be told). This is how your images will be scattered over several hours of time difference even from the same event or moment. It's very inconvenient and the only remedy is to set the time to the actual time zone you are in.
For more on how the Multidysfunctional Handgrip works, and why that doesn't work for me, see Page 34.
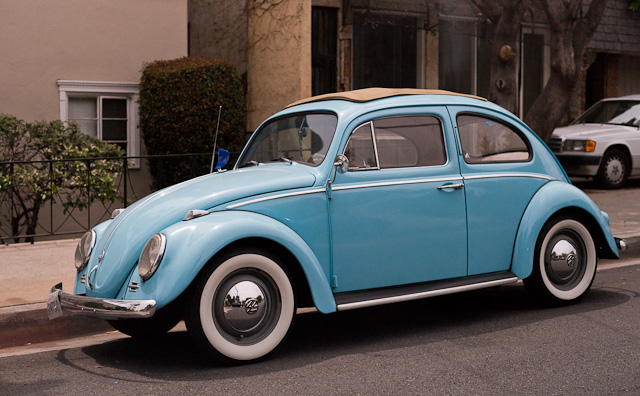
Los Angeles, April 2014.Leica M 240 with Leica 50mm Noctilux-M ASPH f/0.95
Acoustic Signal (sound alerts and sound effects) should be set to Off so the camera is quiet at all times.
You should think some sort of acoustic signal or blinking light would be necessary to help you, but it isn't. It is surprising how sensitive you get when handling a camera and can feel the slightest vibrations from a shutter curtain with complete certainty, in a large noisy stadium in heavy rain. It's a sensitivity you develop in a matter of days, just like you get used to focusing a lens or knowing where the shutter release button sits.

Maximum long exposure times on the Leica M 240
The Leica M 240 has an (somewhat odd) limit on shutter times when one uses the B(ulb) mode for night photography and similar long exposure photography.
The longest exposure time is depending ont he ISO, like this:
ISO 100-200 the maximum exposure time is 60 seconds.
ISO 250-400 the maximum exposure time is 32 seconds.
ISO 500-800 the maximum exposure time is 16 seconds.
ISO 1000-6400 the maximum exposure time is 8 seconds.
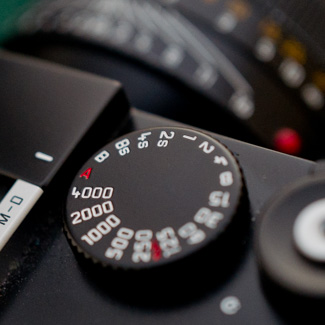
Bulb Exposure Time Setting
You can set the Bulb Exposure Time Preset in the Leica M 240 and Leica M-P 240 on this screen.
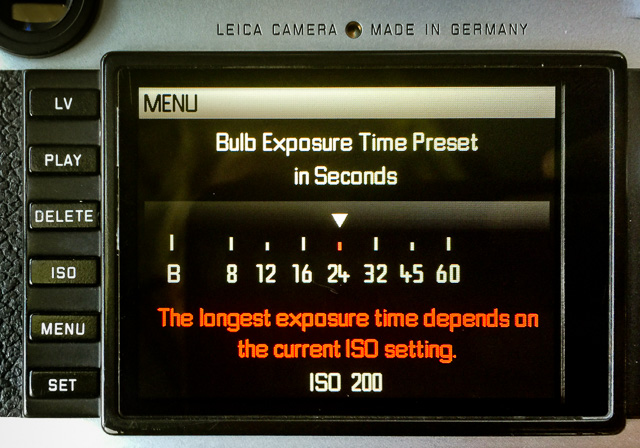
Bulb Exposure Time Setting on the Leica M 240 and Leica M-P 240. If you set it to self timer, you can choose an exposure time and release the camera so the exposure starts 2 or 12 seconds after you press the shutter release. © 2015-2016 Thorsten Overgard.
How to get into thie Bulb Exposure Time Preset mode:
1) Make sure the Shutter Release is set to Self Timer or S (not Continuous or OFF).
2) Set the shutter speed dial on top to B (Bulb).
3) Press the front button on the camera.
4) You can now turn the Thumb Dial to set the time.
4b) Note that if you have set the camera to Direct Exposure Adjustment, you don’t need to press the front button but just turn the dial.
The reason for maximum exposure times
According to Leica Camera AG, these limits have been set to prevent uncorrectable imaging errors caused by longer exposure times.
So what does that mean?

Denmark, September 2014.Leica M 240 with Leica 50mm Noctilux-M ASPH f/0.95
The ISO sensitivity values in digital cameras are increased by applying signal gain. An algorithm (a set of rules followed by a computer; it comes from Arabic decimal systems and the Greek word for numbers. Baically, how to change numbers) amplifies the signal, and the better the algorithm is, the more accurate a tone and color is even when a 200 ISO sensor sees it in dark.
The software algorithm makes it pretend the sensor sees better in dark than it actually does. When it doesn't work it is called noise.
The Leica SL will allow up to 382 second long exposures at 50 ISO (and 191 seconds at 100 ISO).
Advertisement:
Digital image noise in the Leica M 240
Unfortunately this process of either higher ISO and/or longer exposure time amplifies not only the signal, but also the noise of every image. For me the maximum ISO of the Leica M 240 is 3200 ISO. That is as high as I can go if I want to make sure I can use the color photos.
At ISO settings higher than 3200, it is not necessarily certain that the images captured will be free of interference like extreme noise, banding, or individual pixel errors. That's why Leica Camera AG calls it PUSH 6400 ISO where "push" refers to the similar technique of "pushing" the exposure of film by simply developing the film longer or shorter to adjust for exposure. It would always result in less accurate colors and tones, as well as bigger grains. It is the same in the digital age.
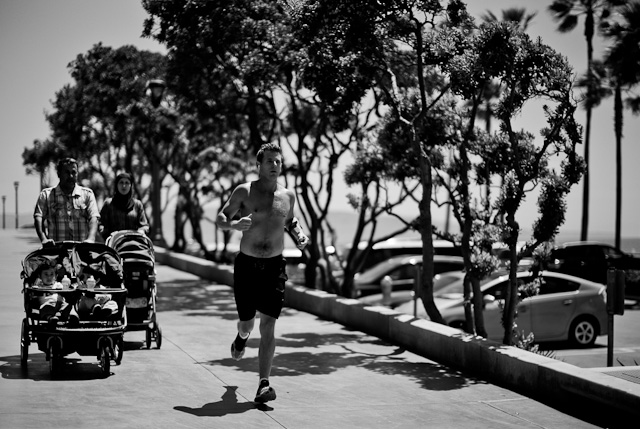
Manhattan Beach, Los Angeles, April 2014.Leica M 240 with Leica 50mm Noctilux-M ASPH f/0.95
It's like an elevator for maximum 6 people: If you are 8 people it might work, or it might not.
It should be noted that the 100 ISO is also a PUSH ISO on the Leica M 240. The sensor has a base of 200 ISO, meaning that this is what it actually is capable of seeing. When you go to PUSH 100 ISO you ask the sensor to pretend there is only half the light, and that stretches the algorithms.
It would probably result in better image quality to shoot at 3200 ISO and then adjust for extremely low light in Lightroom. The original file from the camera will be rather ok, and it will be up to the Lightroom algorithms to adjust the image.
Rue Saint Honoré, Paris, September 2014.Leica M 240 with Leica 50mm Noctilux-M ASPH f/0.95
Horizontal noise, vertical remapping
Horizontal lines are a sign of noise (banding; visible stripes of contrasting color). Vertical lines are a sign that the sensor needs remapping. This is something Leica Camera AG does. It is basically a resetting of the sensor.
Denmark. Leica M 240 with Leica 50mm APO-Summicron-M ASPH f/2.0
Leica M Type 240 and Leica M-P Type 240
Firmware update 2.0.2.5 (click to download)
The firmware update 2.0.1.5 was released July 1, 2014.
The firmware update 2.0.1.7 was released October 10, 2014 to include lens profiles for the four new Summarit lenses introduced. No other changes were made.
The firmware update 2.0.2.5 was released July 8, 2015 to fix a number of firmware bugs that caused the camera to lock up/freeze with Live View/EVF. The firmware update also introduces a new Menu item when the Leica SF 26 flash is attached; "Flash exposure compensation" (requires the SF 26 flash to be updated to Firmware 1.1).
Here are the changes in the Leica M 240 firmware since the first firmware:
-
Improved description of the lens type in Exif-Data
-
Live view is now possible with every lens (including older screw lenses via an adapter) using “manual lens detection”
-
A “Video off” option is now available in the Set menu (see submenu item “Video recording”). The M-Button on the Top-cover is deactivated when this option is chosen.
-
The Horizon (level) is now visible in Live View, overlaying the live image. This additional info-screen is enabled using the menu item “Horizon”
-
New menu item “Exposure Simulation”
Exposure simulation -> Permanent: Live View accurately shows image brightness according to the shutter speed and aperture set in manual exposure (as long as the chosen exposure time is shorter than 1/30s)
Exposure simulation -> Release button half-pressed: Image brightness in live view is adjusted for best visibility, regardless of the actual exposure.
Half pressing the shutter button shows the actual exposure.
-
Extended Auto ISO options
- All Auto ISO options are now visible using the ISO button
- Extra options for “Maximum Exposure Time” - 1x, 2 x, or 4x focal length - can be selected to help avoid camera shake when using auto ISO and long lenses.
-
“Auto ISO in M mode” is now offered as an option. This varies ISO sensitivity for correct exposure when shutter speed and aperture are set manually.
- AlternativelythecamerachoosesthepreviousmanuallychosenISOspeed
-
Crop marks
In Live View, new crop marks for 3:4 / 6:7 / 1:1 / and 16:9 aspect ratios can be displayed. By pressing the up/down keys, the crop marks are superimposed on the live view screen (without additional information)
-
Korean is now available as a menu language
-
During video recording, 1/25s is now used instead of 1/24s. This reduces flicker effects with 50Hz mains voltage
-
Exposure bracketing settings are now saved when the camera is switched off
-
Direct exposure correction
An “EV correction” option in the menu enables direct adjustment. So EV compensation can be altered by turning the thumb wheel, without having to press additional buttons.
-
New Light Metering Mode “Classic / LV disabled”
In this mode, only Classic light-metering is possible; the LV button is disabled to avoid the activation of live view by accident.
-
New menu item “Focus Peaking”
For improved visibility, the color of focus peaking can now be set to red, green or blue.
-
Better display of GPS location data
Position is now shown for JPG files in Adobe Lightroom®
Where the GPS signal is weak, the last position is now deleted after 5min instead of 24h as in previous firmware versions.
-
Bugfix in Live View at high temperatures
"Occasional" malfunction of Live View at high temperatures has been fixed
-
Bugfix in light metering (Live view)
-
Bugfix regarding sensor cleaning function
- The firmware update 2.0.1.7 was released October 10, 2014 to include lens profiles for the four new Summarit lenses introduced. No other changes were made.

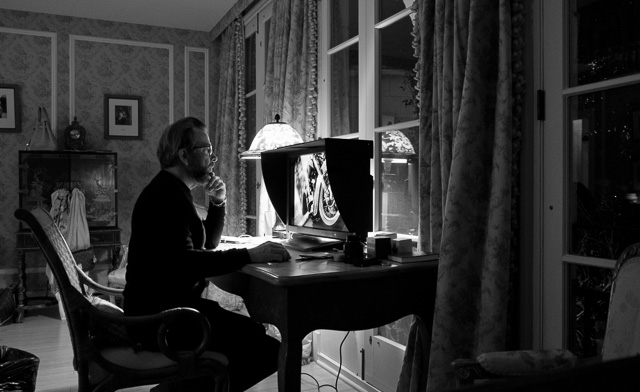
Paris, September 2014. Leica M 240 with Leica 50mm Noctilux-M ASPH f/0.95
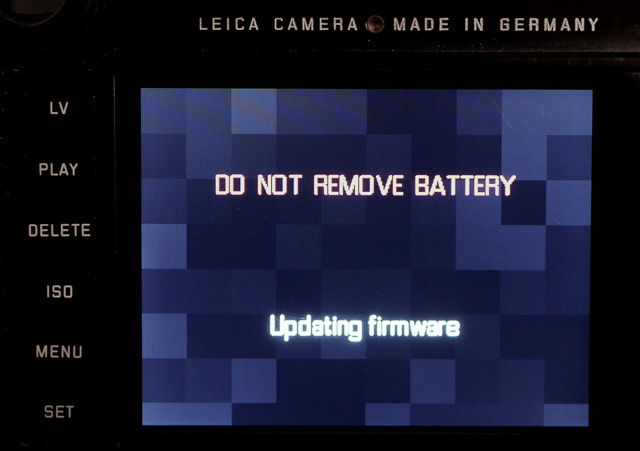
The screen on the camera during updating
Installing the Firmware
- Download the latest software from Leica Camera AG Support Pages.
- Format an SD memory card in your Leica M.
- Turn off the camera and insert the card into an SD card reader – either integrated or connected to your computer. (A reader is required for Firmware updates).
-
Download the Firmware file from the Leica M site using the “DOWNLOAD” link.
-
Save the file M_240-2.0.2.5.FW at the top level of the card’s folder structure.
-
Remove the card properly from your card reader, insert the card into the camera and close the bottom cover.
- Press the “INFO” button and hold it, simultaneously turn on the camera using the main switch.
-
The update process takes 2 - 4 minutes.
-
When the update is done, a corresponding message appears on the screen. The Message disappears after some seconds.
- When the update is complete, your settings are all reset to factory settings so go through them and set them again. You can also store your settings to your SD-card before you start the update and load them back onto the camera after.
|
NEW VERSION 11.3 |
|
| |
 |
|
| |
|
| |
|
|
|
|
| |
|
| |
|
|
| |
Buy Now. Instant delivery.
New Version 11.3
ONLY $698.00
Now includes
4+ hours of
video tutorials.
100% satisfaction
or 100% refund.
More info.
|
|
| |
#2130-1121-3 |
|
| |
|
|
| |
Update to Version 11.3
Apply
code "UPDATE113" on checkout to get this complete version 11.3 update.
$298.00
Updates all previous Surival Kit versions since 2009. |
|
| |
|
|
Buy the complete new
Lightroom Survival Kit 11.3
The Legendary Tutorial for Photographers
Brand-new JUNE 2022-version.
Now with brand-new 4+ hours of video tutorials.
New sections on compostition and storytelling.
How to edit color photos.
How to edit black & white photos.
How to do keywords logical and easy.
The most successful photo editing kit ever
Photographer Thorsten Overgaard first released the Lightroom Survival Kit in 2009 and have honed it with new and fresh updates. This Version 11 is the most radical updated and renewed version ever, four years in the making.
Professional workflow experience made simple, logical and easy to use.
Master editor makes it simple to understand
The Survival Kit is unique and one-of-a-kind being made for photographers for photographers. When someone understands their subject, they can explain it so it is easy to understand. The hallmark of Thorsten Overgaard is to make expert knowledge shown and told in a way so anyone can apply it.
Hands-on advice that works
With a 450 pages workbook and 4+ hours of video, every element of digital photography is touched on, in handy chapters and pre-flight checklists. Editing of color vs black and white photos, keywording, cropping of images, fine-tuning of tones, color balance and color control, export of originals, printing, archiving and backup, and much more.
Comes with the Overgaard Leica Presets (Value $48)
The Lightroom Survival Kit comes with Thorsten Overgaard's special-made Lightroom Presets for all digital cameras and for Leica digital cameras.
Understand all from camera to the final print
Chapters in this version goes over the background for High Dynamic Range (HDR), digital raw files and how to set up a professional photography workflow, from calibrating the screen to editing in Lightroom, and to making a final print. And more ...
10+ years experience in one package
No need to spend years figuring out the smartest way to do things when you can tap into the best way of doing things right here. The workflow of Thorsten Overgaard as been refined through years of field work with more than a thousand workshop attendees.
This method of workflow now used by thousands
The Survival Kit has been taught to thousands in workshops and in this Survival Kit. What does it do? It make you enjoy taking and making photos, and it increases your production considerabely. Most important of all, it'll give you back ownership of your files (which you will understand why is so important, once you have bought the Survival Kit and started applying its methods).
| |
|
|
| |
"Thorsten's methodology is perhaps not what hardware-, software- and cloud-companies want us to do, but as a former IT engineer I can only acknowledge his views about preserving our digital heritage. This workflow explained is for me the best I have ever seen".
★★★★★ |
|
| |
|
|
Video tutorials, image files, presets, checklists, definitions, tutorials of Lightroom, that boils down years of experience to a workflow you can implement in less than one day.
Start working in minutes. |
|
|
| |
|
| |
|
| |
|
| |
|
| |
|
| |
|
|
|
|
|
|
|
A Guided Tour of the July 1, 2014 Firmware by the Beta tester
Jono Slack has written a very helpful article about the difference between the original 2013-firmware and the updated 2014-firmware, "Leica M Firmware Update v. 2.0.1.5".
He was working with Leica Camera AG on the beta-testing of the new firmware for months.

Paris, May, 2014.Leica M 240 with Leica 50mm Noctilux-M ASPH f/0.95
Tired of camera menus?
Try this then. So far only made as a limited camera in 600 numbered pieces for a premium price of $18,000 (including lens though). A Leica M 240 without screen, hence without the menu. The viewfinder offers a few options of menu settings, but else it is all managed on the outside controls, just like back in the old days. Design is assisted by Audi, by original idea by Jan Grarup and others.
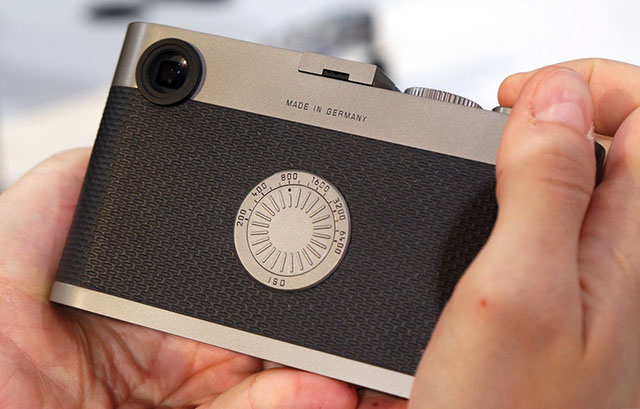
WTF? No display? The Leica M60 digitl rangefinder made in 600 pieces for Photokina 2014 has one unique feature: No display! Dial in the ISO, cross your fingers and press the shutter. Photo: Sam Byford, The Verge.
More Leica MAGIC
For many interesting articles, visit Leica MAGIC on Flipboard curated by Ole-Arild Svendsen.

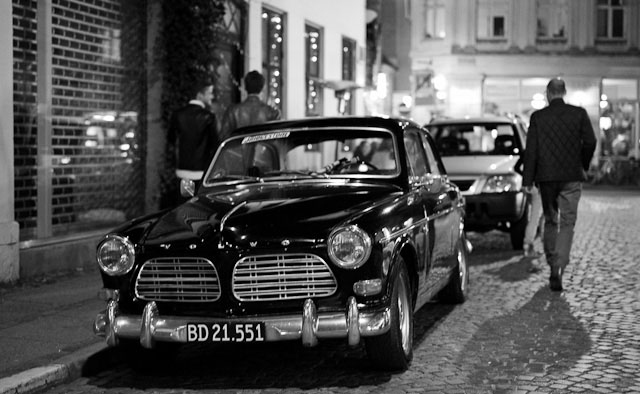
Berlin, September 2014.Leica M 240 with Leica 50mm Noctilux-M ASPH f/0.95
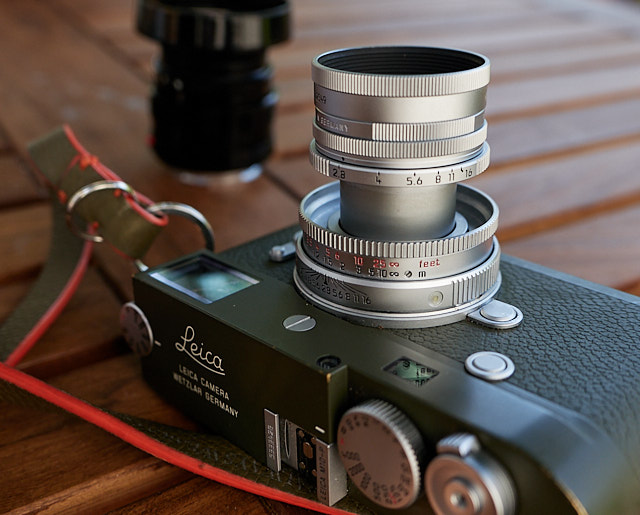
| |
 |
| |
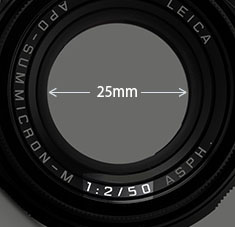
1:2/50 the description says.
But what does it mean? |
| |
|
1: = Basically means 1 divided with. On the lens to the right, it means that the diameter of the hole throught he lens is 25mm.
We would normall call it
a 50mm f/2.0 lens. The writing of 1:2/50 is a tradition from the 1800's of specifying a lens, which reveals quite a bit about the construction:
Focal length 50mm simply means that the distance from center of focus inside the lens to the focusing plane (the sensor or film) is 50mm, and the aperture of f/2 or 1:2 means that the diameter of the hole the light comes throught is 25mm (50mm divided with 2 = 25mm).
In traditional lens design, one could usually tell from looking at the length of a lens if it was a 400mm, 100mm or 35mm. Newer designs with mirrors (in tele lenses) and more corrections (in wide lenses) can make the size of the lenses shorter or longer, but the distance from center of focus to sensor in a modern 50mm lens will still be 50mm for a 50mm and 400mm for a 400mm, and so on.
See Focal length and Aperture further down for more.
35mm
a) 35mm lens is a lens that has a viewing angle of view is 63°vertically, 54° horizontally and 38° vertically within a 35mm film frame or "full-frame" 24x36mm digital format. See Focal length further down.
b) 35mm focal length: the distance from center of focus inside the lens to the focusing plane (the sensor or film) is 35mm.
| |
 |
| |
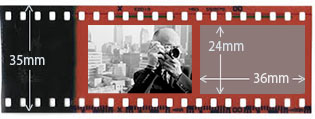
35mm film format (also known as full-frame) |
| |
|
c) 35mm film format (also known as full-frame in digital sensors) was a standard film format that came about in 1892 where the width of the film roll was 35mm, and it's been the most used format ever since. Only a format of 24 x 36mm is used for the photo on the film roll.
35mm film format was first used in 1892 by William Dickson and Thomas Edison for moving pictures with frames of 24 x 18mm, using film supplied by George Eastman (Kodak), and this became the international standard for motion picture negative film in 1909. Later other motion picture formats came about, such as Academy Ratio (22 x 16 mm), Widescreen (21.95 x 18.6 mm), Super 35 (24.89 x 18.66 mm) and Techiscope (22 x 9.47 mm).
The inventor of the Leica camera, Oskar Barnack, built his prototype Ur-Leica in 1913 as a device to test film stock and\ motion picture lenses and had it patented. Putting 35mm film format into a small camera gave him the idea "small negative, large print" and he decided to increase the size of each frame on the 35mm film to 24x36mm (for more detail and sharpness), and then invented an enlarger to make large prints from the small negative. The length of a film, 36 pictures, is said to have become the standard because that was how far Oskar Barnack could stretch his arms (when cutting film from larger rolls to put them into film rolls for the Leica camera).
d) 35mm equivalent is often given as a standard when talking about lenses in small compact-cameras or large format cameras with other sensor/film format than the 24 x 36mm frame. Example: A camera with a 12 x 18 mm sensor has a 14mm lens on it, and even the lens is actually a 14mm, it is specified as a 28mm lens because the viewing angle that ends up on the sensor is equivalent to a 28mm lens on a 35mm of full-frame camera.
| |
 |
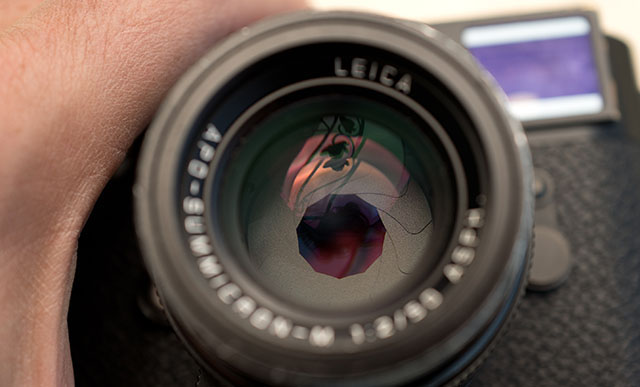
| |
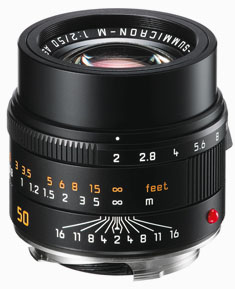
The Leica 50mm APO-Summicron-M
ASPH f/2.0 lens |
| |
|
50mm
a) 50mm lens is a lens that has a viewing angle of view is 47° vertically, 40° horizontally and 27° vertically within a 35mm film frame.
b) 50mm means there is 50mm from the center of focus inside the lens to the focal plane (sensor or film).
c) 50mm lens is often compared to the human eye. Not because of viewing angle (how wide it sees) but because of size ratio (how it sees). The 50mm lens is the lens that comes closest to the size that the human eye see things. Whereas the human eye has a much wider angle of view [120-200°] than the 50mm lens [47°].
AF = Auto Focus. The idea is that the camera does the focusing itself (the word auto comes from Greek "self").
Aperture = The same function as the iris and pupil has in the eye. The pupil in the eye is the dark circular opening in the center of the iris of the eye, varying in size to regulate the amount of light reaching the retina (the sensor area inside the eye).
Aperture on a camera is the f/ stop on the camera that regulates how much light passes through the lens by increasing or decreasing the hole through the lens. On a f/2.0 lens the lens is fully open" at f/2.0. At f/2.8 the aperture inside the lens make the hole through the lens smaller so only half the amount of light at f/2.0 passes through. For each f/-stop (4.0 - 5.6 - 8.0 - 11 - 16) you halve the light. The aperture of the lens is basically the focal length divided with the f/-stop = size of the hole (50mm divided with f/2.0 = the hole is 25 mm in diameter).
Besides regulating the amount of light (so as to match the correct exposure), the aperture also affects the dept of field: , which is how deep the sharpness is. To get the sough-after photos with narrow depth of field where the background is blurry, the lens has to be wide open at f/2.0 or so. Stopping the lens down to f/8 or f/16 will result on more depth of field, meaning the background will start becoming in focus. To maintain narrow depth of field, one can use the ISO sensitivity and/or the shutter speed to match the correct exposure (as aperture is only one of three ways to control the exposure; the correct amount of light).
ORIGIN: Late Middle English : from Latin apertura, from apert- ‘opened,’ from aperire ‘to open’.
The aperture blades inside the consist of a number of blades that - as the aperture ring on the lens is rotated - narrow into a smaller and smaller hole. © Thorsten Overgaard.
| |
 |
| |
The camera in Aperture Priority Mode |
| |
|
Aperture Priority Mode = When the shutter speed dial on top of a Leica M camera is set to A, it is short for “Aperture Priority” and allows the user to set a specific aperture value (f-number) while the camera selects a shutter speed to match it that will result in proper exposure based on the lighting conditions as measured by the camera's light meter. In other words, you set the aperture as priority (f/1.4 for example), and the camera calculates a shutter speed (1/250 of a second) that matches that. If you change the aperture to f/2.0 by changing the aperture ring on the lens, the camera will re-calculate the speed to 1/125 so as to get the same amount of light to hit the sensor (f/2.0 is half the light through the lens as f/1.4 and 1/125 if twice the amount of light on the sensor as 1/250).
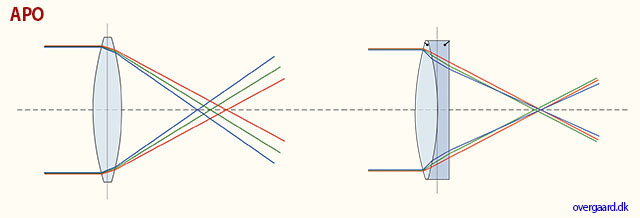
APO corrected basically means that the red, green and blue has been corrected to meet more precisely in the same spot. Clarity of colors and definition of details would be the result.
APO = in lens terminology stands for "apochromatically corrected". In most lenses, optical design concentrates the focus of blue light and green light into a single plane, but red light falls slightly into another plane of focus. In APO lenses, the design and expense has been put in to making red light focus on the same plane as blue and green. Under a microscope you would see that all light subject is now in focus, creating a sharper image overall. Many manufacturers offer APO designs, but in most of these only the very center of the lens is APO corrected. Leica prides itself on making most of the frame APO corrected.
APo-correction has traditionally been used for long tele lenses (and periscopes), but in recent years APO-correction has been applied to 50mm and wide angle lenses as well. One will notice that the colors are really bright and alive, almost more real than to the eye, in lenses like the Leica 90mm APO-Summicron-M ASPH f/2.0 and 50mm APO-Summicron-M ASPH f/2.0.
Apochromat; ORIGIN early 20th century, made of the two words; apo (Greek origin, away from) and chromatic (Latin origin, meaing relating to color).
| |
spherical (ball) |
| |
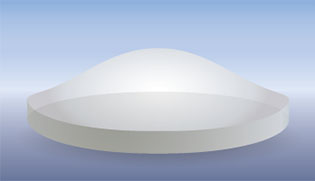
a-spherical (non-ball) |
| |
|
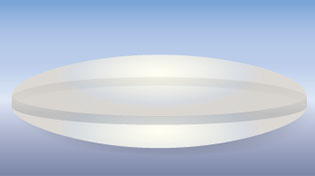
ASPH = (Aspherical lens) stands for "aspheric design".
Most lenses have a spherical design - that is, the radius
of curvature is constant. These are easy to manufacture by
grinding while "spinning" the glass. This design
however restricts the number of optical corrections that can
be made to the design to render the most realistic image possible.
ASPH lenses (a-spherical, meaning non-spherical), however, involve usually 1 element that does
*not* have a constant radius of curvature. These elements
can be made by 1) expensive manual grinding, 2) molded plastic,
or 3) Leica's patented "press" process, where the element
is pressed into an aspherical ("non-spherical")
shape. This design allows Leica to introduce corrections
into compact lens designs that weren't possible before. Practically,
the lens performs "better" (up to interpretation)
due to increased correction of the image, in a package not
significantly bigger than the spherical version.
There is another Aspherical lens manufacture technique: an uneven coating layer is applied to a spherical lens. The coating is thicker on the edges (or on the center, depending). Canon "Lens Work II" calls these "simulated" aspherical lenses. Simulated and Glass-Molded (GMo) asphericals show up in non-L Canon lenses, while the L lenses have actual ground aspheric elements.
A- means non, or without. From Latin, ex.
Sphere: ORIGIN Middle English : from Old French espere, from late Latin sphera, earlier sphaera, from Greek sphaira "ball".
| |
|
|
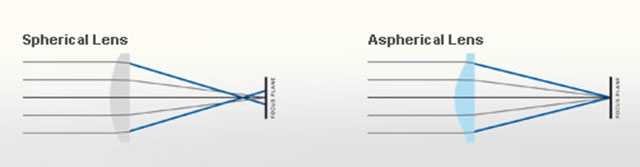 |
| Normal spheric lens (grinded) |
|
ASPH (note the shape of the glass as result of pressing rather than grinding) |
Auto- means “self”. The idea is that when a camera has auto-(something), it does that (something) by itself.
Banding = Noise in digital images. Horizontal lines in a horizontal picture (if the camera is in portrait mode/vertical, the lines will obviously be vertical). It's simply noise; the result of uncontrolled algorithms working overtime with an image the sensor really can't see because it's very dark. (If your image has vertical lines in it, it is more likely that the sensor needs remapping).
This image at 6400 ISO, underexposed and then brought up to correct exposure in Lightroom, displays banding: Horizontal lines in the image. Leica M-D 262 with Leica 50mm APO-Summicron-M ASPH f/2.0.
Base ISO = The ISO the digital sensor was born with. Even a digital sensor goes from say 50 ISO to 25,000 ISO, it only has one base ISO. Any other setting is an algorithm that figures out how the image whould look if there was 64 times more light, or half the light, etc.
When you go down from Base ISO (for example 200 to 100 ISO), you can expect a
decrease in quality. When you go up, the decrease is much less. For some sensors, you loose 2-3 stops by going down 1 step in ISO, but can go 8 steps up and only loose 1 stop in dynamic range. Basically, your ISO range should be from Base ISO and as far up as you can, before you see visible decrease in quality (mostly 3200 ISO - 6400 ISO).
Base ISO for Leica M9 is 160 ISO, for Leica M240 it is 200 ISO. For Leica M10 it is around 160 ISO. For Leica M Monochrom it is 320 ISO. For Leica Q and Leica Q2 it is around 100 ISO. For Panasonic Lumix S it is 200 ISO. For most Canon cameras the base ISO is around 100, for most Nikon cameras it is around 200 ISO.
Bokeh = The visual quality of the out-of-focus areas of a photographic image, especially as rendered by a particular lens: It's a matter of taste and usually photographers discuss a 'nice' or 'pleasant' bokeh (the out-of-focus area is always unsharp, which is why the quality discussed is if one likes the way it renders or not by a particular lens). The closer you get to something, the 'more' bokeh' you get (in that the focus becomes less for the background and foreground at close distances than at long distances). ORIGIN from Japanese 'bo-ke' which mean 'fuzzines' or 'blur.'.
 Bokeh: The visual quality of the out-of-focus areas of a photographic image. Photo at Bar del Fico in Rome. Leica TL2 with Leica 35mm Summilux-TL ASPH f/1.4. © Thorsten Overgaard. Bokeh: The visual quality of the out-of-focus areas of a photographic image. Photo at Bar del Fico in Rome. Leica TL2 with Leica 35mm Summilux-TL ASPH f/1.4. © Thorsten Overgaard.
C = Continuous shooting. When the ring by the Shutter Release on top of the camera (or in the menu of digital cameras that doesn't have such a feature on the outide of the camera) is moved from OFF to C, the camera takes series of images as long as the shutter release is pressed down. In some cameras the speed of continious shooting can be adjusted.

Camera comes from Chambre, mostly in relation to Spanish soldiers’ rooms. Obscura means 'dark', so a dark room is basically the derivation for the word camera.
Camera - is today’s short name for Camera Obscura (meaning “a dark room”). Camera means Chambre and was used only as a Latin or alien word, actually only for Spanish soldiers’ rooms, until popularized in connection with photography in 1727: “Camera Obscura”. In 1793 the slang term “camera” was used by Sterne Tr. Shandy: “Will make drawings of you in the camera” and by Foster (1878), “The eye is a camera”. Camera Obscura was described by Iraqi scientist Ibn-al-Haytham in his book, “Book of Optics” (1021) and by Leonardo da Vinci in 1500; popularized and made widely known in 1589 by Baptista Porta when he mentioned the principle in his book “Natural Magic”. Johannes Kepler mentions Camera Obscura in 1604.
Camera = chambre (room), Obscura = dark (or cover).
| |
|
|
| |
Why is it called a "camera"..?
The word Camera is today's short name for Camera Obscura (which originally means “a dark room”).
Origin of the word Obscura means "dark" or "covered", and the word Camera means Chambre and was used originally only as a Latin or alien word, actually only for Spanish soldiers' rooms, until popularized in connection with photography in 1727: “Camera Obscura”.
In 1793 the slang term “camera” was used by Sterne Tr. Shandy: “Will make drawings of you in the camera” and by Foster (1878), “The eye is a camera”.

Ibn-al-Haytham mentioned Camera Obscura in his "Book of Optics" in 1021.
The concept of Camera Obscura was described by Iraqi scientist Ibn-al-Haytham in his book, “Book of Optics” (1021) and by Leonardo da Vinci in 1500; popularized and made widely known in 1589 by Baptista Porta when he mentioned the principle in his book “Natural Magic”. Johannes Kepler mentions Camera Obscura in 1604.
Camera = chambre (room), Obscura = dark (or cover). |
|
| |
|
|
CCD sensor (as used in Leica M8, M9, Leica S) = (Charged Coupling Devices) - The first digital cameras used CCD to turn images from analog light signals into digital pixels. They're made through a special manufacturing process that allows the conversion to take place in the chip without distortion. This creates high quality sensors that produce excellent images. But, because they require special manufacturing, they are more expensive than their newer CMOS counter parts.
CLA
An acronym for "(C)lean, (L)ubricate & (A)djust", whereby the item is merely re-lubricated, fine-adjusted and calibrated rather than repaired. "I just got my equipment back from CLA at Leica"
CMOS sensor (as used in Leica CL, Leica T/TL/TL2, Leica M10, Leica M 240, Leica M Monochrom Typ 246, Leica S Typ 007, Leica SL, Leica Q, Leica Q2, Leica M10, Leica X, Leica D-Lux, etc.) = (Complimentary Metal Oxide Semiconductor) chips use transistors at each pixel to move the charge through traditional wires. This offers flexibility because each pixel is treated individually. Traditional manufacturing processes are used to make CMOS. It's the same as creating microchips. Because they're easier to produce, CMOS sensors are cheaper than CCD sensors. CMOS allow Live View and use less energy than CCD.
Collapsible - Usually refers to a collapsible lens such as the Leica 50mm Elmarit-M f/2.8 Collapsible, or Leica 90mm Macro Elmar-M f4.0 Collapsible, etc. A collapsible lens is one that can collaps into a compact lens when not in use.
The Leica 50mm Elmar-M f/2.8 Collapsible on a Leica M10-P Safari. Here extruded for use; it can collapse into the camera so as to be more compact when not in use. © Thorsten Overgaard.
Contrast - The degree of difference between tones in a picture. Latin contra- ‘against’ + stare ‘stand.’
 |
|
 |
| Normal to low contrast |
|
High contrast |
| |
|
|
D-Lux (Digital Lux) = A series of compact digital cameras by Leica Camera AG developed with Panasonic since 2003. See my article "Compact Digital Leica Cameras" and my Leica D-Lux 7 review. Lux comes from Latin and means Light.
| |
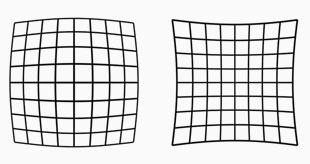 |
| |
Lens distortion looks like this. The lines are not straight. Our eye uses distortion correction. Lens designers can design lenses so they have very little distortion, or they can make less complicated lens designs and "fix" the distortion in software. |
| |
|
Distortion = In photo optics/lenses: When straight lines in a scene don't remain straight because of optical aberration.
Lens designers can correct for distortion to a degree so the whole image field is perfect corrected and all lines remain straight. In modern lens design many designs rely on Software Distortion Correction (SDC).
The eye adjusts for distortion so we always see vertical and horizontal lines straight when we look at things. Even when you get new prescription glasses (if you use such), you will often experience distortion in your new glasses. After a few days they eyes have adjusted for the glasses and the distortion you saw to begin with is now gone. Software Distortion Correction (SDC) is far behind what the human eye can perform of adjustments. (Also see my definition on Perspective for more on the eye and optics)
DNG = Digital Negative, an open standard developed by Adobe. It is a single file that contains the raw image data from the sensor of the camera as well as date, time, GPS, focal length, settings, etc.
The alternative is a RAW file + XMP file where the RAW file contains the image information and the XMP contains the rest of information about where, how and when the picture was taken, as well as editing data when the photo is edited in Lightroom or Capture One.
A Camera Raw profile (that is specific for that camera) in the computer helps the software program, for example Adobe Lightroom, to translate the RAW data into the image. Camera producers provide a Camera profile with their camera, and Adobe makes their own 'refined' Adobe Raw camera profile for all new cameras.
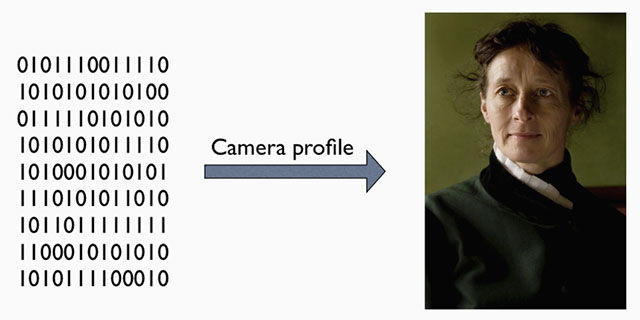
A raw file (or DNG) is simply the full recording of digital data (1's and 0's) from the sensor. In the computer, the sensor data is translated into the exact colors, via a camera profile.

Narrow Dept Of Field in use: The face is in focus, the hand in front is slightly out of focus, the background is much out of focus and blurry, reduced to an atmosphere. Leica 50mm Noctilux f/1.0 at f/1.0 and 2.5 meters distance to subject in focus. © Thorsten Overgaard.
 |
|
 |
| 50mm f/1.4 lens at f/1.4. |
|
50mm f/1.4 lens at f/5.6 |
| |
|
|
| |
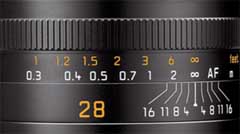 |
| |
The lines on this 28mm lens indicates the DOF. Here the focus is on infinity, and if the lens is stopped down to f/1.6, objects from 1.8 meter to ininity will be 'acceptable sharp'. |
| |
|
DOF = Depth of Field (or Depth of Focus), an expression for how deep the focus is, or (more often use to express) how narrow the area of focus is. This is how much of the image, measured in depth or ditance, will be in focus or "acceptable sharp".
The appearance of the DOF is determined by:
1) aperture (the smaller the aperture hole is, the deeper is the depth of field, and opposite, the wider open a lens you se, the more narrow will the DOF be) and
2) distance to the subject (the farther away, the larger area is sharp; the closer the subject in focus is, the more narrow the DOF gets)..
The DOF scale measurement on top of the Leica lenses shows lines for each f-stop that indicates from which distance to which distance the image will be sharp. Shallow DOF is a generally used term in photography that refer to lenses with very narrow focus tolerance, like f/1.4 and f/0.95 lenses, which can be used to do selective focus; making irrelevant subjects in the foreground and background blurry so only the subjects of essence are in focus and catches the viewers eye).
in modern cameras like the Leica SL2, the camera has a DOF scale inside the viewfinder. As DOF is the same for all lens brands and designs, only depending on focal length, distance and aperture f-stop, the camera can calculate it and show a 'digital DOF scale" in the viewfinder.
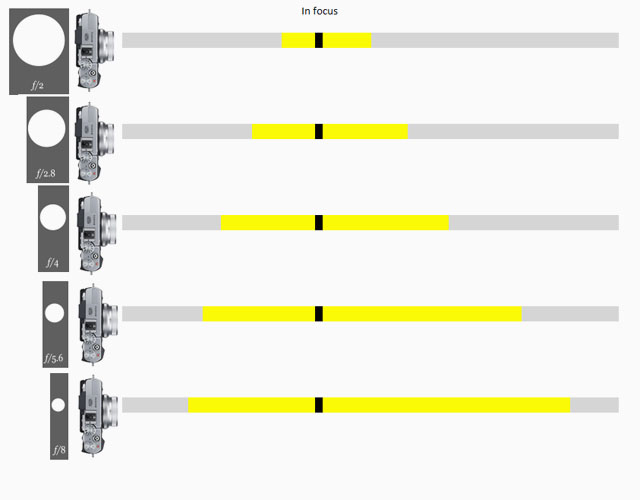
Depth Of Field scale from Fujifilm, same lens with different aperture settings from f/2.0 to f/8.0.

Depth of Field: Focus is on the flowers and the photograph on the desk and the foreground and background is blurred as the depth of field is narrow. If one stop down the aperture of the lens from f/1.4 to f/5.6, more will be in focus. If one stop down the lens to f/16 even more (if not all) will be in forcus. Another rule: The closer you go to a subject (the less focusing range), the more narrow the Depth of Field will be. © Thorsten Overgaard.
Dynamic range. The grade of ‘contrast range’ (or number of tones) a film or sensor, or simply a photograph, possess between bright and dark tones. The human eye is said to have a dynamic range of 10-14 ‘stops’ (but because we scan area by area and compile a concept of the overall scene, they eye is often thought to have a much higher dynamic range), Film used to have 7-13 ‘stops’ and some modern sensors have up to 15-17 ‘stops’.
E - Diameter in Leica filters and screw diameter, as in E46 which means that the filter diameter is 49mm for this lens. In general language, one would see Ø46 used, as Ø is the general symbol for diameter.
Elmar = Refers to the maximum lens aperture - here f3.5 . Historically derived from the original 1925 50mm f3.5 Elmax lens, which was an acronym of (E)rnst (L)ieca and Professor (Max) Berek, designer of the original lenses. Later that year the 50mm f3.5 Elmar superceded the Elmax, which was discontinued due to its complexity and high cost of manufacture.
Elmarit = Refers to the maximum lens aperture - here f2.8 . The name is obviously derived from the earlier (and slower) "Elmar" designation. Not every f/2.8 lens is called an "Elmarit" though, the most obvious current exception being the 50mm f2.8 Elmar-M collapsible lens which for nostalgia and marketing reasons has kept the original 1930's Elmar name (the 50mm f3.5 collapsible Elmar, manufactured 1930-59, was one of Leica's most famous and popular lenses). Vario-Elmarit (and Vario-Summicron, etc) is Leica Camera AG's name for zoom lenses.
Elmax
Elmax lens named after = Ernst Leitz + Max Berak. Ernst Leitz was the founder of Ernst Leitz Optical Industry which later became Leica. Professor Dr. Max Berak was employed at Leica in 1912 and was the architech of the first Leica lens which Ernst Leitz asked him to design for the "Barnack's camera" (the 1913-prototype named after Oscar Barnack who invented it). The lens was a f/3.5 50mm and was known as the Leitz Anstigmat and later the Elmax.

The Leitz Elmax 50mm f/3,5 (1925-1961) on the Leica A camera (1925) camera. Photo by Marco Cavina.
EVF = Electronic ViewFinder. A viewfinder where you look at a small screen through optics/prisms. The advantage is that you see what the sensor sees.
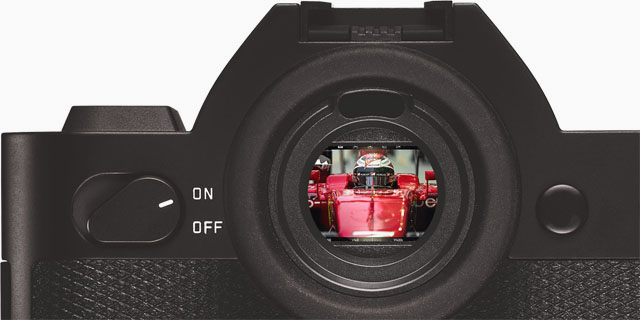
The EVF (Electronic Viewfinder) on the Leica SL 601.
EXIF =Exchangeable Image File, a file generated in camera and enclosed in the image file that contains recording information on the image such as shutter speed, exposure compensation, what metering system was used, aperture setting, ISO setting, date and time the image was taken, whitebalance, which lens was used, camera model and serial number. Some images may even store GPS information so you can see where the image were taken. The data from the EXIF file continues to follow any later editions of the image and can be read in photo editing software such as Capture One and Lightroom, as well as Photoshop (go to the menu File > File Info). There is also software available that can read EXIF data from any file, like Exifdata.com.
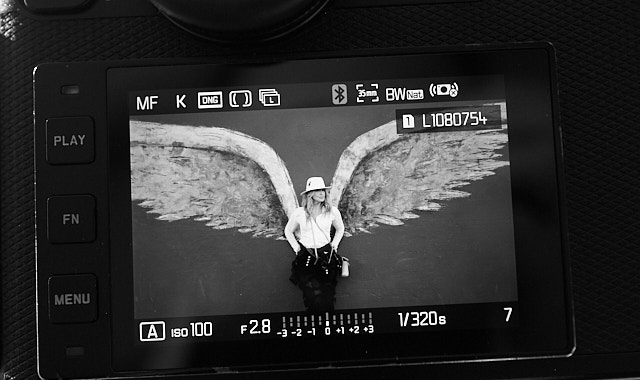
The EXIF data is all the information about shutter speed, metering method, ISO, etc. - and then some more that you don't see on the screen (such as camera model, serial number, lens used, etc).
Exposure Bracketing = The possibility to set the camera to automatically record a series of images where the exposure is above and below what the camera measures. The idea is that at least one of the images will be correctly exposed.
f/ (f-stop, also known as aperture).
f- (focal length). Often given in mm, for example 90mm. In the past they were often given in cm or inch, for example 9.5 cm or 3.2 inch.
f-stop = the ratio of the focal length (for example 50mm) of a camera lens to the diameter of the aperture being used for a particular shot. (E.g., f/8, indicating that the focal length is eight times the diameter of the aperture hole: 50mm/8 = 6,25 mm); or the other way around, the hole is the focal length divided with 8).
ORIGIN early 20th cent.: from f (denoting the focal length) and number.
One f-stop is a doubling or halving of the light going through the lens to the film, by adjusting the aperture riing. Adjusting the f-setting from f 1.4 to f.2.0 is halving the light that goes through the lens. Most Leica lenses has half f-stops to enable the photographer to adjust the light more precicely.
Filters = Glass filters you put in front of the lens. A much used filter is the claer UV filter that is supposed to protects the front of the lens. Other filters are color filters that add effects to black and white photography by changing the color balance. Other filters are ND (Neutral Density) filters that reduce the amount of light coming through (used for for example video recordings as video is usuallu filmed at 1/50th second shutter speed and thus most lenses are too bright wide open. Or they are used for long exposure photography in order to record for example stars movements over the sky. Other filters are filters that create star effects, or blur the view, and almost any effect you can think of.
A traditional Yellow filter in 49mm diameter to screw onto the front of the lens. The yellow filter is used for black and white photography where it slightly darkens skies, helps to cut through haze, and improves overall contrast. Yellows and reds within the scene are also lightened.
Flare = Burst of light. Internal reflections between (and within) lens elements inside a lens. Mostly, flare has a characteristic "space travel" look to it, making it cool. Particularly in older lenses with less or no coating of the glass surfaces to suppress this, it can be a really cool effect. In newer lens designs, the coatings and overall design try to suppress flare and any reflections to a degree, so that there is seldom any flare to be picked up (moving the lens to pick up a strong sunbeam), but instead a "milking out" (or "ghosting") of a circular area of the frame; meaning simply overexposed without any flare-looking flares.
 |
|
 |
Sunlight creating (fairly supressed) flare in the bottom right quadrant of the image of a modern lens. |
|
The camera moved slightly to avoid the flare. |
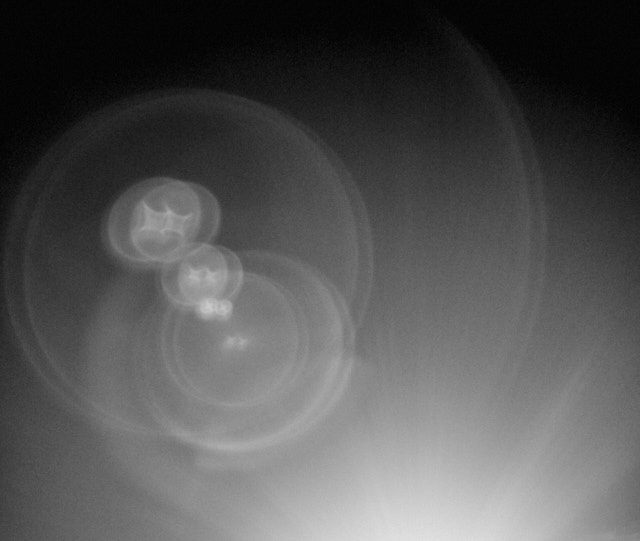
Older lenses with less coating, or without coating, are known to create flare that can look like this (Leica 50mm Summicron-M f/2.0 II Rigid model from the 1960's). © Thorsten Overgaard.
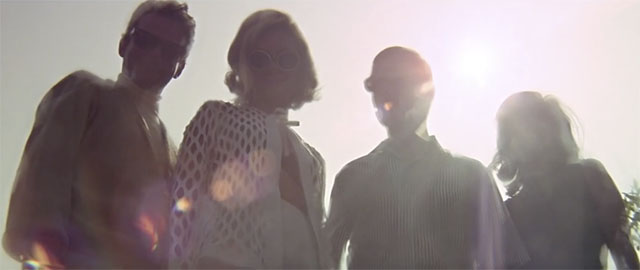
Lens flare in the movie, The Graduate (1967).
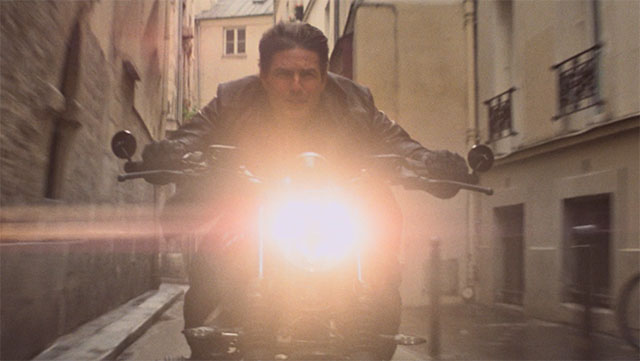
Lens flare in Mission Impossible Fallout (2019)

Lens Flare in Star Trek (2013). JJ Abrams famously said, "I know there's too much lens flare ... I just love it so much. But I think admitting you're an addict is the first step towards recovery (ha ha)"
|
FLE = See "Floating Elements"
Flickering in the EVF is very normal and will apear often without the vertical lines you see in the EVF will be in the picture.
| |
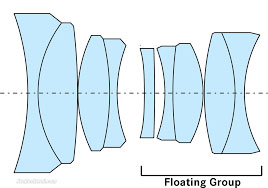 |
| |
Floating elements (a group of lenses or can also be s aingle lens element). . |
Floating Elements (FLE) = Near focus correction in a lens by having a single lens or a group of lenses floating independently of the other lenses. Most lenses are born with poor performance at their closest focusing distance. Center sharpness may be good, but aberrations and corner softness increase when you’re shooting closeups. Floating elements are lens elements outside of the primary focus group that change position when the lens is focused on a close object, correcting aberrations and improving close up performance.
Floating Elements originally was coined by Canon in the 1960's and quickly became the general term for this feature. Other brands came up with new names for the same thing, Minolta called it Floating Focusing, Nikon used the term Close-Range Correction (CRC), Leica call it FLE/Floating Elements.
Floating elements are for close-focus improvement of image quality and not for reducing "focus shift". Floating elements by themselves cannot reduce focus shift, but by reducing the impact of focus distance on performance, they give the designers more freedom in other areas - which could include minimising focus shift.
(As a side-note, when a lens "rattler when moved, it is not the floating elements "floating around" but can be the IS (Image Stabilization) elements for elense that has that, AF elements for auto focus lenses, or the aperture cage that rattles (as in the case of the Leica 35mm Summilux-M f/1.4 FLE - if you stop down the Summilux to f/16, the sound is usually not there).
| |
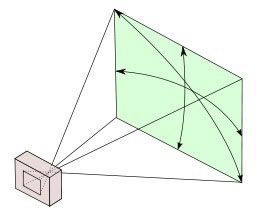 |
| |
A 28 mm lens has a 74° viewing angle |
| |
|
Focal length = Originally focal length referred to the distance from the sensor (or film in older days) to the center of focus inside the lens (28mm, 50mm, 400mm, etc). Today one call it effective focal length (EFL) as a 400mm lens is not nessesarily 400mm long due to optical constructions that can make it shorter. The 35-420mm zoom on the Leica V-Lux 1 is for example only ca. 135 mm long. Nobody uses that measurement, except those who construct lenses! For users of lenses, focal length refers to how wide the lens sees. The viewing angle, which is often given in for example 90° viewing angle for a 21mm lens, 74° viewing angle for a 28mm lens, 6° viewing angle for a 400mm lens, etc.
Each human eye individually has anywhere from a 120° to 200° angle of view, but focus only in the center.
Focus, in - Sharp and clear in appearance. Focus - “The burning point (of a lens or mirror)”. In Latin the word focus meant fireplace or hearth. The word was probably first employed outside of its Latin literal use as “the burning point of a lens or mirror” in optics, and then came to mean any central point. The German astronomer Johannes Kepler first recorded the word in this sense in 1604.
Focus shift = That the focus of a lens shifts as the aperture changes. For example, if one focus a 50mm lens at f/2.0 and then stop the aperture down to f/8, the focus may change, especially noticeable in close focusing. Modern lenses with floating elements (FLE) where the floating elements adjust for image quality in close-focusing may also help avoid focus shift.
Four Thirds - Also known as "4/3" - The Four Thirds System is a standard created by Olympus and Kodak for digital SLR camera design and development.
The system provides a standard which, with digital cameras and lenses available from multiple manufacturers, allows for the interchange of lenses and bodies from different manufacturers. Companies developing 4:3 cameras and/or lenses are Fuji, Kodak, Leica, Olympus, Panasonic, Sanyo, Sigma. See www.4-3system.com
A further development in this was Micro Four Thirds Systems.
Frame lines = the lines inside a viwfinder that indicates the edger of the frame. In a Leica M, the viewfinder always is as wide view as 24-28mm. A mechanical contach on the lens (triggers the camreas frame selector) so the viewfinder shows the frame line of that lens. In the Leica M, the frame lines comes in sets, so there are alwaus twop sets of frame lines shown at any time (see illustration below).
(This is different than in most cameras where you only see what the lens captures: SLR cameras was the evolution in 1940's where the image from the lens was displayed directly onto a matte screen inside the camera via a mirror.
Later mirrorless cameras, the viewfinder shows the exact picture that the sensor sees through the lens).
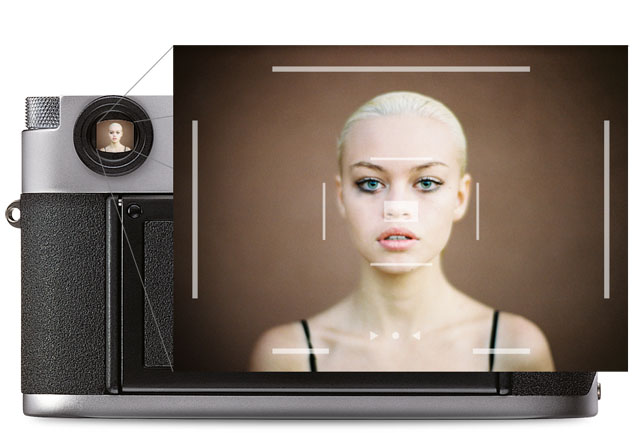
Frame lines of the Leica M, here showing the set of 35mm and 90mm framelines.
| |
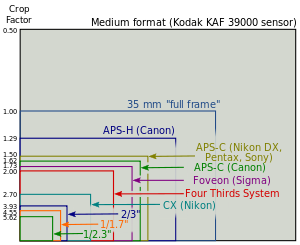 |
| |
Full Frame is "king of photography" |
| |
|
Full Frame (FF) = The size of the sensor is 24 x 36mm which is the format Oskar Barnack and Leica Camera AG invented with the first Leica that was introduced in 1925. Many other formats invented since, such as APS, APS-C and all usually refer to Full Frame ratio, by which it means what size they have compared to Full Frame. The "full frame" technically deifinition thouhg is a sensor that camtures the full frame in one go (as the early sensors as in Leica S1 scanned the image/senor over a period of time).
The 24 x 36mm Full Frame format is so "king of photography" that it has continued to be the ideal for all cameras. Besides this, there exists Large Format cameras such as 4x5" (100 x 125 mm) and Medium Format 6x6 (60 x 60mm amongst other sizes in that area).
Ghosting = Secondary light or image from internal reflections between (and within) lens elements inside a lens. The reflected light may not always be in focus, so overall it looks like a "milked out" image. A subject in focus has brightened patches in front of it that come from reflections inside the lens. the most elementary look of ghosting is when you look in a rear-view mirror in a car at night and you see doubles of the headlights behind you (a strong one and a weaker one), because the headlights are reflected in a layer of clear glass on top of the mirror glass.
 |
|
 |
|
 |
| Degrees of ghosting from strong sunlight entering from outside the frame. To the right the outside light has been shielded with a shade. |
ISO = Light sensitivity of the camera sensor is given in ISO (International Organization for Standardization). It's a standard that was used in film and is now used in all digital cameras also. The base ISO for the Leica TL2 sensor is around 100-150 which means that this is what the sensor "sees". All other levels are computer algorithms calculating the effect as if the sensor could "see" more (hence noise at higher ISO levels).
ISO goes in steps of doubling: When the ISO is raised from 100 ISO to 200 ISO, the camera only need half the amount of light to make the same picture. For each step in ISO to 400, 800, 1600, 3200, etc. the light sensitivity is doubled for the sensor (and the camera sensor only need half the light of the previous ISO to record the same image).

6400 ISO indoor photo. With modern cameras the ISO can go to 3200, 6400, 12,800 and even higher without loss of dynamic range and without digital noise. Leica M10 with Leica 50mm Noctilux-M ASPH f/0.95. © 2017 Thorsten Overgaard.
JPEG = A standard for picture format made in the 1990's by Joint Photographic Experts Group). Mostly referred to as JPG as in L1003455.JPG which would be the name for a JPG file from the camera.
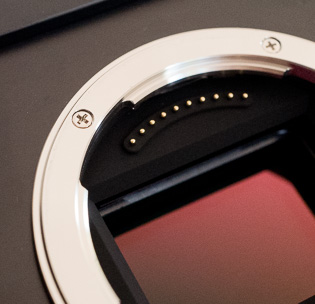
Leica L-mount bayonet. |
L-mount = Lens bayonet mount introduced by Leica for the Leica T in 2014 and used for Leica TL, Leica CL and Leica SL. Since 2019 the L-mount has also been shared with Panasonic, Sigma and others who produce cameras and lenses that are compatible with Leica L cameras and lenses lenses, and vice versa.
The L-mount has a diameter of 51.6 millimeter which is big enough for any design we could wish to design, and at the same time compact enough for the L-mount to be used on compact cameras such as Leica TL and Leica CL with APS-C sensor sizes. Leica chief lens designer Peter Karbe spent years calculating this ideal size, large enouhg for any design, yet as compact as possible. Read my article "Small Camera, Large Print" (2019) with interview with lens designer Peter Karbe for more.
After Leica introduced this new bayonet mount in 2014, Nikon (Z-mount 55mm), Fuji (G-mount 65mm) and Canon (RF-mount 54mm) followed with similar new bayonet mounts, but with bigger diameter, making them less able to produce compact lenses.
A screen on a camera is often referred to as "LCD Screen" for no particular reason (illustration is the back of the Leica Q2 special limited "James Bond/Daniel Craig & Greg Williams" version (2021).
LCD = Screen. LCD itself means liquid crystal display, which is slightly irrelevant (what it is made of) as the expression is mostly used to simply mean "screen".
Leica = A compound word derived from " (Lei)tz" and "(ca)mera". Apparently they were originally going to use "LECA", but another camera company already used a similar name in France, so they inserted the 'i' to prevent any confusion.

The word lens derives from lentil, because of the similar shape.
Lens - A piece of glass or similarly transparent material (like water or plastic) that has a shape so that it can direct light rays. The word “Lens” is used both for single piece of glass as well as a camera lens with several lenses that works together. From ‘lentil’ because similar in shape.
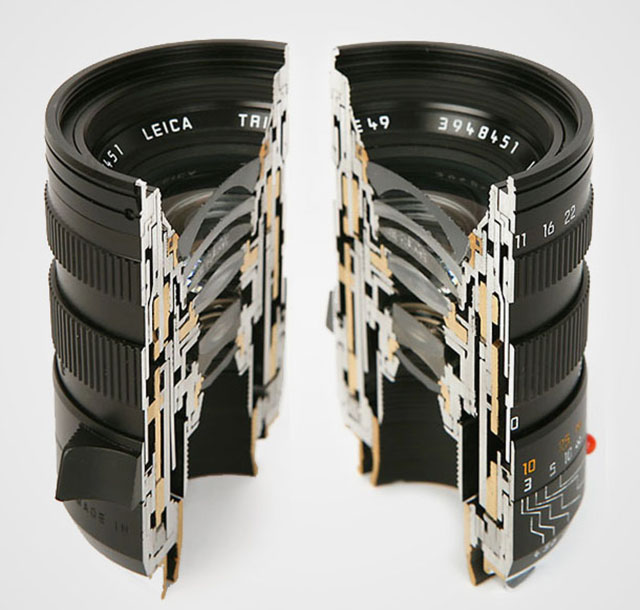
A camera lens consists of several shaped lens elements of glass. The lenses can also be made of simple cheap plastic as in "kit lenses" (sold with a camera as a kit to make a workable cheap package), but it is mostly very exotic glass (that can be heavy or light in weight, very hard or very soft in surface (esay to scratch or very resistant) with each optical glass recipe made to develop very specific qualities in how the glass and final lens treats light. As a general rule, high quality glass is soft, which is why some lenses has as their front and back element, a non-optical lens element that is there to protect the actual optical glass from scratches. As a side noite, Leica made their own glass laboraty, The Leitz Glass Laboratory, from 1949-1989, which deveopled 35 new glass types and took out more than 2,000 patents of glass recipes from more than 50,000 experimental melts of glass. These designs, or recipes, are still used today by the lens designers to obtain very specific optical results. Other lens manufacturers in the world of course have had their glass laboratories, and today one will find an interchange of glass patents amongst production facilities that service Leica, Nikon,, Fuji and so on with optical lens elements.
Lens hood = (also called a Lens shade or Ventilated Shade). A tube or ring attached to the front of a camera lens to prevent unwanted light from reaching the lens and sensor. In the past where lenses were not coated to prevent internal reflections inside the lens, the lens hood was often essential. These days where lenses are coated, the shade serves just as much as decoration and protection (bumper) as well.
ORIGIN Old English hod; related to Dutch hoed, German Hut 'hat,' also to hat.
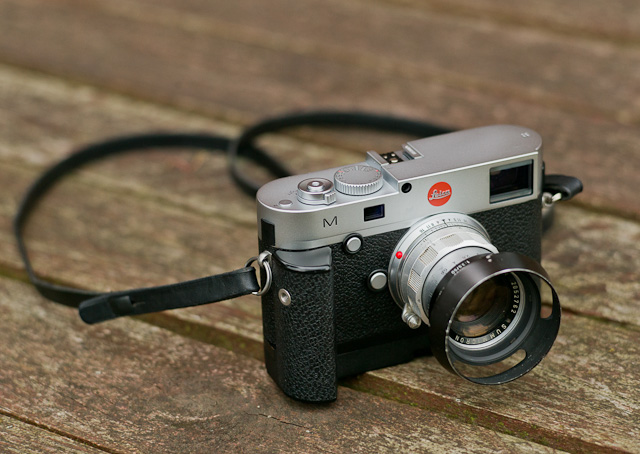
Lens hood or Lens shade or ventilated shade. In the picture is a ventilated shade with clip-on mount to a 50mm f/2.0 lens. Ventilated means it has openings that allow for view from the viewfinder.
Lens names of Leica distinguish which widest aperture the lens has:
| Noctilux |
f/0.95 - f/1.25 |
| Nocticron |
f/ 1.2 (Leica-designed Panasonic lens) |
| Summilux |
f/ 1.4 - f/1.7 |
| Summicron |
f/2.0 |
| Summarit |
f/2.4 - 2.5 |
| Hektor |
f/1.9 - f/6.3 (used 1930-1960 for screw mount lenses only) |
| Elmarit |
f/2.8 |
| Elmar |
f/2.8 - f/4.5 |
| Elmax |
f/3.5 (only used 1921-1925 for the 50mm Elmax f/3.5) |
| Telyt |
f/2.8 - f/6.8 (used for tele lenses) |
Light = Tiny particles called photons that behaves like both waves and particles. Light makes objects visible by reflecting off of them, and in photography that reflecting off of subjects is what creates textures, shapes, colors and luminance. Light in its natural form (emanating from the sun) also gives life to plants and living things, and makes (most) people happier. So far, nobody has been able to determine exactly what light is. The word photography means “writing with light” (photo = light, -graphy = writing). Read more about light in my book Finding the Magic of Light.
Live View = This is the ability to see the image the sensor see, live, via the screen on the back of the camera, or via an electronic viewfinder (EVF).
LMT - Leica Thread-Mount: Also known as M39, is the screw mounted lenses for Leica cameras. It’s a simple as that; you screw on the lens, and back in 1932, the possibility to change the lens was the big news hwen introduced by Leica on the Leica III. The M39 system was updated with the M Bayonet from 1954 for the Leica M3. The M bayonet is a quick way to change lenses and is the current mount for Leica M digital rangefinders.
M (as in "M3", "M6", "M7" etc.)
A) The M originally stands for "Messsucher", which is German "Meßsucher" for "Rangefinder". The "3" in M3 was chosen because of the three bright line finders for the 50, 90 and 135 mm lenses. Later the numbers of the M cameras were more or less chosen to follow each other.
M-body evolution in chronologic order:
M3 - MP - M2 - M1 - MD - MDA - M4 - M5 - CL - MD-2 - M4-2 - M4-P - M6 - M6 TTL - M7 - MP - M8 - M8.2 - M9 - M9-P - MM (black and white sensor) - ME (Type 220) - Leica M (Type 240) - Leica M-P 240 - Leica M 246 Monochrom - Leica M-A (type 127, film camera) - Leica M 262 - Leica M-D 262 (without a screen) - Leica M10 - Leica M10-P, Leica M10 Monochrom, Leica M10-R.
B) M also refer to M-mount as the M bayonet that couple the Leica M lenses to the Leica M camera. Before the M bayonet the coupling between the camera and lens was screwmount.
C)
M nowadays refer to the Leica M line of cameras rather than the "Messsucher".

The Leica M bayonet on the Leica M10.
- M-mount: The Leica M-mount is a bayonet that was introduced with the Leica M3 camera in 1954 and has been used on all subsequent Leica M cameras, as well as on the Epson R-D1, Konica Hexar RF, Minolta CLE, Ricoh GXR, Rollei 35RF, Voigtländer Bessa, and Zeiss Ikon cameras (2019).
Compared to the previous screw mount (M39), the M
mount requires a quick turn of the lens, and ithe lens is mounted. The patent for the M-bayonet ("Bajonettvorrichtung für die lösbare Verbindung zweier Kamerateile") was registered by Ernst Leitz GmbH 10 February 1950 (patent number DE853384). Hugo Wehrenfennig was credited with the invention.
M9
Leica M9 is a model name for the Leica M9 that was introduced on September 9, 2009 (as the first full-frame digital Leica M). It was the latest model designation using the M and a number. From their next model, Leica Camera AG introduced a new model system so each camera would simply be a Leica M but then with a model designation like Typ 240, Typ 246, Typ M-D 262 and so on. The idea was inspired from Apple who name their computers for example MacBook Pro and then it has a sub- model number designation which model it is (and which would define speed of processor, etc).
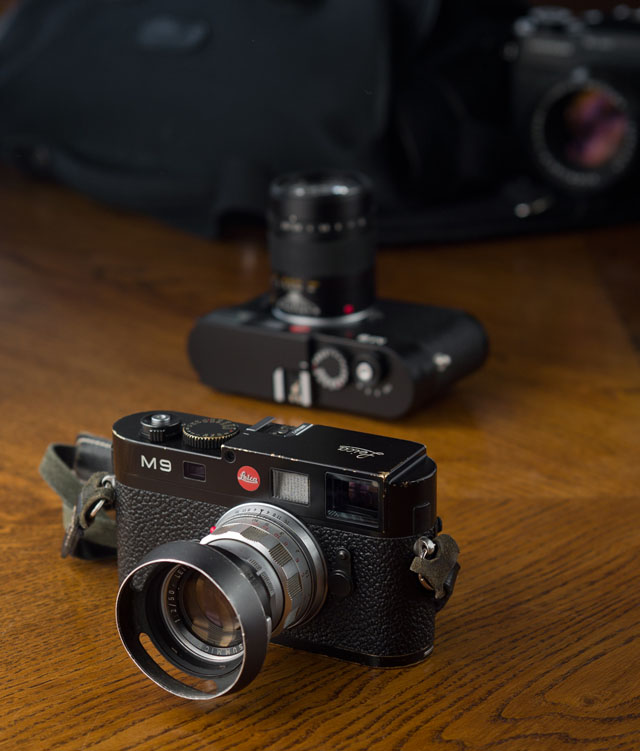
Leica M9 digital rangefinder (2009). © Thorsten Overgaard.
MACRO = Macro lens. The Leica 60mm APO-Elmarit-Macro-R ASPH f/2.8 is a 60mm lens for portraits, landscapes, etc. as well as a near focus macro lens. The Leica Q lens can be turned to Macro which enables you to go close so as to enlarge smaller subjects. The Leica M cameras becomes Macro when you add a Macro ring "Oufro" or "Leica Macro M Adapter" that increases the lens' distance to the sensor. The word macro comes from Greek makros ‘long, large.’
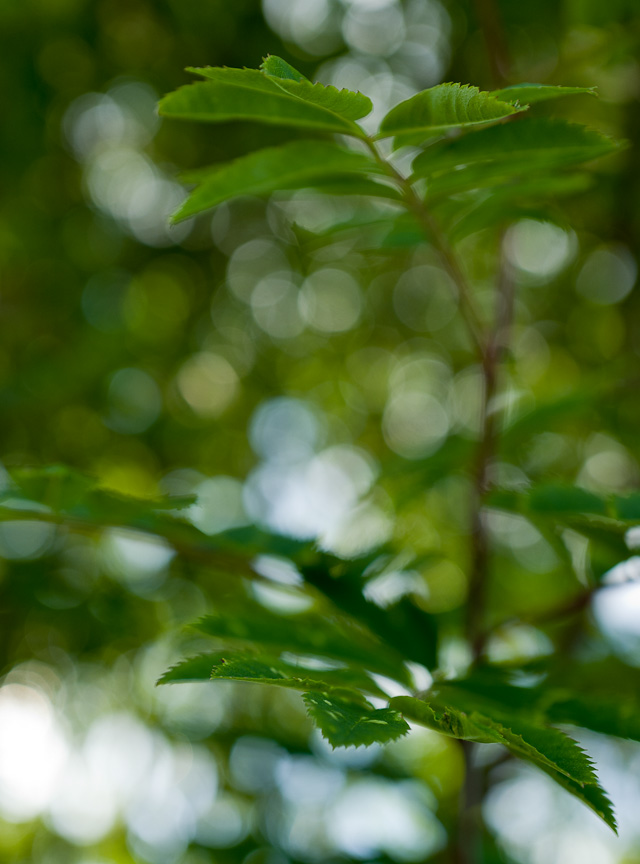
The word macro comes from Greek makros ‘long, large.’ The Leica 60mm APO-Elmarit-Macro ASPH f/2.8 is both a 60mm lens for portraits, landscapes, etc. as well as a near focus macro. © Thorsten Overgaard.
Mandler, Dr. Walter (1922 - 2005)
Legendary Leica lens designer and CEO of Ernst Leitz Canada (ELCAN) 1952-1985. Read more in Leica History.
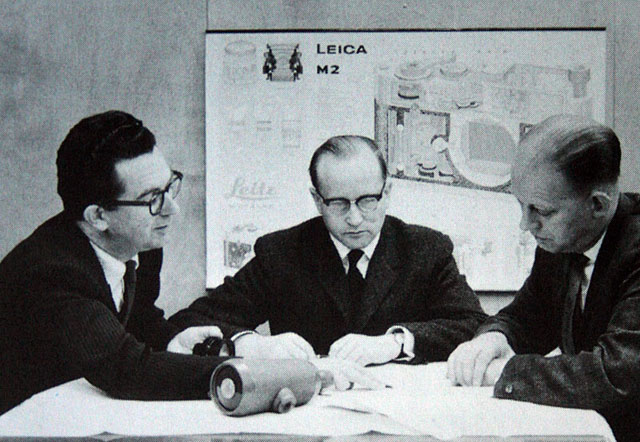
Dr. Walter Mandler (center) at the Ernst Leitz Camera factory.
Megapixel (or MP) - Millions of pixels. See pixel further down. How many units of RGB is recorded by a given sensor by taking height x widt. A Leica M10 delivers a 5952 x 3968 pixel file = 23,617,536 piexls. On a screen the resolution you choose determines the size of the image. Say you have a 5000 pixel wide file and your screen is set for 8000 pixels wide. Then the image will fill only the 5000 pixels fo the 8000 and the rest will be empty, If you then change the screen resolution to 5000 wide, the image would be able to fill out the whole screen.
Meßsucher = (rangefinder or distance finder) = Mess = range, sucher = finder. It is always correctly written with the "ß". There are technically not three "s", rather the "ß" and one "s" because it is a word constructed by the combining of two precise words.
MF (Manual Focus) for lenses that are focused by hands, as opposed to Auto Focus.
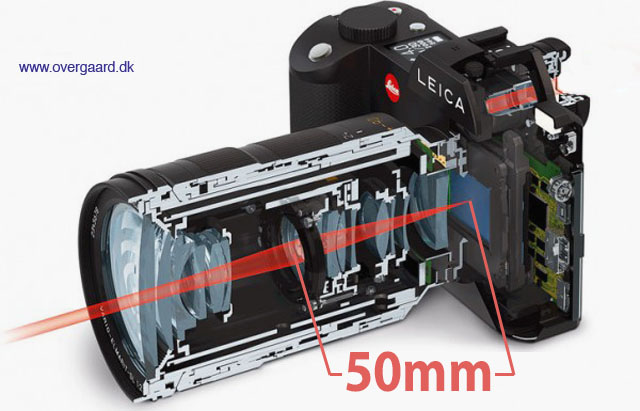
Focal length is determined by the distance from focus inside the lens to sensor surface to, and is given in milliemeters (mm). © Thorsten Overgaard.
mm = millimeter(s), as in a 50mm lens. (Earlier in lens history lenses focal length was given in cm = centimeters; as in a 5 cm lens). For anyone used to centimeters and millimeters, it’s no wonder. But if you grew up with inches, feet and yards, you may have had a hard time grasping what a 50mm lens was. But as lenses were designed first in Europe, the metric system with centimeters and millimeters was used to describe lenses.
(Leica and others made lenses for a while with either meter scale or feet scale; but then eventually started including meter and feet on all the lenses (two scales, usually distinguished with different colors). However, the lens' focal length remained always 50mm, 75mm and so on).
The reason a 50mm lens is a 50mm lens is that there is 50mm from the focus plane (the film or sensor surface) to the center of focus inside the lens. When photography was a young subject, it was engineers who made it all, and the users were expected to understand. The engineers were so into the making of the lenses, that it apparently never dawned upon them that today’s users would think of a 21mm lens as a wide angle lens rather than a lens where there is 21mm from the sensor to the center of focus inside the optics.
MP
a) Stands for Mechanical Perfection, as in the Leica M-P.
b) Megapixels (millions of pixels).
c) Megaphotosites (millions of photosites).
ND
Neutral Density filters are grey filters function as 'sunglasses' for lenses. They simply block the light so that a lens can work at for example f/0.95 or f/2.0 in sunshine.
If a camera is set to 200 ISO and the maximum shutter speed is 1/4.000, this will usually result that the lens has to be at f/2.8 or smaller aperture in sunshine. Else the image will over-exposed. So in order til stay within the maximum shutter speed of 1/4.000 and still use a lightstrong lens wide open, one mount a ND-filter that reduce the light with 3 stops (8X) or 6 stops (64x).
For video ND-filters are used quite a lot (as the shutter speed for video is 1/60), and ND-filters are also used to reduce the light for really long multi-exposures at night (stop-motion video and stills).
ND-filters also exist as variable ND-filters so one can adjust the amount of light going through from for example 1 stop (2X) to 6 stops (64X).
ND-filters also exist as graduated ND-filters where the top of the filter is dark and then gradually tone over in no filter (so as to reduce the skylight in a landscape for example).
The ND filters are called Neutral because it is a neutral filter. It doesn't change colors, only the amount of light.
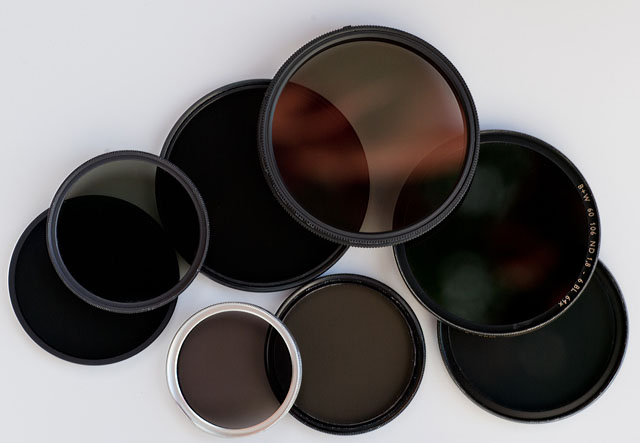
ND-filters / gray-filters.
Noctilux = Also known as "King of the Night" because "Nocti" means Night and "Lux" means Light. The f/1.0 lenes from Leica are named "Noctilux". The first Leica Noctilux lens was the 50mm Noctilux f/1.2 which shortly after it's introduction was improved to the 50mm Noctilux f/1.0. In the current model the f-stop has been improved further to f/0.95.
"Noctilux" refers to the maximum lens aperture - here f1.0 . "Nocti" for nocturnal (occurring or happening at night; ORIGIN late 15th cent.: from late Latin nocturnalis, from Latin nocturnus ‘of the night,’ from nox, noct- ‘night.), "lux" for light. The Leica Noctilux 50mm f1.0 is famous for enabling the photographer to take photos even there is only candleligts to lit the scene. See the article "Leica Noctilux - King of the Night"

The Noctilux "King of the Night" lens. From left the f/0.95 in silver (same on the camera, in black), the f/1.0 in the back and the rare and expensive first model, the f/1.2 in the front.
No.
Number, on this site Leica catalog numbers or order numbers. Some the numbers changed depending on the number of cams in the lens: The Elmarit-R f2.8/135mm started life as No. 11 111, however when fitted with 2 cams for the SL became No. 11 211, yet another No. for the 3 cams lens and a fourth number for 3 cam only at the end of its life. Number changes also applied to M lenses depending on whether they were screw-thread, bayonet or for M3 with “spectacles”. Thus the No. in the Thorsten Overgaard Leica Lens Compendium list is a guideline but not a comlete list of existing catalog numbers.
Optic = Eye or vision. From French optique or medieval Latin opticus, from Greek optikos, from optos ‘seen.’
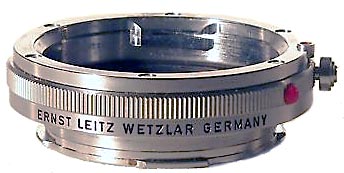
Oufro (model 16469Y)
An original Leitz Extension Ring (produced 1959-1983 as part no. 16469). Used with Oubio for all the longer (125mm+) Visoflex lenses and without OUBIO for 35/50mm. OUFRO can be stacked for greater magnification and will work on the Leica M Type 240 as macro for all lenses (including the Noctilux, 90mm APO-Summicron and even 21mm lenses).
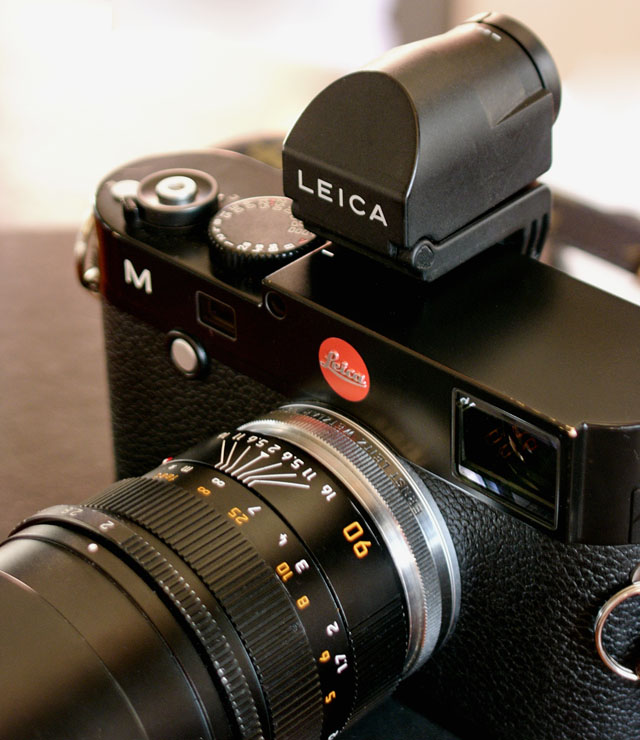 The OUFTO on Leica M Type 240 with Leica 90mm APO-Summicron-M ASPH f/2.0. The OUFTO on Leica M Type 240 with Leica 90mm APO-Summicron-M ASPH f/2.0.
Perspective = The way objects appear to the eye; their relative position and distance. Also, selective focus (foreground and background out of focus) can change the perception of perspective (also see Three-dimensional). A wide angle "widens" the perspective and makes objects further away appear smaller than they are to the eye; and objects closer, relatively larger than they are to the eye. A tele lens will "flatten" the perspective and often objects further away will appear relatively larger than close objects than they are in real life. A 50mm lens is the one closest to the perspective and enlargement ratio of the human eye.
The word Perspective comes from the latin word for optics (perspicere, per- ‘through’ + specere ‘to look’), and so-called Renaissance painting is simply painting done within the framework of optics and the linear perspective it presents.
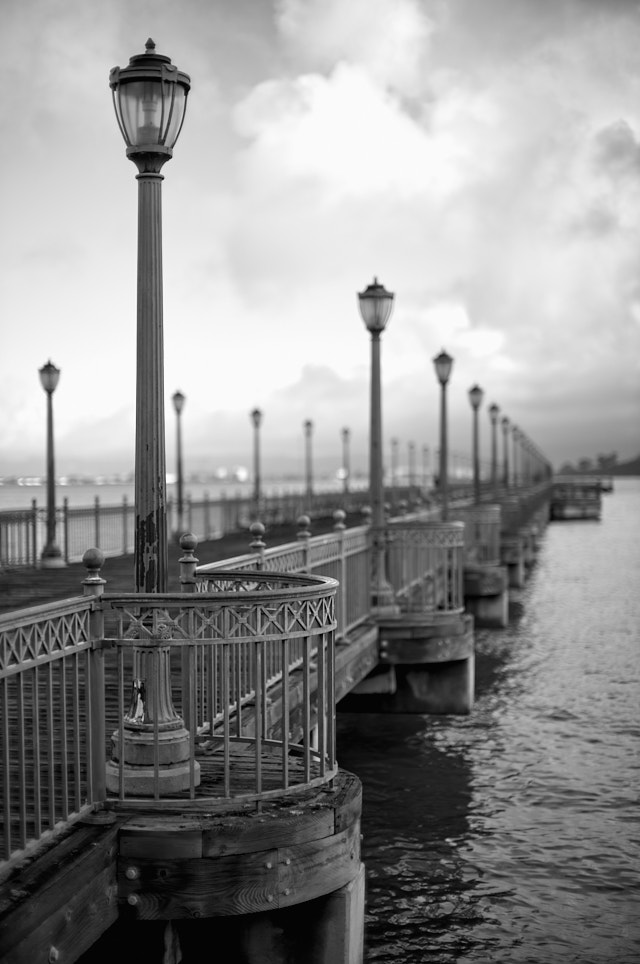
Perspective is relative position and distance. The objects nearby are larger than objects far away. This is how the eye and the mind calculate distance. The eye and the camera automatically captures perspective. In darwing and painting one would see "stupid" two-dimensional drawings 500 years B.C where elements were thrown into the mix without considering that a an object far away must be smaller than if close to the viewer. The word "perspective" comes from "to look through (optics)". Pier 7 in San Francisco by Thorsten Overgaard. Leica M11 with Leica 50mm Noctilux-M ASPH f/0.95.
| |
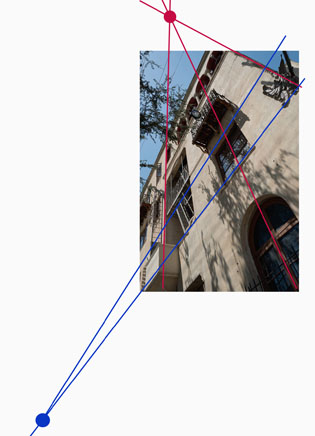 |
| |
Vanishing points are the points where lines meet. This is how you make perspective in paintings and drawings (and some times make movie sets or theatre stages appear more three-dimensional than they are) |
| |
|
Painters works with vanishing points, which is where the lines meet, so as to create an illusion of perspective and three-dimensional effect on a two-dimensional painting or drawing.
The human eye corrects for perspective to an extreme degree. We always see vertical lines vertical and horisontal lines horisontal: The eye has a angle of view equivalent to an 8mm wide angle lens, a size ratio equivalent to a 50mm lens and we focus on relatively small area of the viewing field - one at the time. Three things happens that are worth paying attention to:
1) We compile areas of our view that we focus on, to one conceptual image that "we see". Ansel Adams, the great American landscape photographer pointed out that a large camera used for landscape photography capture every detail in focus and sharp so you can view it in detail after; but the eye does not see everything in focus when you try to compose the landscape photography, the eye scans only one part at a time and stitch the idea together. This makes composing or prevision of a landscape photography challenging.
2) We compile areas of our view that we individually adjust the exposure of. A camera adjust the exposure of the whole image frame to one exposure. That's why what looks like a nice picture to the eye of houses in sunshine with a blue sky above, becomes a photograph of darker buildings with a bright white sky: The camera simply can't take one picture that compare to what we "compiled" with our eyes, adjusting for each type of light.
3) Objects (on a table, for example) in the bottom of our viewing field will appear 100% perspective corrected - to a degree that it is impossible to correct in optics, with or without software correction. A wide angle lens, even with little distortion, will exaggerate the proportions of the closet part so it - to the eye - looks wrong.
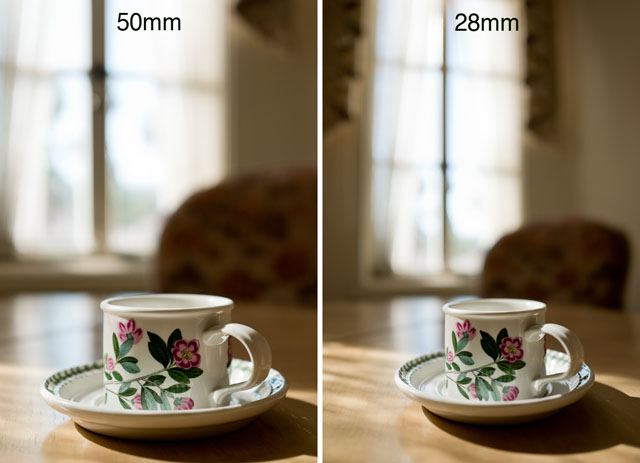
Perspective distortion: Comparing these two photographs you can see how the cup stretches in the 28mm wide angle photograph compared to the 50mm photograph. Both actually has a little stretch because both the cup is in the edge of the frame in both photographs. © Thorsten Overgaard.
Perspective correction - In software like Adobe Lightroom and Capture One Pro there is often a feature to correct perspective (and distortion) like seen below. You can change perspective this way, or at least make believe: If you correct a tall building on teh vertical lines, you will notice that the height of the windows doesn't match the perspective. If the building is with straight lines, the windows should all be of the same size. But a tall building seen from below and corrected with software will have taller windows (closer to camera) in the bottom than in the top (further away from the camera originally).
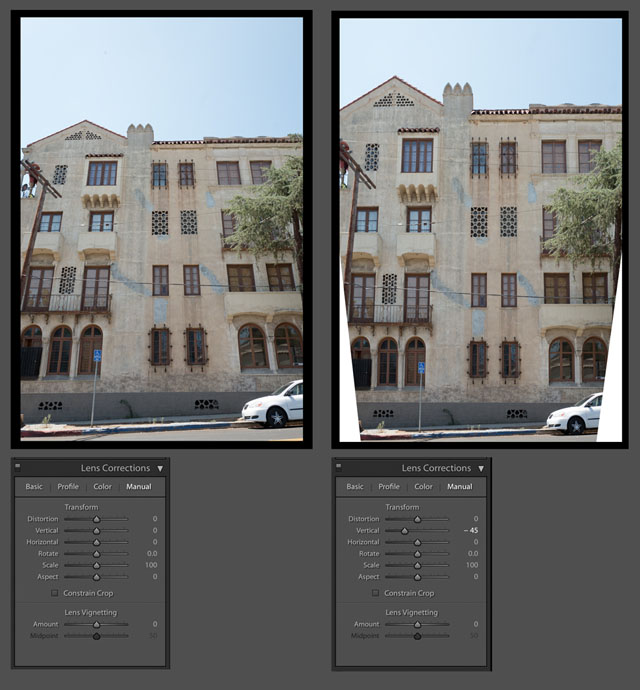
Perspective correction in Adobe Lightroom. © 2017 Thorsten Overgaard.
| |
 |
| |
A graphic illustration of the typical Bayer Color Filter Array on an RGB sensor. It's called a Bayer filter because Bryce Bayer of Eastman Kodak invented the technology of filtering incoming light into RGB and distribute it into the the photosites that each read just one color (R/G/G/B). |
| |
|
Photosite - The unit in a digital camera sensor that records intensity of either red, green or blue. Unlike the output of a sensor, measured in pixels (and where each pixel contains RGB), the photosite records only one color each, and it's intensity (how bright it is). A photosite can not distinguish colors, which is why there is a Color Filter Array (basically a prism) above them to filter the colors and send information to the photosite if 's a R, G og B color. See illustration below. In a monochrome sensor (as in the Leica M Monochrom and the Phase One Achromatic), all photosites are recording intensity of light only as there is no concern which color it is, and there is no color filter.
The ratio of photosites to pixels is not a given. Each block of 4 contiguous photosites contains one photosite sensitive to low wavelengths (blue), one photosite sensitive to high wavelengths (red), and two identical photosites sensitive to medium wavelengths (green). So four photosites would be the minimum to create one 'full-color' pixel. Apart from that, depends on the sensor specifications, which is different from brand to brand. Sometimes four photosites (two Green, one Red and one Blue) makes up one pixel, at other times it's more photosites to one pixel; and there is also pixels sampled from photosites across (sort of overlapping patterns).
Pixel - Made up word from Pix (picture) and el (element). A pixel is the smallest full-color (RGB) element in a digital imaging device. The physical size of a pixel depends on how you've set the resolution for the display screen. The color and tonal intensity of a pixel are variable, meaning that each pixel contains RGB. This is different from a camera sensor's small eyes (photosite) that are an intensity of either red, green or blue. You could say that the digital sensor's photosite (where each unit collects just one color; red, green or blue) is the input technology, whereas the pixels on a screen (where each pixel contains red, green and blue) is the output device. So while sensors are measured in megapixels (mega = million), it's their output unit of pixels, and not the input unit of photosites that is measured and stated. See illustration below.
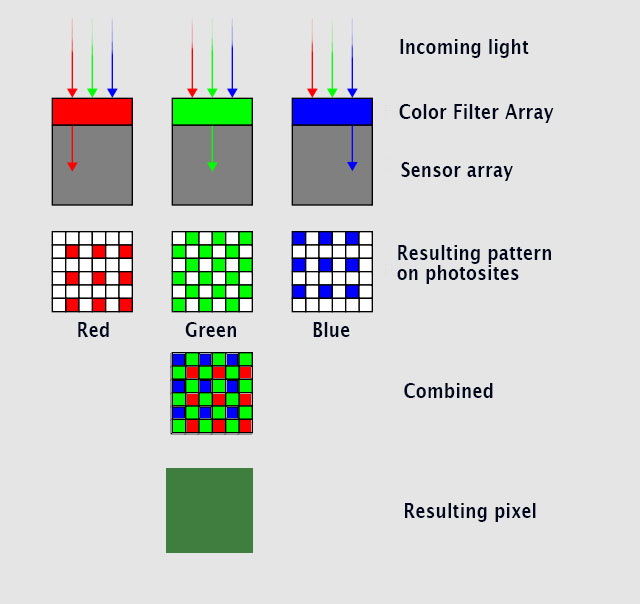
Here's an illustration of how light goes through a color filter that enables the underlying photosites to each record if it';s an R, G or B color - combined - makes up one pixel containing RGB. © Thorsten Overgaard.
R = Resolution, in the name Leica M10-R camera model (2020).
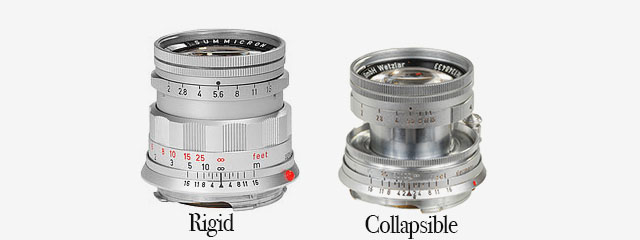
Rigid - Refers usually to the Leica 50mm Summicron-M f/2.0 "Rigid" of 1956.
It is called "Rigid" because, unlike the 50mm Collapsible, this one is not able to be changed.
Rigid means stiff, uable to be forced out of shape. Not able to be changed. From Latin rigere, "be stiff".
The name is a little confusion nowadays as all or most lenses are rigid today, but back in 1925-1956, many lenses were collapsible so the camera was compact when not in use. Just like compact cameras today often has a lens that extrudes when the camera is turned on, and collaps into the camera body when the camera is turned off.
RF
(R)ange (F)inder - the mechano-optical mechanism which allows M Leicas to focus.
Alternative meaning - RF is also shorthand for Hexar RF , Konica's motorised "M-lens-compatible" rangefinder camera released in 2000.
S = Single image. When the ring by the shutter release on top of the camera (or in the menu of a digital camera in case it does not have this ring on the ourside) is moved from OFF to S, the camera takes only one photo at the time (Single). The other possibility is Continuous where the camera takes pictures continiously as long as the shutter release button is helt down. (see above).
Saturation: How colorful, intense or pure the color is. Less saturation would be less colorful, more saturation would be more colorful. In today’s photography, de-saturating a photo on the computer will gradually make it less and less colorful; and full de-saturation would make it into a black and white photo.
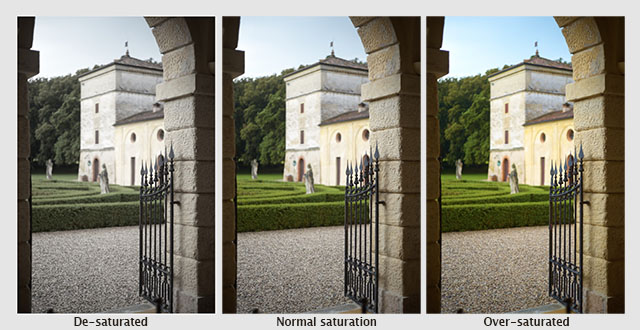
A photo from Verona, Italy de-saturated, normal saturated and over-saturated. © Thorsten Overgaard.
Sensor = A device that detects a physical property (like light) and records it. A camera sensor is a plane plate with thousands of small “eyes” with (photosites) a lens in front of each (CFA, Color Filter Array), which each individually records the amount of red, green and blue light rays that comes through the lens. Together, Red, Green and Blue form all colors of the spectrum, which becomes a pixel. Sensor comes from Latin sens- ‘perceived’.
Sharpness - See “Focus”
Shutter speed dial - The dial on top of the Leica M where you can set the shutter speed manually. It can also be set to A which stands for Aperture Priority (where the camera suggests a shutter speed; or when you move the dial away from A, the camera will show arrows in the viewfinder, suggesting which direction to change the Aperture to, to get the correct exposure).
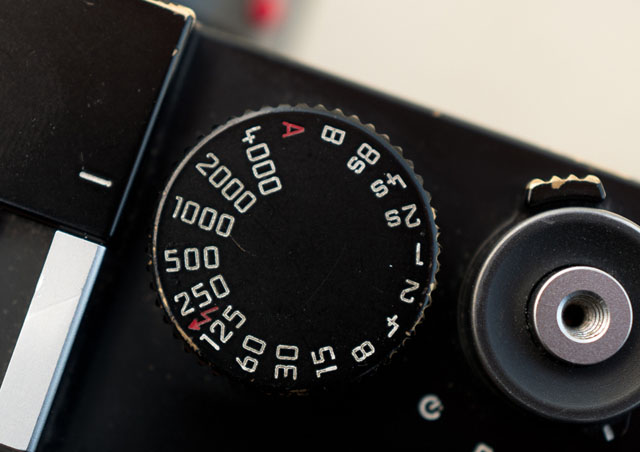
Shutter speed dial set to 1/1000 of a second.
| |
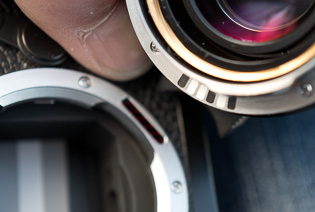 |
| |
The 6-bit code on the flange of the lens is read by the sensor on the Leica M bayonet of all digital Leica M cameras since 2006. © Thorsten Overgaard. |
| |
|
Six-bit code (6-bit code) - An engraving on the flange of M-lenses that makes it possible for digital M-cameras to recognize the lens that has been mounted. The camera can include information on the attached lens and its focal length in EXIF data and make digital corrections for lens-specific flaws, such as color-cast or vignetting. Six-bit coding was introduced for all M-lenses sold since 2006, but many older lenses can be retrofitted with the code at Leica Camera AG in Wetzlar.
SL = Abbreviation for Single-Lens as in the Leica SL that is a camera without reflex (mirror).
SLR = Abbreviation for Single-Lens Reflex; the lens that forms the image on the film/sensor also provides the image in the viewfinder via a mirror. Newer camera models has aen EVF (Electronic Viewfinder) that displays in the viewfinder what the sensor sees in real-time.
| |
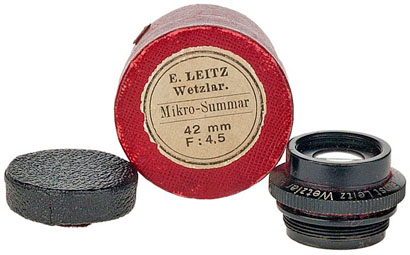 |
| |
Leitz Wetzlar Mikro-Summar 42mm f/4.5 lens anno 1910 might be the first lens carrying the name Summar. |
Summar - (or a story of name development)
The 1933 lens 50mm f2.0 Summar: It started out as Summar(f2.0), then the Summitar (f2.0 in 1939), then the Summarex(f1.5 in 1948), then the Summaron(35mm f.2.8 in 1948, then later f2.0, f3.5 and f5.6 lenses), then the Summarit (f1.5 in 1949 and used again for the 40mm f2.4 on the Leica Minilux in 1995, then again for the 35mm, 50mm, 75mm and 90mm Summarit f2.5 in 2007) then the Summicron(f2.0 in 1953 for the collabsible 50mm) and finally the Summilux(50mm f1.4 in 1959).
ORIGIN of Summar is unknown.
Summarex
The great thing about being a lens designer is that you get to name the lens. Dr. Max Berek who worked for Leitz from 1912 till his death in 1949 named lenses after his two favorite dogs. One was Sumamrex named after his dog Rex, the other Hektor named after his dog Hektor.
Summarit
Refers to the maximum lens aperture - here f/1.5.
Summicron = Refers to the maximum lens aperture - here f/2.0 . There are many guesses how this name came about, a popular one being that the "summi" came from "summit" (summit means the highest point of a hill or mountain; the highest attainable level of achievement) while the "cron" came from "chroma" (ie. for colour). Not so: The name (Summi)cron was used because the lens used Crown glass for the first time, which Leitz bought from Chance Brothers in England. The first batch of lenses were named Summikron (Crown = Krone in Deutsch). The Summi(cron) is a development from the orignal Summar (the 50mm f2.0 lens anno 1933). Vario-Summicron, Vario-Elmarit is Leica Camera AG's name for zoom lenses, for example the Vario-Summicron f/2.0 as the one that is on the Leica Digilux 2.
Summilux = Refers to the maximum lens aperture - here f/1.4 , "-lux" added for "light" (ie. the enhanced light gathering abilities). In Leica terminology a Summilux is always a f/1.4 lens and a Summicron is a f/2.0 lens.
Telyt
Lens nomenclature - short-hand for " telephoto " (tele- is a combining form, meaning to or at a distance) and used in names of instruments for operating over long distances : telemeter. The name has been used for a number of tele lenses from Leica.
ORIGIN: from Greek t?le- ‘far off.’
Three-dimensional = Having the three dimensions of height, width and depth. In photography and lens design, three-dimensional effect is also the perception of even small micro-details; the texture of skin can appear flat and dead or three-dimensional and alive. Also, selective focus (foreground and background out of focus) can change the perception of depth. Also see Perspective.
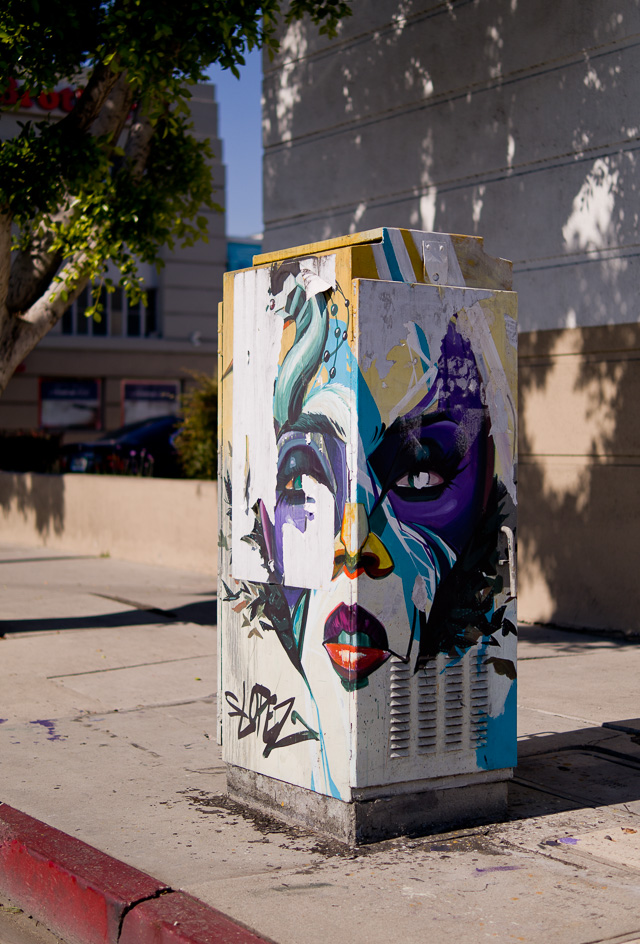
Three-dimensional = Having the three dimensions of height, width and depth. Melrose Avenue in Los Angeles. Leica TL2 with Leica 35mm Summilux-TL ASPH f/1.4. © 2017 Thorsten Overgaard.
Leica T is the compact camera developed by Leica Camera in 2014 as a touch-screen operated camera that can take the Leica L mount lenses made for this camera and the Leica SL and Leica CL. This camera series was names Leica TL later. See my article Compact Leica Cameras for more.
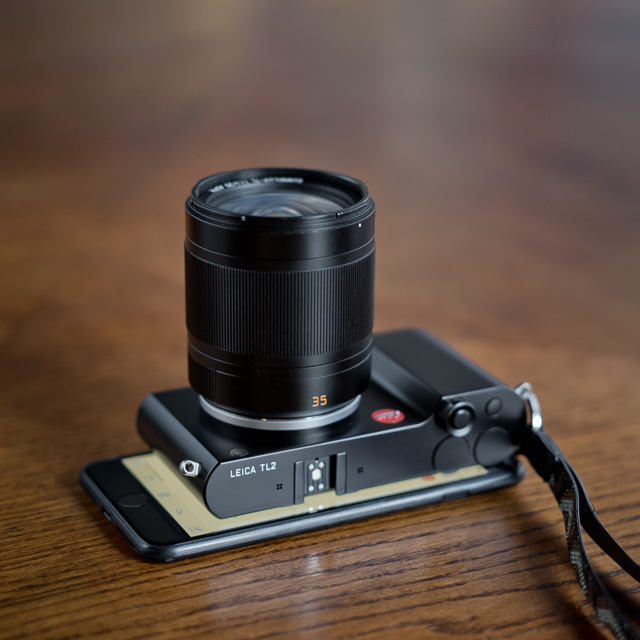
The Leica TL2 (2017) with a 35mm Summilux-L f/1.4 lens, compared with the Apple iPhone 7 Plus. © Thorsten Overgaard.
TTL
(T)hrough (T)he (L)ens light metering, usually WRT the flash metering capabilities built into the R6.2, R8, R9, M7 & M6TTL cameras.
V-Lux is a series of compact SLR-like digital cameras by Leica Camera AG developed with Panasonic since 2006, starting with the Leica V-Lux 1 (2006), V-Lux 2 (2010), V-Lux 3 (2011), V-Lux 4 (2012), V-Lux Typ 114 (2014), V-Lux 5 (2018). See my article "Compact Digital Leica Cameras".
To add confusion, Leica also made a Leica V-Lux 20 in 2010, V-Lux 30 in 2011 and a Leica V-Lux 40 in 2012 that was a temporarily renaming of the Leica C-Lux series.
Vario- is the Leica Camera AG name for zoom lenses. Vario-Elmarit, Vario-Elmar and Vario-Summicron and so on.
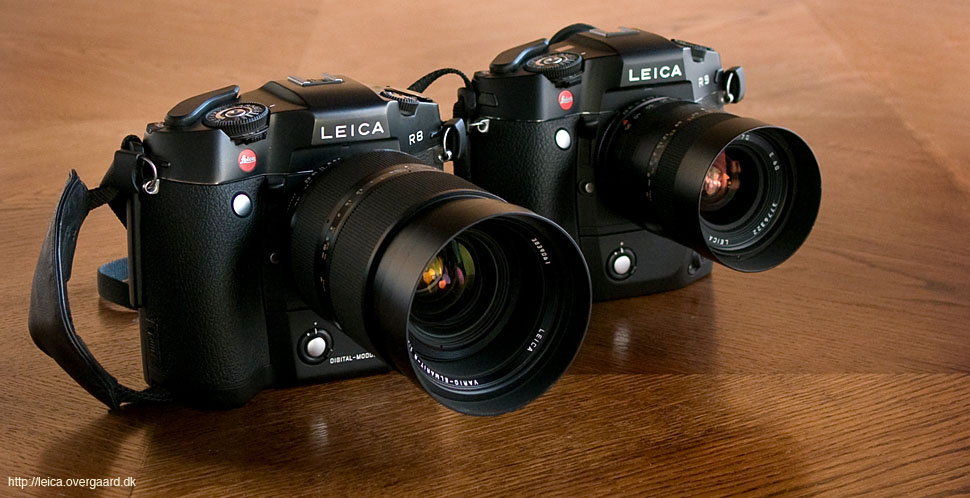
The Leica 35-70mm Vario-Elmarit-R f/2.8 ASPH (left) and the Leica 35-70mm Vario-Elmar-R ASPH f/4.0 (right)
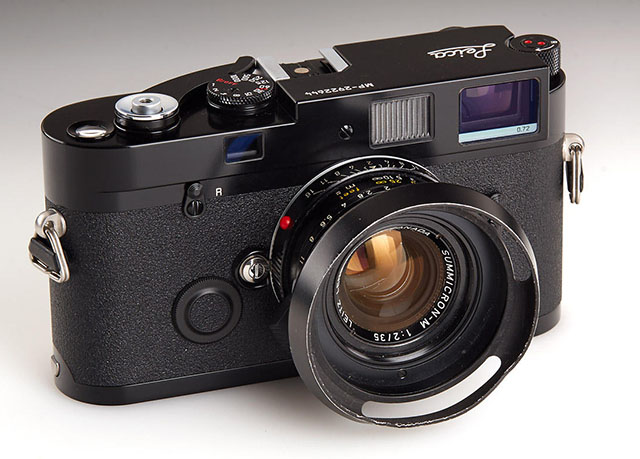
Ventilated shade on a 35mm of Elliott Erwitt's Leica MP camera.
Ventilated Shade - A shade is a hood in front of a lens that provides shade from light going straight onto the lens from outside what you are photographing, which could cause internal reflections like flare, which would make the picture less contrasty.
The ventilated shade has holes so it doesn't obstructs the view from the viewfinder. In many of today’s mirrorless cameras where there is no viewfinder looking ver the lens, so there is no actual need for a ventilated shade; but they are considered classic or vintage looking and are still in high demand. It makes no difference for the purpose of the shade (to create shadow) if it is ventilated or not.
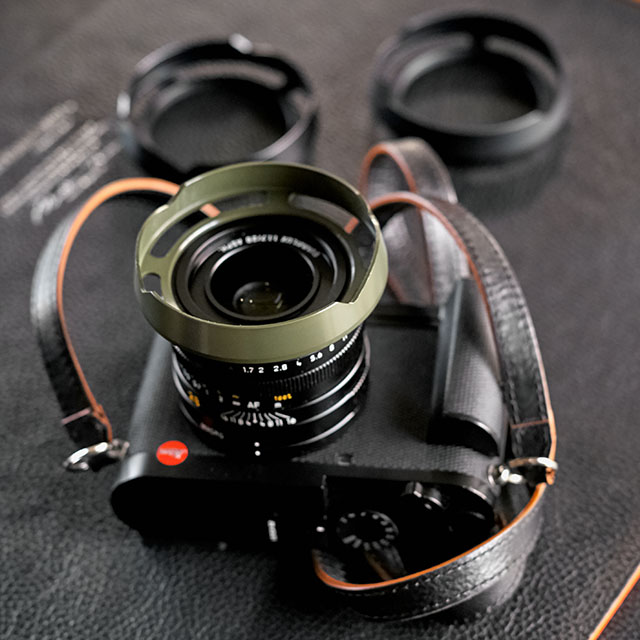
Ventilated Shade for the Leica Q. I make ventilated shades for most lenses and sell them from here.
Viewfinder a device on a camera showing the field of view of the lens. Also known as the German word "Messucher" (or Meßsucher).
1) A built-in viewfinder in a camera that simply show the frame you get when you look through the viewfinder.
2) A rangefinder viewfinder which is also used to focus the lens. In Leica M cameras two pictures has to meet and lay 'on top of each other' for the picture to be in focus.
3) An external viewfinder, usually on top of the camera in the flash shoe, so as to show the field of view of lenses vider than what the built-in viewfinder can show (15mm, 21mm, 24mm, 28mm etc viewfinders exist)
4) Very simple "aiming-devices" on top of a camera that is simply a metal frame without any optics. Just a frame, as for example very old cameras (the original Leica), or when using cameras in diving where you can't look through the camera.
5) A Electronic Viewfinder (EVF) that shows what the sensor sees "live".
WB = Short for White Balance:
White Balance = (often referred to as WB) in camera menus. See my aticle "Adjusting the White Balance in Photoraphy" for explanation, illustrations and examples.
WLAN = German short for WiFi. In camera menus, Leica may refer to WLAN, which is simply German for WiFi, (and for some reason they refuse to believe that the rest of the world doesn't call it for WLAN like they do). WLAN stands for wireless local area network.
X1 - The Leica X1 was released in September 2009, the Leica X2 in 2012, and Leica X Typ 113 was released in September 2014, all with a fixed 23mm f/1.7 lens. Leica X Vario Typ 107 and Leica X-E Typ 102 was released later. A Leica X-U underwater edition was released in 2026. See my article Compact Leica Cameras for more.
XML = Stands for extensible markup language, which is a way enclose information to a document about how to format it, and more.
XMP = Stands for extensible markup platform (also known as XMP sidecar) and is a standard developed by Adobe and standardized by the International Organization for Standardization ISO. XMP is a 'sidecar' to an image that contains the EXIF data (camera settings) as well as other data about the image recording and editing that would norally be in proprietary formats (only readable by certain software). XMP in short is a container enclosed with the image as a 'sidecar' that contains all available information (EXIF data about settings, IPTC data (who took the photo, copyright info, image captions, etc), but most noteable, the XMP allow you to include information about the editing that was performed to the raw or DNG file, so that when you open the image file in another editing software, the raw data, as well as information about the crop, exposure compensation and other editing you did to the photo, is included).
In Adobe Lightroom Classic, one should make sure to select that editing information is written to the XMP file of each image (go to Lightroom > Catalog Settings > Metadata and then click "Automatically write changes into XMP").
Zone System -A system of 11 greytones. Ansel Adams worked out the Zone System in the 1940's with Fred Archer. It may look as simply a grey scale (and it is) but it's the use that has troubled many. If you use a normal external light meter, it will give you the exact amount of light and you can expose your photograph based on that and it will be correct. 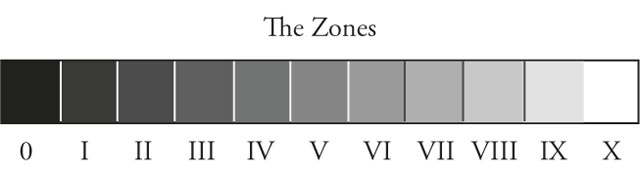
What Ansel Adams basically did was that he studied (by measuring with a spot meter), what the exact grey tones were of the sky, the clouds, the sand, the water, the skin and so on at different times of the day.
You could say that he built up a conceptual understanding of how different materials of different colors and reflective surface would look in black and white at different times of day (or different light conditions). He also realized that a tone changes for the human eye depending on it's size and in which context of other tones it is seen.
In short, you could say that the Zone System is know how something would look in black and white when looking at a scenery. Some who have struggled with the Zone System have done so because they think it is a rule. It is not.
| How Ansel Adams made New Mexico look: |
|
How most people see New Mexico: |
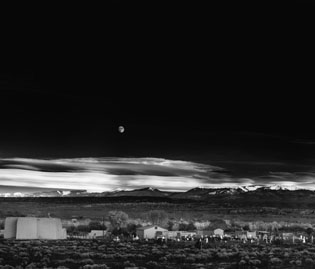 |
|
 |
| The artistic use of the Zone System. |
Ansel Adams developed the Zone System to understand light for himself, but also as a fundament for teaching the light, exposure and making the final photograph. How will it look if you do the usual, and what will it look like if you manipulate it. But most interstingly; how do you work with light, cameras and photographic materials to achieve the look you envision.
The Zone System is meant as a basis on which to create your own aesthetic style and communication. Photography is painting with light. The greyscale is our palette. Ideally we should have a conceptual understanding of the tones and be able to use them intuitive. That was his vision for us all.

Thorsten Overgaard in New York, explaining the Zone System in his "Street Photography Masterclass".
Ø - Diameter. As in Ø49 for example which means that the filter diameter is 49mm for this lens (or if a filter is Ø49, it is 49mm in diameter and fits that Ø49 lens). Leica uses E to express their filters sizes, as in E49 for a 49mm filter size.
|