This is a guide on how to get the best working conditions for your screen. Follow it and get the improvement that is possible.
Calibration of a computer monitor should be a simple operation. It isn't always so I’ve made this guide with the purpose to make it as simple as possible.
The main advantage you gain in calibrating a monitor is a broader dynamic range and that shadow details become better visible.
Spoiler alert: DisplayCal is the best software to use with your Spyder or X-Rite calibrator
If you have a Spyder Pro or X-Rite calibrator, you may download the free 3rd part software DisplayCal (Formerly known as dispcalGUI). It works for both Mac and Windows.
It may take a while. For me, it took 20-30 minutes (where the software did the calibration all by itself), I have heard from others it took between 30 mintes and all nigth.
The DisplayCal seems to be constantly updated with more precise tools when new screens, calibrators and all comes out. So download the latest version, and check for updates whenever you use the software.
Spoiler alert: Buy the Spyder Pro calibrator
Buy the Spyder Pro calibrator and use the DisplayCal software and be done. Read the rest of this article to know why and what the alternatives are. But if you are in a hurry, just do that and be done.
Why calibrate a screen?
Usually, even the best screens increase in shadow details and overall tonality with calibration. Apple screens are generally good, but calibration makes them perfect. Once you calibrate your screen, you speak the same language as others with calibrated screens. You see the same.
If you don't calibrate, it may look great on your screen, but once others see the files on their screens, they look too hard, too warm or something.
If you edit your photos on your new MacBook Pro and you think it all looks wonderful, you are probably right. But if the screen isn't calibrated, you can be almost sure it looks different on other screens.
Calibration gives you a standard to work by, and all you edit will go down into your archive as perfectly edited. Yes, many other people will look at the images on non-calibrated screens, smatphone screens, iPads and old screens. But at least your original edit is correct, and that is why you calibrate.
Having a calibrated screen gives you certainty that what you look at is correct and you can concentrate on making the editing the way you like it.
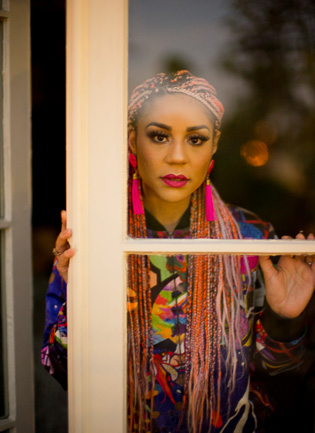
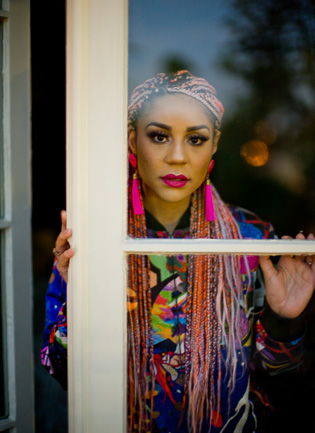
The left screen photo is a screen that is not calibrated. To the right you see the calibrated screen and the colors are a little less saturated. The contrast is less hard and there are more details to be found in shadows and highlights.
How often do do you need you calibrate a screen?
Mostly just once. You get a new computer and you calibrate it. A MacBook screen usually stays the same throughout it's life. If you update the OS, then calibrate again If you bang the screen and get a new one put onto the computer, calibrate again.
Some progressional color labs calibrate their screen every day or almost as often.
Whenever I feel in doubt if my colors and calibration is right, I calibrate. Mostly I trust my EIZO monitors which have self-calibration (you press a button and the screen calibrates itself using a built-in calibrator).
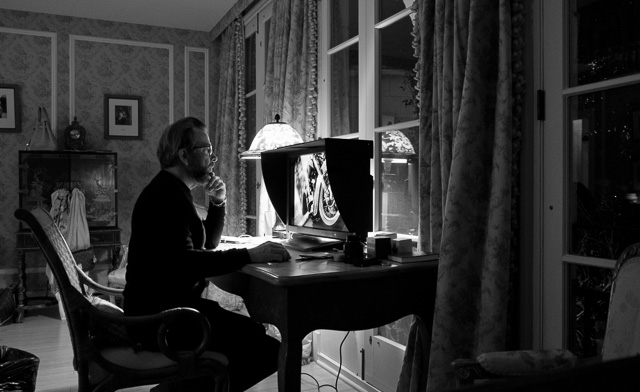
The left screen photo is a screen that is not calibrated. If you thought it was only about colors, that's wrong. The tones of monochrom is very sensitive. In this photo, notice the shadow details (behind the man's face) missing on the un-calibrated screen.
A Royal Mess
Here are the different looks of the screen with different calibrations. The only way to show this is by taking photos of the screen. Look for the (white) background color of empty screen area to the right, the details of shadows in the pictures as well as overall contrast to get an idea of the differences.
Apple's default LCD screen from the factory.
My calibration with Pantone/X-Rite at 6500K that I have been using for over a year.
My calibration with X-Rite at 5400K auto calibration in March 2016.
The Pantone/X-Rite 6500K calibration I got in February 2016 with the old software under El Captain OS
My calibration with X-Rite 7500K auto calibration in March 2016
My calibration with X-Rite 6500K auto calibration in March 2016
My calibration with Spyder 5 Pro in March 2016 run as auto calibration at 6500 Kelvin.
My final calibration with Spyder 5 Pro in March 2016 where I set it to 6500 Kelvin and had the calibration software measure the screen to optimum brightness first.
The conclusion of this complex overview is very simpler: There no standard for what you will arrive at. Not a single ISO standard that the entire color management industry follows.
All you can use the calibration tools for is to to decide what standard you want to settle for.
The core of simple color management on the computer
What you will be getting is more dymanic range, more shadow and highlight details and a fairly neutral color imprint. Expect 10-15% better overall look than what you get from the factory when you open the box with your Apple computer. If you use a PC, the difference will be extreme.
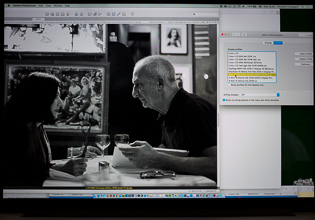
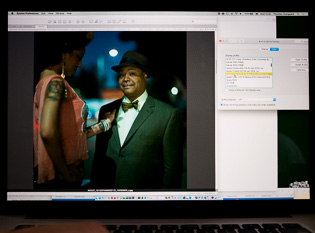
It would have been a beautiful video ...but in reality it would have been a 120 minute video of confusing software delivered on a CD and even more confusing results ... (still from the video) ... so I decided to make it an article instead.
I originally set up two cameras to make a video on how to calibrate a monitor. But after I had the video running for over 60 minutes I realized it was so difficult the video format wasn’t the way to show it. My own attentions-span for videos is extremely short, so why would I expet you to view a two hour video about calibration?
I decided to make it a very short article instead.
(Applause)
Buy the new eBook
"A Little Book on Photography"
by Thorsten von Overgaard
It's a humorous understatement to call this
new eBook by Thorsten Overgaard for "A Little Book on Photography".
It's a grand book, a history lesson, life experience, a biography and poetry book and brilliant photo book!
All in one beautiful package of 180 pages
to fire you up and get you to love
photography ... unconditionally!
"A Little Book on Photography" eBook for computer, Kindle and iPad.
New release March 2017.
Intro price only $47- 180 pages.
Buy Now
Instant Delivery
The purpose of calibrating your monitor is to get a standard that doesn't change.
This is important
The sole purpose of calibrating your monitor is to get a working standard. To get a standardization of your monitor so it always looks the same to you.
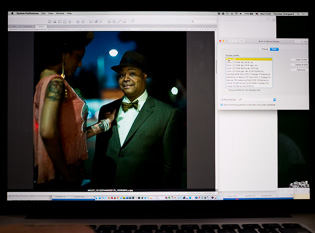
How can you edit a photograph to the right colors you want if you can't trust that your screen shows the right colors to begin with? Leica M 240 with Leica 50mm Noctilux-M ASPH f/0.95.
With the current tools available it is not possible to obtain perfect colors and tones. It’s sad, but it is reality. But you can obtain a standard, and that might be good enough:
Your contribution to accurate colors
Your eyes adjust all the times to changes in light and colors. No matter the conditions, your eyes adjust and you get used to how it is.
If you work on a screen that is too orange, your eyes adjust it to neutral and you see webpages, pictures, text documents the same. You build your own calibration for how the world looks.
When you send your pictures to another person who has a screen that is too blue, he sees everything that way and have adjusted to it.
We see things in relation to hos we usually see them.
Advertisement:
A photographer's guide to ensure color control on your Mac
1. Stop the computer from changing by itself
The first step in getting a standard is to go to System Preferences > Displays > Automatically Adjust Brightness.
Automatically Adjust Brightness should be off:
If it is on, the screen will go up and down in brightness depending on how much light the camera above the screen registers of light behind you.
If the screen brightness adjusts automatically, it adjusts apparent exposure of the images you are looking at. You need it to stay with one setting so you can judge and adjust the exposure of your photographs.
This is the first step in a standardized workflow.
I’ll skip right to the correct calibrator so as to save time. You can read the complete article to know why this is the right calibrator.
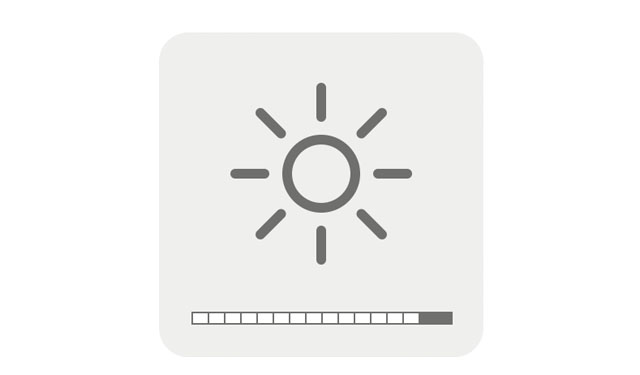
2. Set the brightness right
This is something the calibrator can help setting.
On a MacBook Pro the screen brightness should be 120. The calibrator can help you measure the accurate setting, but generally you should set the brightness to 12 clicks of the 16 possible.
You can adjust the brightness of the screen from 1 – 16 clicks and in a normal office environment 12 clicks gives you about 120.
Too dark:
Too bright:
It's easy to understand: The luminence of your screen determines how you see the photo and which choices you make.
When you go to less ideal working conditions like late night in a dark café, adjust the brightness down so you can tolerate to look at the screen but so that the “exposure” you are looking at is also fairly correct.
If you work in bright light one day you may want to go to 16 clicks and have the screen as bright as possible. But generally you will find that editing pictures correctly in dark or bright environment is difficult.
The screen brightness on a Mac goes from 1 to 16 clicks. Usually 11 on a MacBook Pro is about right for office light (no strong ligh sources from behind or the front. (Above it is at 14 click of 16).
This extension course if made for you! It can be done at home and travel at your own pace. I have taught workshops for years and the Overgaard New Inspiration Extension Course is my experience compressed to a package of training, articles, drills, assignments and video tutorials that will inspire you and take your photography to the next level! For a limited time my course includes something you cannot get anywhere or anytime else:
A portfolio-review by Thorsten Overgaard.
"The Overgaard
New Inspiration
Extension Course" For computer and iPad. 181 p eBook.
Only $798
Order now - Instant delivery.
3. Stop dimming when on battery
Likewise, you don't want energy saving to adjust the screen luminence either.
Go to System Preferences > Energy Saver > Turn off dimming when on battery power:
4. Calibrate with the right calibrator: Spyder Pro
It comes in a compact box that you can use for travel or keep in a closet.
The software is very simple to use and you simply run it as recommended K6500, 2.2 Gamma and so on.
This will give a pretty good calibration.
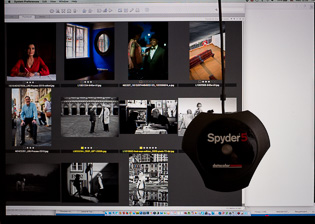
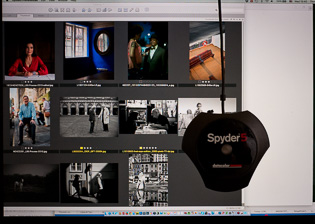
The right calibrator to use is the Spyder Pro.
Slightly improved calibration with Spyder 5 Pro
I ran another calibration to set my screen to the right luminance. You can set up the software to check that.
My calibration with Spyder 5 Pro in March 2016 run as auto calibration at 6500 Kelvin.
My final calibration with Spyder 5 Pro in March 2016 where I set it to 6500 Kelvin and had the calibration software measure the screen to optimum brightness first.
Simple-to-use Spyder Pro video instruction
There is an instruction video on the Datacolor website that is straight-forward and makes it easy to install, calibrate and re-calibrate.
Your first calibration with Spyder Pro will be done in less than 30 minutes from the mailman arrives till you are done.
The interesting thing about that video is that it shows exactly what to do, and that's how it is in real life.
I learned a lesson in doing this. I remembered the Spyder calibrator to create too warm/orange screens so I never considered getting one. That was what I had seen some years ago with people using the Spyder.
My last calibrator that worked well was a Pantone, but as Pantone (and MacBeth) had been bought by X-Rite, I trusted X-Rite would be the best choice.
My Pantone was still supported by X-rite but it didn’t work well. The screen became green!
My calibration with Pantone/X-Rite at 6500K that I have been using for over a year.
The Pantone/X-Rite 6500K calibration I got in February 2016 with the old software under El Captain OS
All-right, it was time for an update!
I ordered a new X-Rite.
I deliberately ordered the most simple I could get, taking note of the reviews online. The X-Rite Color Munki for $164 had really bad reviews; else I would have taken that one. The simpler, the better is my experience. I read the reviews closely to see if the software actually works with the current system because that is the most common problem with color calibration.
That's when my trouble began!
In short, X-rite is the Microsoft of color calibration. Here’s all what is wrong with it:
1. It comes with a CD!
The X-Rite comes with a CD with the software (and when was the last time you had a CD-drive in your computer?).
2. Software not updated
The CD is not usable either because you don’t have a CD drive or because the software on the CD is simply outdated. You have to find the current software online, which is not as difficult as it used to be with X-Rite.
But the software is from before the current El Captain came out (Sept 30, 2015) making it interesting if it will actually work. I’ve been waiting for 6 months on software updates from X-Rite in the past, making it impossible to do anything.
3. X-Rite insists on measuring the light in the room
The idea that a calibrator should always be connected to a computer to constantly adjust the colors of the screen to the room is a really bad one. Your eye look at the screen and not the wall behind you. I’ve seen this in practical use and it is a disaster.
When using a portable computer, the idea of bringing a calibrator with you is even more ridiculous. But unlike the Spyder that by default expect you to not want to use the room calibrator with your computer, the X-Rite insists on measuring the room as part of the calibration!
4. X-Rite also likes to measure the reflections of your screen
To complicate matters further, the X-Rite also has a new feature that can measure the reflection on the screen and adjust for that! It sounds as if they are really concerned about your screen, but if you consider the complications and the thinking behind you see it is just bringing you out on thinner ice.
5. Too many choices
The X-Rite offers multiple choices between setting your own white point or choosing 3-4 different ones. There’s no right way to do it?
6. What to do next?
The interface is not intuitive. You have to click on each process to get to the next screen. It takes a while till you understand how the software works on top of all the confusing choices. It should just be a click to "next" and "next" - and that's how the Spyder 5 Pro software works.
7. The X-Rite comes up with different results each time.
For reasons unknown the X-Rite looks wrong (most likely because it measures the room light as a factor in the calibration). So I do another calibration and it looks different! I do three more and now I have five different looks to my screen.
This obviously doesn’t built a lot of confidence so I do a sixth calibration changing the settings to advanced and tweaking a few things (which I have happily forgotten). It looks ok, but I am confused! How would I know if I did it right or wrong?
I wrote a post on my Facebook wall and get quite a few recommendations for the Spyder. So I decide to order one of those as well and let it all be till that one arrived.
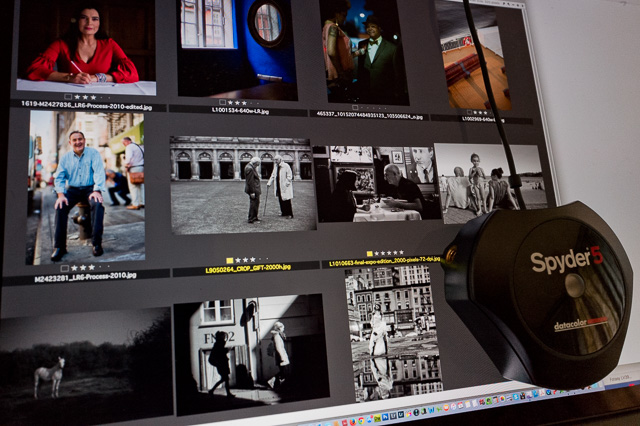
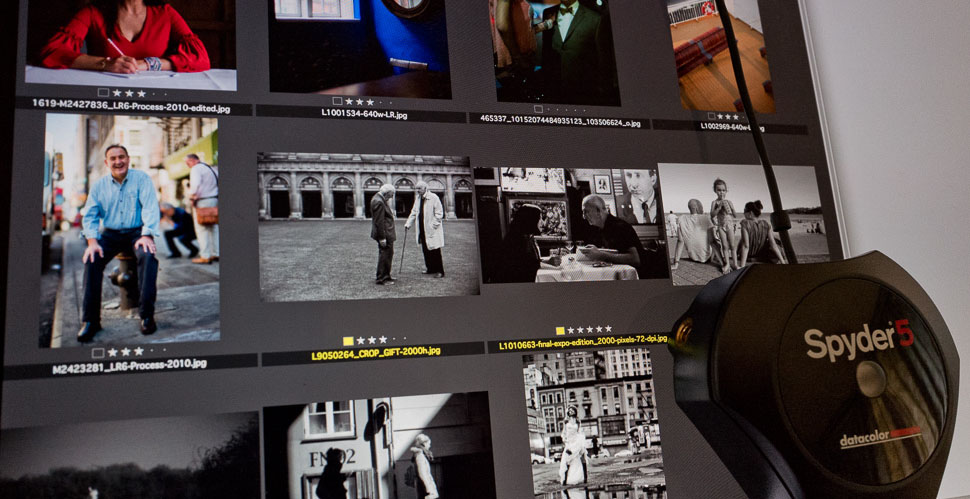
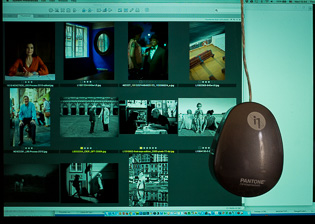
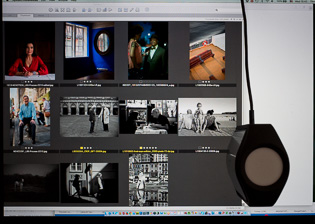
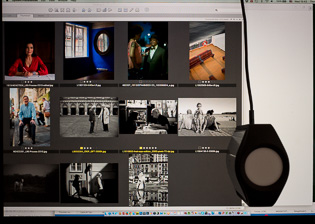
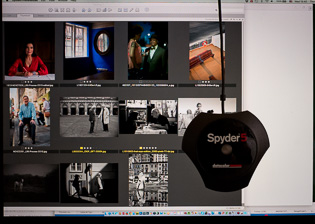
Spyder 5 Pro, X-Rite and Pantone calibrators. They all work by the same principle: The eye on the screen reads the colors the software flashes onto the screen over 3 minutes and determine the necessary changes to obtain correct looking colors on the screen. A calibration profile is stored in the comptuer and basically adjusts what the computers graphic cards sends to the screen.
Apply
code "UPDATE113" on checkout to get this complete version 11.3 update.
$298.00
Updates all previous Surival Kit versions since 2009.
Buy the complete new
Lightroom Survival Kit 11.3
The Legendary Tutorial for Photographers
Brand-new JUNE 2022-version.
Now with brand-new 4+ hours of video tutorials.
New sections on compostition and storytelling.
How to edit color photos.
How to edit black & white photos. How to do keywords logical and easy.
The most successful photo editing kit ever
Photographer Thorsten Overgaard first released the Lightroom Survival Kit in 2009 and have honed it with new and fresh updates. This Version 11 is the most radical updated and renewed version ever, four years in the making.
Professional workflow experience made simple, logical and easy to use.
Master editor makes it simple to understand
The Survival Kit is unique and one-of-a-kind being made for photographers for photographers. When someone understands their subject, they can explain it so it is easy to understand. The hallmark of Thorsten Overgaard is to make expert knowledge shown and told in a way so anyone can apply it.
Hands-on advice that works
With a 450 pages workbook and 4+ hours of video, every element of digital photography is touched on, in handy chapters and pre-flight checklists. Editing of color vs black and white photos, keywording, cropping of images, fine-tuning of tones, color balance and color control, export of originals, printing, archiving and backup, and much more.
Comes with the Overgaard Leica Presets (Value $48)
The Lightroom Survival Kit comes with Thorsten Overgaard's special-made Lightroom Presets for all digital cameras and for Leica digital cameras.
Understand all from camera to the final print
Chapters in this version goes over the background for High Dynamic Range (HDR), digital raw files and how to set up a professional photography workflow, from calibrating the screen to editing in Lightroom, and to making a final print. And more ...
10+ years experience in one package
No need to spend years figuring out the smartest way to do things when you can tap into the best way of doing things right here. The workflow of Thorsten Overgaard as been refined through years of field work with more than a thousand workshop attendees.
This method of workflow now used by thousands
The Survival Kit has been taught to thousands in workshops and in this Survival Kit. What does it do? It make you enjoy taking and making photos, and it increases your production considerabely. Most important of all, it'll give you back ownership of your files (which you will understand why is so important, once you have bought the Survival Kit and started applying its methods).
"Thorsten's methodology is perhaps not what hardware-, software- and cloud-companies want us to do, but as a former IT engineer I can only acknowledge his views about preserving our digital heritage. This workflow explained is for me the best I have ever seen".
★★★★★
Video tutorials, image files, presets, checklists, definitions, tutorials of Lightroom, that boils down years of experience to a workflow you can implement in less than one day.
Start working in minutes.
Conclusion
None of the calibration tools and their software builds confidence that your calibration is standard or perfect.
The Spyder is clearly the easiest, safes, and also the least expensive. It's simple: Get the Spyder Pro.
The X-Rite is another piece of cloudy add-ons that sounds like it will do wonders but will give you a headache.
The Advanced/Manual calibration I did with the X-Rite is close to the Spyder calibration which (for me) builds some confidence that it doesn’t get much better with the current tools. But the route to get it right with the X-Rite was a mess and gave me 6-8 different calibrations!.
I would have liked to be able to do a 7500K calibration on the Spyder (cooler/more blue) as I have a preference for that. But having used the new calibration for a few days, I’ve gotten used to it.
Generally I think any Leica Store and Apple Store should offer a service to calibrate people’s screens. Most of the work is understanding the software. The actual calibration is 10-15 minutes.
Both Spyder and X-Rite recommend monthly re-calibration and that is not necessary. But it might instill an idea that it is a really important tool and you should buy and own one, rather than having it done just once.
A flat screen doesn’t really change a lot over two-three years so it's not that you will be using your calibrator a lot. Though, if you have several screens on the same computer it is almost mandatory to have a Spyder 5 Pro so you can adjust them from time to time so they all are in sync.
As always, feel free to send me ane-mail with comments, suggestions, ideas, corrections
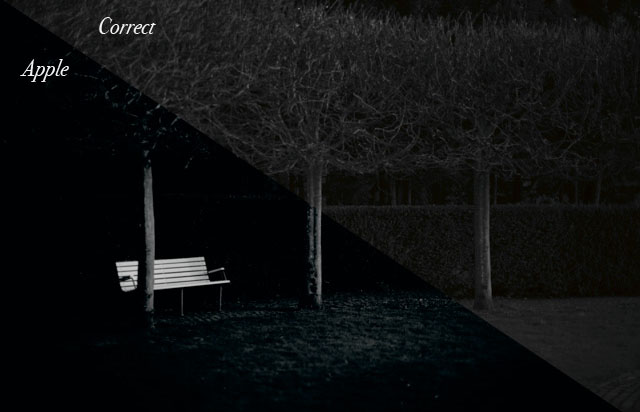
Contrast clash in Apple OSX:
Problem with images in Apple Preview and Apple Safari
Update March 2017: In this article I recommend using the Spyder with the DisplayCAL third party software. However, with the OSX Sierra for Apple, the pictures viewed in Safari and Preview isn't supported. If you calibrate your screen with DisplayCAL things will look good in Lightroom, Photoshop and other applications, but in Safari and Preview, the photographs will look darker and more heavy (as if "black" was increased). This is both on Apple Retina 15 screens as well as connected external screens.
(Apple did announce with their new OSX Sierra that the software would give more dynamic range for screens (on their new MacBooks I presume); but somehow that is not the case using DisplayCAL software; if it is the case at all!).
Here's how the correct view is in PhotoShop and Lightroom vs. how the Apple Preview and Apple Safari shows the same picture:
Leica Monochrom Masterclass
I will be writing more about the Leica M Monochrom Type 246 in the coming months, particularly about editing the images towards a special film look and monochrome look using Lightroom 6 (Lightroom CC). I will also be addressing how to get a monochrome look from the Leica M 240.
For more info on Paris Masterclass, have a look here:
Thorsten von Overgaard is a Danish-American multiple award-winning photographer, known for his writings about photography and Leica cameras. He travels to more than 25 countries a year, photographing and teaching workshops to photographers. Some photos are available as signed editions via galleries or online. For specific photography needs, contact Thorsten Overgaard via email.
You can follow Thorsten Overgaard at his television channel magicoflight.tv.
I am in constant orbit teaching
Leica and photography workshops.
Most people prefer to explore a
new place when doing my workshop.
30% of my students are women.
35% of my students dotwo or more workshops.
95% are Leica users.
Age range is from 15 to 87 years
with the majority in the 30-55 range.
Skill level ranges from two weeks
to a lifetime of experience.
97% use a digital camera.
100% of my workshop graduates photograph more after a workshop.


 It would have been a beautiful video ...but in reality it would have been a 120 minute video of confusing software delivered on a CD and even more confusing results ... (still from the video) ... so I decided to make it an article instead.