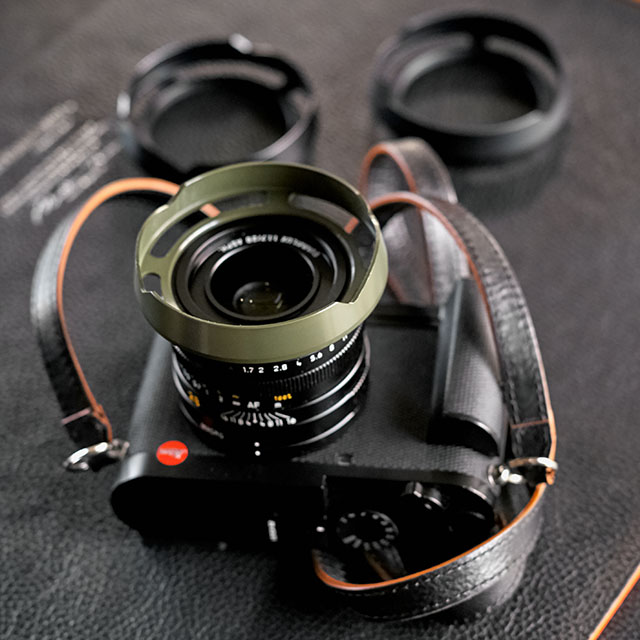
Leica Q3 Full-Frame Mirrorless Digital Rangefinder - Page 2
Leica Q3 Review - Page 2
By: Thorsten Overgaard. December 18, 2023. Most recent update May 27, 2025.
This is a contined review and user report that started on Page 1. For manuals and firmware, visit Page 3. The Leica Q3 43 review is on the "Leica Q3 43 APO" page. There is also a dedicated Leica Q3 43 APO Menu Setup page.
Leica Q3: The Perfect Menu Setup
explained step by step
You can set up your Leica Q3 by following the screen shots in this article, and you will be fine. As we say, "Set it and forget it." My ideal for any camera is simplicity, speed of operation, and high image quality.
(For how to set up the Leica Q3 43 APO, see this guide).
Video Review
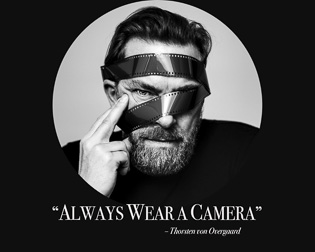
The Leica Q3 Review and heritage, by Thorsten Overgaard.
Start here: Unpacking the Leica Q3
Have your Leica Q3 ready next to you to do thisstep by step.
When the Leica Q3 is started up for the very first time, it will play a graphic sequence, and then the first screen is where you select your language.
The next screen is for date and time. I suggest setting it to the local time where you live and leaving it at that, even if you travel, so your files always have your ‘home zone’.
When you press , the overview screen shows Program mode, AUTO ISO, and iAF. This has to change to Aperture mode, 200 ISO, and AFs. In the following, I will go over why that is and what it does for you. The idea is that once you have set up the camera, you don't have to do much in the menu in the future.
The outside of the camera has the possibilities to adjust the tree main controls (aperture, shutter speed and ISO), as well as manual focus, should you wish to use manual focus. To get to the "Quick Menu", press at the button and you see a great overview on the touch screen where you can check that everything is right (mainly that exposure compensation is set to -1/3 at all times), and with a touch change white balance and speed of frames per second as the two most prominent settings worth changing to fit the occasion.
When you press the "hidden" button on top, you can easily change ISO speed on the camera menu.
The aperture is set to A(uto) from factory, but you might want to set it to f/1.7 for depth of field.
Full Leica Q3 Pack
Special
12 video classes with work book
+ 484 page eBook,
+ Styles for Capture One for Leica Q3/Q2/Q
+ Lightroom Presets. for Leica Q3/Q2/Q
Normal price $869.00
Normal price $869.00
Save 45%
Only $478.00
USE CODE: "ILOVEQ3"
Buy now. Book delivered instantly.
Video class link follows within 48 hours.
100% satisfaction or money back.
Released May 2024
Item #2192-0623
Leica Q3 Know-All-eBook
484 pages illustrated for Computer,
Kindle,
iPad or smartphone.
Most things necessary for a photographer can be done from the outside of the Leica Q3 camera and in the "Quick Menu":
The outside of the camera has the possibilities to adjust the tree main controls (aperture, shutter speed and ISO), as well as manual focus, should you wish to use manual focus.
Only one setting necessary for Leica Q3 on most days
Whenever you pick up the Leica Q3, the only question should be, "What's your ISO?" Press the "hidden" Function button on top of the thumbwheel. This prompts a slider on the screen with ISO settings, and then you can simply set it to ISO 200 for "daylight" or ISO 3200 for "evening."
If you change the Aperture ring from Auto to f/1.7, you will now see the camera goes into Aperture Priority mode (sometimes confused or perceived as Auto mode).
Next, change the ISO from Auto ISO to ISO 200 if you are using the camera outdoor, or 3200 ISO if you use it in a dark indoor setting or outside in the evening. (You can always press the ‘hidden’ button on top of the thumbs wheel on the very top right of the camera to set the ISO. This ‘hidden’ button is the shortcut to set the ISO).
Now we get into auto focus, which is a big deal to explain, but simple to use after this: Change the iAF to AFs.
AFs means that the autofocus focuses on a single spot and remains there as long as the shutter release is pressed halfway or fully down. Another option is AFc, which is continuous autofocus, meaning that it tracks the spot and adjusts the focus as the subject moves. However, this continuous mode results in a slight vibration of the camera and the preview image as autofocus continually checks if the subject has moved. Whether AFc is suitable for photographing running people, moving cars, flying birds, playing children, or rolling skateboarders is something you need to assess. The constant checking-checking-checking may or may not be fast enough to capture the focus on the moving subject. My approach is to predict where the subject will be, set the focus there, and not change it, making AFs ideal for my style. I dislike having to keep an eye on what the camera's autofocus does by itself, as it often changes the focusing spot, resulting in a blurred face with a perfectly focused background!
iAF stands for "Intelligent Auto Focus," and when enabled, the Leica Q3 supposedly uses AFs until it detects that the subject moves, at which point it switches to AFc. Generally, with any camera, I prefer either manual focus or using AFs where the autofocus locks onto what I've decided it should lock onto (and then does not change). This way, I have control over what the camera is doing. With iAF, I don't know what or when the camera changes its mind. After all, I am the one taking the photos, not the camera.
The rhythm of getting auto focus right - and fast
Another important detail in focusing the Leica Q3 (or any AF camera) is to 1) 'prioritize focusing' and then 2) 'take the photo.'
This means that you 1) point the focusing point of the Leica Q3 at the face or other subject you want to be in focus. When the spot lights up green, the focus is locked there (and doesn’t move if you use AFs). Now you can concentrate on 2) taking the photo. You might even—while keeping the shutter release button half-pressed and thus keeping the focus locked—adjust the frame to get a more pleasant composition, all while keeping the focusing point locked. Then, when you fully press the release, it takes the photo with no delay.
This has the advantage that your timing is perfect because there is no delay from the moment you fully press the shutter release to when the camera takes the photo. Otherwise, if you point the camera and focusing point at a face or other subject and then fully press the release to take a photo, the camera 1) first tries to find the focus, and then when it lights up green; 2) takes the photo. The downside of this is a) there is a delay between pressing the release and the time the photo is taken (the delay is as long as the AF of the camera takes to nail the focus), and b) while you ‘snapshot’ the frame like this, you don’t actually see what the camera decides to focus on. All in all, the precious expression you aimed to capture in a photo happened 1/10 second before you took the photo, or the camera changed the focus to the ear instead of the eyes.
The faster, more competent way, with 100% control, is to 1) observe through the viewfinder what your frame might be and where to put the AFs focusing point, then 2) put the AFs at the object you want in focus and press the release button halfway down so the AF focuses on it and lights up green to acknowledge that it got the focus locked. Finally, you 3) place the exact frame you want, and once the timing is right, you fully press the release button to capture the photo that you observed and decided how you wanted.
Optionally, you may also choose to manually focus the Leica Q3: Simply move the focusing ring on the lens from AF until it clicks. Now, when you look through the viewfinder, and when you turn the focusing ring, it will zoom in, making it really easy to focus. The advantage of this is that you now control the focus, and the focus stays where you put it; which is helpful if you want to focus on a person or place and keep the focus there to take a photo whenever something happens that you want to capture. About 50% of my workshop students use manual focus on the Leica Q3, so it is rather normal to do. The overall percentage of all Leica Q3 users who use manual focus is 30%.
The advantage of manual focus is, as described above, that you decide where the focus is, and it stays there. Furthermore, if you've picked a scene in, for example, a restaurant where you want to wait for a couple at a table to have a certain expression, all you have to do is wait: Once you've set the focus on their faces, it stays there. No chance that AF decides to focus on the background or the front edge of the table or something.
There seems to be satisfaction in taking a photo with manual focus. It feels more like you took the photo, and not the camera. I've heard it said a few times from people, and it confirms what I observed myself. Using autofocus lenses sometimes makes it a bit dull, and it is as if my attention is more in the camera to get the focus to lock on the right spot than at the scene or person in front of the camera.
In any case, I find more pleasure in 'doing my focus myself' than letting the camera do it. Take it for what you want; nobody will ever ask you if a photo was taken with autofocus or not because it doesn't make a difference in the final photo. Only if you feel like it might engage you more, then try manual focus.
Change the diopter of the Leica Q3 to fit your eyesight
Press the round black button on the back between the viewfinder and the white engraving “LEICA CAMERA WETZLAR GERMANY”. It pops out and is the diopter adjustment that allows adjustment of eyesight from -4 to +2. When you look into the viewfinder, turn the diopter adjustment left or right until the text is crisp and sharp. Then press it into the camera again.
Press it and it pops out. Adjust it so the text in the viewfinder looks crisp and sharp. Then pop it back in place so it is flush with the camera body.
"Set it and forget it" menu settings
for Leica Q3
By Thorsten von Overgaard
Once you have set up the following six menu screens, you can mostly just use the outside controls of the camera.
Menu Screen 1 settings:
Main Menu
1 2 3 4 5 6
Drive Mode
Continious - 2 fps
Self Timer
Off
Focusing
AFs
Field
Touch AF: Off
Focus Peaking: Off
Exposure Metering
Multi-Field
Exposure Compensation
- 1/3 EV
ISO
200 ISO
Menu screen 1 of the Leica Q3 explained:
Drive Mode should be set to Continuous - 2 fps as a good all-round setting for singles and series. This enables you to take just a single photo (by pressing the shutter and letting go), but also to continue taking a series of photos if you are chasing a moving subject or trying to capture a changing expression (by simply holding the shutter release down).
Also - Reducing Leica Q3 blackout time
Also, Continious - 2 fps or 4 fps has the advantage that the fairly slow 0.4-second blackout time of the viewfinder in Single mode is reduced to nothing (after Firmware 2.1 was released). (Blackout time is the time when the viewfinder turns black after you take a photo).
Self Timer is a feature used only to delay the photo. It can be set to a 2 or 12-second delay, so the Leica Q3 takes a photo 2 or 12 seconds after you pressed the shutter release. You have to set the Leica Q3 to Single drive mode for Self Timer to be available.
Focusing shoud be set to AFs(ingle) and Field (or Spot). AF Assist lamp I set to Off as it will else light up when it is dark, and I don't want people to see a bright AF light in their face. Touch AF should be set to Off.
Touch AF in EVF should be set to AF Quick Setting Only (for the sole reason that you can then double-tap the screen and have the focusing field return to the center of the screen, even when the screen is off and you are looking through the EVF). If you set Touch AF
Focus Peaking should be set to Off (is under Focusing > Focus Assist > Focus Peaking) so as to avoid red outline for manual focusing. His is perhaps contrary to what "msot people", becuse the red outline to indicate sharpness is there to help you see when it is in focus. However, my experience and opinion is that the red outline makes it impossible to see the sharpness of what you want in focus. So I turn it off so I can see for myself when it is in focus.
Here is the sub-screen under "Focusing":
Menu Screen 1:3 "Focusing":
Focusing
Focus Mode
AFs
AF Mode
Field
AF Assist Lamp
Off
Focus Assist
Auto Magnification: ON
Focus Peaking: OFF
Peaking Sensitivity: Medium
Touch AF
Off
Touch AF in EVF
AF Quick Setting Only
Exposure Metering I set to Multi-Field or Center-Weighted. The Center-Weighted is the classic metering method where the camera aims to get the 2/3 center of the frame (imagine an oval) to match midtone. This matches what a normal city scene looks like; a mix of colors and tones that together in a mix is midtone. Multi-Field is a slightly more advanced metering method where the camera tries to foresee the correct exposure based on a midtone center, taking highlights and shadows into account. It doesn't always work great in all cameras, but in the Leica Q3, it works well enough to be the standard setting.
In perhaps 70% of cases, the light meter will get the exposure right. In the 30% of cases where you have a dark background, or perhaps a person with strong light behind the person, the light meter will get it wrong. Of course, it will because it doesn't know what you are photographing. It always tries to make the scene midtone. So in the case of the portrait with strong backlight, the meter will underexpose it. Once you know how the light meter "thinks," you can predict where it will see the scene wrong, and you must take over by adjusting the exposure using the shutter speed dial. In the portrait scene, the camera suggests a shutter speed of 1/2000, but you know (or can tell from a test photo) that the correct exposure would be 1/250 to get the face correctly exposed.
Any scene with "not normal light" will always confuse the light meter (or rather, confuse the user) because the picture is too dark or too bright. The trick with moving the camera is one way to do it. Another very safe way is to look at the picture and the shutter speed in the bottom right of the frame and then use the shutter speed dial to adjust it to a more likely correct exposure time; take a photo and look at the preview again. Once you have the shutter speed right, the photo will be perfect.
Imagine you set the exposure right this way and then set the focus right by locking it with AF or manual focus, then not much can go wrong: Now you can observe the scene and concentrate on timing and capturing the right moment.
A light meter judging this scene would just register a lot of light and thus underexpose the entire frame in an attempt to make it look like a pleasant mid-tone. You, as the user, know that it is not the bright background but the scooter and person in the foreground, and then set exposure to make them look correct no matter how much or little light there is behind them.
Classic
Center-weighted:
Highlight-
weighted:
Spot:
Multi-field:
All is adjusted so the center oval is mid tone.
All is adjusted so the highlight is 1% black
(not 100% white)
All is adjusted so the spot is mid tone.
All is adjusted depending on what the algorithm in the camera think it is..
“Spot” metering is the same as center-weighted, but only a spot in the center of the frame measures the light. Very effective to read light if you know what you are doing, very confusing if you don’t: The camera sets the overall exposure based on whatever the spot is pointed at. If an open door into a dark hallway in an otherwise sunny street, the overall photo will be over-exposed (but the dark hallway correctly exposed). If the spot is pointed at the horizon on the beach with lots of light, the rest of the beach will be under-exposed. But if you know where the point is, and how large it is, you can use it to measure the light coming off from different surfaces, in the sun and shade and get an overall idea of how much light there is.
“Highlight-weighted” is the fairly new option that sets the overall exposure so that the highlights stay 2% black and never get over-exposed. I don’t see that as a generally preferable option, as there are many scenes where a blown highlight is okay and is not valid to be determining the overall exposure of a photo. If you use "Highlight-Weighted", then every photo you take, you will have to lift in editing. If you don't mind this post-processing work, then it is a sure way to capture all details and adjust them later. If you don't particularly like to edit photos on the computer, then Highlight-Weighted is not for you.
Exposure Compensation I have set to -1/3 EV, which means that when the camera's light meter suggests 1/500 of a second, the exposure will be 1/600 and slightly darker than what the camera would come up with. I do this because I feel that it is the more correct exposure generally, and it will result in richer tones and colors.
(In comparison, the Leica M11 should be set to -2/3 EV, the Leica M9 and M9 Monochrom to -1/3 EV, and the Leica M10 does not need any correction).
When you turn the shutter speed dial, you are going manual and controlling the exposure directly. The Exposure Compensation does not affect manual settings of shutter speed. So if you use an external light meter to measure the light, then that reading will be what you set the camera to - and it will perform precisely that.
When you turn the shutter speed dial on the Leica Q3, you are going to manual and control the exposure directly. When done, turn the dial back to A(perture Priority), and the camera will suggest the exposure time for each photo. Only when you want to adjust it, simply change the shutter speed dial to the correct exposure time.
Exposure compensation (by the use of the thumbwheel) is a very comfortable way to correct the image exposure, but it is made for the unenlightened user who doesn’t know he or she can simply do so by turning the Shutter Speed Dial (or the Aperture) for the desired exposure. Exposure compensation using the thumbwheel complicates what he or she already doesn’t understand. Even for me, who sometimes knows what I do, I have a hard time knowing if the camera chooses to adjust the exposure by changing the ISO or the shutter speed. I could live happily in oblivion, having just performed a satisfactory exposure. But the right way is to know what is where in the settings. Changing ISO from 200 to 400 is potentially more damaging to the image quality than changing the shutter speed from 1/250 to 1/500, which has no impact on the image quality.
As you correctly asked yourself just now, "Why is there a thumbwheel if it is such a bad idea?" The explanation is that when somebody started making digital cameras where the ISO, shutter speed, and aperture are set on a screen, the obvious and classic controls outside of the camera were omitted. To avoid having to go into the menu to change exposure, someone invented the thumbwheel to "adjust it all" in what is marketed as "the easy way." For people who never had those controls on a camera but entered photography when the thumbwheel was there, it seems like a brilliant way to do things. But if you are used to "the old ways," then the great thing is that the Leica Q3 offers the outside controls via the shutter speed dial (and aperture ring). In fact, the Leica Q3 offers both the thumbwheel for those who think it's the route to nirvana, as well as the old-school controls for those who like to be able to look at a wheel and observe what the exact settings are.
ISO is a number that indicates how sensitive to light the sensor is. The abbreviation ISO stands for "International Organization for Standardization," which decided those standards for sensitivity back in 1947.
The point is that when you change the ISO number, you change how sensitive to light the sensor is. If there was always enough daylight, we wouldn't be having this discussion, and the camera could be set to 200 ISO as a 'normal daylight' setting. However, when the sun goes down or we walk into a dark building, we need more light. And by changing the ISO, we simply make the sensor amplify the light. This is how we can take photos at night.
I change the Leica Q3 to 3200 ISO when I need more light. I could go higher ISO, or I could go lower. But I find that 3200 ISO works for almost anything, and that saves me the discussions with myself about which ISO might be the right one. 3200 ISO always works. So there it is!
ISO settings interestingly enough double or halve the light sensitivity. When you go from 100 ISO to 200, you double the sensitivity, and by this scale of doubling the sensitivity, when you set the Leica Q3 to 3200 ISO, the sensor is 16x more sensitive than at 200 ISO.
As a matter of fact, the two other light controls on a camera, Aperture and Shutter Speed, also involve doubling and halving of light. Some have coined the terrible phrase "the exposure triangle," which refers to ISO/Shutter Speed/Aperture. I don't know what they were thinking when they coined that concept, but I can tell you how this doubling and halving works: Imagine that your Leica Q3 suggests a shutter speed of 1/1000 second at 200 ISO, and you have set the Aperture to f/1.7. But now you want everything to be sharp, so you want to set the lens to f/11. By doing so, you reduce the light coming through the lens by 32 times. In other words, not much light comes through. To compensate for that, you can change the shutter speed to 1/30 (long enough to allow for 32x more light to pass onto sensor), which will then result in the same correct exposure of the image as if taken with f/1.7 and 1/1000th of a second. Then again,you might consider 1/30th of a second a bit hard to hold the camera still, so instead of doing that, you could stay at 1/1000th of a second and simply change the ISO from 200 to 6400 ISO, which would be another way of taking the same photo, with the same result in terms of exposure.
1/1000 at f/1.7
1/60 at f/8
So you see, this is how you can interchange the settings to control light. There are only three ways to control light and exposure, and that is Aperture / ISO / Shutter Speed. These you can shuffle around until the exposure is right, and only Aperture is the setting that changes the photo artistically (because the Aperture determines the depth of focus). You will notice throughout my articles, books, and videos that I kind of always lock my ISO at 200 or 3200 and set the lens' aperture to f/1.7; and then the only setting I use to control the amount of light is the shutter speed. Because shutter speed has no influence on the artistic visual look of an image (it makes no difference for a mountain if it is photographed at 1/30th of a second or 1/4000th of a second), and the shutter speed dial sits conveniently on top of the camera - easy to adjust to the desired speed.
As a final word on ISO and sensitivity to light, and making it something you can wrap your mind around, I often compare ISO sensitivity to children playing in the sun. A red-haired child can play in the sun for 20 minutes and then must go in the shade, whereas a brown-eyed child can play for hours. Pigment in the skin simply determines how sensitive we are to sunlight. This is very similar to how it was with film back in the day when we used film: A chemical mixture on the film made that film either very sensitive to light (3200 ISO) or much less sensitive (64 ISO). In the age of digital sensors, algorithms (calculations) in the camera calculate "what if the light was 32x stronger" and things like that. In reality, a sensor only has one sensitivity, and most camera sensors are either 100 ISO, 160 ISO, or 200 ISO as their "base ISO". Everything else is algorithms that amplify the light the sensor actually perceives 32x times or 128x times so as to pretend the sensor is more sensitive to light. When you stretch the algorithms, you get noise, lines, less accurate colors, and fewer shades of tones. This was a more relevant talk in 2005 where ISO 400 was stretching things to a degree that the image quality dropped considerably. But as technology has evolved, most cameras can easily do 3200 ISO without any visible drop in quality, and very often 6400 ISO or 12800 ISO. No doubt that we will soon see technology evolve so that 100,000 ISO is not a problem in terms of image quality (1000x the actual light the sensor sees). What we are going to use it for I don't know, but I'm sure it is coming.
Having suffered through this talk about ISO, maybe you now understand why I see no reason to use AUTO ISO. Because you seldom have to consider anything other than either 200 ISO 'daylight' or 3200 ISO 'night' setting. All you have to do is observe if it's day or night, and then set the ISO accordingly.
Now, it's not a shame to use AUTO ISO, and it is not illegal either. Only be aware that when you set the ISO to auto, you let the camera decide what ISO is good for you. You let one of the controls of exposure out of your control, you leave it to a machine to determine what is best for you. This means that if you change the Shutter Speed to a manual speed to make the image less bright - surprise! - the camera will change the ISO so as to make the image as bright as the camera thinks it should be. In other words, you cannot control exposure anymore and must rely on the camera to do the right thing. Which is what "auto" ironically means because "auto" means "self".
You can choose an auto strategy and use the Leica Q3 with the ease of a smartphone camera. Let the camera figure it all out and make it look good in most cases: If you set the lens to A(uto aperture), the ISO to AUTO, and the shutter speed dial to A(perture priority), the camera will shuffle the ISO, aperture, and shutter speed to its delight and make every photo according to what the camera is programmed to.
Let's be realistic. The cool thing about smartphone cameras is that it is very easy to take photos where you can see every detail in focus and the light looks right. The ease of producing nicely looking photos is what makes that type of smartphone cameras so popular that we bring them everywhere and anytime. On the other hand, the reason you got a Leica Q3 most likely is that you wanted to elevate your snapshot photography to more of an artistic expression and experience. You wanted to make real photographs.
I feel like an artisan pizza maker trying to convince people to stop buying frozen pizzas. But I would like to point out how easy it is to do it the right way. When you realize there are only three controls of light and that you can control them all to get even the most artistic and demanding light situation to look great, photography becomes easy and predictable. Take the jump to understand them, which is to lock the ISO at 200, set the Aperture to f/1.7, and notice the shutter speed the camera suggest - and change it with the shutter speed dial whenever you see you can do better.
12 video classes with work book
+ 484 page eBook,
+ Styles for Capture One for Leica Q3/Q2/Q
+ Lightroom Presets. for Leica Q3/Q2/Q
Normal price $869.00
Normal price $869.00
Save 45%
Only $478.00
USE CODE: "ILOVEQ3"
Buy now. Book delivered instantly.
Video class link follows within 48 hours.
100% satisfaction or money back.
Released May 2024
Item #2192-0623
Leica Q3 Know-All-eBook
484 pages illustrated for Computer,
Kindle,
iPad or smartphone.
Auto ISO Settings are only relevant should you use AUTO ISO. In case you do, here is where you define the maximum ISO you allow the camera to go to (6400 ISO), and the slowest shutter speed you allow the camera to go down to (1/125).
White Balance can, for the most part, be set to AWB (Auto White Balance) as this will work in most cases, and the AWB will adjust the colors to look neutral and correct, as the eye does for us all the time. Despite the fact that the color of light changes throughout the day from cold blue to white to warm orange to cold blue, and indoors often to yellow warm light from artificial light sources, the eye and the mind neutralize it all to be "white light."
White Balance is balancing colors to be neutral white (which is the color of sunlight in the middle of the day). White Balance and the color of light are also often referred to as "Kelvin" because it was the Scottish-Irish physicist William Thomson Kelvin who defined color temperatures for light and other things.
As said, the eye and the mind adjust it all to white. Once you start noticing colors of light, you can see them. You see that fluorescent lamps are green, that tungsten lamps are yellow/orange. However, to a camera sensor, color temperature is very influential for how the overall color balance looks.
A candlelight is 1200 Kelvin (very red in a photo), a tungsten lamp in a living room, office, or restaurant is 3200 Kelvin (very yellow-orange in a photo), sunlight during the day is 5400 Kelvin and is called “white light” or “daylight” because in this light, the standard for how colors look is set or perceived. In the shade of a building or a tree, or indoors during a sunny day, the Kelvin is 7300 (colder blue in a photo), and towards sunset, the overall last daylight raises quickly from 8,000 to 12,000 Kelvin overall while the sunlight itself is very warm.
For the human eye, all light looks white unless you pay particular attention. We adjust constantly for color temperature and see almost any scene in correct “daylight” colors. Therefore, it is often a mystery for people why their photos look orange from last night inside the restaurant.
The answer is simply that the camera doesn’t automatically adjust. The solution is near because a digital camera has the possibility to set the Kelvin "color temperature" to match the light – so as to add warm or cold tones digitally to what the sensor captures. The result will be clean and clear, correct colors.
As color balance is the most important aspect in making aesthetically color photos with clarity and refinement, Kelvin is quite an important feature to master.
Color film used to be (and still is when used) balanced to daylight 5400 Kelvin, which is why most photos in daylight look satisfactory. Hence, the same route can be taken with a digital camera when you are not happy with what the Auto White Balance setting delivers you.
In using Auto White Balance, we know that "auto" cannot always be trusted because it's a machine that tries to determine what is right or beautiful. But it can get pretty close most of the time.
Here is the original photo photographed at 5029 Kelvin, adjusted to 7086 Kelvin. As you can imagine, a scene like this is open to interpretation because you have colder light in the shades than the sunshine reflected. The key is the skin tone that should be correct, but also the overall mood. How does it make you feel? But knowing that the daylight Kelvin is 5400 (the sunshine) and shade Kelvin is around 7300 usually, you can use that as a guide.
The white balance menu also offers to set the White Balance to Daylight, Overcast, and other possibilities. Setting a camera to 5400 Kelvin or Daylight can be workable, as that is what color film used to be, but also because it will give a consistent look to your colors and pictures. In editing, you may then adjust the Kelvin in those pictures that need adjustment, to whichever Kelvin you feel is right. Knowing that shade is usually 7300 Kelvin can make editing as easy as simply leaving scenes in sunshine at 5400 Kelvin and changing all scenes in the shade to 7300 Kelvin.
You can also use a WhiBal card or a Kodak R-27 Graycard to balance the colors before or after you take a photo: You simply hold the card up in the scene, take a photo of the card, and then in post-processing (editing), you can use the White Balance pointer to calibrate all colors after that card (this will calibrate not only Kelvin - which is warm/cold, it will also calibrate Tint - which is magenta/green cast). Once you have balanced the test photo, you can apply the same white balance to the series of photos taken in the same conditions.
I have made a few essential Presets for Lightroom that does minor adjustments to the Leica files, so as to get the tones the exact way I want. To get the "Leica look", rather than a “digital sensor look”.
Free today when you use the code:
"LEICAOVERGAARD"
on checkout
Photo File Format should be set to DNG, Digital Negative, a raw format made by Adobe that (unlike raw files from Nikon, Fuji, etc., that consist of two files) is all picture data in one single DNG file. The DNG file is a complete dump of all the data the sensor captured, into one big file. This allows for even extreme changes of exposure, colors, shadow details, highlight details, and more.
A DNG or raw file upon import will traditionally look a little dull, and that is how it is supposed to be. So, some editing is required to make it sing and have punch. Once you are done editing your DNG photos in Capture One or Lightroom, you export them as JPG files, ready for use on screen, email, print, etc.
The Leica Q3 has a special quality in that the DNG files are often very close to the final result you would want. They are not as 'flat' and 'dull' as DNG files can tend to be. This overall makes editing of Leica Q3 files easy and fast.
You can set the camera to record both DNG+JPG, and I have tested it and I wouldn't bother. The JPG is a bit washed out and digitally looking, in my opinion.
DNG Resolution should be set to L-DNG, which is the maximum size and resolution.
JPG Settings are relevant even if you don't plan to photograph in JPG, because the setting of the JPG also determines the preview in the EVF or on the screen, as well as the preview recorded with the file. For example, you can set the JPG to Film Style > BWnat Monochrome, and you will see a preview in black and white at all times in the viewfinder, but it also means that if you download photos to your smartphone via the Leica Fotos App on the road to post them or mail them, the previews you download will be black & white. If you choose Vivid, the previews will be in vivid colors. And so on.
In the menu of JPG Settings, you will also find Leica Looks which are a few special looks Leica offers via download only. This is basically Styles/Presets of editing (as you know them from Lightroom or Capture One), but applied in-camera. Special effects.
iDR is "intelligent dynamic range" and should be set to OFF. You may experiment with it, but my policy is that I will not let a machine apply "intelligence" to how something should look in some randomized manner.
Optical Image Stabilization is mainly for video where the image will be stabilized even when the camera moves. That is why you set it to Auto so that it is only active when needed (which would be video). For still photos, it tends to reduce the quality of the image details.
Photo Aspect Ratio is standardly 3:2, which is "full frame" format or 36 x 24mm.
Perspective Control is a rather smart feature, if and when you need it. What it does is that it adjusts tilting lines in a photo so that skyscrapers, door entrances, etc., are straightened (straight vertical lines). This is something that you used to do in post-processing in Lightroom or Capture One (and can still do easily). But now it is in the camera. I must admit I do not use it, so mine is set to OFF. I still use post-processing adjustments when I need it, and I find the constant adjustment attempts on the camera screen a bit of an intrusion in the choice of composition! But that is me. If you are doing architecture photos in New York, taking interior photos of your home, or visiting an old town in Europe, turning on Perspective Control will adjust all buildings, windows, door openings, street lamps, and other lines into a very neat pattern of straight and orderly lines. It’s a neat feature that would require a tilt-shift lens and a lot of manual adjustment in the past. Now it is done in-camera in an instant. The only thing to be alert to is that perspective control is only applied to the JPG. Once you import the JPG and the DNG, the DNG will show the uncorrected image. In Lightroom, you then go to Develop > Transform > Guided, and the picture will straighten based on the in-file data on perspective control. In Capture One, you will have to apply Keystone Vertical adjustment yourself to get the same result. The look will be the same.
Shutter type you set it to Hybrid. This is a combination of a mechanical shutter up to 1/2000th of a second, and any faster speeds above that and up to 1/16000 are turned over to be performed by the electronic shutter. Fundamentally, the introduction of the electronic shutter enables you to shoot the lens wide open at f/1.7 and never worry about over-exposure.
For reasons unknown, the Leica Q3 shutter speed tops at 1/8000 in Aperture (A) mode. If you encounter sunshine and want to go to 1/16000, you have to do a workaround: Set the shutter speed dial to 1/2000, then go to the MENU and press the 1/2000 symbol, and then turn the thumb wheel right to get to 1/16000. This could be a hardware limitation, and/or it could be fixed in a future firmware edition.
As the Leica Q3 introduces a BSI sensor (back-illuminated sensor), which improves shadow details and more, it also has a longer "sensor readout time" than the sensor used in the Leica Q2 and Leica Q. A slower readout time can result in "warpedimages" like the Volkswagen below.
What happens is that the sensor always reads line by line. You take a picture, and the data is stored from the top left corner to the right, the next line, and so on, like you read a book. This goes incredibly fast, naturally. However, a slower readout time makes the reading of the sensor data slower than the actual exposure. So, you may take a photo at 1/250 or 1/2000 seconds, which is fast enough to freeze most actions; the slower readout time of 20 ms or 30 ms means that the shape of the object changes if the object moves. This was never really an issue with the Leica Q2 or Leica Q, and perhaps it will be improved in firmware updates later. Or you may never notice it.
At faster speeds than 1/2000, the shutter goes from a mechanical shutter to an electronic shutter. Due to the "readout time" of the shutter, the electronic shutter can cause "warping" of the images. While the photo above is taken at 1/2500th of a second and easily freezes the motion, the sensor readout time causes the sensor to read the image line by line while the object is still moving. The only way to avoid the chance of "warping" is to use the mechanical shutter. As technology moves forward, this will cease to be a problem. The BIS sensor of the Leica Q3 has a slower readout time than the previous sensors.
Flash settings should be set to On in case you attach a flash to the Leica Q3. Frankly, I don't see many who do.
Exposure Preview should be set to P-A-S-M. The only alternative is P-A-S, in which case you wouldn't see an exposure preview of Manual shutter speeds. The only time this would be relevant would be if you wanted to see the preview fully bright (at long exposure at night, for example), or you trust your manual settings so much you don't want to see a preview of the actual exposure (working in a studio with models, for example). "P-A-S-M" stands for Program, Aperture Priority, Shutter Priority, and Manual.
Leica Q3 user manuals
Leica Q3 comes with a quick setup-manual book in the box. You can download a complete user manual for Leica Q3 online from the download area of Leica-Camera.com > Service > Support > Downloads
Grid: Off
Clipping/Zebra: Off
Level Gauge: Off
Histogram:
Off
Menu screen 4 of the Leica Q3 explained:
Auto Review > Off because a preview blocks your view for the duration of the preview (1-5 seconds), and if shown on the back screen, it is usually gone too soon for you to look at it. Set it to Off to not have the screen lit up and tell everybody that you just took a photo. If and when you want to look at a photo to check it, press PLAY and look at it on the screen or into the viewfinder (Tip: Press PLAY and look at the images in the viewfinder will make it much easier to see details and get an idea of how the image will look on a larger computer screen).
The exception, maybe, is when you want to quality control each photo you take as you move on. Then a 1-second review in the EVF can be helpful.
Long exposure noise reduction should be ON. Unless you want the file as clean as possible so as to do the noise reduction yourself in post-production in Capture One or Lightroom. Noise reduction will only kick in with actual longer exposures.
Customize Control is a set of customizations you don't really need to deal with. If you want to change them from default, you can set them on the camera simply by holding an Fn button down for a few seconds; then you can assign a function to that Fn button. Only I would make sure to visit Wheel Assignment and set it to Off so that the thumb wheel doesn't affect your exposure. If you set the thumb wheel to Exp. Comp., the exposure will change when you turn the wheel (deliberately or by accident).
In Customize Control, you can also set up a Favorites Menu, should you wish to do so (your favorite items on the first screen).
The pre-assigned buttons for controls on the Leica Q3 are set for zoom, video/still, and ISO. The center button turns off screen info (clean picture as in above), and another click turns on all information, histogram, etc.
Digital Zoom in the menu for changing the crop of the sensor image to 35mm, 50, 75mm or 90mm. It is here in the menu for no other reason than that if you re-assign the 'Fn button 1' don the back of the Leica Q3 to something else than zoom, then you would have to go into the camera menu to change it.
User Profile should be left to simply be the Default Profile, which is the same as having no profiles. That said, some people like to program User Profiles for types of photography so that a profile for night photography has the ISO setting, noise reduction, etc., for that use.
Capture Assistants are things you can turn on, and they will show on the screen. I turn all of them off because I don't need any of them in my daily use of the Leica Q3. But here they are:
Grid is a net to help you get lines straight (and Rules of Third).
Clipping/Zebra is blinking lights to indicate if an area of the photo is completely black or completely white. The idea is that if it is black, it is under-exposed, and if it is white, it is over-exposed. I never agree with these, and I don't like blinking things in my pictures. Clipping/Zebra used to be a great thing on broadcast video cameras back in 2010 when the screens were so bad you couldn't see what was going on, and then the videographer could adjust exposure based on Zebra stripes on the screen indicating when it was too bright.
Level Gauge is so you can hold the camera 100% horizontal, which can be of great help doing architecture and landscape.
Histogram is a graphic representation of the distribution of tones across the image. If you can read it and use it, you will want to turn it on at all times. If it makes no sense, leave it off.
Power Saving Mode > 2 min
USB Charging > ON
Edit File Name > Q*****
Camera Infomation
Firmware > Start Update
Menu screen 5 of the Leica Q3 explained:
Play Mode Setup is what shows on the Play screen when you view the photos you took. I have all of them set to off, and you should do the same unless you know what a histogram is. Though, if you are into reading histograms, turn that one on. Clipping (blinking lights for over/underexposed areas in a photo) I think should be off as it really have no place in a camea. It tends to disturb the ability to look at and judge a photo more than it helps.
Group Display Mode should be set to Off (what it is, is that if you take large series of photos at high speed continious, they group as a series and present themselves as a video-like sequence in review mode, and there is a Play button to see the preview of them - as well as a possibility to get an overview with 12 pictures on the screen at the sime as tuhumbnails, and then you can delete them individually on the touch screen. This is sort of madness, based on the idea that you took so many pictures that you immediately want to delete most of them).
Display Settings cover a few settings. The main setting is EVF-LCD that should be EVF Extended. This means that you always use the EVF and the screen on the back remain shut off and only is in use when you review photos or access the menu of the camra. Tip: When you tilt out the screen of the Leica Q3, the screen turns automatically on. So I use that of course to "turn on" the screen if I want to use it for focusing/framing.
Other settings in Display Settings you can leave as is.
Genius detail: When you select EVF Extended, the back screen of the Leica Q3 only is activated for menu settings and preview. But then, if you pull out the screen, it activates! This make it possible to simply use the back screen for focusing without going into the menu. (Ventilated Shade in RED designed by Thorsten von Overgaard).
Leica FOTOS is an app you can download online, and once it is on your smartphone or iPad, you simply open Leica FOTOS on the camera and connect it to the app. This allows you to download previews of photos you have on the camera, so as to post them on social media or to send them in email. The app also allows you to remote control the camera, as well as update firmware via the phone. Leica collects exit data from the photos and uses it to know what settings people use.
As a side note, the Leica FOTOS app connects to any and all Leica cameras you have. If you have a Leica Q or Leica SL that does videos, you can remote control video recording via the smartphone or iPad. You can put the camera on a tripod and click the focusing point to your face and record a video that will stay in focus on your face. I’m just mentioning this as you see many vloggers who use a Fuji or Canon, and the focus goes in and out during their video. Not with Leica Q3, Leica SL, etc., where you set the focus point in the Leica FOTOS App from your remote position (in front of the camera), and it stays in focus.
Format Card is where you can format your SD card. Some insist on formatting their SD cards every time they have copied their pictures to the computer. I never format the card after copying photos to the computer. I drag the photos to the waste bin on the computer and Empty Trash. If an SD card acts up and needs formatting, I use the free program SD Card Formatter and have done so for years.
Camera Settings is where you can edit file name, for example so all files start with Q_____ instead of L_____. The rest of the settings you let be as is (including Power Saving set to 2 minutes).
Acoustic Signal should all be off.
USB Charging is set to On and you can leave it there in case you want to charge the camera with an USB-C cable (via the port on the left side of the screen).
USB-Mode is set to Apple MFi and you can leave it here (basically means that the Leica Q3 has been approved by Apple to be connected to Apple devices). With the Leica Q3 comes a USB-C cable to connect the Leica Q3 to your iPhone, in case you want to transfer DNG files faster than what the Bluetooth connection offer.
Camera Information is serial number, regulatory information and Firmware version. If there is a newer version of the Leica Q3 Firmware available, you download it to an SD card, and when you insert the SD card and go to Firmware > Start Update,it will install the newer firmware. This can also be done with the Leica FOTOS app, but that is challenging technology and life unnecessarily. Update via SD card works well.
Menu Screen 6 settings:
Main Menu
1 2 3 4 5 6
Language
English
Reset Camera
NoE
Menu screen 6 of the Leica Q3 explained:
Language is where you set the language. Or change it in case somebody else will be using the camera and should be able to understand it in their language.
Reset Camera is a way to reset the camera back to factory settings.
Stay around, get a free eBook
Sign up for the newsletter here and enjoy a free eBook by Thorsten Overgaard.
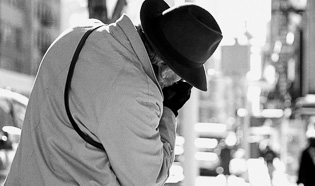
Harrison Furlong with the Leica Q3. Photo: Tim Furlong Jr.
External settings of the Leica Q3
By Thorsten von Overgaard
External settings of the Leica Q3
Once the menu has now been set up, everything except white balance can be adjusted using the outside controls of the Camera: The “Exposure Triangle” is readily available on outside controls of the camera. This makes it very easy to stay in the know at all times what the camera is set up to, and to change the settings in a split second.
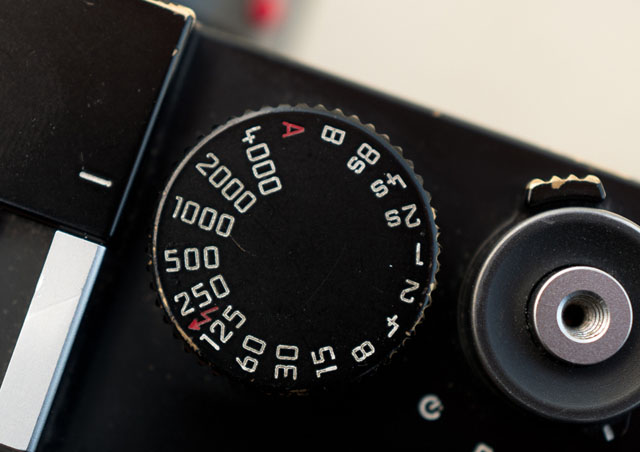
Shutter Speed Dial
This is the main control of the Leica Q3 to get the exposure right. The shutter speed dial on the top of the camera can stay at A (Aperture Priority; which basically makes the camera automatically select a shutter speed to get the right exposure). This should be your main adjustment of the exposure because it is easy to “go manual” by changing the shutter speed, and it is nondestructive. It doesn’t add noise, it doesn’t change the depth of field. It just changes for how long the shutter curtain is open so the sensor can be exposed to light. The more light, the faster shutter speed.
Only thing to know about shutter speed is that when it gets slower than 1/125th of a second, you may start experiencing motion blur. That for example a car driving by is blurry because it moves faster than to be frozen by 1/125th of a second. In the other end, when the exposure time should be faster than 1/2000th of a second, the mechanical shutter cannot go faster so the exposure time becomes electronic shutter where the sensor “turns on and turns off” up to 1/16000th of a second.
The way I use shutter speed is that I have it on A and the camera suggest a shutter speed. I will often take a photo, look at it on the screen, and then if too dark or too bright, I will adjust the shutter speed dial accordingly. If the camera suggested 1/250 and the result is too dark, I can set the shutter speed dial to 1/125 and get the light right. I control it now and can fine-tune the exposure. When I’m done with that photo, I will set the camera back on A as that is the starting point that will work for maybe 80% of the photos I do without further adjustments.
The ISO is easy to change on the "hidden" button on top of the thumbs wheel. I suggest to “lock” the ISO to a daylight setting (200 ISO or 100 ISO) or an evening setting (3200 ISO). If it is a very overcast and dark day, I may turn to 400 ISO or 800 ISO for my daylight setting.
I don’t constantly change ISO. I set it in the morning, and then when it gets dark I change it to 3200 ISO. If I walk in a city and for a moment walk inside to have a coffee, I wil change the ISO to 3200 before I walk in the door, and back to 200 ISO the moment I am stepping outside again. I never consider “what ISO to use”, I have it set so the camera is always ready for the location I am in. If the ISO dial is set on A(uto), the camera will determine ISO setting itself, which could be considered convenient and “always ready” but also means that you never know what the ISO is.
Each “step” in ISO either reduce light to half, or doubles it. Going from 200 ISO to 400 ISO makes the sensor twice as sensitive to light, and going from 400 ISO to 800 ISO doubles the sensitivity once again. And so on.
ISO stands for “International Standardization Organization” and is simply an agreed-upon standard for how light-sensitive a sensor is.
Aperture Ring
The aperture ring on the lens that regulates how much light cones through the lens. Each step (called “f-stop” or “EV”) reduce light to half, or double the light intake. The numbers on the aperture ring, f/1.7, f/2.0, f/2.8, f/4.0 etc. each stand for focal length 28mm divided with f-stop = diameter of the aperture hole.
A 28mm lens at f/2.0, has a hole through of 14mm in diameter. Stopped down to f/4.0, the hole through is 7mm. So as you can see, the numbers in themselves does not give a light value, but simply tell how much the focal length is divided with. So stop looking at the numbers, and just know that for each change of f-stop, the light is halve or doubled. Only from f/1.7 to f/2.0, ot os half a stop only.
The reason the Leica Q3 has an f/1.7 lens and not a traditional f/1.4 Summilux lens, is to keep the size of the lens compact, as well as to make the package of Leica Q3 workable in any light condition without having to add filters for sunshine.
Aperture means “hole through” and is how large or small a hole there is in the lens for the light to pass. The smaller aperture, the less light. The wider aperture, the more light comes through. So much for control of light for exposure. The Aperture also determines depth of field in that the smaller opening (the smaller hole through), the more dept of sharpness there is. For narrow depth of field and dreamy out of focus background, a f/1.7 or f/2.0 lens is perfect. For everything sharp and in focus, f/8 or f/16 should be the choice.
The thumbs wheel
I have disabled for exposure control and other, so now it serves a few other functions: it is perfect to scroll through the menu, and it is great to scroll through ISO settings and White Balance settings.
When pressing PLAY and looking through pictures, I can use the wheel to scroll through the images fast. If I select one photo, I can use the thumbs wheel to zoom in and out (but will mostly simply double-tap on the screen to see a detail in a photo).
The Fn buttons
The Leica Q3 is equipped with quie a few, but all very discrete Fn buttons. Fn stands for Function because they each have a function; and the function of each button can be re-arranged by you. Simply press and hold down a n Fn button long enough for a menu to pop up on the screen. Then you can re-assign any function to it.
On/Off switch
If you asked me, I would say I always leave the camera on and let it go to sleep by itself. But that is probably not true. I think it is more correct to say that I turn on the camera in the morning, and when I am done using it and put it down, I turn it off. The on/off switch is one of those things that sits in the fingers, but also one I feel could be omitted on a camera. I mean, if you want to make sure it is turned off, pop out the battery.
In this article I went over how to set up the menu of the Leica Q3 so it works. I tried to go over the consequences are of the choices. What you need to know, and what you need not to know about.
A stupid man buys a camera so advanced he cannot comprehend it. His stupidity consists of considering himself so wise that he cannot comprehend his own stupidity.
A wise woman buys a simple camera that she know she, with some time dedicated to the project, might be able to get to work and have fun with. Her wisdom consists of considering there are many other things to do in life than learning a stupid camera
The incomprehensibility of photography
Photography is simple. If you know how to do it. What is not known and not understood, is incomprehensible … by the simple fact that it isn’t known. Because, If you knew it, it wouldn’t be incomprehensible, right?
It’s a blessing to know all the is to know, and know that one does in fact know all there is to know about it. To know enough to get the show on the road is where I set the bar.
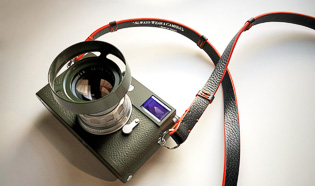
The Leica Q3 Ventilated Shade designed Thorsten Overgaard for "Always Wear A Camera". Available in black paint, matte black paint, RED, Safari Green and Silver. This shade also fits Leica Q and Leica Q2 models.
The Leica Q3 Know-All eBook, Video Masterclass and Presests
By Thorsten von Overgaard
Full Leica Q3 Pack
Special
12 video classes with work book
+ 484 page eBook,
+ Styles for Capture One for Leica Q3/Q2/Q
+ Lightroom Presets. for Leica Q3/Q2/Q
Normal price $869.00
Normal price $869.00
Save 45%
Only $478.00
USE CODE: "ILOVEQ3"
Buy now. Book delivered instantly.
Video class link follows within 48 hours.
100% satisfaction or money back.
Released May 2024
Item #2192-0623
Leica Q3 Know-All-eBook
484 pages illustrated for Computer,
Kindle,
iPad or smartphone.
The Thorsten Overgaard user-guides on Leica Q3, Leica Q2 and Leica Q
I've written the most extensive user guides that exist for the Leica Q and Leica Q2, and of course the Leica Q3 will go through intensive use in the same manner, and the result will be free articles, sample photos and an eBook. Sign up for my newsletter to stay in the know on the Leica Q3 (and get a free eBook instantly when you sign up).
The serial number of the Leica Q3 is engraved at the buttom plate of the camera. It is also visible in the last screen 6 of the camrea menu under Camera Information, and it is in the files that the camera makes: When you open the image in Capture One or Adobe Lightroom Classic, you will be able to see which serieal number the camera has.
Also, on the box the camera came in, there is a serial number, as well - usually - information as to what date the camera was made.
1:2/50 the description says. But what does it mean?
1: - Basically means 1 divided with. But why is it on the front of the lens? If you look close, a lens will often say 1:2/50mm on the front, meaning it is a 50mm lens with an f/2.0 apterture. The 1: itself is a ratio, that indicates that the aperture diameter (25mm) is the ratio of 50mm divided with 2.
It's a strange way of writing product information on modern products, but here's how it's right:
a) A lens is called a 50mm lens because there is 50mm from the sensor to the center of focus inside the lens.
b) A lens is f/2.0 when the widest opening is 50mm divided with 2 = The lens opening is 25mm in diameter at it's widest. Had it been an f/2.8 lens (1:2.8/50), the widest aperture opening would be 50mm divided with 2.8 = 17.8mm.
AEL = Auto Exposure Lock. This is a function that can be used when you want to reframe the scene, but keep the current exposure from changing. By default the Leica Q locks both Exposure and Focus when you press the release button half down.
AFL = Auto Focus Lock. This is a function that can be used when you want to reframe the scene, but keep the current focusing from changing. By default the Leica Q locks both Exposure and Focus when you press the release button half down.
AF = Auto Focus. The idea is that the camera does the focusing itself (the word auto comes from Greek "self").
AF Assist Lamp = The little red lamp on the front of the Leica Q that will light up in dark places so as to help the Auto Focus to see in the dark. If you put a hand in front of the lens and press the shutter release button you can see it in action.
Aperture = The f/ stop on the camera that regulates how much light passes through the lens. On a f/1.7 lens the lens is fully open" at f/1.7. At f/2.0 the aperture inside the lens make the hole through the lens smaller so only half the amount of light at f/1.7 passes through. For each f/-stop (4.0 - 5.6 - 8.0 - 11 - 16) you halve the light. The aperture of the lens is basically the focal length divided with the f/-stop = size of the hole (28mm divided with f/1.7 = the hole is 45 mm). ORIGIN: Late Middle English : from Latin apertura, from apert- ‘opened,’ from aperire ‘to open’.
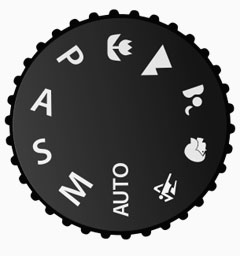
The camera in Aperture Priority Mode
Aperture Priority Mode. When the shutter speed dial on top of a Leica camera is set to A, it is short for “Aperture Priority” and allows the user to set a specific aperture value (f-number) while the camera selects a shutter speed to match it that will result in proper exposure based on the lighting conditions as measured by the camera's light meter. In other words, you set the aperture as priority (f/1.4 for example), and the camera calculates a shutter speed (1/250 of a second) that matches that. If you change the aperture to f/2.0 by changing the aperture ring on the lens, the camera will re-calculate the speed to 1/125 so as to get the same amount of light to hit the sensor (f/2.0 is half the light through the lens as f/1.4 and 1/125 if twice the amount of light on the sensor as 1/250).
spherical (ball)
a-spherical (non-ball)
ASPH = (Aspherical lens) stands for "aspheric design".
Most lenses have a spherical design - that is, the radius
of curvature is constant. These are easy to manufacture by
grinding while "spinning" the glass. This design
however restricts the number of optical corrections that can
be made to the design to render the most realistic image possible.
ASPH lenses (a-spherical, meaning non-spherical), however, involve usually 1 element that does
*not* have a constant radius of curvature. These elements
can be made by 1) expensive manual grinding, 2) molded plastic,
or 3) Leica's patented "press" process, where the element
is pressed into an aspherical ("non-spherical")
shape. This design allows Leica to introduce corrections
into compact lens designs that weren't possible before. Practically,
the lens performs "better" (up to interpretation)
due to increased correction of the image, in a package not
significantly bigger than the spherical version.
There is another Aspherical lens manufacture technique: an uneven coating layer is applied to a spherical lens. The coating is thicker on the edges (or on the center, depending). Canon "Lens Work II" calls these "simulated" aspherical lenses. Simulated and Glass-Molded (GMo) asphericals show up in non-L Canon lenses, while the L lenses have actual ground aspheric elements.
A- means non, or without.From Latin, ex.
Sphere: ORIGIN Middle English : from Old French espere, from late Latin sphera, earlier sphaera, from Greek sphaira "ball".
Normal spheric lens (grinded)
ASPH (note the shape of the glass as result of pressing rather than grinding)
Auto- means “self”. The idea is that when a camera has auto-(something), it does that (something) by itself.
Auto Focus = The idea is that the camera does the focusing itself (the word "auto" comes from Greek "self"). Ironically and factually, it does not work that easily, which is why many types of Auto Focus have been added to this feature. Ironically, it was supposed to make it easy for the user to get sharp photos but has become a filter of focusing complexities in front of the user with a variety of made-up fancy names: Face detection, iAF (Intelligent Auto Focus), AFc (continuous), Tracking AF, Multi-Field AF, Eye Detection AF, Zone AF, and more.
Banding = Noise in digital images. Horizontal lines in a horizontal picture (if the camera is in portrait mode/vertical, the lines will obviously be vertical). It's simply noise; the result of uncontrolled algorithms working overtime with an image the sensor really can't see because it's very dark. (If your image has vertical lines in it, it is more likely that the sensor needs remapping).
This image at 6400 ISO, underexposed and then brought up to correct exposure in Lightroom, displays banding: Horizontal lines in the image. Leica M-D 262 with Leica 50mm APO-Summicron-M ASPH f/2.0.
Base ISO = The ISO the digital sensor was born with. Even a digital sensor goes from say 50 ISO to 25,000 ISO, it only has one base ISO. Any other setting is an algorithm that figures out how the image whould look if there was 64 times more light, or half the light, etc.
When you go down from Base ISO (for example 200 to 100 ISO), you can expect a
decrease in quality. When you go up, the decrease is much less. For some sensors, you loose 2-3 stops by going down 1 step in ISO, but can go 8 steps up and only loose 1 stop in dynamic range. Basically, your ISO range should be from Base ISO and as far up as you can, before you see visible decrease in quality (mostly 3200 ISO - 6400 ISO).
Base ISO for Leica M9 is 160 ISO, for Leica M240 it is 200 ISO. For Leica M10 it is around 160 ISO. For Leica M Monochrom it is 320 ISO. For Leica Q and Leica Q2 it is around 100 ISO. For Panasonic Lumix S it is 200 ISO. For most Canon cameras the base ISO is around 100, for most Nikon cameras it is around 200 ISO.
Bokeh = The visual quality of the out-of-focus areas of a photographic image, especially as rendered by a particular lens: It's a matter of taste and usually photographers discuss a 'nice' or 'pleasant' bokeh (the out-of-focus area is always unsharp, which is why the quality discussed is if one likes the way it renders or not by a particular lens). The closer you get to something, the 'more' bokeh' you get (in that the focus becomes less for the background and foreground at close distances than at long distances). ORIGIN from Japanese 'bo-ke' which mean 'fuzzines' or 'blur.'.
Camera -is today’s short name for Camera Obscura (meaning “a dark room”). CamerameansChambre and was used only as a Latin or alien word, actually only for Spanish soldiers’ rooms, until popularized in connection with photography in 1727: “Camera Obscura”. In 1793 the slang term “camera” was used by Sterne Tr. Shandy: “Will make drawings of you in the camera” and by Foster (1878), “The eye is a camera”. Camera Obscura was described by Iraqi scientist Ibn-al-Haytham in his book, “Book of Optics” (1021) and by Leonardo da Vinci in 1500; popularized and made widely known in 1589 by Baptista Porta when he mentioned the principle in his book “Natural Magic”. Johannes Kepler mentions Camera Obscura in 1604.
Camera = chambre (room), Obscura = dark (or cover).
Why is it called a "camera"..?
The word Camera is today's short name for Camera Obscura (which originally means “a dark room”).
Origin of the word Obscura means "dark" or "covered", and the word Camera meansChambre and was used originally only as a Latin or alien word, actually only for Spanish soldiers' rooms, until popularized in connection with photography in 1727: “Camera Obscura”.
In 1793 the slang term “camera” was used by Sterne Tr. Shandy: “Will make drawings of you in the camera” and by Foster (1878), “The eye is a camera”.
Ibn-al-Haytham mentioned Camera Obscura in his "Book of Optics" in 1021.
The concept of Camera Obscura was described by Iraqi scientist Ibn-al-Haytham in his book, “Book of Optics” (1021) and by Leonardo da Vinci in 1500; popularized and made widely known in 1589 by Baptista Porta when he mentioned the principle in his book “Natural Magic”. Johannes Kepler mentions Camera Obscura in 1604.
Camera = chambre (room), Obscura = dark (or cover).
C = Continuous shooting. In the menu of the Leica Q2 under the menu point Continuous Shooting you can define if the Continuous should be Low (3 fps), Medium (5 fps) or High (19 fps).
Central Shutter = Some lenses, for example the Leica S lenses and the Leica Q where a shutter is located in the lens itself. In most cameras there is a shutter curtain just in front of the sensor, and in SLR (Single Lens Reflex) cameras there is also a mirror in front of the shutter curtain.
In the Leica T/TL/TL2 the shutter is in front of the sensor, but only acts to "refresh" the sensor. In the Leica TL2, there is a mechanical shutter curtain from 30 sec. to 1/4000 shutter times, and digital shutter from 1/4100 to 1/40,000 shutter times. A digital shutter is simply "turning on/off the recording of the sensor.
CMOS sensor (as used in Leica CL, Leica T/TL/TL2, Leica M 240, Leica M Monochrom Typ 246, Leica S Typ 007, Leica SL, Leica Q, Leica Q2, Leica M10, Leica X, Leica D-Lux, etc.) = (Complimentary Metal Oxide Semiconductor) chips use transistors at each pixel to move the charge through traditional wires. This offers flexibility because each pixel is treated individually. Traditional manufacturing processes are used to make CMOS. It's the same as creating microchips. Because they're easier to produce, CMOS sensors are cheaper than CCD sensors. CMOS allow Live View and use less energy than CCD.
Contrast - The degree of difference between tones in a picture. Latin contra- ‘against’ + stare ‘stand.’
CS = Central Shutter = As in the Leica S lenses for the Leica S where a shutter is located in the lens itself. In most cameras there is a shutter curtain just in front of the sensor, and in SLR (Single Lens Reflex) cameras there is also a mirror in front of the shutter curtain.
In the Leica Q and Leica Digilux 2 the shutter is in the lens which makes the camera mirrorless as well as very quiet because there is not a metal shutter curtain going up and down in front of the sensor.
Depth - Distance between front and back. Distance from viewer and object.
Digital Zoom = Refers to zooming in on a scene digitally. All that happens is that the camera zooms into the area of the sensor and records only that. The quality will be less as it's a smaller part of the same recording. Zoom is originally used for an optical zoom lens where optics move inside the lens so as to enlarge the subject optically. This does not reduce the image quality/resolution the same way as digital zoom does. Generally, digital zoom can be performed on any picture later in the computer as it's in essence simply a crop.
In the Leica QDigital Zoom refers to the possibility to change the crop from 28mm to 35mm or 50mm (and for the Leica Q2, 75mm as well). Choosing a different "digital zoom" simply shows frame lines for the chosen focal length in the EVF and in the final image (that is in fact the full 28mm frame), there is a pre-selected crop for the chosen frame when you open the image in Lightroom or Capture One Pro.
Digital Shutter = A digital shutter is simply "turning on/off the recording of the sensor. In the "old days" this had to be done with an actual mechanical shutter curtain; a metal curtain in front of the sensor (or film) that goes up for 1/125th of a second, for example. In the Leica TL2, there is a mechanical shutter curtain from 30 sec. to 1/4000 shutter times, and digital shutter from 1/4100 to 1/40,000 shutter times.
Diopter adjustment = Adjustment in a camera viewfinder to fit to the eye's ability to focus. Often a camera has a little dial too adjust for eyesight less than perfect. For example the Leica Q3 has a -4 to +2 possible adjustment so that the electronic viewfinder will look sharp by moving the focus distance to the screen so it fits the eye.
The Leica Q3 has a -4 to +2 possible adjustment so that the electronic viewfinder will look sharp by moving the focus distance to the screen so it fits the eye.
DIS = Digital Image Stabilization. This is a feature often offered in video recorders and some times for tele lens still photography (so as to avoid motion blur when the lens is moving during slow shutter speeds).
Lens distortion looks like this. The lines are not straight. Our eye uses distortion correction. Lens designers can design lenses so they have very little distortion, or they can make less complicated lens designs and "fix" the distortion in software.
Distortion = In photo optics/lenses: When straight lines in a scene don't remain straight because of optical aberration.
Lens designers can correct for distortion to a degree so the whole image field is perfect corrected and all lines remain straight. In modern lens design many designs rely on Software Distortion Correction (SDC).
The eye adjusts for distortion so we always see vertical and horizontal lines straight when we look at things. Even when you get new prescription glasses (if you use such), you will often experience distortion in your new glasses. After a few days they eyes have adjusted for the glasses and the distortion you saw to begin with is now gone. Software Distortion Correction (SDC) is far behind what the human eye can perform of adjustments. (Also see my definition on Perspective for more on the eye and optics)
DNG = Digital Negative, an open standard developed by Adobe. It is a single file that contains the raw image data from the sensor of the camera as well as date, time, GPS, focal length, settings, etc.
The alternative is a RAW file + XLM file where the RAW file contains the image information and the XML contains the rest of information about where, how and when the picture was taken.
A Camera Raw profile (that is specific for that camera) in the computer helps the software program, for example Adobe Lightroom, to translate the RAW data into the image.
A raw file (or DNG) is simply the full recording of digital data (1's and 0's) from the sensor. In the computer, the sensor data is translated into the exact colors, via a camera profile.
DOF = Depth of Field. This is how much of the image will be in focus or "acceptable sharp". The DOF is determined by the subject distance (the farther away, the larger area is sharp; the closer the focus is, the less of the lage is sharp), the lens aperture (the depth of field is narrow at f/1.4 and larger at f/5.6) and the focal length of the lens (tele lenses has very narrow depth of field whereas wide angle lenses has a wide depth of field) and film or sensor size (small-sensor cameras has a wide depth of field wheras medium format or large format cameras has a very narrow depth of field). As an example, a Leica 21mm Super-Angulon-M f/3.4 lens is sharp all over the focus field from 2 meter to infinity when set at a distance of 3 meters at f/3.4. The DOF scale measurement on top of the Leica lenses shows lines for each f-stop that indicates from which distance to which distance the image will be sharp. Shallow DOF is a generally used term in photography that refer to lenses with very narrow focus tolerance (which can be used to do selective focus; making irrelevant subjects in the foreground and background blurry so only the subjects of essence are in focus and catches the viewers eye).
Depth Of Field scale from Fujifilm.
Dynamic range. The grade of ‘contrast range’ (or number of tones) a film or sensor, or simply a photograph, possess between bright and dark tones. The human eye is said to have a dynamic range of 10-14 ‘stops’ (but because we scan area by area and compile a concept of the overall scene, they eye is often thought to have a much higher dynamic range), Film used to have 7-13 ‘stops’ and some modern sensors have up to 15-17 ‘stops’.
EVF = Electronic ViewFinder. A viewfinder where you look at a small screen through optics/prisms. The advantage is that you see what the sensor sees.
The EVF (Electronic Viewfinder) on the Leica SL 601.
Exposure Bracketing = The possibility to set the camera to automatically record a series of images where the exposure is above and below what the camera measures. The idea is that at least one of the images will be correctly exposed.
f/ (f-stop, also known as aperture).
f- (focal length). Often given in mm, for example 90mm. In the past they were often given in cm or inch, for example 9.5 cm or 3.2 inch.
f-stop = the ratio of the focal length (for example 50mm) of a camera lens to the diameter of the aperture being used for a particular shot. (E.g., f/8, indicating that the focal length is eight times the diameter of the aperture hole: 50mm/8 = 6,25 mm); or the other way around, the hole is the focal length divided with 8).
ORIGIN early 20th cent.: from f (denoting the focal length) and number.
One f-stop is a doubling or halving of the light going through the lens to the film, by adjusting the aperture riing. Adjusting the f-setting from f 1.4 to f.2.0 is halving the light that goes through the lens. Most Leica lenses has half f-stops to enable the photographer to adjust the light more precicely.
The aperture blades inside the lens is clearly visible in this photo by Eolake Stobblehouse.
Flare = Burst of light. Internal reflections between (and within) lens elements inside a lens. Mostly, flare has a characteristic "space travel" look to it, making it cool. Particularly in older lenses with less or no coating of the glass surfaces to suppress this, it can be a really cool effect. In newer lens designs, the coatings and overall design try to suppress flare and any reflections to a degree, so that there is seldom any flare to be picked up (moving the lens to pick up a strong sunbeam), but instead a "milking out" (or "ghosting") of a circular area of the frame; meaning simply overexposed without any flare-looking flares.
Sunlight creating (fairly supressed) flare in the bottom right quadrant of the image of a modern lens.
Fn = Short for Function. It's a button you can program. In the Leica Q it is by default set to be White Balance, so when you press it, you can choose which White Balance setting you want. You can press again and another function comes up. To complicate matters more, you can program the FN button to your own likes.
A 28 mm lens has a 74° viewing angle
Focal length = On the Leica Q it is 28mm and originally referred to the distance from the sensor (or film in older days) to the center of focus inside the lens. Nobody uses that measurement, except those who construct lenses! For users of lenses, focal length refers to how wide the lens sees. The viewing angle, which is often given in for example 90° viewing angle for a 21mm lens, 74° viewing angle for a 28mm lens, 6° viewing angle for a 400mm lens, etc.
Each human eye individually has anywhere from a 120° to 200° angle of view, but focus only in the center.
Focus, in - Sharp and clear in appearance. Focus - “The burning point (of a lens or mirror)”. In Latin the word focus meant fireplace or hearth. The word was probably first employed outside of its Latin literal use as “the burning point of a lens or mirror” in optics, and then came to mean any central point. The German astronomer Johannes Kepler first recorded the word in this sense in 1604.
Full Frame (FF) = The size of the sensor is 24 x 36mm which is the format Oskar Barnack and Leica Camera AG invented with the first Leica that was introduced in 1925. Many other formats invented since, such as APS, APS-C and all usually refer to Full Frame ratio, by which it means what size they have compared to Full Frame.
Full Frame is "king of photography"
The 24 x 36mm Full Frame format is so "king of photography" that it has continued to be the ideal for all cameras. Besides this, there exists Large Format cameras such as 4x5" (100 x 125 mm) and Medium Format 6x6 (60 x 60mm amongst other sizes in that area).
Hue = A color or shade depending on the dominant wavelength of red, green or blue. The word Hue comes from Swedish hy which is "skin complexion". It is independent of intensity, so often (in computer editing programs for example), Hue is an adjustment along Saturation which is (intensity of color as compared to white).
iAF is "Intelligent Auto Focus," and when on, the camera supposedly uses AFs (Auto Focus Single) until it detects that the subject moves, at which point it switches to AFc (Auto Focus Continuous). Generally, with any camera, I would either manually focus or use AFs, where the autofocus locks onto what I've decided it should focus on (remains stable and does not change). This way, I have a clear understanding of what the camera is doing. With iAF, I don't know when or why the camera changes its focus. After all, I am the one taking the photos, not the camera.
AFc (Continuous) means that the autofocus constantly checks if the focus has moved, triggering a continuous movement of the autofocus mechanism in the camera. This movement is accompanied by vibration, which can be felt and sometimes heard. At the same time, the preview in the viewfinder or on the screen constantly 'vibrates' or 'breathes.'
AFs (Single) is where 1) you point the focusing spot onto a subject or detail or the subject, and 2) when you touch the shutter release, the camera quickly focus on that spot, and 3) as long as you hold the shutter release half down, the focus is locked on that distance no matter where you move the camera (to recompose for example, or to wait for the right moment), and then 4) when you press the shutter release down, the camera takes that photo without delay (as the focus ia already set). When you move your finger away from the the shutter release, the AF is ready to a new cycle of 1, 2, 3, 4.
ISO = Light sensitivity of the camera sensor is given in ISO (International Organization for Standardization). It's a standard that was used in film and is now used in all digital cameras also. The base ISO for the Leica Q sensor is 100 ISO which means that this is what the sensor "sees". All other levels are computer algorithms calculating the effect as if the sensor could "see" more (hence noise at higher ISO levels).
ISO goes in steps of doubling: When the ISO is raised from 100 ISO to 200 ISO, the camera only need half the amount of light to make a picture. For each step in ISO to 400, 800, 1600, 3200, etc the light sensitivity is doubled for the sensor (and the camera sensor only need half the light of the previous ISO to record the same image).
JPEG = A standard for picture format made in the 1990's by Joint Photographic Experts Group). Mostly referred to as JPG as in L1003455.JPG which would be the name for a JPG file from the camera.
Summilux = Refers to the maximum lens aperture - normally f1.4 , "-lux" added for "light" (ie. the enhanced light gathering abilities). In the Leica Q the lens is a Summilux even it is a f/1.7 and not f/1.4.
LCoS display
LCOS (viewfinder screen in the Leica Q and Leica Q2) = Liquid crystal on silicon is a high-quality method for near-eye displays, better than LCD (Liquid-crystal display). There are two broad categories of LCoS displays: Three-panel and single-panel. In three-panel designs, there is one display chip per color, and the images are combined optically. In single-panel designs, one display chip shows the red, green, and blue components in succession with the observer's eyes relied upon to combine the color stream.
Leica = A compound word derived from " (Lei)tz" and "(ca)mera". Apparently they were originally going to use "LECA", but another camera company already used a similar name in France, so they inserted the 'i' to prevent any confusion.
Lens hood = (also called a Lens shade). A tube or ring attached to the front of a camera lens to prevent unwanted light from reaching the lens and sensor. In the past where lenses were not coated to prevent internal reflections inside the lens, the lens hood was often essential. These days where lenses are coated, the shade serves just as much as decoration and protection (bumper) as well. ORIGIN Old English hod; related to Dutch hoed, German Hut 'hat,' also to hat.
Lens hood or Lens shade attached to the front of the lens to prevent light rays from the side to hit the optics, which could introduce unwanted light and hence reduce contrast of the image. These days where lenses are coated, the shade serves as decoration and protection as well.
Level Gauge = This is a tool in the viewfinder to see if you hold the camera 100% horizontal and/or vertical. You can turn it on in the Menu > Photo Live View Setup > Level Gauge > On.
Light = Tiny particles called photons that behaves like both waves and particles. Light makes objects visible by reflecting off of them, and in photography that reflecting off of subjects is what creates textures, shapes, colors and luminance. Light in its natural form (emanating from the sun) also gives life to plants and living things, and makes (most) people happier. So far, nobody has been able to determine exactly what light is. The word photography means “writing with light” (photo = light, -graphy = writing). Read more about light in my book Finding the Magic of Light.
Live View = This is the ability to see the image the sensor see, live, via the screen of a digital camera, or via an electronic viewfinder (EVF).
MACRO = Macro lens. The Leica Q2 lens can be turned to Macro which enables you to go close so as to enlarge smaller subjects. The word macro comes from Greek makros ‘long, large.’
Maestro II - A processor developed first as Maestro for the Leica S2 and upgraded to Maestro II for the Leica S (Typ 007). The Leica Q has a Mestro II (Leica Q edition) processor developed by SocioNext Inc. based on Fujitsu's Mibeault architecture.
Megapixel (or MP) - Millions of pixels. See pixel further down. How many units of RGB is recorded by a given sensor by taking height x widt. A Leica M10 delivers a 5952 x 3968 pixel file = 23,617,536 piexls. On a screen the resolution you choose determines the size of the image. Say you have a 5000 pixel wide file and your screen is set for 8000 pixels wide. Then the image will fill only the 5000 pixels fo the 8000 and the rest will be empty, If you then change the screen resolution to 5000 wide, the image would be able to fill out the whole screen.
Meßsucher (rangefinder or distance finder) = Mess = range, sucher = finder. It is always correctly written with the "ß". There are technically not three "s", rather the "ß" and one "s" because it is a word constructed by the combining of two precise words.
mm = millimeter(s), as in a 50mm lens. (Earlier in lens history lenses focal length was given in cm = centimeters; as in a 5 cm lens). For anyone used to centimeters and millimeters, it’s no wonder. But if you grew up with inches, feet and yards, you may have had a hard time grasping what a 50mm lens was. But as lenses were designed first in Europe, the metric system with centimeters and millimeters was used to describe lenses.
The reason a 50mm lens is a 50mm lens is that there is 50mm from the focus plane (the film or sensor) to the center of focus inside the lens. When photography was a young subject, it was engineers who made it all, and the users were expected to understand. The engineers were so into the making of the lenses, that it apparently never dawned upon them that today’s users would think of a 21mm lens as a wide angle lens rather than a lens where there is 21mm from the sensor to the center of focus inside the optics.
ND = Neutral Density filters are grey filters that functions as 'sunglasses' for lenses. They simply block the light so that a lens can work at for example f/1.7 in sunshine.
ND (Neutral Density) filters to put in front of lenses to reduce the amount of light that comes in. They don't have any other effect than that and doesn't change contrast, color or anything.
NFC = Near field communication is a technology that enables smartphones and cameras (or other devices) to establish radio communication with each other by touching the devices together or bringing them into proximity to a distance of typically 10 cm (3.9 in) or less.
PASM in the menu of the Leica Q is most likely is made up from the letters of a mode dial on a traditional camera. Nobody knows for sure.
PASM (screen mode) = Basically means that you are in control of the camera and haven't selected any of the Screen Modes available in the Leica Q menu. PASM is most likely short for P = Program Mode / A = Aperture Priority / S = Shutter Priority / M = Manual Control (... what Moron comes up with those silly abbreviation; and then don't explain them in the manual?).
Pixel - Made up word from Pix (picture) and el (element). A pixel is the smallest full-color (RGB) element in a digital imaging device. The physical size of a pixel depends on how you've set the resolution for the display screen. The color and tonal intensity of a pixel are variable, meaning that each pixel contains RGB. This is different from a camera sensor's small eyes (photosite) that are an intensity of either red, green or blue. You could say that the digital sensor's photosite (where each unit collects just one color; red, green or blue) is the input technology, whereas the pixels on a screen (where each pixel contains red, green and blue) is the output device. So while sensors are measured in megapixels (mega = million), it's their output unit of pixels, and not the input unit of photosites that is measured and stated. See illustration below.
S = Single image. When the ring by the shutter release on top of the camera (or in the menu of a digital camera in case it does not have this ring on the ourside) is moved from OFF to S, the camera takes only one photo at the time (Single). The other possibility is Continuous where the camera takes pictures continiously as long as the shutter release button is helt down. (see above).
Saturation: How colorful, intense or pure the color is. Less saturation would be less colorful, more saturation would be more colorful. In today’s photography, de-saturating a photo on the computer will gradually make it less and less colorful; and full de-saturation would make it into a black and white photo.
Sensor = A device that detects a physical property (like light) and records it. A camera sensor is a plane plate with thousands of small “eyes” with (photosites) a lens in front of each (CFA, Color Filter Array), which each individually records the amount of red, green and blue light rays that comes through the lens. Together, Red, Green and Blue form all colors of the spectrum, which becomes a pixel. Sensor comes from Latin sens- ‘perceived’.
Screen Mode = A menu point in the Leica Q that allow you to choose different pre-programmed ways of recording stills with the camera. For example Sunset, Snow/Beach, Fireworks, etc.
Nobody knows what the modes does but they sound helpful. Panorama (move the camera and it takes a series of images; just like iPhone) and Time Lapse (interval of images to record change) are also in the Screen Mode menu and may be useful. All screen modes are equally undefined in the manual, so all you can do is try and see if you can figure out what happened. PASM is the setting you use to avoid any pre-programmed modes (see above.
SDC = Software Distortion Correction. A correction of lens distortion (not straight lines) applied in the camera and which is part of the DNG or RAW file. In Lightroom or Capture One Pro the SDC of the camera file is applied automatically (and cannot be removed), in software like AccuRaw one can open the DNG file without the SDC correction. Sean Reid Reviews have written a good article on what SDC is and does in "Software Distortion Correction".
SDC (Software Distortion Correction): In Lightroom the correction profile for the Fujinon 23mm is applied automatically and cannot be turned off.If you go into Develop mode in Lightroom and look under Lens Correction > Profile, you will see a message in the bottom with an exclamation mark. When you click on that, you get the message above.
Shutter speed dial - The dial on top of the Leica M where you can set the shutter speed manually. It can also be set to A which stands for Aperture Priority (where the camera suggests a shutter speed; or when you move the dial away from A, the camera will show arrows in the viewfinder, suggesting which direction to change the Aperture to, to get the correct exposure).
Shutter speed dial set to 1/1000 of a second.
SLR = Abbreviation for Single-Lens Reflex; the lens that forms the image on the film/sensor also provides the image in the viewfinder via a mirror. The Leica Q has no traditional viewfinder and no mirror. the image seen in the EVF is what the sensor sees.
Summilux = Refers to the maximum lens aperture - here f1.4 , "-lux" added for "light" (ie. the enhanced light gathering abilities). In Leica terminology a Summilux is always a f/1.4 lens and a Summicron is a f/2.0 lens. In the Leica Q2 the lens is f/1.7 but is called a Summilux because it is closer to f/1.4 than f/2.0.
Three-dimensional = Having the three dimensions of height, width and depth. In photography and lens design, three-dimensional effect is also the perception of even small micro-details; the texture of skin can appear flat and dead or three-dimensional and alive. Also, selective focus (foreground and background out of focus) can change the perception of depth. Also see Perspective.
Ventilated Shade - A shade is a hood in front of a lens that provides shade from light going straight onto the lens from outside what you are photographing, which could cause internal reflections like flare, which would make the picture less contrasty.
The ventilated shade has holes so it doesn't obstructs the view from the viewfinder. In many of today’s mirrorless cameras where there is no viewfinder looking ver the lens, so there is no actual need for a ventilated shade; but they are considered classic or vintage looking and are still in high demand. It makes no difference for the purpose of the shade (to create shadow) if it is ventilated or not.
Ventilated Shade for the Leica Q3. I make ventilated shades for most lenses and sell them from here.
Viewfinder = a device on a camera showing the field of view of the lens.
1) A built-in viewfinder in a camera that simply show the frame you get when you look through the viewfinder.
2) A rangefinder viewfinder which is also used to focus the lens. In Leica M cameras two pictures has to meet and lay 'on top of each other' for the picture to be in focus.
3) An external viewfinder, usually on top of the camera in the flash shoe, so as to show the field of view of lenses wider than what the built-in viewfinder can show (15mm, 21mm, 24mm, 28mm etc viewfinders exist)
4) Very simple "aiming-devices" on top of a camera that is simply a metal frame without any optics. Just a frame, as for example very old cameras (the original Leica), or when using cameras in diving where you can't look through the camera.
5) A Electronic Viewfinder (EVF) that shows what the sensor sees "live".
The Full
Street Photography
Bundle
(The three items illustrated below)
"Street Photography Masterclass" $698.00
"This is Street Photography" $298.00
18 video classes with PDF work book
and illustrated eBook,
Normal price $1,296.00
Desk Blotters and Larger-Than-Life Mousepad Nothing beats the feelling of soft calfskin leather on your desk ... but this one takes away reflections, damps the keyboards and makes you happy!
Thorsten von Overgaard is a Danish-American multiple award-winning photographer, known for his writings about photography and Leica cameras. He travels to more than 25 countries a year, photographing and teaching workshops to photographers. Some photos are available as signed editions via galleries or online. For specific photography needs, contact Thorsten Overgaard via email.
You can follow Thorsten Overgaard at his television channel magicoflight.tv.
I am in constant orbit teaching
Leica and photography workshops.
Most people prefer to explore a
new place when doing my workshop.
30% of my students are women.
35% of my students dotwo or more workshops.
95% are Leica users.
Age range is from 15 to 87 years
with the majority in the 30-55 range.
Skill level ranges from two weeks
to a lifetime of experience.
97% use a digital camera.
100% of my workshop graduates photograph more after a workshop.
 in Florida.© Thorsten Overgaard.")
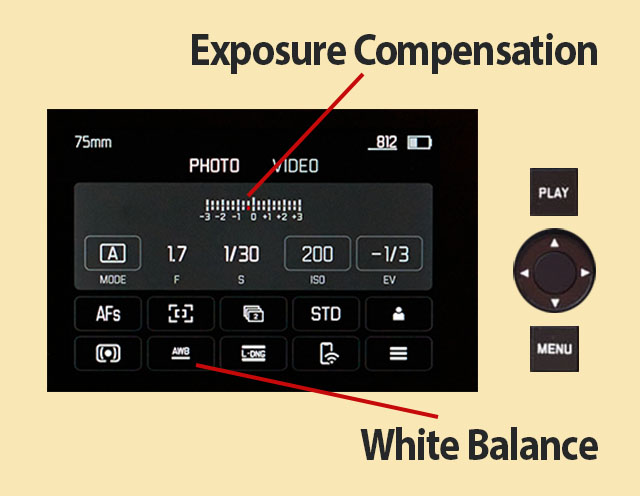

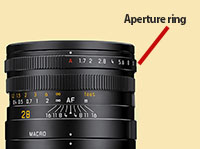


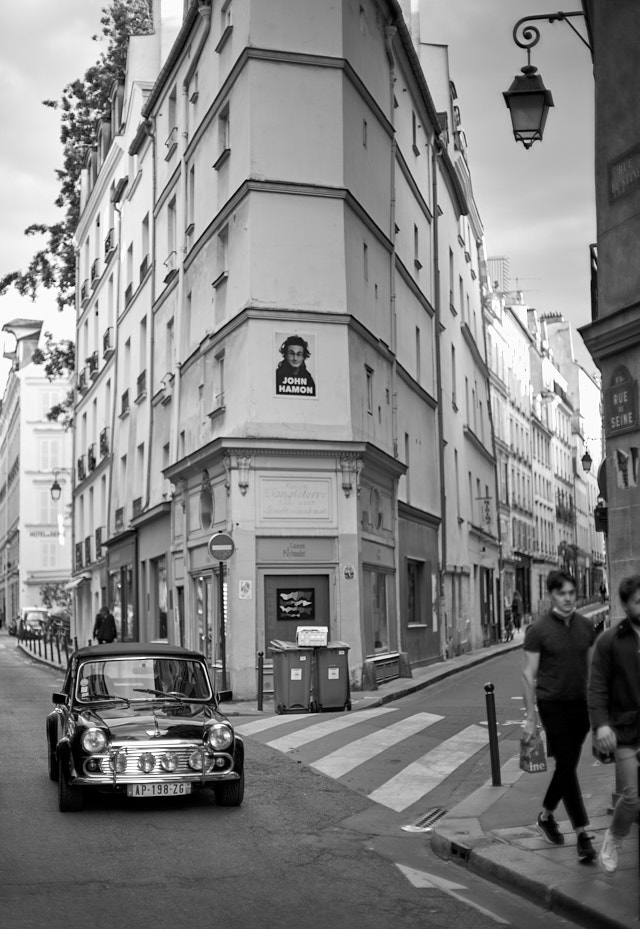


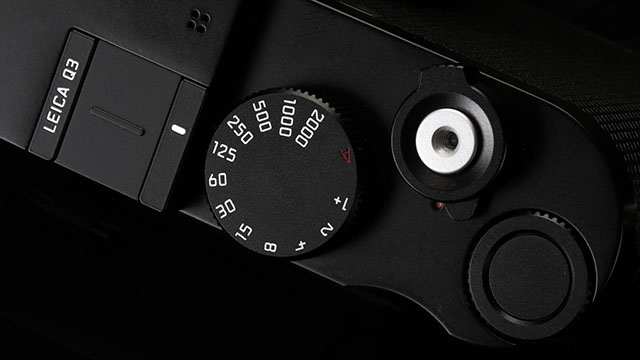

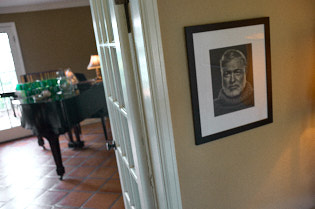
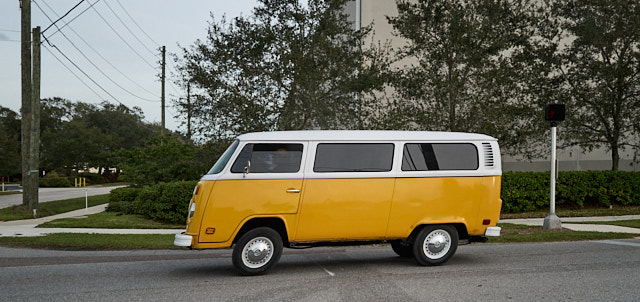


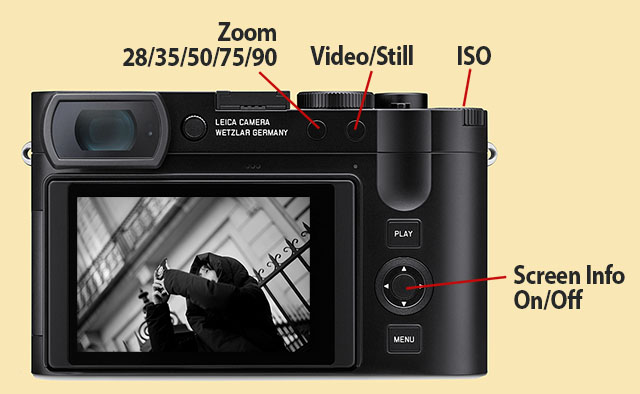

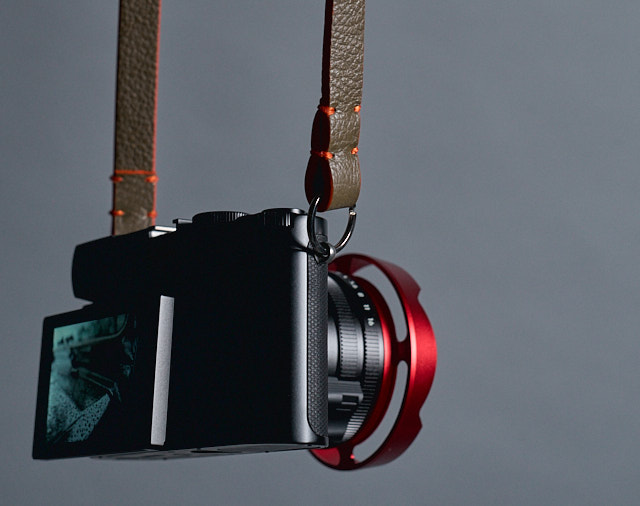


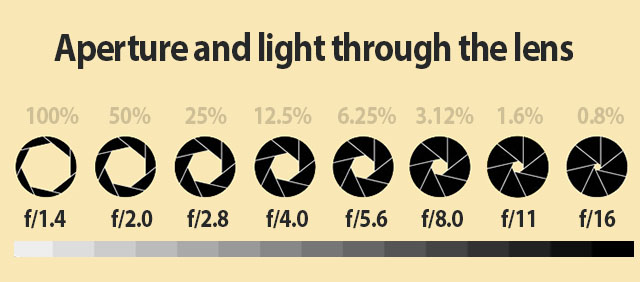


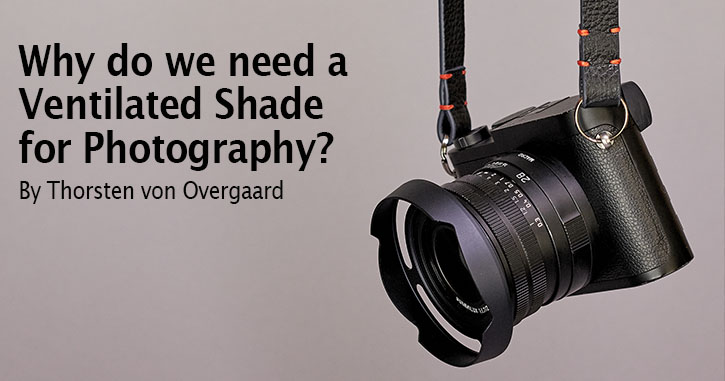


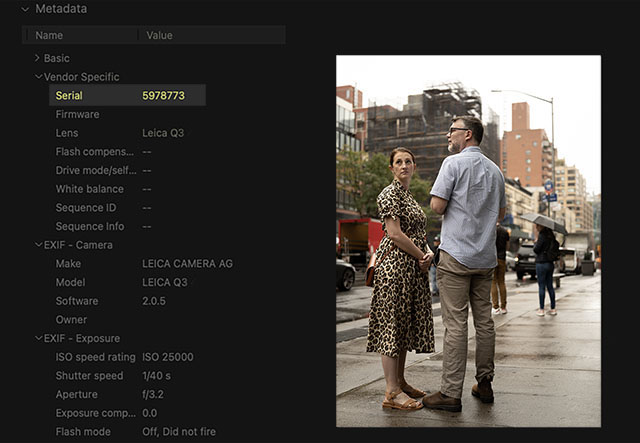

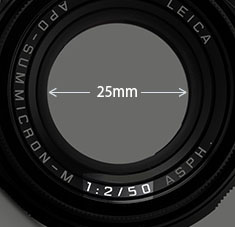
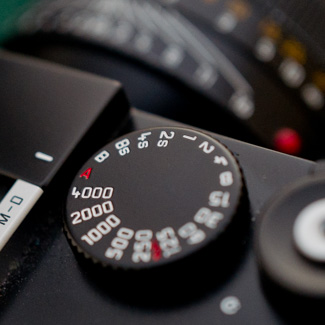
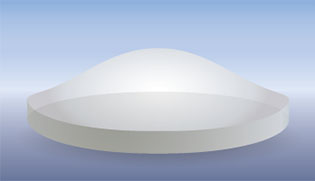
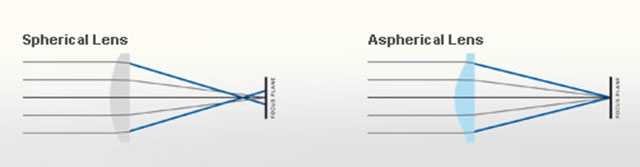
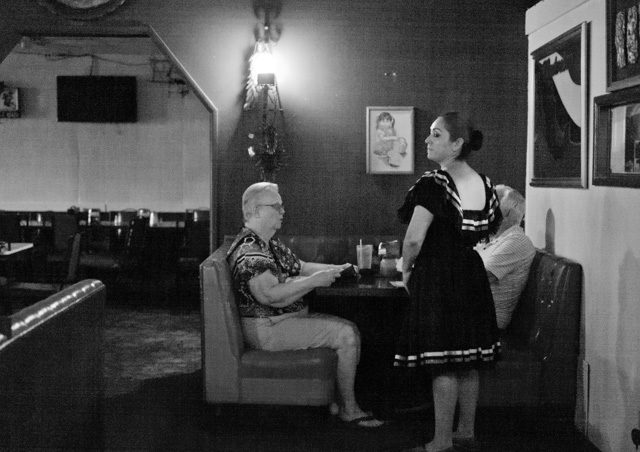

 Bokeh: The visual quality of the out-of-focus areas of a photographic image. Photo at Bar del Fico in Rome.
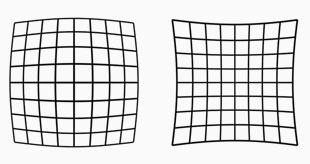
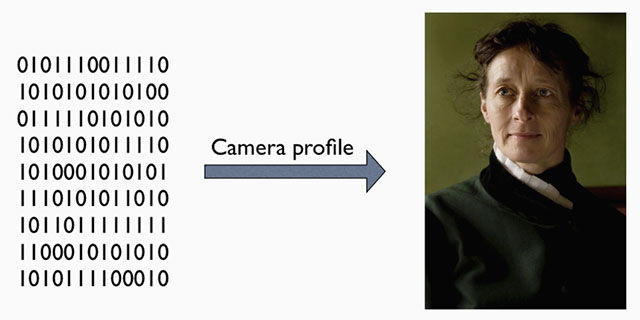
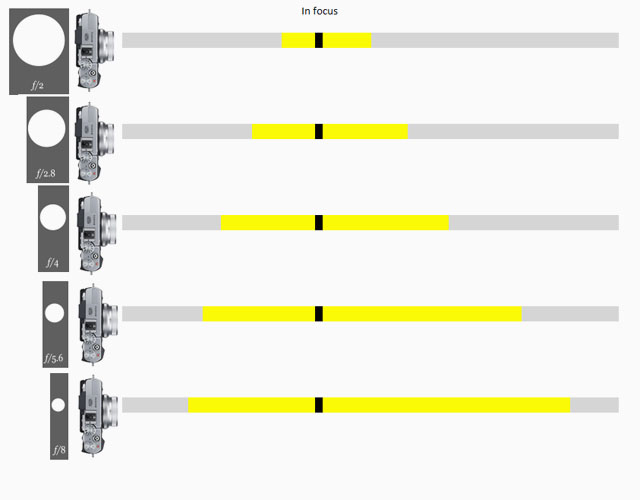
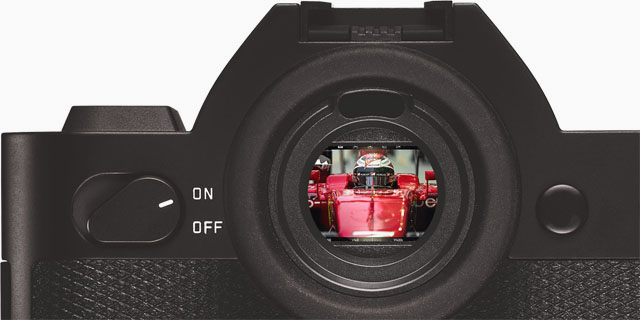
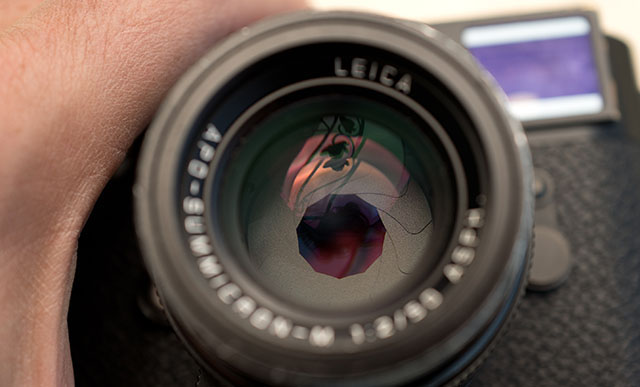 The aperture blades inside the lens is clearly visible in this photo by