Leica M Monochrom Digital Rangefinder Camera - Page 21 Index of Thorsten Overgaard's user review pages on Leica M9, Leica M9-P, Leica M-E, Leica M9 Monochrom, Leica M10, Leica M10-P, Leica M10-D, Leica M10-R, Leica M10 Monohcrom, Leica M11, Leica M11-D, Leica M 240, Leica M-D 262, Leica M Monochrom 246, Leica SL, Leica SL2, Leica SL2-S, Leica SL3, Leica SL3-S as well as Leica TL2, Leica CL, Leica Q, Leica Q2, Leica Q2 Monochrom, Leica Q3 and Leica Q3 43:
To you, Henri
By: Thorsten Overgaard. January 3, 2013. Latest edit on April 1, 2020.
(For more on the Monochrom, visit the previous page 20, "Monochrom M" about the release of the Leica M Monochrom in Berlin in May 2012. More pages will be added about the Leica M Monochrom later)
Add to Flipboard Magazine.
The Leica M Monochrom had the working title Henri, and I guess a chance ending up being named simply Henri. But then Leica camera AG came up with a better idea of simply naming the cameras by their letters, Leica M and Leica M Monochrom.

Leica M Monochrom (2012) with Leica 50mm Noctilux-M f/1.0 (1976). © Thorsten Overgaard
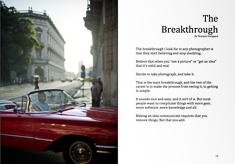
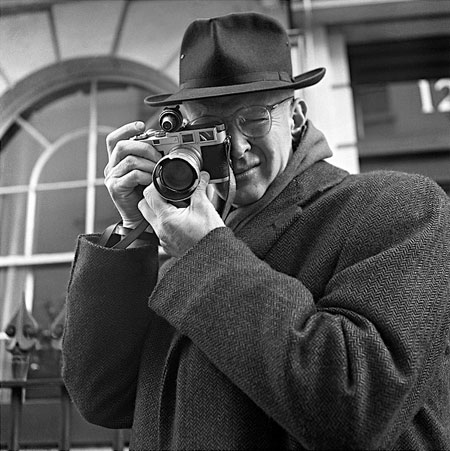
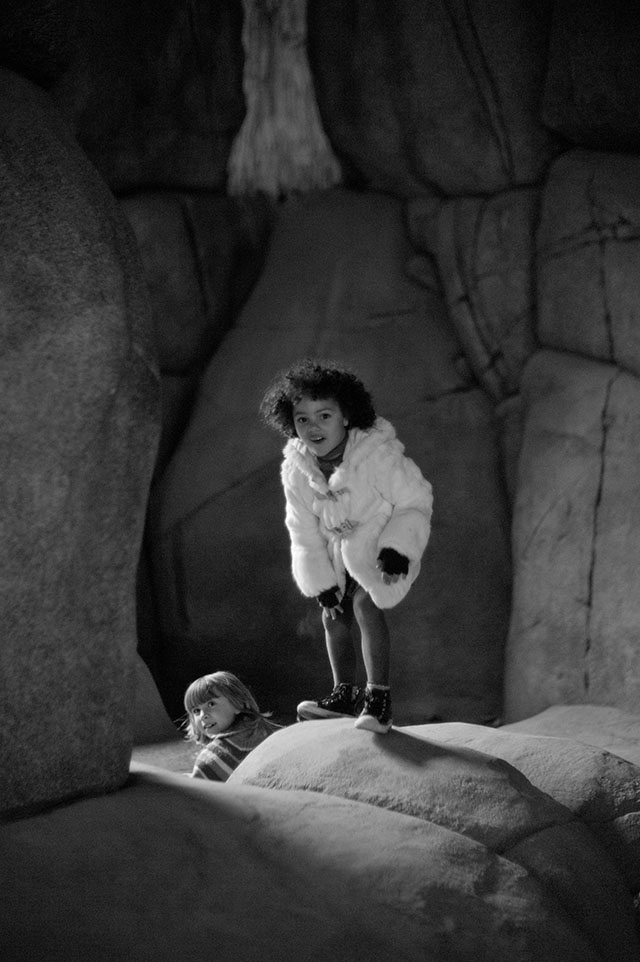
The camera was, and is, thought of as the tool for an artist. For a Henri Cartier Bresson to use in this digital age.
I wonder what he would have thought of it, had we walked the streets of Paris today. In the sunshine late in the afternoon with some rainy clouds coming and going, making the light interesting.
What would have come from an expert mouth that loves its subject?
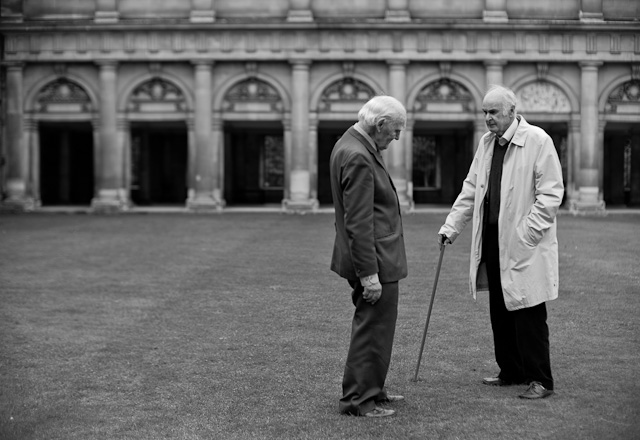
Two fellows of Cambridge University on the lawn of the university courtyard where only fellows can walk. Leica M Monochrom (2012) with Leica 50mm Noctilux-M f/1.0 (1994). © Thorsten Overgaard. 320 ISO.
I am sure he would not understand the interest in zooming in on details in the images to admire the sharpness of details. Though, as it is how the cameras capture things these days, he might see it as both a challenge to avoid the details taking over the simplicy of the story, yet at the same time enjoy a new detailed view into the magic of light.

Leica M Monochrom (2012) with Leica 50mm Noctilux-M ASPH f/0.95 (2008). © Thorsten Overgaard.
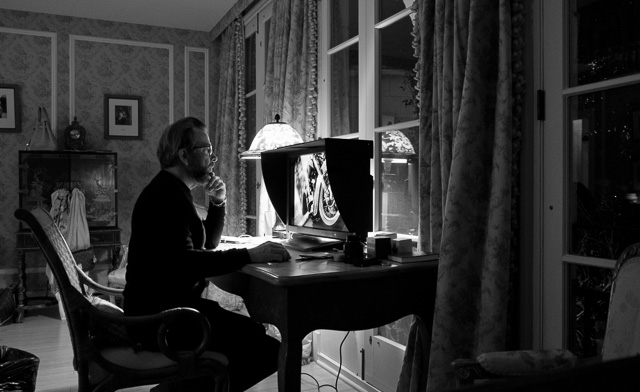
Henri Cartier Bresson used to empty and archive film rolls at night before bed time and fill new ones for the next day. What has taken the place of this ritual? I guess seeing the battery chargers blinking in the distant corner, the Thundebolt harddrives chewing on the new images whilst Lightroom imports the images could have the same calming effect. If the record player was playing some nice music.
Would he indulge in editing the images himself, or would he simply go through them, and let his now 75 year old master printer Voja Mitrovic deal with editing and printing them?

Boy club excursion with Leica M9-P, Leica M3 and Leica M Monochrom Matthias Frei, Ernst Schlogelhofer and Hartmut Henninge). © Thorsten Overgaard. Leica M Monochrom (2012) with Leica 50mm APO-Summicron-M ASPH f/2.0 (2012), 320 ISO.
| |
|
|
|
|
| |
Buy the new eBook
"The Freedom of Photographic Expression"
by Thorsten Overgaard |
|
| |
|
|
|
|
| |
"The Freedom of
Photographic Expression"
eBook for computer, Kindle and iPad
Released March 2024.
First editon: October 2016
Now 303 pages. |
|
In this easy-to-read and easy-to-apply eBook,
Thorsten Overgaard takes beginners and experienced photographers through the basics of controlling the light and the camera.
This book covers the technical side of photography from beginners level to semi-pro, features a number of photographs by Thorsten Overgaard and chapters on his philosophy on photography.
Only $248.00
| |
|
|
| |
Buy Now

Instant Delivery. |
|
| |
|
|

|
|
| |
"I've bought the new book - made a start reading it - it is really interesting.
I know it’s basic at the beginning but it isn't written in a patronizing way. I have been taking photographs for many years and have been lucky enough to be paid to take them for the last seven years; but it's always good to be taken back to the start"
P. S. (UK) |
|
"Really enjoy your writing and teaching"
D. K. (USA)
"I love your insights on photography."
D.B. (USA)
★
★
★
★
★
★ |
|
|
Leica M Monochrom (2012) with Leica 50mm Noctilux-M ASPH f/0.95 (2008). © Thorsten Overgaard.
In a way, because he was not against new ideas and technology, I think he would have gotten over not having to rewind the film with his thumb. Instead he would find help in the two frames per second to capture exactly that decisive moment. Because I don't think he was running a competition with himself trying to capture it in one frame. I think he was rather interested in capturing it in one of the frames. And clearly here the Leica M Monochrom would help.
In any case, we can guess but we cannot know, although it is an interesting thought experiment. It would be comforting if he liked the camera made for him.
What perhaps is the most interesting part of this story is that Leica Camera AG intended to create the optimum artists' tool, with Henri in mind: But for any photographer wanting to capture simply black & white, with as little technology between him self and the image, as possible.
Leica M Monochrom (2012) with Leica 50mm Noctilux-M ASPH f/0.95 (2008). © Thorsten Overgaard.
A decision is a decision 'till you change your mind
Let's go back almost three months to the day I got the Leica M Monochrom. I was so proud of my self-control: I received the box and put it on a table downstairs, then resumed with the work I was doing upstairs. I knew it was coming but hadn't written back that they should keep it, nor had I yet decided if I actually wanted it.
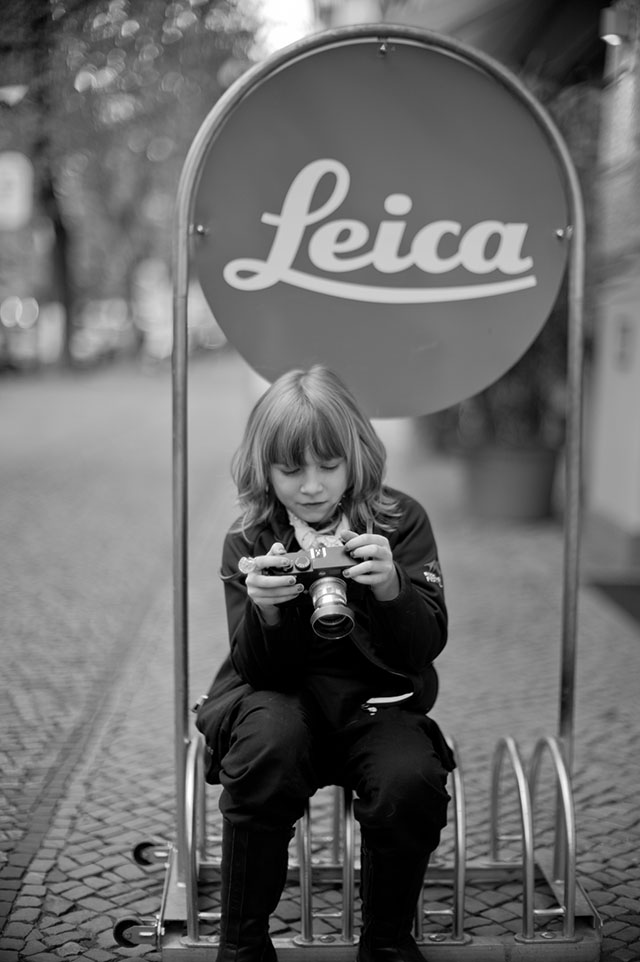
My daughter Robin Isabella outside Mesiter Camera in Berlin. Leica M Monochrom (2012) with Leica 50mm Noctilux-M f/1.0 (1976).
After a few hours I went down and picked up the box, just to enter the serial number outside of the box into my Leica Camera AG Owners Page where I keep track of all my serial numbers, just in case something gets lost.
I guess it was at this point I finally had to make a decision. I could still return the box unopened.

Leica M Monochrom (2012) with Leica 50mm Noctilux-M ASPH f/0.95 (2008). 1600 ISO. © Thorsten Overgaard.

Leica M Monochrom (2012) with Leica 50mm Noctilux-M ASPH f/0.95 (2008). © Thorsten Overgaard.
Some days earlier I had gotten an e-mail from my Leica pusher that she would send my Monochrom on the coming Tuesday. I would be at Photokina on the Monday evening before and would know what the Leica M10 might be, and hopefully get one the same evening or the day after. I had heard rumors that the M10 wouldn't be delivered for 4-6 months, but if it existed, I would get one. Somehow. The impossible Leica M9 I got within 48 hours. Nothing is impossible.
"If you can believe something great, you can achieve something great" as Katy Perry would say.
Maybe I didn't need a Leica M Monochrom after Photokina. Maybe the Leica M10 would be the answer to everything. Maybe I should just keep things simple.

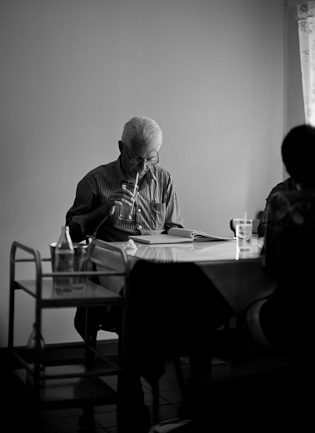
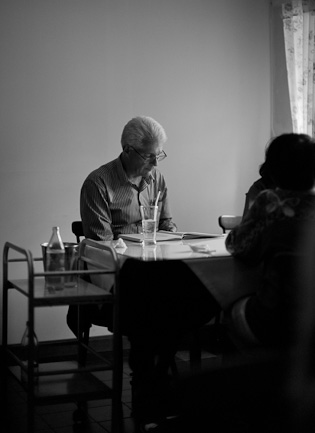
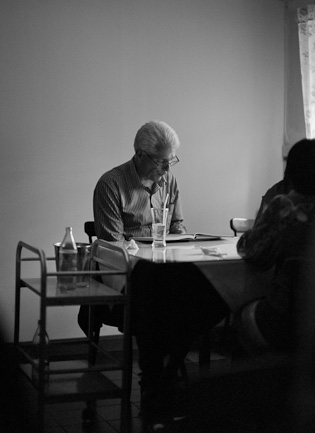
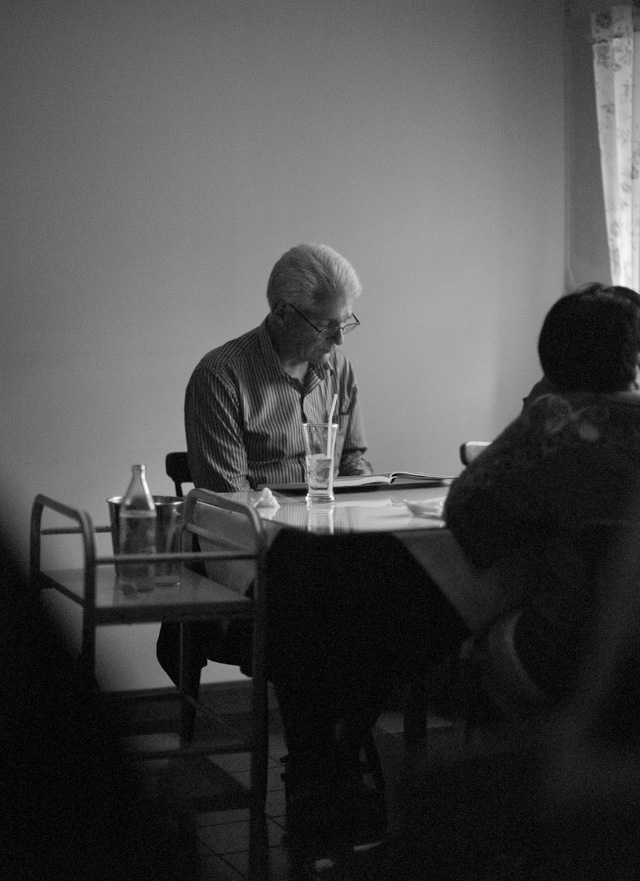
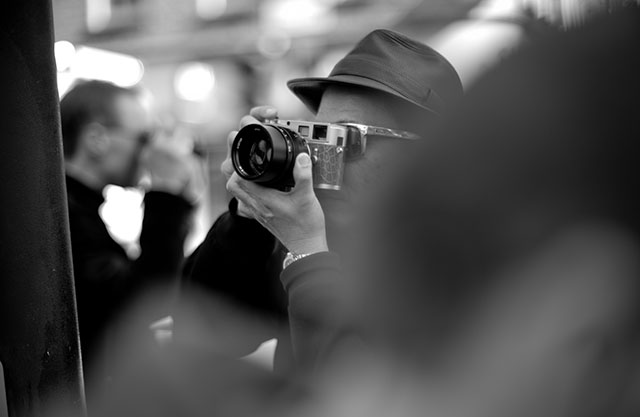
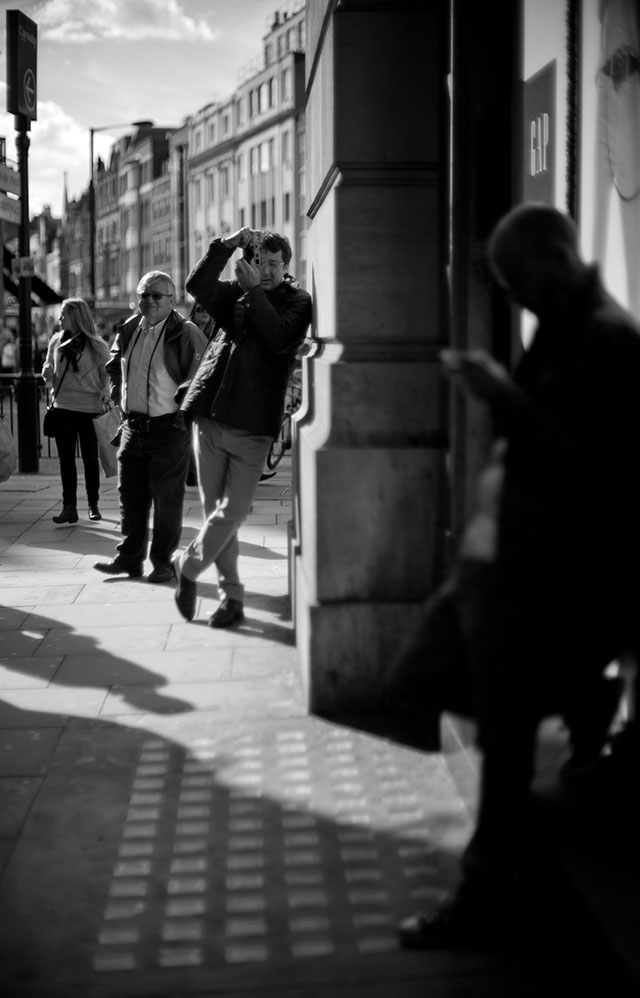
A man reading a book in a cafe in United Kingdom while being photographed by a stranger wearing a pancake hat. © Thorsten Overgaard, October 2012. Leica M Monochrom with Leica 50mm APO-Summicron-M ASPH f/2.0. 320 ISO.
So I didn't answer the mail. I planned to just let it float into the unknown, and make a decision after Monday evening at Photokina.
But Monday came around and even then I couldn't decide. So I decided to decide later.
And now later had arrived to my doorstep.
I remember back in May 2012, me and some friends, our enthusiasm for the new Leica M Monochrom, and our instant decision to order it. We ordered it that very same evening. Dr. Kufmann had actually spilled some hints about it almost a year yearlier.

Leica M Monochrom (2012) with Leica 50mm Noctilux-M ASPH f/0.95 (2008). © Thorsten Overgaard.
Now this box was sitting on my desk, and so far all we had in common was the knowledge of its serial number. Would it really be worth it to open the box, or would I be happier to return it? Different arguments went back and forth, I tried to convince my self that no matter what, I deserved it! On the other hand, I preferred to have as few pieces of equipment as possible. Keep things simple. But there were no new arguments on the table that I hadn't heard myself telling myself since two weeks ago.
I opened the box.
There was only one way to find out if it was true love... or not. And when my eyes met the eyepatched bayonet of the Leica M Monochrom, we both knew:
There would be love.
Inside Cafe Lynfabrikken in Aarhus, Denmark. This is what I consider my first Leica M Monochrom photo.
Leica M Monochrom (2012) with Leica 50mm Noctilux-M f/1.0 (1976). © Thorsten Overgaard.
| |
|
|
|
|
| |
Buy the new eBook
"A Little Book on Photography"
by Thorsten von Overgaard |
|
| |
|
|
|
|
| |
Order now - Instant delivery.
More info
★
★
★
★
★
★ |
|
It's a humorous understatement to call this
new eBook by Thorsten Overgaard for
"A Little Book on Photography".
It's a grand book, a history lesson, life experience, a biography and poetry book and brilliant photo book!
All in one beautiful package of 180 pages
to fire you up and get you to love
photography ... unconditionally!
"A Little Book on Photography"
eBook for computer, Kindle and iPad.
New release March 2017.
Intro price only $47 - 180 pages.
| |
|
|
| |
Buy Now
Instant Delivery |
|
| |
|
|
|
|
| |
|
|
Leica M Monochrom (2012) with Leica 50mm Summicro-M f/2.0 II (1956) © Thorsten Overgaard.
Learning about colors with the Leica M Monochrom
I installed a few hours more of self-control, before I took the Leica M Monochrom out to show it my city. Perhaps also, I was trying to test if it's uncompressed love for me was real, and if my childish lust for adventure in black & white would persist after the chemicals of the fresh-smelling silver box had drifted off.
From the many camera straps I have on shelf for moments like this - the brown Leica a la Carte, the black Artisan & Artist, the (sexy) braided Annie Barton, a few Gordy's straps, another red cotton Artisan & Artist - I decided to use the black leather strap that it came with and which had been made specially for the Leica M Monochrom.
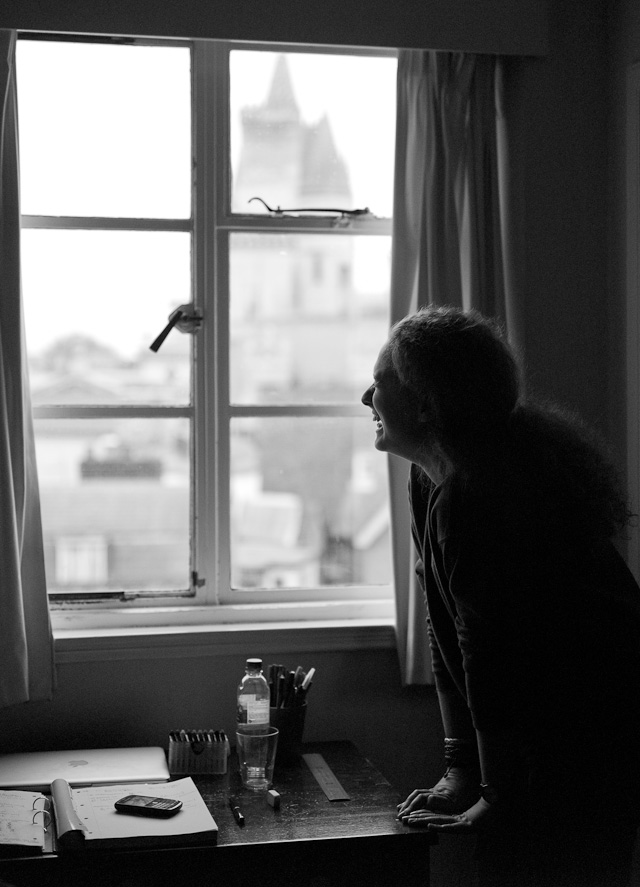
London. Leica M Monochrom (2012) with Leica 50mm Noctilux-M f/1.0 (1976). © Thorsten Overgaard
Then I went out to show the Leica M Monochrom some of my favorite cafes in Aarhus, as I do with any new friend who has just arrived (Aarhus just made the list of the top 5 happiest cities in the world, by the way).
I parked the car nearby the first cafe, Raw Bar. The air was fresh and clean, the lighting, fantastic. I looked over the lake and ... by golly! I've never seen such bright and beautiful ... colors!
And my friend, the Leica M Monochrom couldn't even see them. Born complete color-blind.

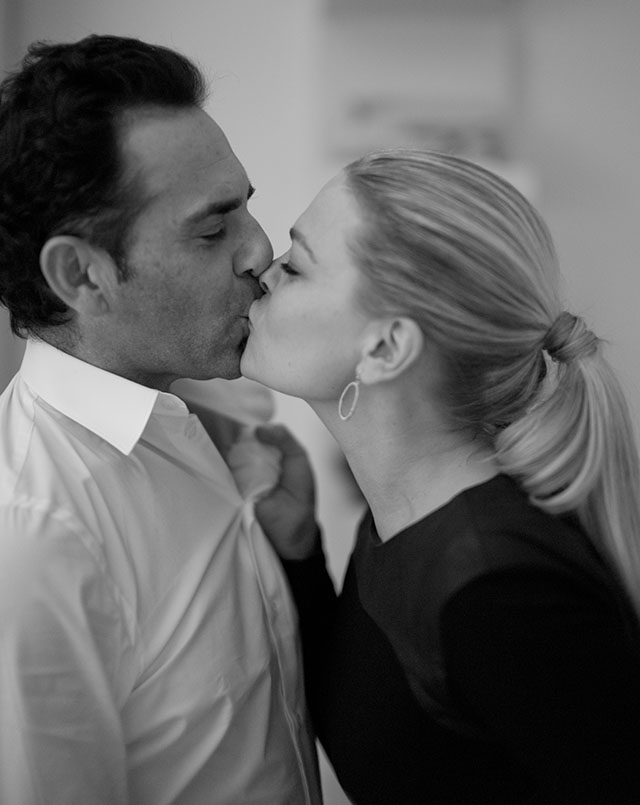
Sabine Kohler. London. Leica M Monochrom (2012) with Leica 50mm Noctilux-M f/1.0 (1976). © Thorsten Overgaard
| |
|
|
|
|
| |
New eBook from Thorsten Overgaard:
"The Portrait Book
– How to Make People Look Beautiful" |
|
| |
|
|
|
|
| |

"Love the book.
Very insightful and very well done"
"You are my favorite author" |
|
Questions answered in this new eBook:
- What’s the secret behind Mona Lisa?
- How do you make anybody look beautiful?
- What is the right timing for portraits?
- What do you say to the people?
- How to photograph your spouse?
- How to edit portraits?
- What is the one right thing in all portraits?
- How to do research for portraits?
- What is the secret to light in portraits?
- Which lens to use for portraits?
- What is the composition rules for portraits?
- How to photograph children?
- Who should I photograph?
- How to do street portraits?
- and more...
Buy Now. Instant Delivery.
Only $298.00
578 pages.
Released April 5, 2020
|
|
| |
#1905-0119 |
|
100% satisfaction or money back. |
|
| |
|
|
|
|

Layla Bego. Leica M Monochrom (2012) with Leica 50mm Noctilux-M ASPH f/0.95 (2008). © Thorsten Overgaard.
A new understanding of my self and my eye
The first thing I learned about the Leica M Monochrom is that it will be mainly a tool for understanding, rather than a technically different tool.
The technical aspect is rather quickly covered. The colors are gone, and that means no need for the color filters in front of the sensor (that all digital color-sensors have) that separates the three main colors into three channels of illumination. The filter took away some light (1 stop) and without it the sensor that originally had a base ISO of 160 ISO now has a base ISO of 320 ISO.

London. Leica M Monochrom (2012) with Leica 50mm Noctilux-M f/1.0 (1976). © Thorsten Overgaard
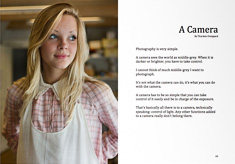
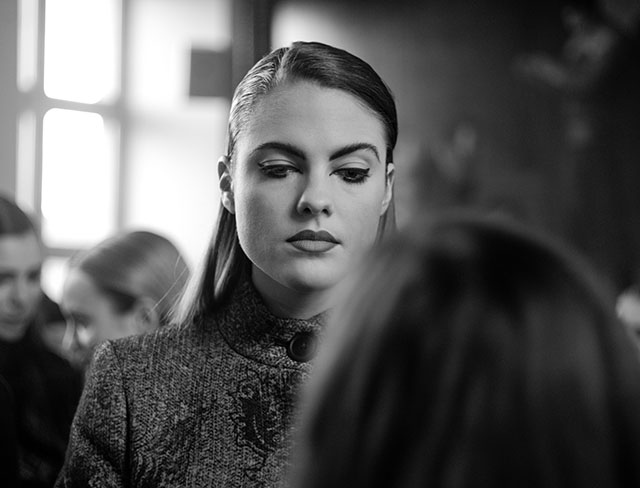
As a result, the sharpness has also increased. The amount of microdetails has increased quite a bit. In the case of portraits, the details are so sharp one must often edit the facial details of images if one wishes to remain friends with the female subjects one photographs. A problem I thought Leica S users with their 37.5 Megapixel resolution was alone about, but a reality and a problem Leica M Monochrom users now also face. A lot of sharp details, and some times too many and too detailed!
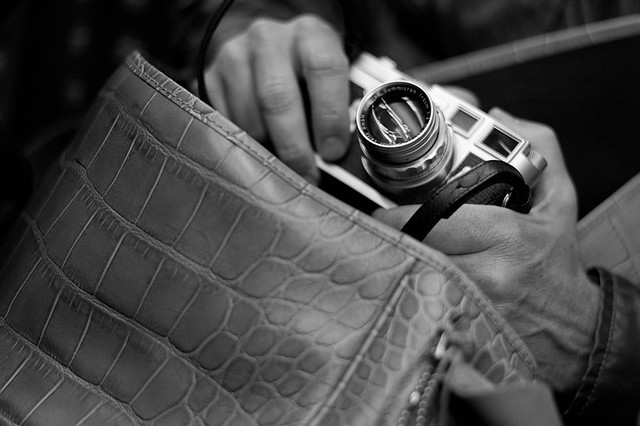
Leica M3 comes out of a Paul Smith bag. © Thorsten Overgaard. Leica M Monochrom (2012) with Leica 50mm APO-Summicron-M ASPH f/2.0 (2012). 3200 ISO.
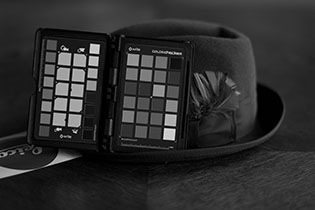
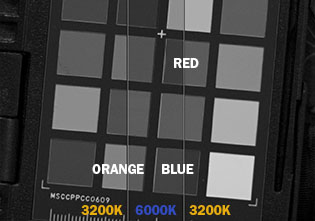
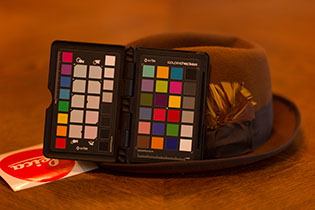
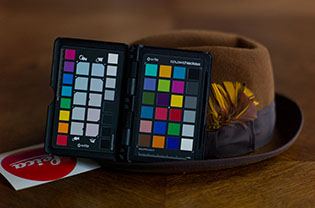
Color temperature act as color filter for the Leica M Monochrom
Surprisingly, or not as surprisingly, when the color temperature changes, the colors change. Also on the Leica M Monochrom.
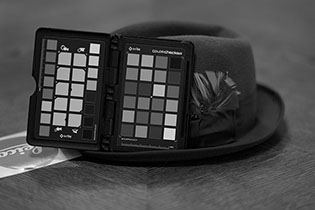
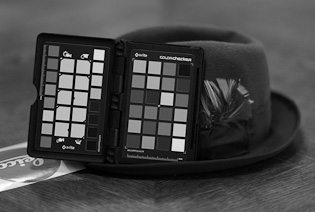
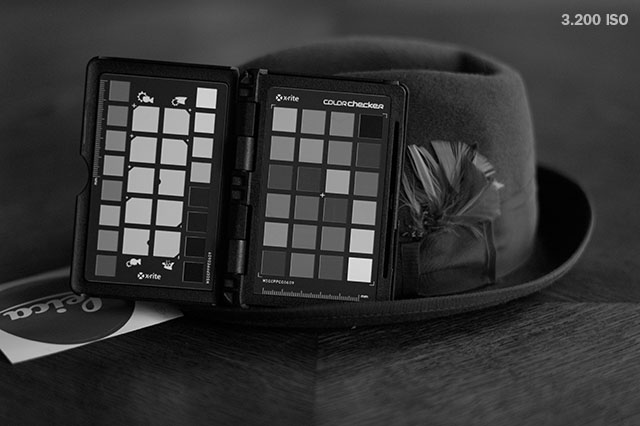
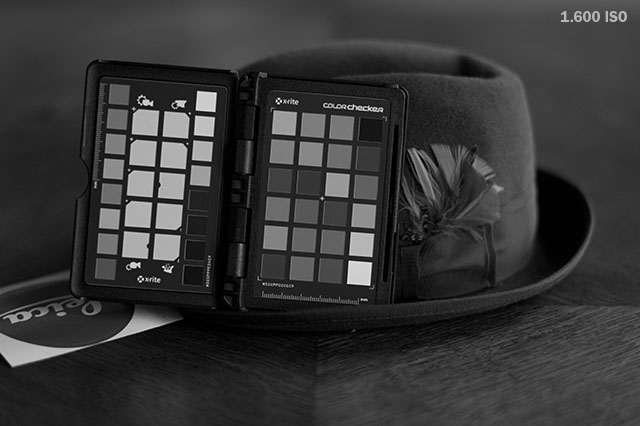
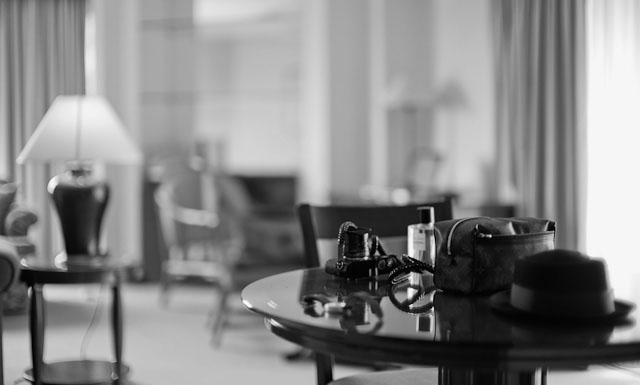
In the examples below I tested out of my personal curiosity, how the Leica M Monochrom deals with colors at 3200 Kelvin (Tungsten light) and 6000 Kelvin (bluish cold overcast daylight).
Note that the change of the background and the light on the hat is due to the fact that the Tunsten light comes from above, whereas the 6000 Kelvin daylight comes from available light from the right (only one light source is 'on' at the time).
Hannah laughing. Inside the girls' dormitory at Cambridge University. Leica M Monochrom (2021) with Leica 50mm APO-Summicron-M ASPH f/2.0 (2012). 3200 ISO. © Thorsten Overgaard
Now, what on Earth are we talking about?
If you have the Leica M Monochrom and plan never to return to color, you may or may not skip this part. Everybody else should pay close attention.
| |
 |
| |
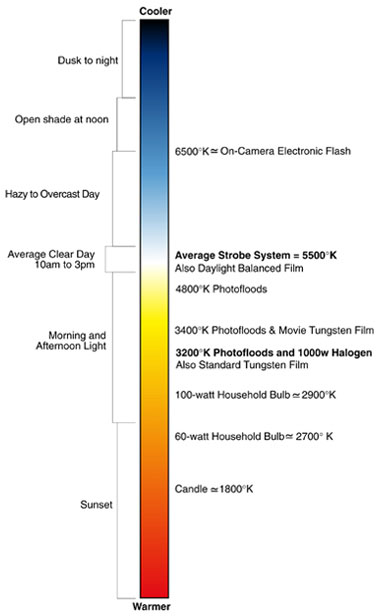
The Kelvin scale of color temperature |
Color is a temperature, or actually a wavelength. The higher the speed, the cooler, the slower he speed of wavelength, the warmer colors.
But for simplicity we refer to colors as temperature, and the Irish physicist William Thomson Kelvin was the one who defined the scale we now know as Kelvin. Each color has a Kelvin value, and the white "daylight" is 5500 Kelvin.
To the human eye most colors appear to be the same throughout the day, but in actual fact the colors change from bluish before sunrise and then become warmer and warmer as the sun comes about.
Around midday the light is white, known as Daylight 5500 Kelvin.
Late in the afternoon as we approach sunset the sun goes low and the colors become warm. Just before sunset you see the orange-red sunset, and that is the color it gives to things till it disappears behind the horizon. If you pay attention during the sunset, you can quite easily see how the sunny side of buildings and trees have a warm glow, whereas the shadowed side has a cold bluish cast.
For a camera this difference between bluish cold shadows and the orange-red surfaces hit by the sun by sunset is the bare reality. Your eyes adjust for it, which is practical in many regards.
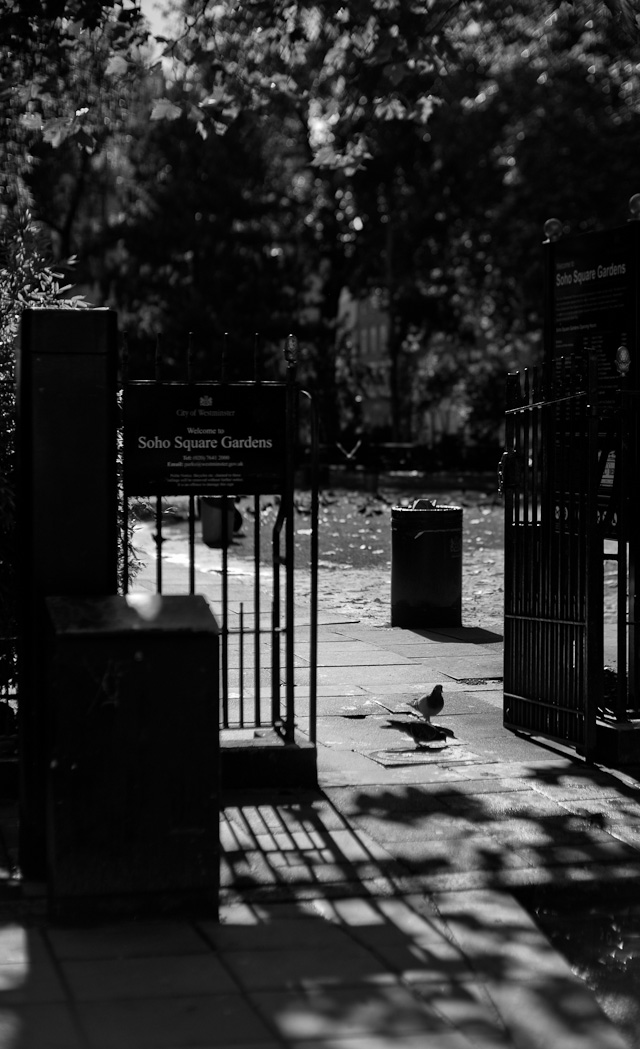
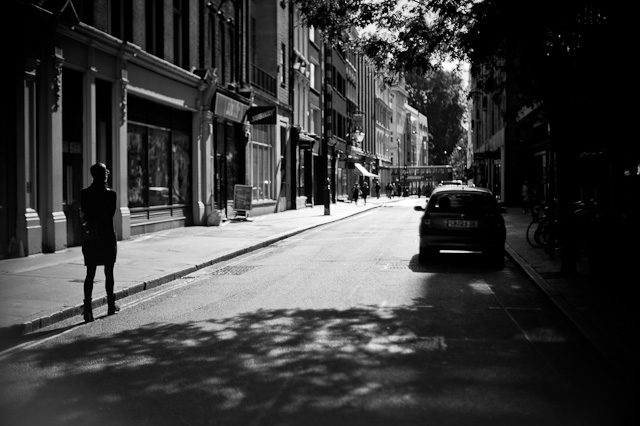
Soho Square Gardens, London. Leica M Monochrom (2012) with Leica 50mm Noctilux-M f/1.0 (1976). © Thorsten Overgaard.
Color understanding in black and white and red
One used to talk about panchromatic films (pan means all-inclusive) and traditional film. Without going into too much detail, the panchromatic film would respond to the luminance of all colors, whereas the traditional black & white film would see red as black.
So what about the Leica M Monochrom? Not that it really matters, because in my view you are given a tool, and then you learn it and get the best out of it.
Though it is interesting and importaint to know how the tools you are given react. So is the Leica M Monochrom a panchromatic sensor that responds to luminance alone across all colors, or does it behave more like a traditional black & white film?
I did this test in low light in my daylight studio to test both high ISO and how the Leica M Monochrom sensor works with colors. And I would expect that the sensors ability to handle colors would be stressed at high ISO and low light. So I wanted to try that.
Leica M Monochrom (2012) with Leica 50mm Noctilux-M ASPH f/0.95 (2008). © Thorsten Overgaard.
After all the sensor only "sees" 320 ISO, so when darker than that, the ISO has to go up so the computer algorithms can help the sensor "see". In other words, this should be on the edge of performance.
Now, a few things have changed in digital black and white photography since the days of the film. When you import a color raw or DNG file (or color JPG) into Lightroom and change it into black and white, you can change the tone of each of the different color channels. You couldn't with black & white film, and you can't with the Leica M Monochrom.
Leica M Monochrom DNG and Leica M9 black & white JPG seem to be close - or the same - in their definition of colors. As seen in the above photos, the tones are in the same area, the Leica M Monochrom perhaps a bit softer and more well-defined. But then, the above Leica M Monochrom to the left is a DNG file exported as JPG from Lightroom whilst the Leica M9 file to the right is the cameras' JPG file straight from the camera. The DNG should be more detailed ...
Perhaps the real advantage, apart from the higher ISO and more definition, is not a different way of seeing colors, but the fact that the black & white DNG contains more data to stretch than the JPG.

© Thorsten Overgaard, London, October 2012. Leica M Monochrom with Leica 50mm Noctilux-M f/1.0
One could also say that the Leica M9 DNG-file turned into black and white in Lightroom would contain a similar, larger amount of information to stretch as the Leica M Monochrom black & white DNG file. But that is not the case. The Leica M Monochrom file has a further advantage because there is no color sepatration filter in front of the sensor. The image is simply more well-defined and the sensor sees better as the Leica M Monochrom has a base ISO of 320, and the Leica M9 sensor has a base ISO of 160 ISO. In other words, when it is dark in a corner, a shadow or overall in the image, the Leica M Monochrom sees more and better, resulting in less noise.
Leica M Monochrom (2012) with Leica 50mm Noctilux-M f/1.0 (1976). © Thorsten von Overgaard.
I don't know if this analogy would make sense, or even be true: A 3CCD video camera is considered the high quality of video because it records the main colors separately, whereas a cheap consumer video records all three colors into one channel. The Leica M Monochrom doesn't have to deal with three colors, only light. But it uses a sensor that was designed for three colors. So more horsepower.
I don't know if this is the case. I actually happen to think that the Leica M Monochrom is much similar to the Leica M9 black & white results and that the biggest effect is on the users thinking process. But this "3CCD used for one color" analogy might make it easier to grasp the concept of the horsepower the Leica M Monochrom has, or should have.

Leica M Monochrom (2012) with Leica 50mm Noctilux-M ASPH f/0.95 (2008). © Thorsten Overgaard.

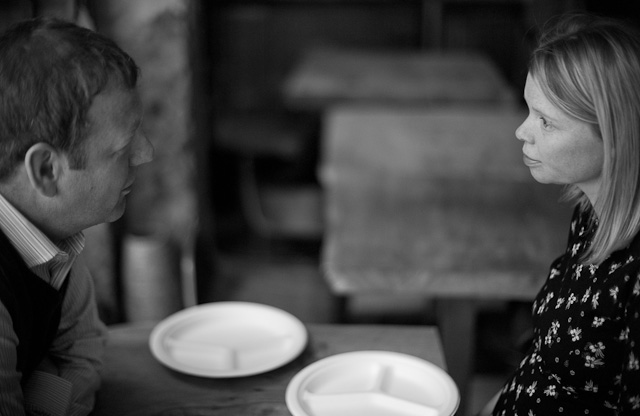
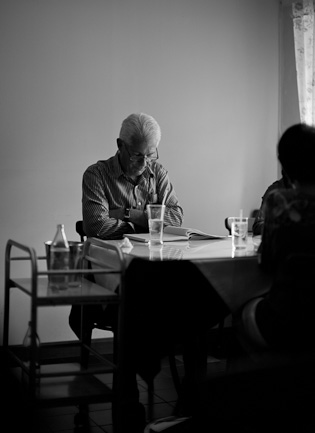
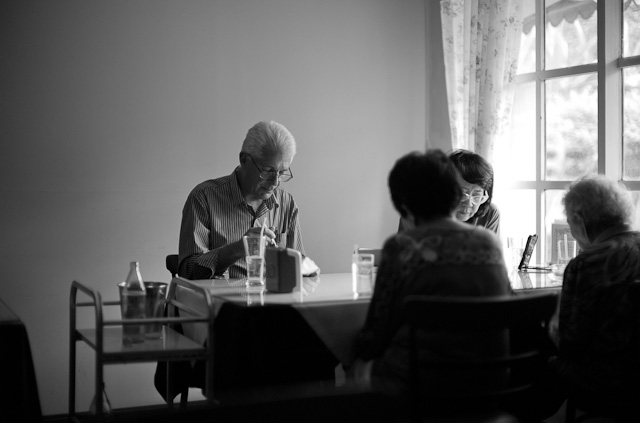
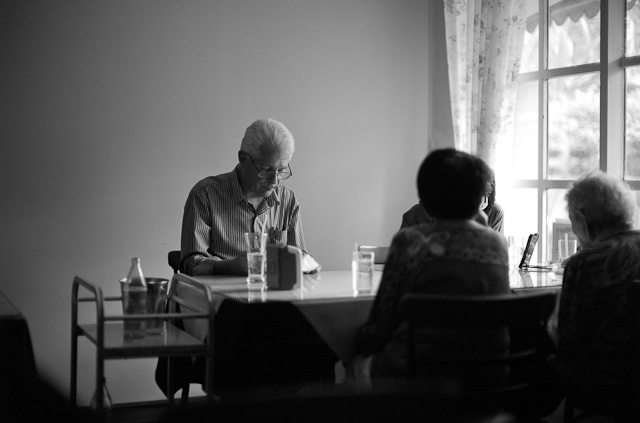
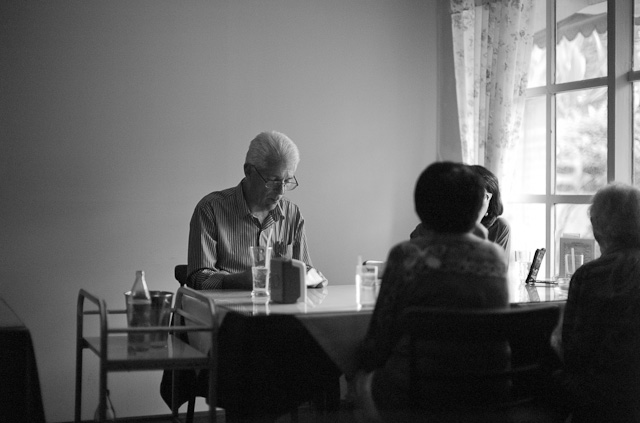
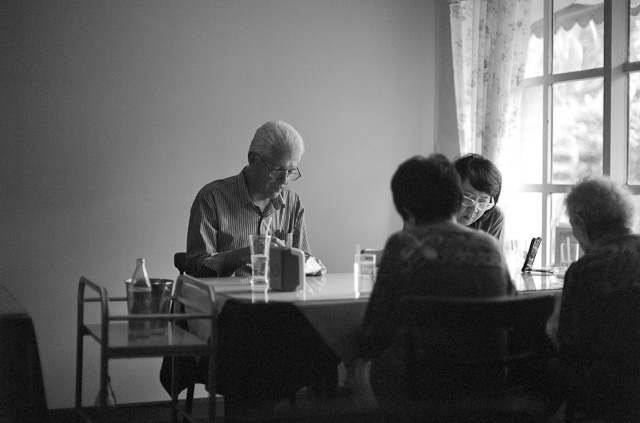
Woman reading a paper in a Cafe in United Kingdom. © Thorsten Overgaard, October 2012. Leica M Monochrom with Leica 50mm APO-Summicron-M ASPH f/2.0. 3200 ISO.
Noise and change of tones over high and low ISO
If one looks at a 100% crop, one should realize that one never does that in real life. Because when you do, you are standing with your nose against a 180 cm x 120 cm print hanging on the wall of the Guggenheim.
People don't stand that close to photos unless it is a very grainy image of a nudist beach in Italy from the 1960's and one of the dots looks like Lolita, whom you once went to boarding school with. Could it really be her?
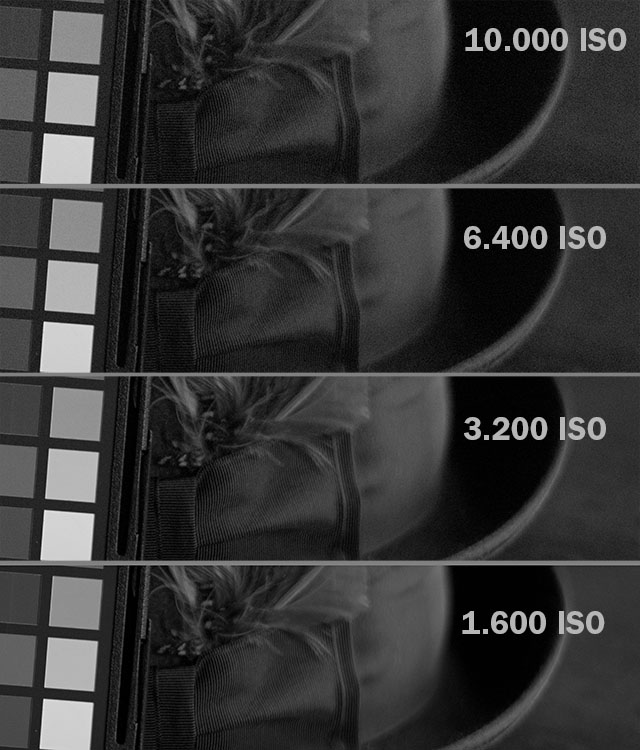
In real life you don't. But let's just for the sake of the experiement look at the actual noise level from 10,000 ISO and down. Here it is with your nose just in front of the image:

Apart from virtually no noise at 1600 ISO, the higher ISO show some grain or noise.
Does the quality of the tones change in Monochrom, as colors would in a normal Leica M9 or dSLR ..?
What interested me more to find out with the Leica M Monochrom, was if the tones would change at different ISO levels.
With the Leica M9 I never go above 800 ISO because I want to be sure the colors look right even in low light, even with mixed light sources.
When you go above 800 ISO on the Leica M9 you might get lucky, and the colors look OK. But if you don't get lucky ... the magazine or the client who commisioned the photos won't be happy with the magenta skin tones.
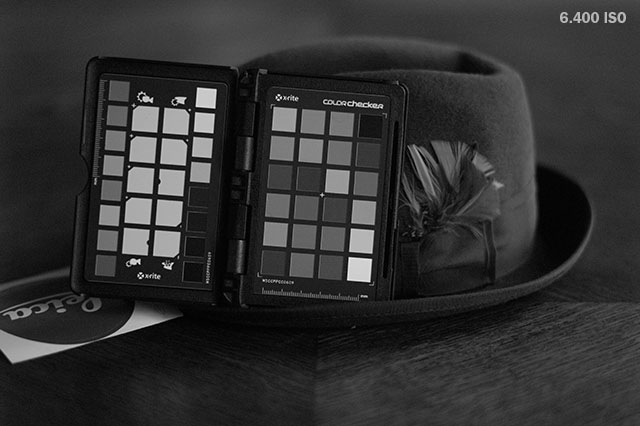
But I had good and bad results at low light with the Leica M Monochrom, so I wondered if the sensor was unable to deliver the same nice tones at hight ISO. Hence I did a test for my self to find out:
Factually, when I look at the color chart, it doesn't look to me like the quality of tones drops at high ISO. Does the contrast or tonality of the hat or the wooden table change? Nah, not really.
Maybe the contrast appear a bit harder at 10,000 ISO but it's far from the washed-out effect I feared. There is actaully no washed-out effect. But I think the lower quality at higher ISO that I feared and suspected was rather a result of photographing in bad light conditions. Those were the times where I would turn to 6400 ISO and even 10,000 iSO.
It is apparently true that the Leica M Monochrom - despite that it sees color temperature - doesn't react to color channel noise. Simply because it doesn't have the color separation.
Was it me, or did the look actually change when I shot in low light? I have had a few occasions where I looked at my images from a low light shooting and wondered, did I lose something in this shot? Did I get too comfortable and use a high ISO just to make life easy, but lost tonality?
This actually has been the main question I have had with the Leica M Monochrom. Is high ISO purely a matter of noise/grain, or is it also a matter of quality of tones?
Here is a crop of 80% of the frame:

1/180 second at 10,000 ISO. Leica M Monochrom with Leica 90mm APO-Summicron-M ASPH f/2.0
1/125 second at 6400 ISO. Leica M Monochrom with Leica 90mm APO-Summicron-M ASPH f/2.0
1/60 second at 3200 ISO. Leica M Monochrom with Leica 90mm APO-Summicron-M ASPH f/2.0
1/30 second at 1600 ISO. Leica M Monochrom with Leica 90mm APO-Summicron-M ASPH f/2.0
I look at the pictures above, and frankly I don't think there is a any difference in the tonal quality. And if there is, I can't tell. And if I can't tell, I don't worry about it.
My philosophy about editing and quality is that if it works for me, it works for others too. It's my image.
It also means that if I feel 10,000 ISO is too high, it really doesn't matter what others think. It's doesn't work for me.
Leica M Monochrom (2012) with Leica 50mm Noctilux-M f/1.0 (1976). © Thorsten von Overgaard.
| |
|
|
|
|
|
|
| |
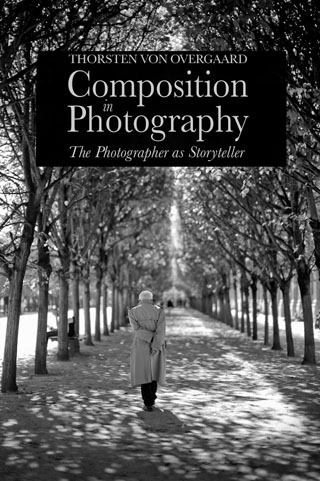
Buy the new eBook
"Composition in Photography"
by Thorsten von Overgaard |
|
| |
|
|
|
|
|
|
| |
Composition in Photography
- The Photographer as Storyteller
This book will inspire your photographic eye and make you wonder about all the possibilities you can now see.
In this exciting new book Thorsten Overgaard expands and simplifies the subject of composition. It's elevated from geometric patterns to actual storytelling by practical use of space, rhythm, time, colors, emotions and intuition in your photography.
- The Basics of Composition.
-
Composition in the Third Dimension.
- Picture Stories.
- Accenturating with Light.
- Photograph as a Melody.
- Which lens are you?
- Fear of sharpness?.
- Vanishing Point.
- The most important
element of composition
- What is the unknown secret
why it is you mostly can't get
the Rule of Thirds to work?
- How does a camera see
differently than the eye?
- What does quantum physics and
photography have in common?
- What's the greatest adventure you can
set out on in photography these days?
- A Sense of Geometry.
Only $398.00.
Order now. Instant delivery.
864 pages. 550 Illustrations. |
|
"It’s your best work so far"
"I’m being gently led"
" I love this book!!!"
"The book is incredible"'
"It’s like therapy for the human spirit."
"Beautiful and inspiring"
"Full of practical advice
and shared experience"
'I love how hands-on and
laid back Thorsten's witting style is"
"Inspiring"
"Intense and thought-provoking" |
|
| |
|
|
|
100% satisfaction of money back. |
|
| |
|
|
|
|
|
|

Leica M Monochrom (2012) with Leica 50mm Noctilux-M ASPH f/0.95 (2008). © Thorsten Overgaard.
So where do I stand on this? I think I feel comfortable at 1600 - 3200 ISO with a Noctilux. Why go higher with such a light-strong lens?
If I apply logic, the M9 worked well at 800 ISO. This sensor is a stop faster, so 1600 would be the same in the Leica M Monochrom. But 3200 ISO looks pefect from the Leica M Monochrom compared to black and white from the Leica M9 at 2500 ISO.
I shot a few unscientific tests when waiting for lunch in Bangkok:
 |
| 400 ISO Leica M Monochrom with Leica 50mm Noctilux-M ASPH f/0.95. Bangkok, December 2012. |
| |
 |
|
 |
|
 |
| 800 ISO Leica M Monochrom |
|
1600 ISO Leica M Monochrom |
| |
|
|
 |
|
 |
| 3200 ISO Leica M Monochrom |
|
6400 ISO Leica M Monochrom |
| |
|
|
 |
| 10000 ISO Leica M Monochrom |
Perhaps this is more of what I wanted to test, the highlights and shadow areas:
 |
| 1600 ISO Leica M Monochrom with Leica 50mm Noctilux-M ASPH f/0.95. Bangkok, December 2012. |
| |
|
|
 |
| 3200 ISO Leica M Monochrom with Leica 50mm Noctilux-M ASPH f/0.95. Bangkok, December 2012. |
| |
|
|
 |
| 6400 ISO Leica M Monochrom with Leica 50mm Noctilux-M ASPH f/0.95. Bangkok, December 2012. |
| |
|
|
 |
| 10000 ISO Leica M Monochrom with Leica 50mm Noctilux-M ASPH f/0.95. Bangkok, December 2012. |
| |
|
|
Leica M Monochrom is not about technical details
But if we are honest, then what does all this technical stuff mean?
Not much, really, and I am glad we have put it behind us.
I did the above tests not to test the camera, but to find out for myself. I have been wondering how the Leica M Monochrom saw colors compared to the Leica M9, how the tones of the Leica M Monochrom might change over different ISO levels (especially when stressed at higher ISO settings).
That the Leica M Monochrom in fact sees colors differently at different color temperatures shouldn't have surprised me, but did.

In any case, I am just not doing tests. I am using equipment, and if it somehow makse sense to use a piece of equipment, I do.
Then, I try to learn how to use it the best for my purpose.
The real test of a camera is if you love to use it.
Do you take it with you and take pictures with it?
Do you feel good about the images you shoot?

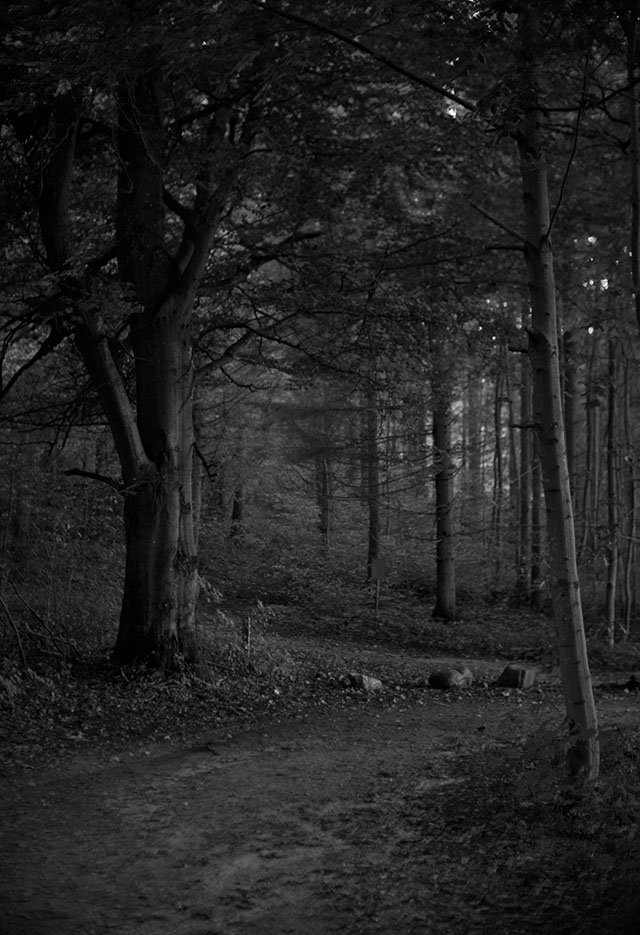
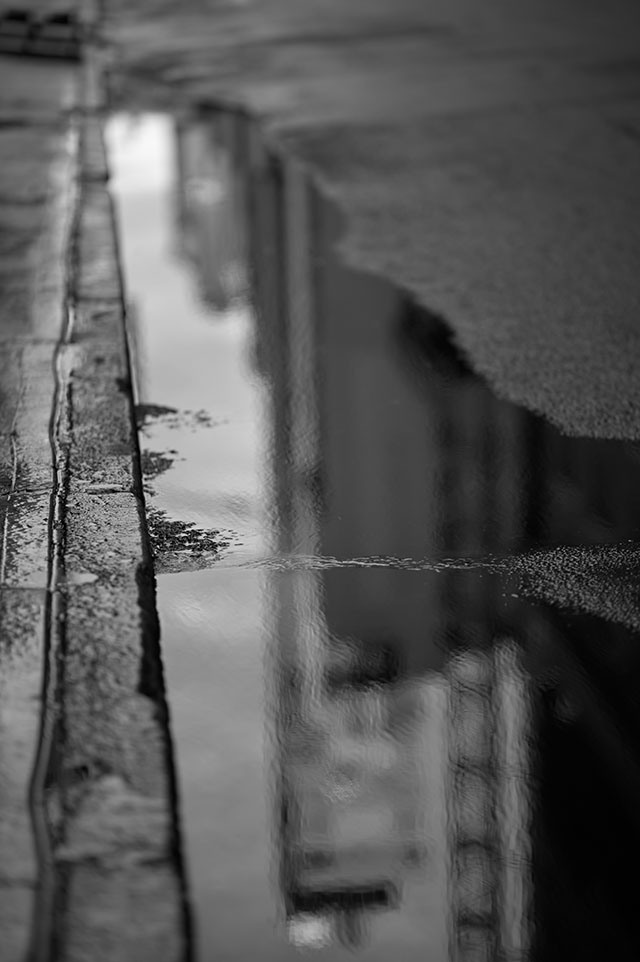
Rainy December in the Kingdom of Denmark. © Thorsten Overgaard, December 2012. Leica M Monochrom with Leica 50mm Noctilux-M ASPH f/0.95. 1600 ISO
3200 ISO is the new 800 ISO
One thing you get very used to, very fast, is the ability to take photos anywhere and anytime. With a good lighstrong lens and the high ISO there are no limitations anymore. And you are not even stretching the quality.
After a few days of using the Leica M Monochrom, returning to the Leica M9 feels like hitting a wall. It is amazing how quickly you forget to work below 800 ISO and how restrictive it feels when you have to.
Leica M Monochrom (2012) with Leica 50mm Noctilux-M f/1.0 (1996). © Thorsten Overgaard.
Ironically, one of the first assignments I had after having taken in the Leica M Monochrom, was shooting at an event lit by candlelight and a few low-light LED lights. The Leica M Monochrom was perfect for the assignment, except the magazine asked for color photos.
I did bring the Monochrom, but mainly I shot Leica M9 at 800 ISO.
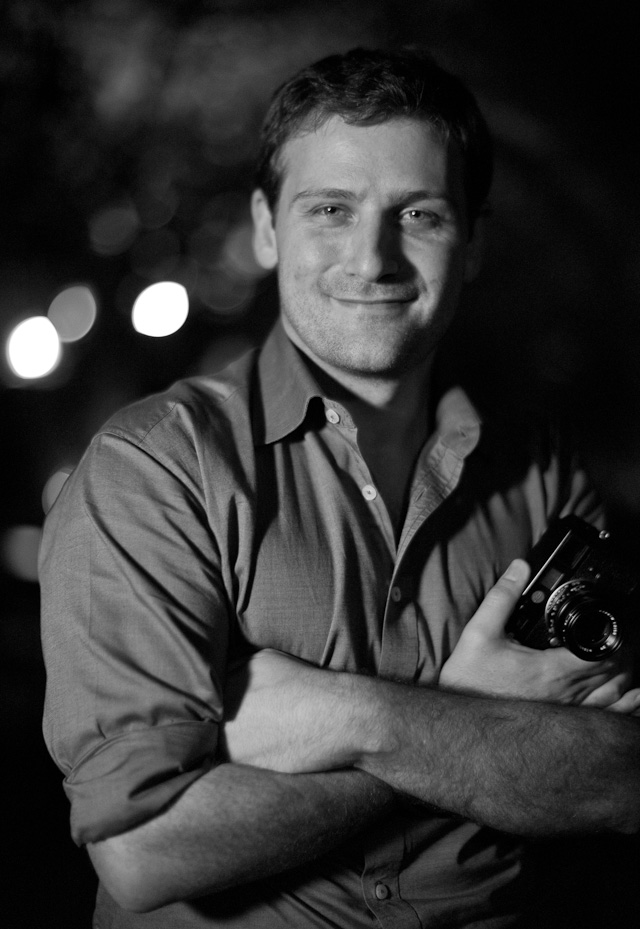
Andrew McArdle of Perth, Australia. Leica M Monochrom (2012) with Leica 50mm Noctilux-M f/1.0 (1996). © Thorsten Overgaard. 3200 ISO.
Originally I got the Leica M9 as a fun toy. I had to have it, but I used Leica R8 and Leica R9 for everything that mattered. I didn't expect the Leica M9 to become part of the professional kit. But in a matter of 4-5 months I realized I could use it alongside, and not so many months later I realized I could do without the bulky and heavy dSLR cameras and simply rely on the Leica M9 as the only camera.

What started out as lust for a new toy became my business. And in a way I wanted to take the same chance with the Leica M Monochrom. Who knows what will happen, what will come about? Even RED came out with a new RED Epic Monochrom camera for moviemaking. Maybe Woody Allen wasn't that conservative after all. Maybe Monochrom is the new black?
Hence, even I could predict and also see from week to week that the Leica M Monochrom would take the backseat on assignments, I would use it for everything else I possibly could. To learn to tame it and to provoke my eye.
To see where it would lead, to work with a monochrom camera.
© Thorsten Overgaard, London, October 2012. Leica M Monochrom with Leica 50mm Noctilux-M f/1.0
I also happen to see a new era for the Leica M system. I meet people who give the Leica M9-P to the wife and say they will only use the Leica M Monochrom from now on; "I anyways always only shoot black & white".
I have also met people who used the Leica M Monochrom for a while and then returned to the Leica M9; "I can't get the black & white look from the MM that I can from the M9, so my future cameras will be Leica M-E".

Leica M Monochrom (2012) with Leica 28mm Summilux-M ASPH f/1.4 (2014). © Thorsten Overgaard.
Others say they look forward to the Leica M and the EVF (electronic viewfinder) and it's ability to help focusing, as well as replace several acoustic 21mm, 24mm, 28mm and other viewfinders.
Very few have said they want a Leica M with video, but many will be playing with it.
I think the Leica M video will lead some people to ask for a further developed Leica M Video that have the connections for proper sound, better ways to handle the camera and such.
Leica M Monochrom (2012) with Leica 50mm Noctilux-M f/1.0 (1976). 3200 ISO. © Thorsten Overgaard.
And I also think that the EVF will be so popular with many, and the bulky design of it on top of the Leica M, that they will ask for a future Leica M edition with a built-in digital viewfinder.
But even more will continue to ask for the traditional acoutsic viewfinder Leica M is known for. So one version with the traditional and the possibility for adding one on top, another version with EVF built-in at the expense of the traditional viewfinder.
Leica M Monochrom (2012) with Leica 90mm Summilux-M ASPH f/1.5 (2019). © Thorsten Overgaard.
Quite many I have met think the new Leica M is "too electronic" but I think that when they get it in their hands, they will realize that they only got that impression from the coverage of Photokina. All the pictures and talk about the EVF, the R-lenses, the video, the larger screen and such. In actual fact the Leica M feels like a Leica M9, with three extra buttons - and a lot more horsepower. It's going to create mayhem when people find out what it is. (I'm happy to say my Leica M is reserved, even paid for, so I'm not going to be in a different line).
I guess what I am saying is that the Leica M will take several different directions. You don't have to love, even understand, each and every Leica M model that comes about. They will be different creatures for different needs.
Sunny side up in Bangkok. Leica M Monochrom with Leica 50mm Noctilux-M ASPH f/0.95 (2008). © Thorsten Overgaard.
Uncompressed files
The Leica M Monochrom comes with no choice between compressed or uncompressed files as the Leica M9 and Leica M9-P does. There is uncompressed, and that is it.
In LFI (page 56 of the January 2013 issue) this reason was given for why the Monochrom doesn't offer compressed DNG files:
"Leica's lossy compression procedure uses a simple but effective method of reducing the original 16,384 brightness levels to just 256, without visible loss in image quality. Despite the course representation of tonal values in the compressed raw data, the interpolation between several sensor pixels to derive a complete set of RGB data in the final image creates a finely resolved histogram without any obvious gaps.
Leica M Monochrom (2012) with Leica 90mm Summilux-M ASPH f/1.5 (2019). © Thorsten Overgaard.
Since the demosaicing step is missing from the image processing pipeline of a monochrome camera, thinning out the full gamut of tonal values would have a visible effect, so lossy compression is not an option for black and white photography."
JPG or DNG ... or both?
I started out shooting uncompressed DNG along with JPG to see what worked the best. I had heard from a few people that the JPG worked well and that was all they used.
However, my decision was to use the DNG. All in all, it looks better, and somehow I feel the black & white DNG is the thing that really distinguish the Leica M Monochrom from the Leica M9's JPG Fine in black & white.
Black & white DNG (that is something new!) and a sensor that picks up micro details
The DNG, along with the lack of disturbing filters in front of the sensor, is what I see give me the possibility to create something different.

Matthias Frei in London. Leica M Monochrom (2012) with Leica 50mm Noctilux-M f/1.0 (1976).
SD-cards
Some may argue for 32 GB SD-cards in the camera then, but I haven't gone there yet. I still use my good old trusted SanDisk 16GB 30mb/sec and 45mb/sec cards in the Leica M9 and Leica M Monochrom (I shoot compressed in the Leica M9 so I can fill in twice as many M9 shots on a 16GB card as on MM shots on the same card).
Speed of writing to SD-cards
The speed of buffering and writing uncompressed DNG files to the SD-cards is considerable slower than the Leica M9 writing compressed DNG files to the SD-card. Get used to it. I haven't, but I have to.
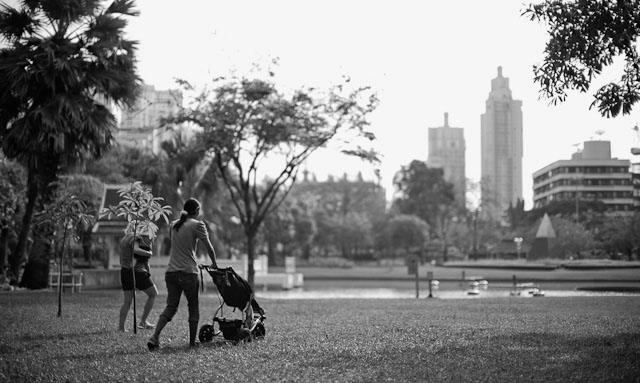
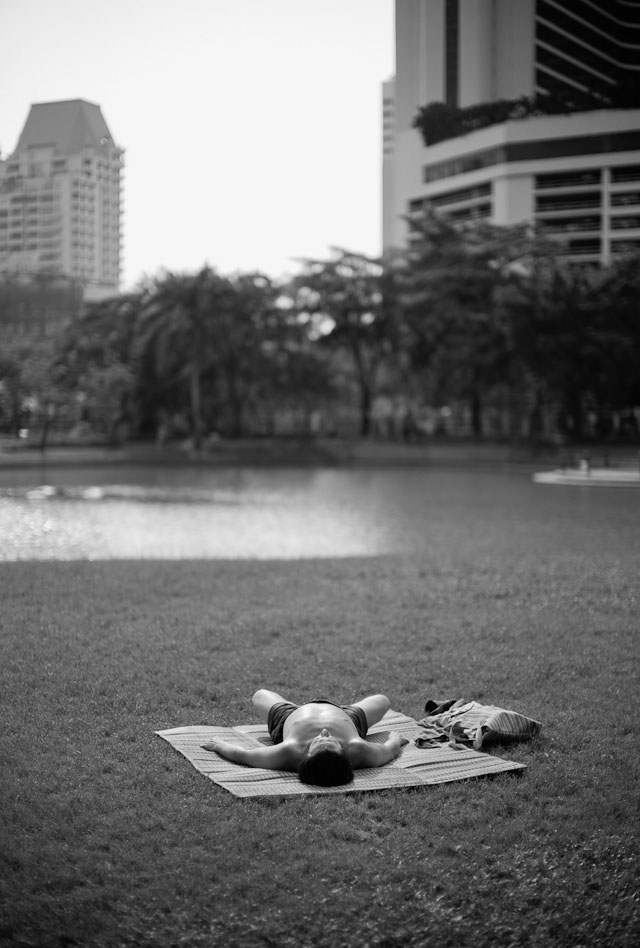
Park in Bangkok. Leica M Monochrom (2012) with Leica 50mm Noctilux-M ASPH f/0.95 (2008). © Thorsten Overgaard.
The "no more space on SD-card" error
I've been around a couple of people who had an error on their SD-card with the Leica M Monochrom where there were no more space on the SD-card. Or rather, there were supposed to be space but the camera reported there was no space and as a result, wouldn't fire.
When you encounter an error like that, it can be everything. Card, a hidden folder on the SD-card because the user has been using the SD-card for storage and/or forgot to empty the waste bin after having thrown the images out.
Leica M Monochrom (2012) with Leica 50mm APO-Summicron-M ASPH f/2.0 (2012). © Thorsten von Overgaard.
We handled it this way, and this was also the way I handled it when my camera acted up the same way a couple of weeks ago:
I have no idea what the problem was. I only had it once and this handled it, so I haven't indulged in it further.
Make a new folder.
Reset the number sequence.
Reset the camera.
Turn the camera off, take out the battery.
Insert the battery, turn on the camera.
I'm sure this is over the top. But it can be done in a minute or two, and it handles any problems.
When I come to think of it, one of the cameras that had this problem was a leica M9-P. But whatever. I recommend using the same trusted SD-card forever. Don't change brand, don't change speed, don't change size of cards. Just stay with what works. Period.
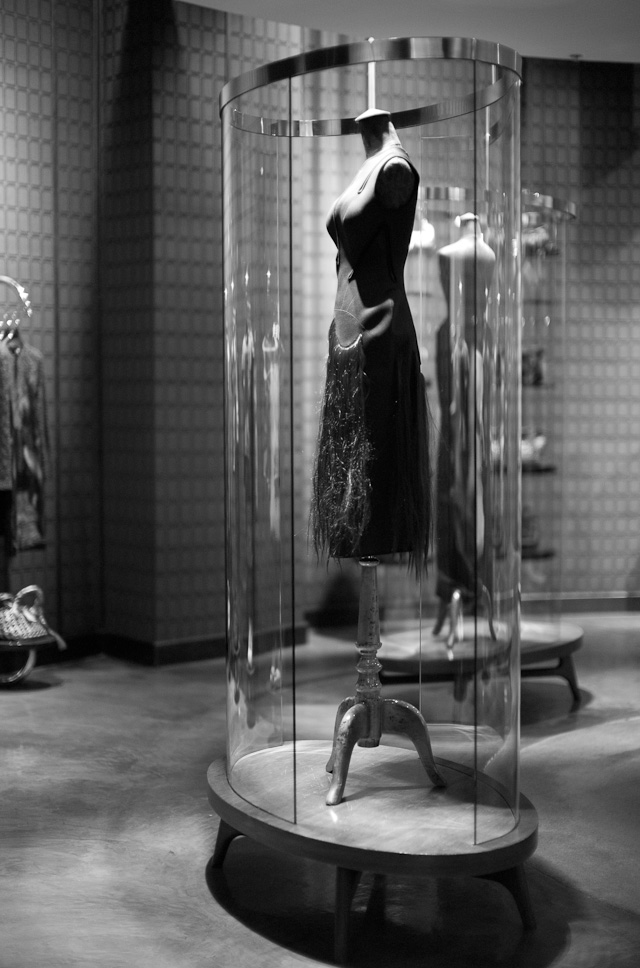
Fashion store in Bangkok, Thailand. Leica M Monochrom (2012) with Leica 50mm Noctilux-M ASPH f/0.95 (2008). 3200 ISO. © Thorsten Overgaard.
Yes, you will need ND-filters for all of your lenses
ND filters are Neutral Density filters. Or sunglasses for lenses.
The ND filter reduces the light going through the lens without degrading the quality or changing colors or anything. Just less light.
If you live in a Sunshine state, or visit a synny place with your Leica M9, you will need ND filters if you want to keep the lens fully open at f/0.95 or f/1.4 or whatever. You should always keep the aperture as open as the lens goes (as covered elsewhere in these pages).
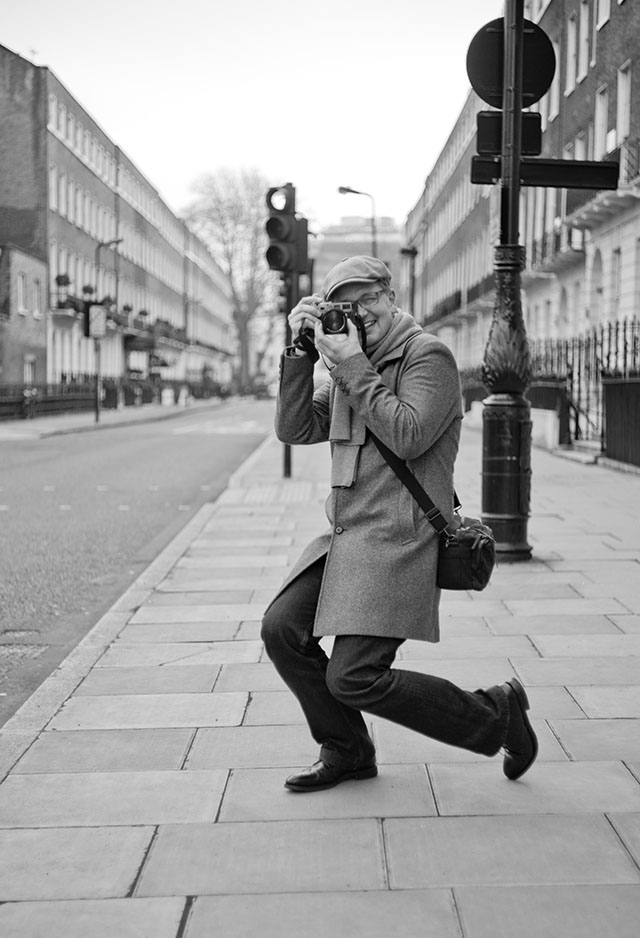
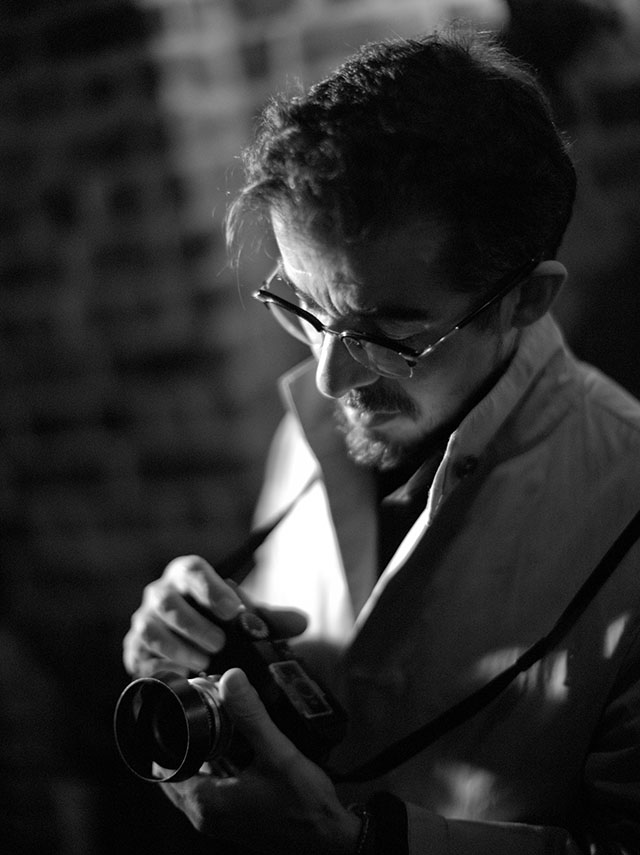
Thorsten von Overgaard in London. Leica M Monochrom (2012) with Leica 50mm Noctilux-M f/1.0 (1976).
Aperture is not for light control but for control of DOF (Depth Of Field), so only if you actually want more sharpness in the the front or back (for a group of three people portraits for example) should you use aperture to get more sharpness.
The rest should be done wide open. That is my opinion and how I always do it.
I keep stumbling into people who live in exotic countries with too much traffic and too much sun ... and yet they don't own a single ND filter. They use the aperture to step down the light.
And what a waste of good lenses!

Leica M Monochrom (2012) with Leica 90mm Summilux-M ASPH f/1.5 (2019). © Thorsten Overgaard.
8X ND-filters from B+W
You should get a 3 STOP ND filter for all of your lenses. Get B+W Made in Germany ND-filters, and get 3 stop (also known as 8X filters because you reduce the light to half, three times, 2x2x2 = 8).
As we like it (one should think), those ND-filters are handmade and hard to get. But get them anyways, and don't buy 64X filters or any other silly filters some photo stores have in stock. Outside the Leica ranks where few lenses are used wide open, ND-filters are mostly used to create stop-motion series. Hence the very dark 64X ND-filters are in stock for such purposes.
You want 3-stop 8X ND-filters.
Shoot 320 ISO outdoor
You will shoot 320 ISO outdoor, which is the base ISO of the Leica M Monochrom. If you go as low as PUSH 160 ISO you loose 3-4 stops of dynamic range. So don't.
Never go below 320 ISO.
At 320 ISO in sunshine your precious f/1.4 lens is turned into a f/4.0 lens without the ND-filter. So get ND filters and get plenty. If you have friends with Leica, buy them ND filters for their birthday.
When the sun gets up you put on your 3-stop ND filter and your f/1.4 lens behaves like a f/4.0 lens but remain fully open at f/1.4.
If you go indoor with your lens with ND-filter, you turn up the ISO to 3200 ISO or so, and you can shoot indoor without removing the ND filter.
When the sun goes down you take off the ND filter.

Leica M Monochrom (2012) with Leica 28mm Summilux-M ASPH f/1.4 (2014). © Thorsten Overgaard.
Don't use ND filter and UV filter at the same time
The ND filter protects the
lens when it is on. If you must, put on your UV-filter when you take off the ND filter. Don't have both of them on at the same time as it may give you dark corners.
I generally don't use UV filters because I don't like them. I like to look at the lens, and I am fearless. I made a scratch in the front glass of my 35mm Summilux-M ASPH f/1.4 FLE two weeks after I got it.
Leica M Monochrom (2012) with Leica 50mm Noctilux-M f/1.0 (1976). © Thorsten Overgaard
But as the lenses are handmade, repair is possible. I paid 250 Euro to get it fixed at the mothership in Solms. That is less than an UV filter cost. So that is how I treat my lenses.
I'm not suggesting you are wrong using UV-filters, I'm just provoking you to re-consider if it is really necesary (though on the Leica 50mm Noctilux-M you should never use UV-filter in the evening as it will cause reflections).
Unlike the UV-filters, the lens glass is hard. There has been a few lenses existing with 'soft glass', such as the 21mm Super-Angulion, but none of the current lenses are easy to screatch. Though it is possible with some work and attitude.

Leica M Monochrom (2012) with
Leica 50mm Summilux-M ASPH 1.4 (2004). © Thorsten Overgaard.
Learning to expose correctly, again
Film, if you remember, always have film (or plastic) in the empty (white) spaces. The Leica M Monochrom has nothing. Just white with no information.
Unlike the Leica M9 that always seem friendly with over-exposure, the Leica M Monochrom show no mercy. If you blow out the highlights, there is no information to gain back in Lightroom.
No-information (white) highlights also could be said to be a new aesthetics. Something you have to get used to decide to like, or something you want to avoid.

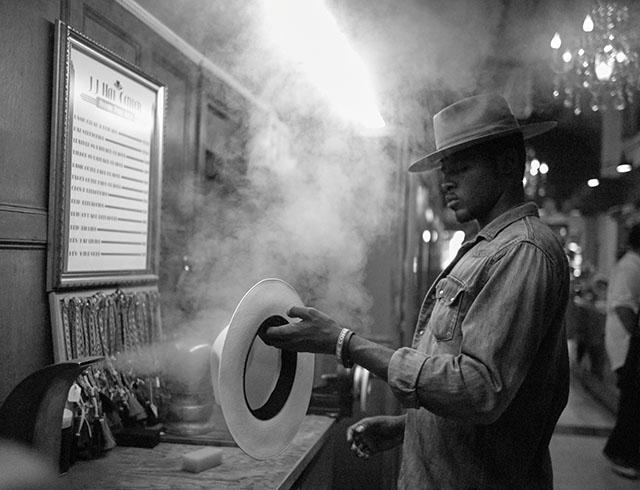
Local hip-hop artist in Kuala Lumpur, Malaysia. Leica M Monochrom (2012) with Leica 90mm APO-Summicron-M ASPH f/2.0 (1998). © Thorsten Overgaard
Say you are shooting the underground in London and there are lamps in the ceiling. If you expose the people walking, correctly, the lamps will eventually be compleetely white and blown out. You can decide either, that this is how it is, or that that effect in an(y) image is untolerable.
In any case it will be a good idea to send images with blown-out highlight via Photoshop and edit Levels from 0-255 to 2-253 so that there is a little definition of grey in the highlights and the black areas are not completely closed to 100% black. You will notice that all the images on this page has that little definition in white edges because I did that.
Leica M Monochrom (2012) with Leica 28mm Summilux-M ASPH f/1.4 (2015). © Thorsten Overgaard.
It takes a few days to get used to read the display of the Leica M Monochrom correctly. In general the image should look underexposed on the display, compared to how it should look on the Leica M9. So you may spend a few days not really getting the results you had hoped for. But you will get there.
The full greyscale
One thing that I could see, and which annoyed me, was that the majority of Leica M Monochrom images I saw coming out from the people who had started using it, were very grey.
I have a certain aesthetics in black and white that I subscribe to. Partly defined by what the Leica M9 produces, partly based on the aesthetics I have built from what I have seen through the years; in prints, books and magazines, as well as my years with extensive use of black & white film.

London. Leica M Monochrom. © Thorsten Overgaard
With a new tool, I was curious to see what the aesthetics could and would develop into, but at the same time I was certain that one would have to deal with the files a bit more violent than most people did in the beginning.
Because so many seemed to try to preserve the full greyscale of the sensor. As if a full greyscale was the aim.
I think not.

Girl in the Skytrain in Bangkok. Leica M Monochrom (2012) with Leica 50mm Noctilux-M ASPH f/0.95 (2008). 1600 ISO. © Thorsten Overgaard
I don't like it as extreme as the photo series Leica Camera AG presented with the Leica M Monochrom. Those violently beaten-up hardcore processed images that showed sharpness and detail. It has to be some kind of black and white traditional aesthetics, I think, plus some more that the new camera would make possible.
When the Leica M9 came out, we all spent a good three to six months trying to get the files to behave, and at the same time learn from the files what things could look like. And I think it is safe to say that the result is a look that is unique and which today is recognized as the "Leica M9 look". Even so much that some fear that the new Leica M with a CMOS sensor won't be able to produce a similar pleasing look.
(I actually think - and hope - that look is not a Leica M9 look, but a Leica Camera AG look. They didn't just buy a sensor, they designed it. For the M9, and now for the Leica M. I saw some 3200 ISO files from the Leica M some months ago, and I didn' cancel my order. I'm going to use 3200 ISO color on the Leica M).

New York. Leica M Monochrom (2012) with Leica 28mm Summilux-M ASPH f/1.4 (2015). © Thorsten Overgaard.
Monochrom to develop into a unique visual language, or at least technique, that is unique because it can be done only with that camera, and which have some qualities that are recognizable and valued from the history of photography with film. Plus possibly something new even film can't do.
I still feel we have some miles to walkon this. My own results have moved to a place around the results I can get with the Leica M9, and I am curious to see where it leads from there. I am not studying the files, I'm just working with them and move my borders bit by bit towards something that will hopefully be better.
Part of working with the files is to see the light, and to see it differently. Because without great light, no great pictures. But perhaps what the Leica M Monochrom can do is to capture light differently. Maybe it allows more, and/or differently.
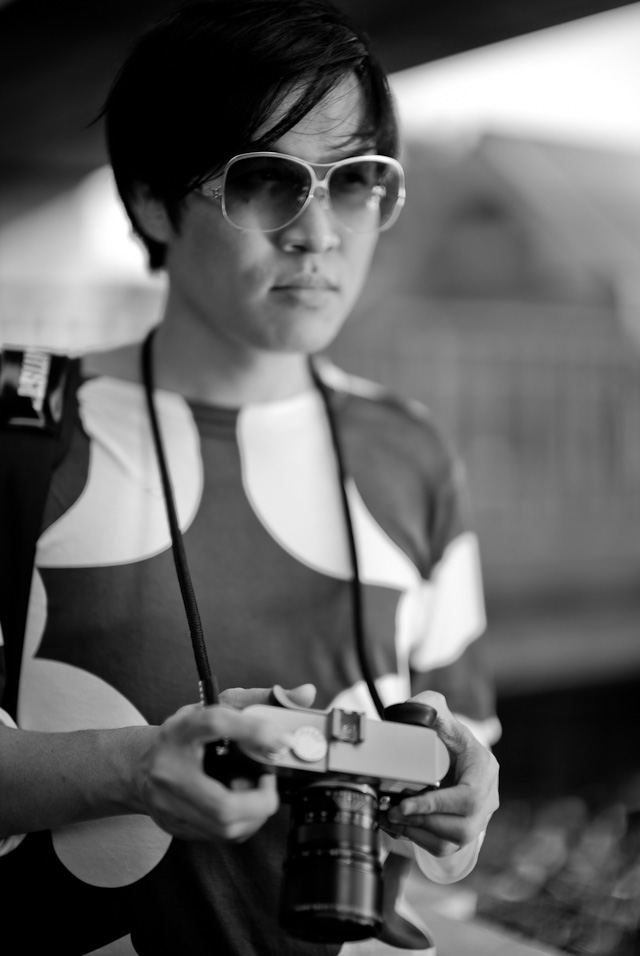
Joe Nattapol Suphawong in Bangkok, Thailand. Leica M Monochrom (2012) with Leica 50mm Noctilux-M ASPH f/0.95 (2008). © Thorsten Overgaard
It is interesting that many will ask if my Leica M9 files are from the Leica M Monochrom ... and that even I can be in doubt with some photos. If I took it with Leica M9 or with the Leica M Monochrom.
In a way it is good, because it means that I circel around my own aesthetics and it is not the camera that defines a style. It is me who make the style. I just happen to work towards the same aesthetics with any camera.
But I feel there is something to be learned not just from using the Leica M Monochrom and its simplicity and funky limited view on the world. I also feel there is some new ground to be taken, and that new gound can only be found with the camera in hand.

Leica M Monochrom (2012) with Leica 50mm Noctilux-M f/1.0 (1976). © Thorsten Overgaard
I, as many others, prefer to work within a workflow and with tools I know well. A professional is one who can produce a predictable result of a certain standard. One who knows he can do it before he begins. Therefore the first step with a new tool as the Leica M Monochrom is to get to that safe ground: Knowing that you can get the usual quality with this tool.
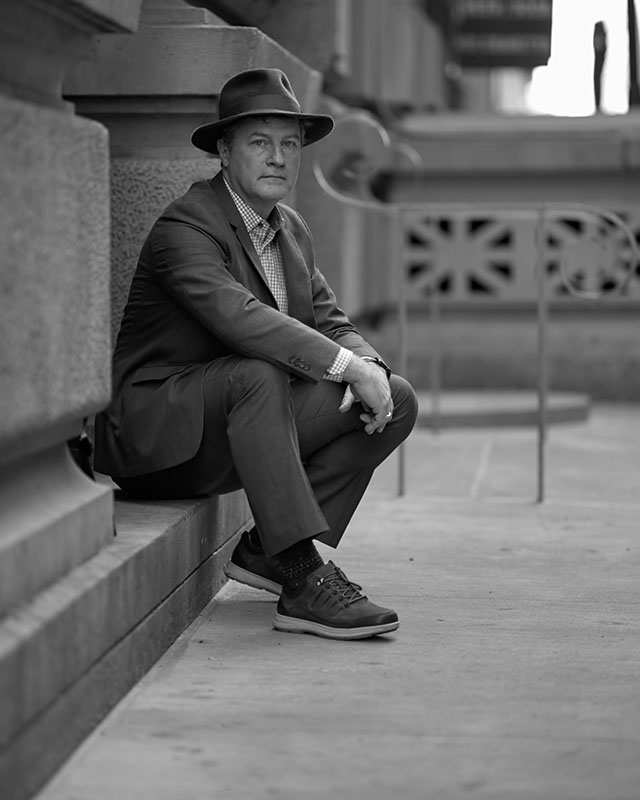
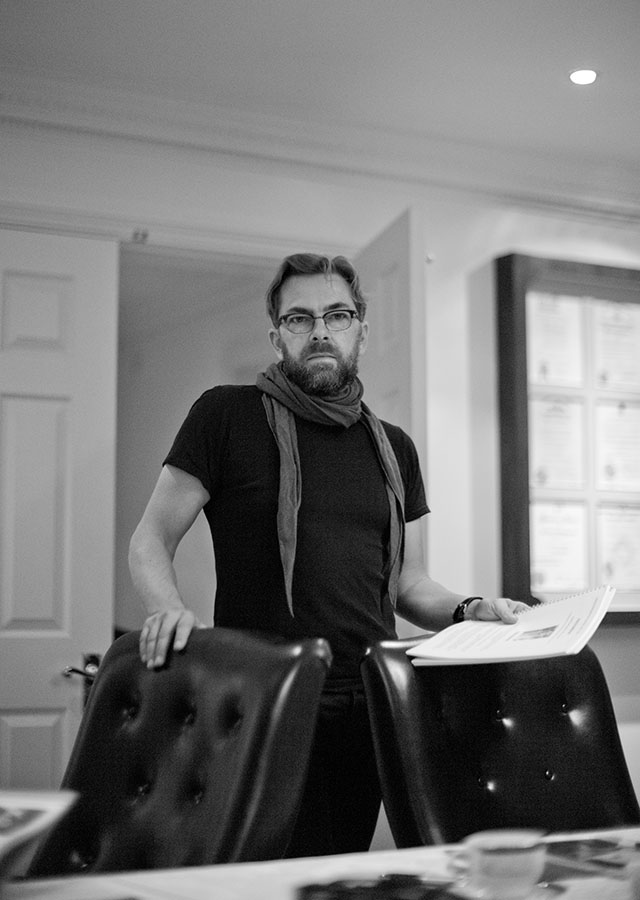
Thomas Montgomery for a magazine shoot. Leica M Monochrom (2012) with Leica 50mm Summicron-M f/2.0 (Version II, 1956). © Thorsten Overgaard
From there it will have to develop, and I hope we can all join in and learn from each other. Though I get many nice e-mails and other recognitions, I feel Leica is doing a lot of the work, and the users of Leica are doing most of the work by using, testing and sharing your thoughts, tweaks and results. I feel more like a curator of experience and history in doing my website and my work. I didn't learn all I know from my own experience, I learned it from our collective experiences.
I feel it is imporaint to acknowledge that we all share a responsibility, as well as enjoyment, in working with this new camera based on very old and sane ideas. And in case nobody thanked you for it before, I hereby do.
Thank you!
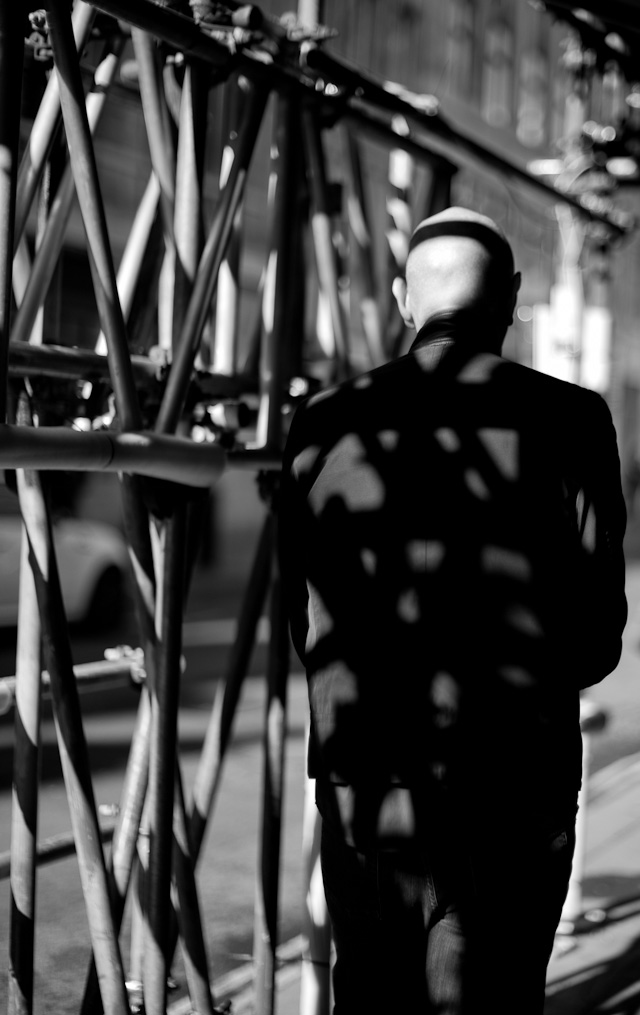
Getting packed to leave for another city. Kuala Lumpur, Malaysia. Leica M Monochrom (2012) with Leica 50mm Noctilux-M ASPH f/0.95 (2008). 320 ISO. © Thorsten Overgaard
|
NEW VERSION 11.3 |
|
| |
 |
|
| |
|
| |
|
|
|
|
| |
|
| |
|
|
| |
Buy Now. Instant delivery.
New Version 11.3
ONLY $698.00
Now includes
4+ hours of
video tutorials.
100% satisfaction
or 100% refund.
More info.
|
|
| |
#2130-1121-3 |
|
| |
|
|
| |
Update to Version 11.3
Apply
code "UPDATE113" on checkout to get this complete version 11.3 update.
$298.00
Updates all previous Surival Kit versions since 2009. |
|
| |
|
|
Buy the complete new
Lightroom Survival Kit 11.3
The Legendary Tutorial for Photographers
Brand-new JUNE 2022-version.
Now with brand-new 4+ hours of video tutorials.
New sections on compostition and storytelling.
How to edit color photos.
How to edit black & white photos.
How to do keywords logical and easy.
The most successful photo editing kit ever
Photographer Thorsten Overgaard first released the Lightroom Survival Kit in 2009 and have honed it with new and fresh updates. This Version 11 is the most radical updated and renewed version ever, four years in the making.
Professional workflow experience made simple, logical and easy to use.
Master editor makes it simple to understand
The Survival Kit is unique and one-of-a-kind being made for photographers for photographers. When someone understands their subject, they can explain it so it is easy to understand. The hallmark of Thorsten Overgaard is to make expert knowledge shown and told in a way so anyone can apply it.
Hands-on advice that works
With a 450 pages workbook and 4+ hours of video, every element of digital photography is touched on, in handy chapters and pre-flight checklists. Editing of color vs black and white photos, keywording, cropping of images, fine-tuning of tones, color balance and color control, export of originals, printing, archiving and backup, and much more.
Comes with the Overgaard Leica Presets (Value $48)
The Lightroom Survival Kit comes with Thorsten Overgaard's special-made Lightroom Presets for all digital cameras and for Leica digital cameras.
Understand all from camera to the final print
Chapters in this version goes over the background for High Dynamic Range (HDR), digital raw files and how to set up a professional photography workflow, from calibrating the screen to editing in Lightroom, and to making a final print. And more ...
10+ years experience in one package
No need to spend years figuring out the smartest way to do things when you can tap into the best way of doing things right here. The workflow of Thorsten Overgaard as been refined through years of field work with more than a thousand workshop attendees.
This method of workflow now used by thousands
The Survival Kit has been taught to thousands in workshops and in this Survival Kit. What does it do? It make you enjoy taking and making photos, and it increases your production considerabely. Most important of all, it'll give you back ownership of your files (which you will understand why is so important, once you have bought the Survival Kit and started applying its methods).
| |
|
|
| |
"Thorsten's methodology is perhaps not what hardware-, software- and cloud-companies want us to do, but as a former IT engineer I can only acknowledge his views about preserving our digital heritage. This workflow explained is for me the best I have ever seen".
★★★★★ |
|
| |
|
|
Video tutorials, image files, presets, checklists, definitions, tutorials of Lightroom, that boils down years of experience to a workflow you can implement in less than one day.
Start working in minutes. |
|
|
| |
|
| |
|
| |
|
| |
|
| |
|
| |
|
|
|
|
|
|
|
| |
NEW VERSION 22.3 |
|
| |
 |
|
| |
|
|
|
|
| |
490 pages easy-to-understand
workflow logics, checklists, Styles
and 3+ hours of videos.
Packed with help and tools for all questions on digital photography workflow.
Read more ...
Buy now
Start today

Thorsten Overgaard
Black and White Photography
Editing Color Photographs
Special Effects
Organizing files
Organizing Old Archives
Keywords
How to do safe backup
Hardware setup
Screens and Calibration
Printing Workflow
Capture One on iPad
Capture One Live
Publishing
+ Export Formats
+ Free Overgaard Styles
+ Preflight Checklists
The one and only method
The Survivel Kit is the only of it's kind, made by photographers for photographers.
|
|
The Brand New June 2022
"Capture One Survival Kit 22"
By Thorsten Overgaard
The complete workflow of Thorsten Overgaard,
made easy with pre-flight checklists and step-by-step instructions on how to set up and use a professional
photo editing software like Capture One Pro.
Laid out in a way that is easy to understand
and everyone can apply. Works for Capture One Pro 22
and all previous versions.
New revised version
This is the most revised version ever of the
best-selling Surival Kit by Thorsten Overgaard. This new
version includes many new chapters, on Capture One on iPad and how to add keywords better, as well as more
than 3+ hours of videos tutorials with
Thorsten Overgaard.
Simple and to-the-point tools on how to use select tools, how to do backup and how to manage and organize pictures archives so they don't get lost and doesn't have to be reorganized again and again.
Expanded and simplified
Also: Specialized first-help chapters on how to
sync your entire photo archive with the smartphone,
how to escape Apple Photos, how to empty photos out
of an iPhone, how to get out of Lightroom CC, what to do with iPad editing ... and more on how to not survive the digital age and perhaps even outsmart it.
Now comes with
Overgaard Leica Styles for FREE
Special black & white conversion, better skintones
and a CMOS sensor color correction.
(Value $48.00. FREE with this kit).
Thorsten Overgaard
Capture One Survival Kit 22.3
For computer, iPad, smartphone and Kindle.
Buy Now
Instant download.
Price $798.00
100% satisfaction or money back.
Released June, 2022.
UPDATE
VERSION 22.3 UPDATE
Compatible with all previous versions.
Simply use
code: "UPDATE22"
Only $298,00
|
|
|
| |
|
|
|
|
| |
#2131-1222-3 |
|
|
|
Leica M Monochrom (2012) with Leica 50mm Noctilux-M ASPH f/0.95 (2008). © Thorsten Overgaard
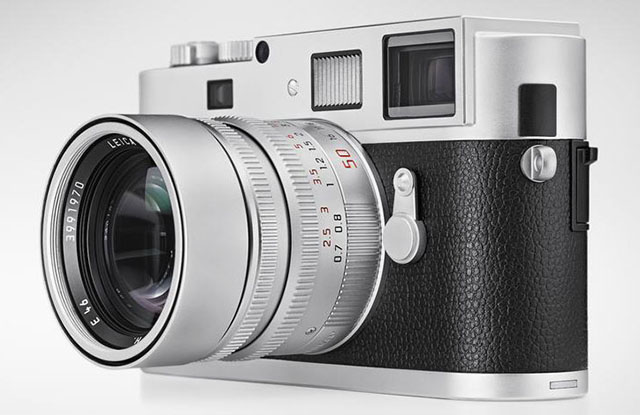
The New Leica M Monochrom in Silver Chrome
The Leica M Monochrom is now finally available in Silver Chrome as a standard model since May 28, 2014. There has been a few limited and special editions made sicne the release in 2012 of the Leica M Monochrom, as well as a few made-to-order in the beginning. Now everybody get one.
The price at BH PHoto is $7,998 and one can buy worldwide via PayPal and "buy now, pay in 6 months" without intersts (you buy now and if you pay the balance within 6 months, it is interest-free).
This most likely also means that one can ask Customer Service at Leica in Wetzlar directly for a quote for an upgrade til silver chrome if that is the dream.
The price at BH PHoto is $7,998 and one can buy worldwide via PayPal and "buy now, pay in 6 months" without intersts (you buy now and if you pay the balance within 6 months, it is interest-free).
Continues on Page 22 -->

Leica Definitions
By Thorsten Overgaard. For full list of definitoons, visit Leica Definitions
| |
 |
| |
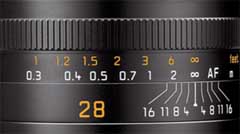
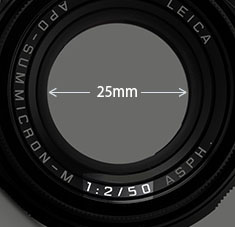
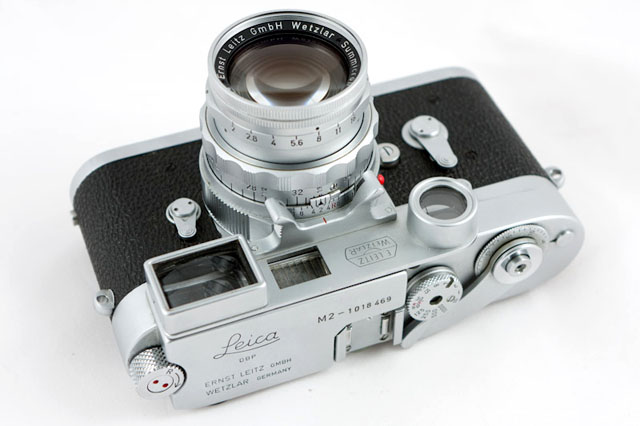
1:2/50 the description says. But what does it mean? |
| |
|
1:
Basically means 1 divided with. But why is it on the front of the lens? If you look close, a lens will often say 1:2/50mm on the front, meaning it is a 50mm lens with an f/2.0 apterture. The 1: itself is a ratio, that indicates that the aperture diameter (25mm) is the ratio of 50mm divided with 2.
It's a strange way of writing product information on modern products, but here's how it's right:
a) A lens is called a 50mm lens because there is 50mm from the sensor to the center of focus inside the lens.
b) A lens is f/2.0 when the widest opening is 50mm divided with 2 = The lens opening is 25mm in diameter at it's widest. Had it been an f/2.8 lens (1:2.8/50), the widest aperture opening would be 50mm divided with 2.8 = 17.8mm.
35mm
a) 35mm lens is a lens that has a viewing angle of view is 63°vertically, 54° horizontally and 38° vertically within a 35mm film frame:
b) 35mm film format is a standard film format where the actual widt of the film is 35mm. In photography the frame within the widt of the film is 24mm (on the width) and 36mm (on the lenght of the film roll). 35mm was first used in 1892 by William Dickson and Thomas Edison for moving pictures with frames of 24 x 18mm, using film stock supplied by George Eastman (Kodak), and became the international standard for motion picture negative film in 1909 [later other formats came about such as Academy Ratio (22 x 16 mm), Widescreen (21.95 x 18.6 mm), Super 35 (24.89 x 18.66 mm) and Techiscope (22 x 9.47 mm)].
Oskar Barnack built his prototype Ur-Leica in 1913 as a device to test film stock and/or motion picture lenses and had it patented, but Ernst Leitz did not decide to produce it before 1924.
c) 35mm is often given as a comparison when talking about lenses in small cameras or cameras with other sensor/film format than the 24 x 36mm frame. The camera has a smaller sensor and hence uses a wider lens to capture the same image as a "35mm camera" would. Example: A camera with a 12 x 18 mm sensor has a 14mm lens on it, and even the lens is actually a 14mm, it is specified as a 28mm lens (35mm) which means that the resulting image is equivalent to a 28mm lens on a 35mm camera.
| |
 |
| |
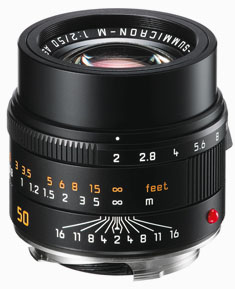
The Leica 50mm APO-Summicron-M ASPH f/2.0 lens |
| |
|
50mm
a) 50mm lens is a lens that has a viewing angle of view is 47° vertically, 40° horizontally and 27° vertically within a 35mm film frame.
b) 50mm lens is often compared to the human eye. Not because of viewing angle but because of size ratio. The 50mm lens is the lens that comes closest to the size that the human eye see things (whereas the human eye has a much wider angle of view [120-200°] than the 50mm lens [47°], thought a more narrow focus (your eyes may observe very wide but your focus is on a limited view within that angle of view).
AF = Auto Focus. The idea is that the camera does the focusing itself (the word auto comes from Greek "self").
APO = stands for "apochromatically corrected". In most lenses, optical design concentrates the focus of blue light and green light into a single plane, but red light falls slightly into another plane of focus. Red subjects, therefore, would be ever so slightly out of focus compared to blue and green subjects in the same frame. Not sure you'd ever notice though, the difference is so slight. This is the same basic principle that requires you to shift the focus for infrared photography, related to the wave length of red light. In APO lenses, the design and expense has been put in to making red light focus on the same plane as blue and green. Under a microscope you would see that all light subject is now in focus, creating a sharper image overall. Many manufacturers offer APO designs, but in most of these only the very center of the lens is APO corrected. Leica prides itself on making most of the frame APO correct.
If one look at the images produced by the APO lenses (Leica 90mm APO-Summicron-M ASPH f/2.0, the Leica 50mm APO-Summicron-M ASPH, and the Leica 50mm Summilux-M ASPH f/1.4 that is in fact APO-corrected), one will notice that the colors are really bright and alive, almost more real than to the eye.
Apochromat; ORIGIN early 20th century, made of the two words;
apo: Greek origin, away from
chromatic (Latin origin, meaing relating to color.
Aperture = The f/ stop on the camera that regulates how much light passes through the lens. On a f/1.7 lens the lens is fully open" at f/1.7. At f/2.0 the aperture inside the lens make the hole through the lens smaller so only half the amount of light at f/1.7 passes through. For each f/-stop (4.0 - 5.6 - 8.0 - 11 - 16) you halve the light. The aperture of the lens is basically the focal length divided with the f/-stop = size of the hole (28mm divided with f/1.7 = the hole is 45 mm).
ORIGIN: Late Middle English : from Latin apertura, from apert- ‘opened,’ from aperire ‘to open’.
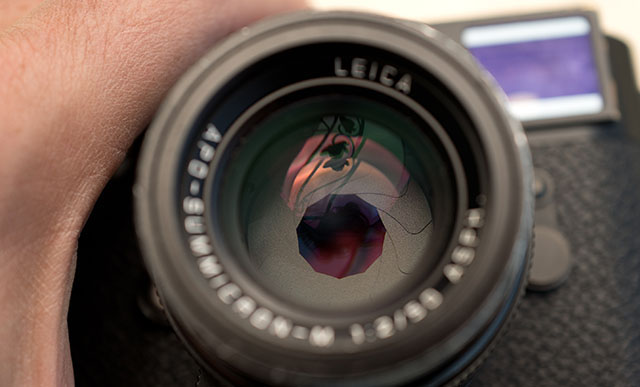 The aperture blades inside the lens is clearly visible in this photo by Eolake Stobblehouse. The aperture blades inside the lens is clearly visible in this photo by Eolake Stobblehouse.
| |
 |
| |
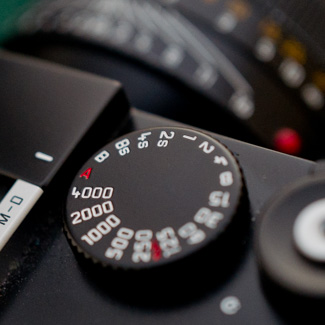
The camera in Aperture Priority Mode |
| |
|
Aperture Priority Mode. When the shutter speed dial on top of a Leica camera is set to A, it is short for “Aperture Priority” and allows the user to set a specific aperture value (f-number) while the camera selects a shutter speed to match it that will result in proper exposure based on the lighting conditions as measured by the camera's light meter. In other words, you set the aperture as priority (f/1.4 for example), and the camera calculates a shutter speed (1/250 of a second) that matches that. If you change the aperture to f/2.0 by changing the aperture ring on the lens, the camera will re-calculate the speed to 1/125 so as to get the same amount of light to hit the sensor (f/2.0 is half the light through the lens as f/1.4 and 1/125 if twice the amount of light on the sensor as 1/250).
| |
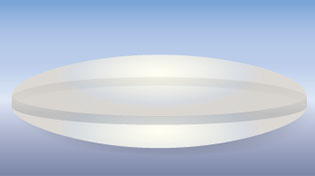
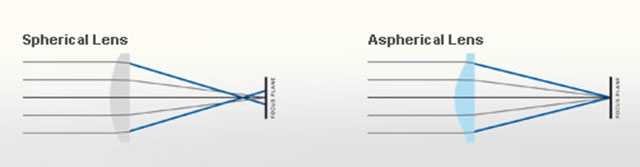
spherical (ball) |
| |
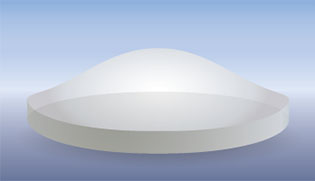
a-spherical (non-ball) |
| |
|
ASPH = (Aspherical lens) stands for "aspheric design".
Most lenses have a spherical design - that is, the radius
of curvature is constant. These are easy to manufacture by
grinding while "spinning" the glass. This design
however restricts the number of optical corrections that can
be made to the design to render the most realistic image possible.
ASPH lenses (a-spherical, meaning non-spherical), however, involve usually 1 element that does
*not* have a constant radius of curvature. These elements
can be made by 1) expensive manual grinding, 2) molded plastic,
or 3) Leica's patented "press" process, where the element
is pressed into an aspherical ("non-spherical")
shape. This design allows Leica to introduce corrections
into compact lens designs that weren't possible before. Practically,
the lens performs "better" (up to interpretation)
due to increased correction of the image, in a package not
significantly bigger than the spherical version.
There is another Aspherical lens manufacture technique: an uneven coating layer is applied to a spherical lens. The coating is thicker on the edges (or on the center, depending). Canon "Lens Work II" calls these "simulated" aspherical lenses. Simulated and Glass-Molded (GMo) asphericals show up in non-L Canon lenses, while the L lenses have actual ground aspheric elements.
A- means non, or without. From Latin, ex.
Sphere: ORIGIN Middle English : from Old French espere, from late Latin sphera, earlier sphaera, from Greek sphaira "ball".
| |
|
|
 |
| Normal spheric lens (grinded) |
|
ASPH (note the shape of the glass as result of pressing rather than grinding) |
Auto- means “self”. The idea is that when a camera has auto-(something), it does that (something) by itself.
Banding = Noise in digital images. Horizontal lines in a horizontal picture (if the camera is in portrait mode/vertical, the lines will obviously be vertical). It's simply noise; the result of uncontrolled algorithms working overtime with an image the sensor really can't see because it's very dark. (If your image has vertical lines in it, it is more likely that the sensor needs remapping).
This image at 6400 ISO, underexposed and then brought up to correct exposure in Lightroom, displays banding: Horizontal lines in the image. Leica M-D 262 with Leica 50mm APO-Summicron-M ASPH f/2.0.
Base ISO = The ISO the digital sensor was born with. Even a digital sensor goes from say 50 ISO to 25,000 ISO, it only has one base ISO. Any other setting is an algorithm that figures out how the image whould look if there was 64 times more light, or half the light, etc.
When you go down from Base ISO (for example 200 to 100 ISO), you can expect a
decrease in quality. When you go up, the decrease is much less. For some sensors, you loose 2-3 stops by going down 1 step in ISO, but can go 8 steps up and only loose 1 stop in dynamic range. Basically, your ISO range should be from Base ISO and as far up as you can, before you see visible decrease in quality (mostly 3200 ISO - 6400 ISO).
Base ISO for Leica M9 is 160 ISO, for Leica M240 it is 200 ISO. For Leica M10 it is around 160 ISO. For Leica M Monochrom it is 320 ISO. For Leica Q and Leica Q2 it is around 100 ISO. For Panasonic Lumix S it is 200 ISO. For most Canon cameras the base ISO is around 100, for most Nikon cameras it is around 200 ISO.
Bokeh = The visual quality of the out-of-focus areas of a photographic image, especially as rendered by a particular lens: It's a matter of taste and usually photographers discuss a 'nice' or 'pleasant' bokeh (the out-of-focus area is always unsharp, which is why the quality discussed is if one likes the way it renders or not by a particular lens). The closer you get to something, the 'more' bokeh' you get (in that the focus becomes less for the background and foreground at close distances than at long distances). ORIGIN from Japanese 'bo-ke' which mean 'fuzzines' or 'blur.'.
 Bokeh: The visual quality of the out-of-focus areas of a photographic image. Photo at Bar del Fico in Rome. Leica TL2 with Leica 35mm Summilux-TL ASPH f/1.4. © 2017 Thorsten Overgaard. Bokeh: The visual quality of the out-of-focus areas of a photographic image. Photo at Bar del Fico in Rome. Leica TL2 with Leica 35mm Summilux-TL ASPH f/1.4. © 2017 Thorsten Overgaard.
Burning = Expose one area of a photos more (in the development in the darkroom by exposing more light from the negative onto the light-senisitive paper by shading for all other areas than one with two hands forming a hole, or a piece of metal or paper with a hole in it). In modern digital post processing (using editing software liek Lightroom or Capture One Pro), a digital tool "burn" a selected area and makes it darker digitally. (Also see "Dodging").
| |

|
| |
C for continious |
C = Continuous shooting. When the ring by the Shutter Release on top of the camera (or in the menu of digital cameras that doesn't have such a feature on the outide of the camera) is moved from OFF to C, the camera takes series of images as long as the shutter release is pressed down. In some cameras the speed of continious shooting can be adjusted. For exampel in the Leica Q under the menu point Continuous Shooting you can define if the Continuous should be Low (3 fps), Medium (5 fps) or High (19 fps).
Camera - is today’s short name for Camera Obscura (meaning “a dark room”). Camera means Chambre and was used only as a Latin or alien word, actually only for Spanish soldiers’ rooms, until popularized in connection with photography in 1727: “Camera Obscura”. In 1793 the slang term “camera” was used by Sterne Tr. Shandy: “Will make drawings of you in the camera” and by Foster (1878), “The eye is a camera”. Camera Obscura was described by Iraqi scientist Ibn-al-Haytham in his book, “Book of Optics” (1021) and by Leonardo da Vinci in 1500; popularized and made widely known in 1589 by Baptista Porta when he mentioned the principle in his book “Natural Magic”. Johannes Kepler mentions Camera Obscura in 1604.
Camera = chambre (room), Obscura = dark (or cover).
| |
|
|
| |
Why is it called a "camera"..?
The word Camera is today's short name for Camera Obscura (which originally means “a dark room”).
Origin of the word Obscura means "dark" or "covered", and the word Camera means Chambre and was used originally only as a Latin or alien word, actually only for Spanish soldiers' rooms, until popularized in connection with photography in 1727: “Camera Obscura”.
In 1793 the slang term “camera” was used by Sterne Tr. Shandy: “Will make drawings of you in the camera” and by Foster (1878), “The eye is a camera”.
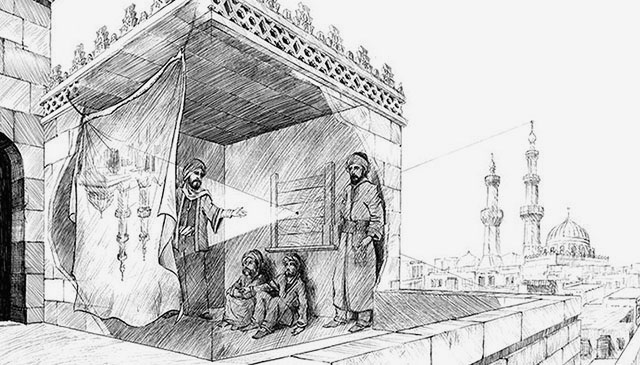
Ibn-al-Haytham mentioned Camera Obscura in his "Book of Optics" in 1021.
The concept of Camera Obscura was described by Iraqi scientist Ibn-al-Haytham in his book, “Book of Optics” (1021) and by Leonardo da Vinci in 1500; popularized and made widely known in 1589 by Baptista Porta when he mentioned the principle in his book “Natural Magic”. Johannes Kepler mentions Camera Obscura in 1604.
Camera = chambre (room), Obscura = dark (or cover). |
|
| |
|
|
CCD sensor (as used in Leica M8, M9, Leica S) = (Charged Coupling Devices) - The first digital cameras used CCD to turn images from analog light signals into digital pixels. They're made through a special manufacturing process that allows the conversion to take place in the chip without distortion. This creates high quality sensors that produce excellent images. But, because they require special manufacturing, they are more expensive than their newer CMOS counter parts.
CLA
An acronym for "(C)lean, (L)ubricate & (A)djust", whereby the item is merely re-lubricated, fine-adjusted and calibrated rather than repaired. "I just got my equipment back from CLA at Leica"
CMOS sensor (as used in Leica CL, Leica T/TL/TL2, Leica M 240, Leica M Monochrom Typ 246, Leica S Typ 007, Leica SL, Leica Q, Leica Q2, Leica M10, Leica X, Leica D-Lux, etc.) = (Complimentary Metal Oxide Semiconductor) chips use transistors at each pixel to move the charge through traditional wires. This offers flexibility because each pixel is treated individually. Traditional manufacturing processes are used to make CMOS. It's the same as creating microchips. Because they're easier to produce, CMOS sensors are cheaper than CCD sensors. CMOS allow Live View and use less energy than CCD.
Contrast - The degree of difference between tones in a picture. Latin contra- ‘against’ + stare ‘stand.’
Depth - Distance between front and back. Distance from viewer and object.
| |
 |
| |
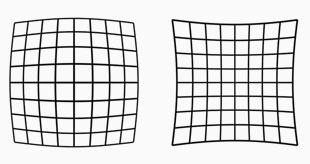
Lens distortion looks like this. The lines are not straight. Our eye uses distortion correction. Lens designers can design lenses so they have very little distortion, or they can make less complicated lens designs and "fix" the distortion in software. |
| |
|
Distortion = In photo optics/lenses: When straight lines in a scene don't remain straight because of optical aberration.
Lens designers can correct for distortion to a degree so the whole image field is perfect corrected and all lines remain straight. In modern lens design many designs rely on Software Distortion Correction (SDC).
The eye adjusts for distortion so we always see vertical and horizontal lines straight when we look at things. Even when you get new prescription glasses (if you use such), you will often experience distortion in your new glasses. After a few days they eyes have adjusted for the glasses and the distortion you saw to begin with is now gone. Software Distortion Correction (SDC) is far behind what the human eye can perform of adjustments. (Also see my definition on Perspective for more on the eye and optics)
DNG = Digital Negative, an open standard developed by Adobe. It is a single file that contains the raw image data from the sensor of the camera as well as date, time, GPS, focal length, settings, etc.
The alternative is a RAW file + XLM file where the RAW file contains the image information and the XML contains the rest of information about where, how and when the picture was taken.
A Camera Raw profile (that is specific for that camera) in the computer helps the software program, for example Adobe Lightroom, to translate the RAW data into the image.
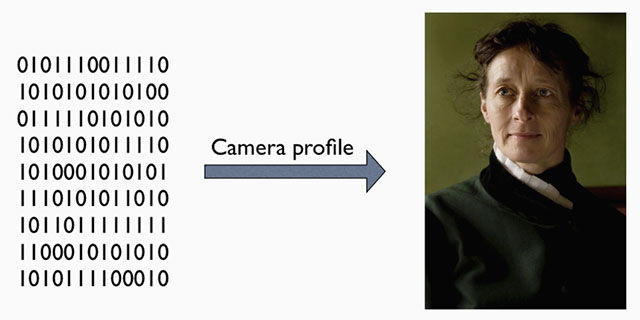
A raw file (or DNG) is simply the full recording of digital data (1's and 0's) from the sensor. In the computer, the sensor data is translated into the exact colors, via a camera profile.
Dodging = Expose one area of a photos less (in the development in the darkroom by exposing less light from the negative onto the light-senisitive paper by shading for an area with a hand or piece of metal of paper). In modern digital post processing (using editing software liek Lightroom or Capture One Pro), a digital tool "dodge" a selected area and makes it lighter digitally. Also see "Burning")
Dodging in the darkroom using a piece of metal or paper to shade so a portion of the light-sensitive paper gets less light. Photo: richardpickup.
DOF = Depth of Field. This is how much of the image will be in focus or "acceptable sharp". The DOF is determined by the subject distance (the farther away, the larger area is sharp; the closer the focus is, the less of the lage is sharp), the lens aperture (the depth of field is narrow at f/1.4 and larger at f/5.6) and the focal length of the lens (tele lenses has very narrow depth of field whereas wide angle lenses has a wide depth of field) and film or sensor size (small-sensor cameras has a wide depth of field wheras medium format or large format cameras has a very narrow depth of field). As an example, a Leica 21mm Super-Angulon-M f/3.4 lens is sharp all over the focus field from 2 meter to infinity when set at a distance of 3 meters at f/3.4. The DOF scale measurement on top of the Leica lenses shows lines for each f-stop that indicates from which distance to which distance the image will be sharp. Shallow DOF is a generally used term in photography that refer to lenses with very narrow focus tolerance (which can be used to do selective focus; making irrelevant subjects in the foreground and background blurry so only the subjects of essence are in focus and catches the viewers eye).
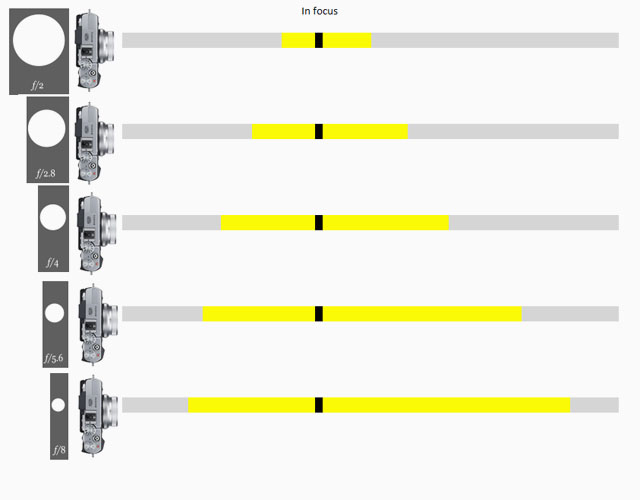
Depth Of Field scale from Fujifilm.
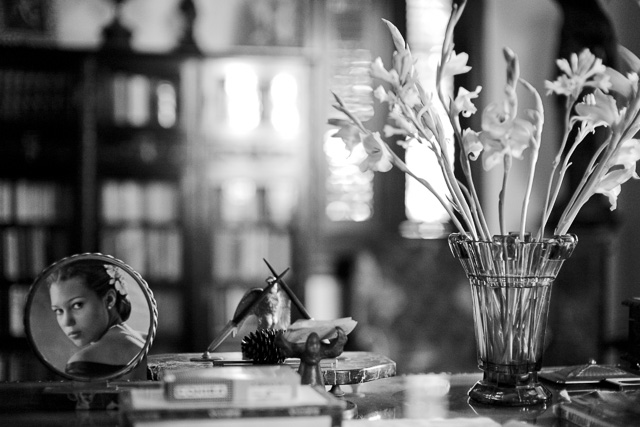
Depth of Field: Focus is on the flowers and the photograph on the desk and the foreground and background is blurred as the depth of field is narrow. If one stop down the aperture of the lens from f/1.4 to f/5.6, more will be in focus. If one stop down the lens to f/16 even more (if not all) will be in forcus. Another rule: The closer you go to a subject (the less focusing range), the more narrow the Depth of Field will be. © 2017 Thorsten Overgaard.
DR = Dual Range lens. This is a type of Leitz/Leica lens that works as macro (near focus range) and normal lens, and comes with googles/"Eyes" for the macro function. The 50/2 Dual Range Summicron was made from 1956 to 1968, only in chrome, with a near-focusing range as close to 478mm.
You mount the googles/"Eyes" to focus at close range. If you use the lens in normal range, you can take off the googles/"Eyes"
The googles/"Eyes" can be critical for which camera the lens fits on. the Leica M6 TTL requires that the plastic tab onthe eyes is removed; and other Leica M models likewise. It fits on the Leica MP, M2, M3 and oterh models. .
Leica M2 with Dual Range Summicron-M f2.0. © Dave Dunne.
Dynamic range. The grade of ‘contrast range’ (or number of tones) a film or sensor, or simply a photograph, possess between bright and dark tones. The human eye is said to have a dynamic range of 10-14 ‘stops’ (but because we scan area by area and compile a concept of the overall scene, they eye is often thought to have a much higher dynamic range), Film used to have 7-13 ‘stops’ and some modern sensors have up to 15-17 ‘stops’.
ELCAN - Ernst Leitz Canada, established 1952, was the Leitz family's guarantee against another war in Europe and/or invasion from Russia after WWII. Besides becoming a copy of the Wetzlar factory, it also became the somewhat military/industrial branch of Ernst Leitz . Because of the precision work, high standards and knowledge in optics for science and millietary, the ELCAN plant was sold to Raytheon (USA), who bought it from its previous owner, Hughes Aircraft Co.
Ernst Leitz Canada (ELCAN) was established in 1952 close to Toronto in Canada.
Elcan-M is the name of lenses for M lenses that fits the Leica M system Leica M, as the U.S. Navy High Resolution Small Format Camera System during the Vietnam war.
Elcan-R is also the name of a series of R lenses made in the 1960ies and early 1970ies that fits Leica R system, as the U.S. Navy High Resolution Small Format Camera System during the Vietnam war.
The Leitz ELCAN-M 90mm Noctilux-M f/1.0 model C164 on a Leica KE-7 film camera made for the U.S. Navy.
Elmar = Refers to the maximum lens aperture - here f3.5 . Historically derived from the original 1925 50mm f3.5 Elmax lens, which was an acronym of (E)rnst (L)ieca and Professor (Max) Berek, designer of the original lenses. Later that year the 50mm f3.5 Elmar superceded the Elmax, which was discontinued due to its complexity and high cost of manufacture.
Elmarit = Refers to the maximum lens aperture - here f2.8 . The name is obviously derived from the earlier (and slower) "Elmar" designation. Not every f/2.8 lens is called an "Elmarit" though, the most obvious current exception being the 50mm f2.8 Elmar-M collapsible lens which for nostalgia and marketing reasons has kept the original 1930's Elmar name (the 50mm f3.5 collapsible Elmar, manufactured 1930-59, was one of Leica's most famous and popular lenses). Vario-Elmarit (and Vario-Summicron, etc) is Leica Camera AG's name for zoom lenses.
Elmax
Elmax lens named after = Ernst Leitz + Max Berak. Ernst Leitz was the founder of Ernst Leitz Optical Industry which later became Leica. Professor Dr. Max Berak was employed at Leica in 1912 and was the architech of the first Leica lens which Ernst Leitz asked him to design for the "Barnack's camera" (the 1913-prototype named after Oscar Barnack who invented it). The lens was a f/3.5 50mm and was known as the Leitz Anstigmat and later the Elmax.

The Leitz Elmax 50mm f/3,5 (1925-1961) on the Leica A camera (1925) camera. Photo by Marco Cavina.
Exposure Bracketing = The possibility to set the camera to automatically record a series of images where the exposure is above and below what the camera measures. The idea is that at least one of the images will be correctly exposed.
f/ (f-stop, also known as aperture).
f- (focal length). Often given in mm, for example 90mm. In the past they were often given in cm or inch, for example 9.5 cm or 3.2 inch.
f/1.25 is the size of the "hole through" the lens, the aperture. f/1.25 means focal length divided with 1.25. In the Leica 75mm NoctiluxM ASPH f/1.25, the "hole through" the lens at f/1.25 is 60mm in diameter. At f/1.4 the "the hole through" is 53.5mm in diameter. At f/4 the "hole through" is 18.75mm in diameter.
Each step smaller from f/1.4 to f/2.0 to f/2.8 to f/4.0 and son on is a reduction ofthe light to half for each step. The Noctilux f/1.25 therefore lets 50% more light in through the lens than a 75/1.4 Summilux.
f-stop = the ratio of the focal length (for example 50mm) of a camera lens to the diameter of the aperture being used for a particular shot. (E.g., f/8, indicating that the focal length is eight times the diameter of the aperture hole: 50mm/8 = 6,25 mm); or the other way around, the hole is the focal length divided with 8).
ORIGIN early 20th cent.: from f (denoting the focal length) and number.
One f-stop is a doubling or halving of the light going through the lens to the film, by adjusting the aperture riing. Adjusting the f-setting from f 1.4 to f.2.0 is halving the light that goes through the lens. Most Leica lenses has half f-stops to enable the photographer to adjust the light more precicely.
The aperture blades inside the lens is clearly visible in this photo by Eolake Stobblehouse.
Flare = Burst of light. Internal reflections between (and within) lens elements inside a lens. Mostly, flare has a characteristic "space travel" look to it, making it cool. Particularly in older lenses with less or no coating of the glass surfaces to suppress this, it can be a really cool effect. In newer lens designs, the coatings and overall design try to suppress flare and any reflections to a degree, so that there is seldom any flare to be picked up (moving the lens to pick up a strong sunbeam), but instead a "milking out" (or "ghosting") of a circular area of the frame; meaning simply overexposed without any flare-looking flares.
 |
|
 |
Sunlight creating (fairly supressed) flare in the bottom right quadrant of the image of a modern lens. |
|
The camera moved slightly to avoid the flare. |
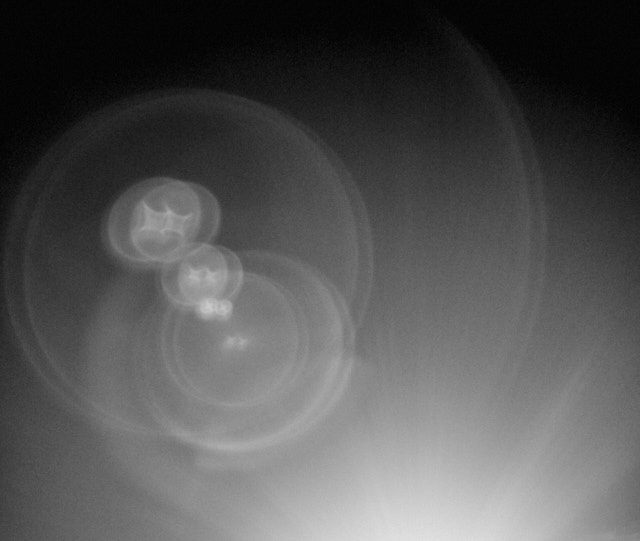
Older lenses with less coating, or without coating, are known to create flare that can look like this (Leica 50mm Summicron-M f/2.0 II Rigid model from the 1960's). © Thorsten Overgaard.
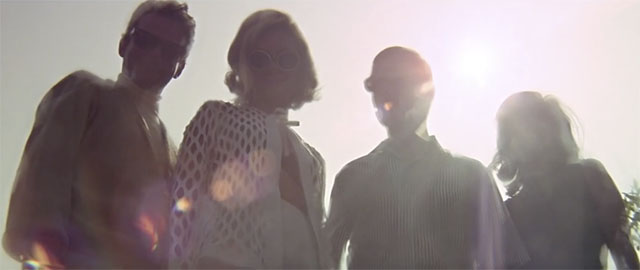
Lens flare in the movie, The Graduate (1967).
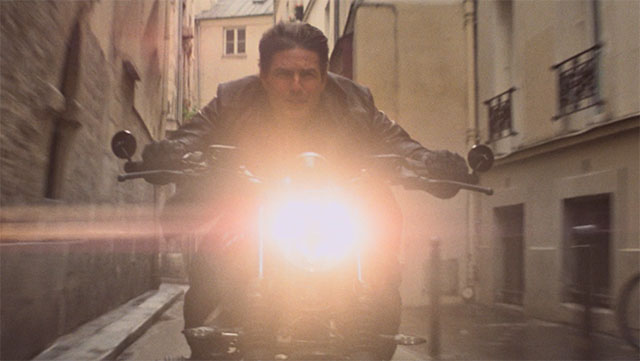
Lens flare in Mission Impossible Fallout (2019)

Lens Flare in Star Trek (2013). JJ Abrams famously said, "I know there's too much lens flare ... I just love it so much. But I think admitting you're an addict is the first step towards recovery (ha ha)"
|
Flickering = blinking light. This may result in "banding like" horizontal stripes in an image, or simply that the light you see isn't in the picture, or it looks different. For example, you take a photo in light, and the result you get is darker. You take another, and now it is all right. The reason is that some light blinks. Here's the difference within one second (notice how the light in the room, the wall light and the sign light all flicker):
 |
|
 |
| |
|
|
 |
|
 |
Flickering light causing different result in each frame becasuse the light blinks faster than the eye sees, but slow enough to be caught on camera. Here at shutter time 1/1500 sec, four pictures within a second.
Often you will see that you take a portrait indoor in an office, and from frame to frame the person has shade on one side of the face in one photo, but not the next. |
| |
|
|
Flickering ligh is a new challenge that photographers face, which is flicering light that looks good to the eye, but result in different results in a photo. Through cinema and photography history, the three standard high-quality light soruces have been daylight (from the sun), daylight HMI (5400 Kelvin Hydrargyrum medium-arc iodide lamps) and tungsten lamps (3200 Kelvin). When I say high-quality, it's because those are the light types that ensure high color quality (see the definition of CRI - Color Rendering Index in my "Leica and Photography Definitions page") and how quality light traditionally has a score above 90 CRI).
In recent years we have seen "light that flickers" because it has a pulse, such as stage light, photo lamps, video lights and of course indoor and outdoor late night lamps using LED (Light-emitting diode), compact fluorescent lightbulp-shaped lamps and other low-energy lamps (such as halogen). These light also generally have lower CRI (Color Rendering Index) below 90, and even lamps that are stated to have 90 CRI or higher, may mis out on the important red and blue tones, which will make it impossible to get the colors right, espoecially skin tones). If a stage has one or more low-quality lights (which they thend to have), these will pollute the colors of the scene to some degree.
| |
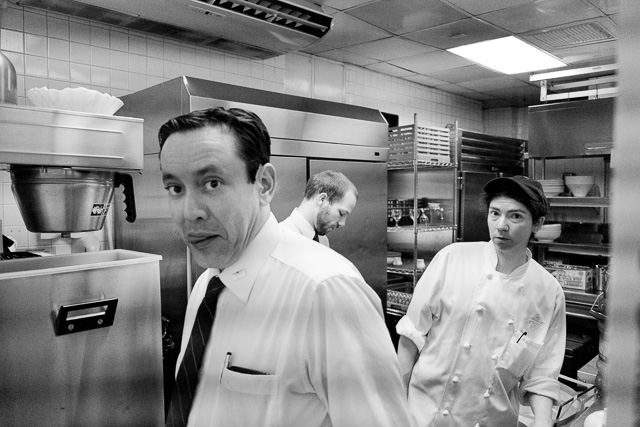 |
| |
Banding as result of electronic shutter, and often also if the ISO is high. |
Flickering horizontal stripes (or "banding"-looking stripes) may appear when you use electronic shutter, and you are photographing with one or more light sources that flickers.
When the electronic shutter is on, you are usually at higher shutter speeds than 1/2000, which means there it would be possible to go down to a lower ISO, and to activater the mechanical shutter. (In some cameras you can choose to use electronic shutter throughout the entire range, which would make the camera completely silent; and this alone may cause horizontal stripes/banding if one or more lights in the room flickers).
Flickering in the EVF is very normal and will apear often without the vertical lines you see in the EVF will be in the picture.
| |
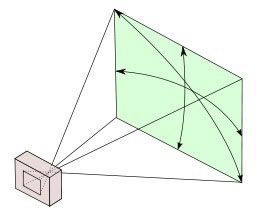 |
| |
A 28 mm lens has a 74° viewing angle |
| |
|
Focal length = Originally focal length referred to the distance from the sensor (or film in older days) to the center of focus inside the lens (28mm, 50mm, 400mm, etc). Today one call it effective focal length (EFL) as a 400mm lens is not nessesarily 400mm long due to optical constructions that can make it shorter. The 35-420mm zoom on the Leica V-Lux 1 is for example only ca. 135 mm long. Nobody uses that measurement, except those who construct lenses! For users of lenses, focal length refers to how wide the lens sees. The viewing angle, which is often given in for example 90° viewing angle for a 21mm lens, 74° viewing angle for a 28mm lens, 6° viewing angle for a 400mm lens, etc.
Each human eye individually has anywhere from a 120° to 200° angle of view, but focus only in the center.
Focus, in - Sharp and clear in appearance. Focus - “The burning point (of a lens or mirror)”. In Latin the word focus meant fireplace or hearth. The word was probably first employed outside of its Latin literal use as “the burning point of a lens or mirror” in optics, and then came to mean any central point. The German astronomer Johannes Kepler first recorded the word in this sense in 1604.
| |
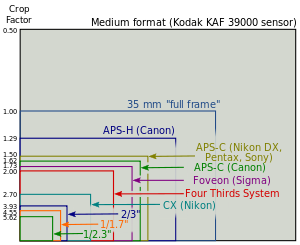 |
| |
Full Frame is "king of photography" |
| |
|
Full Frame (FF) = The size of the sensor is 24 x 36mm which is the format Oskar Barnack and Leica Camera AG invented with the first Leica that was introduced in 1925. Many other formats invented since, such as APS, APS-C and all usually refer to Full Frame ratio, by which it means what size they have compared to Full Frame. The "full frame" technically deifinition thouhg is a sensor that camtures the full frame in one go (as the early sensors as in Leica S1 scanned the image/senor over a period of time).
The 24 x 36mm Full Frame format is so "king of photography" that it has continued to be the ideal for all cameras. Besides this, there exists Large Format cameras such as 4x5" (100 x 125 mm) and Medium Format 6x6 (60 x 60mm amongst other sizes in that area).
Ghosting = Secondary light or image from internal reflections between (and within) lens elements inside a lens. The reflected light may not always be in focus, so overall it looks like a "milked out" image. A subject in focus has brightened patches in front of it that come from reflections inside the lens. the most elementary look of ghosting is when you look in a rear-view mirror in a car at night and you see doubles of the headlights behind you (a strong one and a weaker one), because the headlights are reflected in a layer of clear glass on top of the mirror glass.
 |
|
 |
|
 |
| Degrees of ghosting from strong sunlight entering from outside the frame. To the right the outside light has been shielded with a shade. |
| |
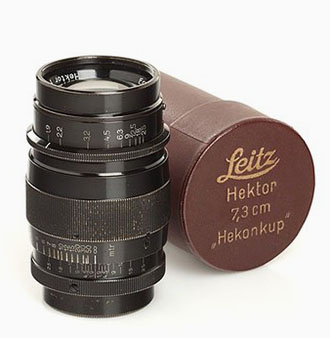 |
| |
The Hektor 73mm f/1.9 of 1930-1931 sells at $900 - $6,000 these days. |
| |
|
Hektor - Refers to the maximum lens aperture - usually f2.5 (whihc at the time of development in the 1930's was considered very light-strong lenses). The name was apparently taken from the name of lens designer, Professor Max Berek's dog, Hektor. He also had another favorite dog, Rex, which may have inspired the lens name Summarex.
But ...
there is also another possibility, which is that Hektor (the lens and/or the dog) was inspired by Hektor, the oldest son of the Trojan king Priamos, who is listed in the history books as being the most couragerous defender of his home city, Troy. (Max Berek knew of this because Greek history had been required during his high school education).
In any case, the first 50mm Hektor f/2.5 was designed by Max Berek in 1931 for the Leica I Model A, and the - for that time - extremely light-strong 73mm Hektor f/1.9 was designed in 1930-1931 in preparation of the modular Leica system.
Hue = A color or shade depending on the dominant wavelength of red, green or blue. The word Hue comes from Swedish hy which is "skin complexion". It is independent of intensity, so often (in computer editing programs for example), Hue is an adjustment along Saturation which is (intensity of color as compared to white)
ISO = Light sensitivity of the camera sensor is given in ISO (International Organization for Standardization). It's a standard that was used in film and is now used in all digital cameras also. The base ISO for the Leica TL2 sensor is around 100-150 which means that this is what the sensor "sees". All other levels are computer algorithms calculating the effect as if the sensor could "see" more (hence noise at higher ISO levels).
ISO goes in steps of doubling: When the ISO is raised from 100 ISO to 200 ISO, the camera only need half the amount of light to make the same picture. For each step in ISO to 400, 800, 1600, 3200, etc. the light sensitivity is doubled for the sensor (and the camera sensor only need half the light of the previous ISO to record the same image).

6400 ISO indoor photo. With modern cameras the ISO can go to 3200, 6400, 12,800 and even higher without loss of dynamic range and without digital noise. Leica M10 with Leica 50mm Noctilux-M ASPH f/0.95. © 2017 Thorsten Overgaard.
JPEG = A standard for picture format made in the 1990's by Joint Photographic Experts Group). Mostly referred to as JPG as in L1003455.JPG which would be the name for a JPG file from the camera.
Leica = A compound word derived from " (Lei)tz" and "(ca)mera". Apparently they were originally going to use "LECA", but another camera company already used a similar name in France, so they inserted the 'i' to prevent any confusion.
Lens - A piece of glass or similarly transparent material (like water or plastic). It has a shape so that it can direct light rays. The word “Lens” is used both for single piece of glass as well as a camera lens with several lenses that works together. From ‘lentil’ because similar in shape.
Lens hood = (also called a Lens shade). A tube or ring attached to the front of a camera lens to prevent unwanted light from reaching the lens and sensor. In the past where lenses were not coated to prevent internal reflections inside the lens, the lens hood was often essential. These days where lenses are coated, the shade serves just as much as decoration and protection (bumper) as well.
ORIGIN Old English hod; related to Dutch hoed, German Hut 'hat,' also to hat.
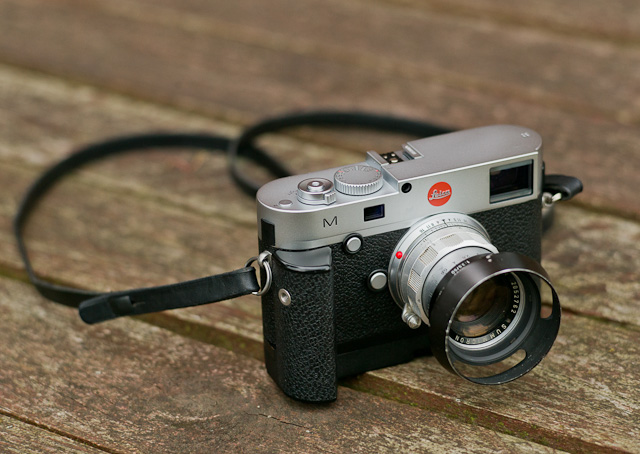
Lens hood or Lens shade attached to the front of the lens to prevent light rays from the side to hit the optics, which could introduce unwanted light and hence reduce contrast of the image. These days where lenses are coated, the shade serves as decoration and protection as well.
| |
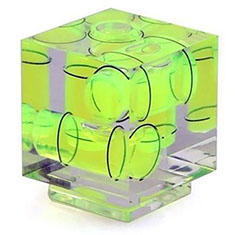 |
| |
Bubble Level Gauge to mount onto the flash shoe. |
| |
|
Level Gauge = This is a tool in the viewfinder to see if you hold the camera 100% horizontal and/or vertical. You can turn it on in the Menu > Photo Live View Setup > Level Gauge > On.
Before level gauge was integrated as a digitized feature in modern digital camers, it was a Bubble Level Gauge / Spirit Level you put on top of the camera.
The idea is to be able to get 100% vertical and horizontal lines (because if you tilt the camera slightly, the horizon will not be horizontal, and of you tilt the camera forward or backwards, the lines of for example vertical buildings will not be vertical.
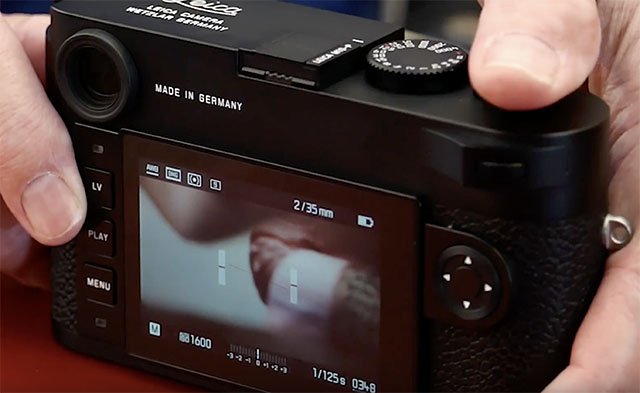 Digitized level gauge in a Leica M10-P. You tilt the camera up and down (front/back and left/right) till the level is completely straight. Digitized level gauge in a Leica M10-P. You tilt the camera up and down (front/back and left/right) till the level is completely straight.
Light = Tiny particles called photons that behaves like both waves and particles. Light makes objects visible by reflecting off of them, and in photography that reflecting off of subjects is what creates textures, shapes, colors and luminance. Light in its natural form (emanating from the sun) also gives life to plants and living things, and makes (most) people happier. So far, nobody has been able to determine exactly what light is. The word photography means “writing with light” (photo = light, -graphy = writing). Read more about light in my book Finding the Magic of Light.
Leica Thread-Mount (LTM): Also known as M39, is the screw mounted lenses for Leica cameras. It’s a simple as that; you screw on the lens, and back in 1932, the possibility to change the lens was the big news. The M39 system was updated with the M Bayonet from 1954 for the Leica M3. The M bayonet is a quick way to change lenses and is the current mount for Leica M digital rangefinders.
M (as in "M3", "M6", "M7" etc.)
A) The M originally stands for "Messsucher", which is German "Meßsucher" for "Rangefinder". The "3" in M3 was chosen because of the three bright line finders for the 50, 90 and 135 mm lenses. Later the numbers of the M cameras were more or less chosen to follow each other.
M-body evolution in chronologic order:
M3 - MP - M2 - M1 - MD - MDA - M4 - M5 - CL - MD-2 - M4-2 - M4-P - M6 - M6 TTL - M7 - MP - M8 - M8.2 - M9 - M9-P - MM (black and white sensor) - ME (Type 220) - Leica M (Type 240) - Leica M-P 240 - Leica M 246 Monochrom - Leica M-A (type 127, film camera) - Leica M 262 - Leica M-D 262 (without a screen) - Leica M10 - Leica M10-P.
B) M also refer to M-mount as the M bayonet that couple the Leica M lenses to the Leica M camera. Before the M bayonet the coupling between the camera and lens was screwmount.
C)
M nowadays refer to the Leica M line of cameras rather than the "Messsucher".
M9
Leica M9 is a model name for the Leica M9 that was introduced on September 9, 2009 (as the first full-frame digital Leica M). It was the latest model designation using the M and a number. From their next model, Leica Camera AG introduced a new model system so each camera would simply be a Leica M but then with a model designation like Typ 240, Typ 246, Typ M-D 262 and so on. The idea was inspired from Apple who name their computers for example MacBook Pro and then it has a sub- model number designation which model it is (and which would define speed of processor, etc).
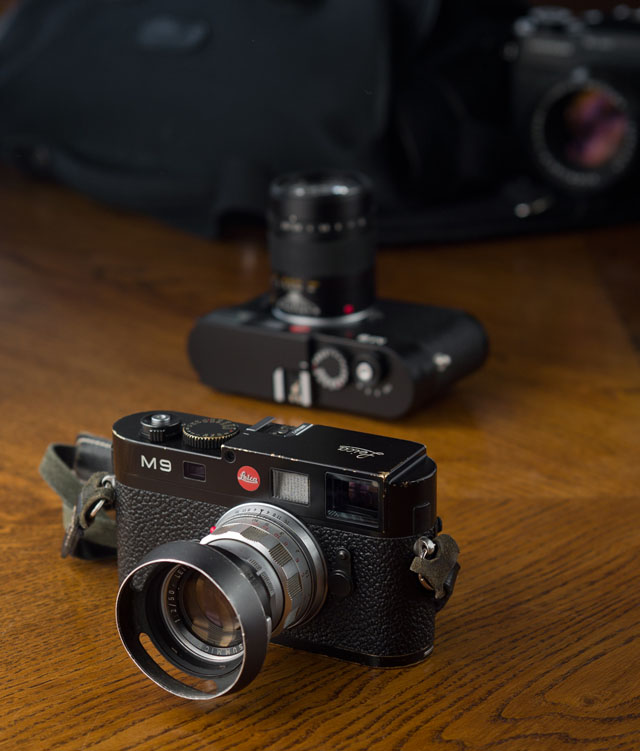
Leica M9
Mandler, Dr. Walter (1922 - 2005)
Legendary Leica lens designer and CEO of Ernst Leitz Canada (ELCAN) 1952-1985. Read more in Leica History.
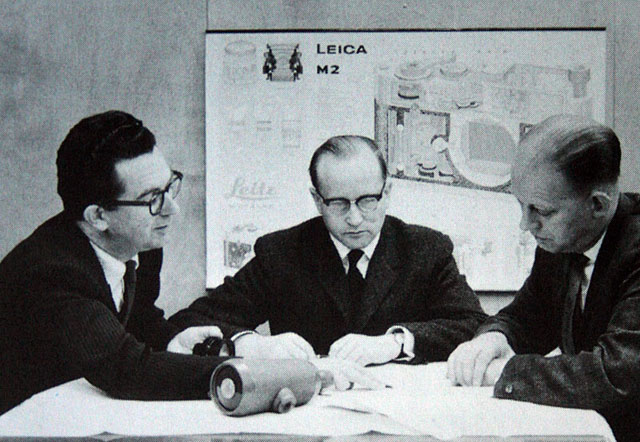
Dr. Walter Mandler (center) at the Ernst Leitz Camera factory.
Megapixel (or MP) - Millions of pixels. See pixel further down. How many units of RGB is recorded by a given sensor by taking height x widt. A Leica M10 delivers a 5952 x 3968 pixel file = 23,617,536 piexls. On a screen the resolution you choose determines the size of the image. Say you have a 5000 pixel wide file and your screen is set for 8000 pixels wide. Then the image will fill only the 5000 pixels fo the 8000 and the rest will be empty, If you then change the screen resolution to 5000 wide, the image would be able to fill out the whole screen.
Meßsucher = (rangefinder or distance finder) = Mess = range, sucher = finder. It is always correctly written with the "ß". There are technically not three "s", rather the "ß" and one "s" because it is a word constructed by the combining of two precise words.
MF (Medium Format), as in the Leica S System.
MF (Manual Focus) for lenses that are focused by hands, as opposed to Auto Focus.
mm = millimeter(s), as in a 50mm lens. (Earlier in lens history lenses focal length was given in cm = centimeters; as in a 5 cm lens). For anyone used to centimeters and millimeters, it’s no wonder. But if you grew up with inches, feet and yards, you may have had a hard time grasping what a 50mm lens was. But as lenses were designed first in Europe, the metric system with centimeters and millimeters was used to describe lenses.
The reason a 50mm lens is a 50mm lens is that there is 50mm from the focus plane (the film or sensor) to the center of focus inside the lens. When photography was a young subject, it was engineers who made it all, and the users were expected to understand. The engineers were so into the making of the lenses, that it apparently never dawned upon them that today’s users would think of a 21mm lens as a wide angle lens rather than a lens where there is 21mm from the sensor to the center of focus inside the optics.
MP
a) Stands for Mechanical Perfection, as in the Leica M-P.
b) Megapixels (millions of pixels).
c) Megaphotosites (millions of photosites).
ND
Neutral Density filters are grey filters function as 'sunglasses' for lenses. They simply block the light so that a lens can work at for example f/0.95 or f/2.0 in sunshine.
If a camera is set to 200 ISO and the maximum shutter speed is 1/4.000, this will usually result that the lens has to be at f/2.8 or smaller aperture in sunshine. Else the image will over-exposed. So in order til stay within the maximum shutter speed of 1/4.000 and still use a lightstrong lens wide open, one mount a ND-filter that reduce the light with 3 stops (8X) or 6 stops (64x).
For video ND-filters are used quite a lot (as the shutter speed for video is 1/60), and ND-filters are also used to reduce the light for really long multi-exposures at night (stop-motion video and stills).
ND-filters also exist as variable ND-filters so one can adjust the amount of light going through from for example 1 stop (2X) to 6 stops (64X).
ND-filters also exist as graduated ND-filters where the top of the filter is dark and then gradually tone over in no filter (so as to reduce the skylight in a landscape for example).
The ND filters are called Neutral because it is a neutral filter. It doesn't change colors, only the amount of light.
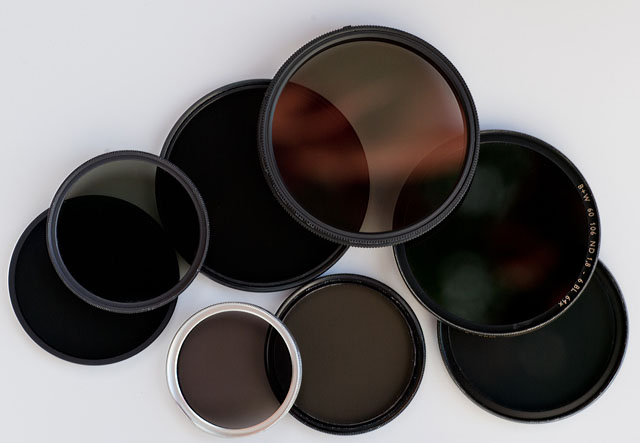
ND-filters / gray-filters.
"Niner"
The nick-name for the 90mm f/2.5 Leica lens in the 30's when it first came out.
Noctilux = Also known as "King of the Night" because "Nocti" means Night and "Lux" means Light. The f/1.0 lenes from Leica are named "Noctilux". The first Leica Noctilux lens was the 50mm Noctilux f/1.2 which shortly after it's introduction was improved to the 50mm Noctilux f/1.0. In the current model the f-stop has been improved further to f/0.95.
"Noctilux" refers to the maximum lens aperture - here f1.0 . "Nocti" for nocturnal (occurring or happening at night; ORIGIN late 15th cent.: from late Latin nocturnalis, from Latin nocturnus ‘of the night,’ from nox, noct- ‘night.), "lux" for light. The Leica Noctilux 50mm f1.0 is famous for enabling the photographer to take photos even there is only candleligts to lit the scene. See the article "Noctilux - King of the Night"

The Noctilux "King of the Night" lens. From left the f/0.95 in silver (same on the camera, in black), the f/1.0 in the back and the rare and expensive first model, the f/1.2 in the front.
No.
Number, on this site Leica catalog numbers or order numbers. Some the numbers changed depending on the number of cams in the lens: The Elmarit-R f2.8/135mm started life as No. 11 111, however when fitted with 2 cams for the SL became No. 11 211, yet another No. for the 3 cams lens and a fourth number for 3 cam only at the end of its life. Number changes also applied to M lenses depending on whether they were screw-thread, bayonet or for M3 with “spectacles”. Thus the No. in the Thorsten Overgaard Leica Lens Compendium list is a guideline but not a comlete list of existing catalog numbers.
Optic = Eye or vision. From French optique or medieval Latin opticus, from Greek optikos, from optos ‘seen.’
Perspective = The way objects appear to the eye; their relative position and distance. Also, selective focus (foreground and background out of focus) can change the perception of perspective (also see Three-dimensional). A wide angle "widens" the perspective and makes objects further away appear smaller than they are to the eye; and objects closer, relatively larger than they are to the eye. A tele lens will "flatten" the perspective and often objects further away will appear relatively larger than close objects than they are in real life. A 50mm lens is the one closest to the perspective and enlargement ratio of the human eye.
The word Perspective comes from the latin word for optics (perspicere, per- ‘through’ + specere ‘to look’), and so-called Renaissance painting is simply painting done within the framework of optics and the linear perspective it presents.
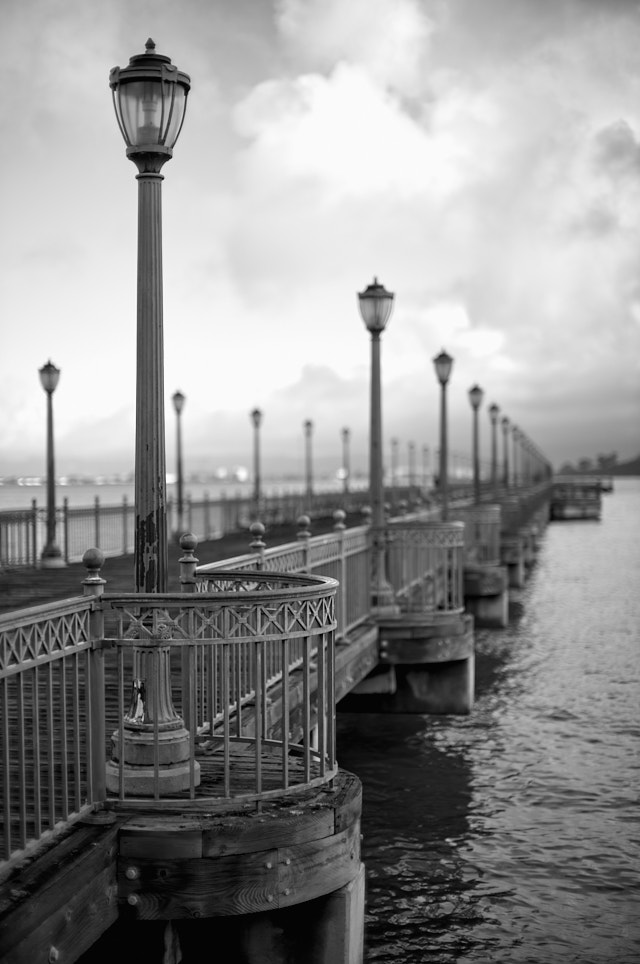
Perspective is relative position and distance. The objects nearby are larger than objects far away. This is how the eye and the mind calculate distance. The eye and the camera automatically captures perspective. In darwing and painting one would see "stupid" two-dimensional drawings 500 years B.C where elements were thrown into the mix without considering that a an object far away must be smaller than if close to the viewer. The word "perspective" comes from "to look through (optics)". Pier 7 in San Francisco by Thorsten Overgaard. Leica M11 with Leica 50mm Noctilux-M ASPH f/0.95.
| |
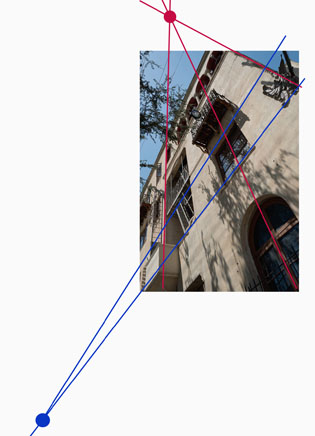 |
| |
Vanishing points are the points where lines meet. This is how you make perspective in paintings and drawings (and some times make movie sets or theatre stages appear more three-dimensional than they are) |
| |
|
Painters works with vanishing points, which is where the lines meet, so as to create an illusion of perspective and three-dimensional effect on a two-dimensional painting or drawing.
The human eye corrects for perspective to an extreme degree. We always see vertical lines vertical and horisontal lines horisontal: The eye has a angle of view equivalent to an 8mm wide angle lens, a size ratio equivalent to a 50mm lens and we focus on relatively small area of the viewing field - one at the time. Three things happens that are worth paying attention to:
1) We compile areas of our view that we focus on, to one conceptual image that "we see". Ansel Adams, the great American landscape photographer pointed out that a large camera used for landscape photography capture every detail in focus and sharp so you can view it in detail after; but the eye does not see everything in focus when you try to compose the landscape photography, the eye scans only one part at a time and stitch the idea together. This makes composing or prevision of a landscape photography challenging.
2) We compile areas of our view that we individually adjust the exposure of. A camera adjust the exposure of the whole image frame to one exposure. That's why what looks like a nice picture to the eye of houses in sunshine with a blue sky above, becomes a photograph of darker buildings with a bright white sky: The camera simply can't take one picture that compare to what we "compiled" with our eyes, adjusting for each type of light.
3) Objects (on a table, for example) in the bottom of our viewing field will appear 100% perspective corrected - to a degree that it is impossible to correct in optics, with or without software correction. A wide angle lens, even with little distortion, will exaggerate the proportions of the closet part so it - to the eye - looks wrong.
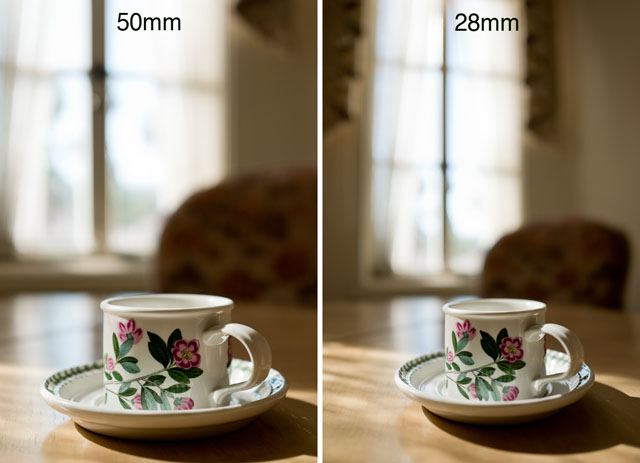
Perspective distortion: Comparing these two photographs you can see how the cup stretches in the 28mm wide angle photograph compared to the 50mm photograph. Both actually has a little stretch because both the cup is in the edge of the frame in both photographs. © Thorsten Overgaard.
Perspective correction - In software like Adobe Lightroom and Capture One Pro there is often a feature to correct perspective (and distortion) like seen below. You can change perspective this way, or at least make believe: If you correct a tall building on teh vertical lines, you will notice that the height of the windows doesn't match the perspective. If the building is with straight lines, the windows should all be of the same size. But a tall building seen from below and corrected with software will have taller windows (closer to camera) in the bottom than in the top (further away from the camera originally).
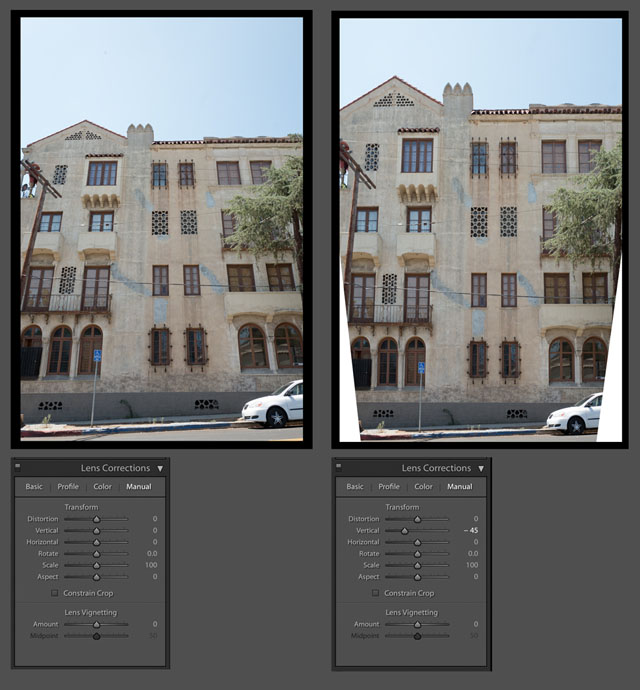
Perspective correction in Adobe Lightroom. © 2017 Thorsten Overgaard.
| |
 |
| |
A graphic illustration of the typical Bayer Color Filter Array on an RGB sensor. It's called a Bayer filter because Bryce Bayer of Eastman Kodak invented the technology of filtering incoming light into RGB and distribute it into the the photosites that each read just one color (R/G/G/B). |
| |
|
Photosite - The unit in a digital camera sensor that records intensity of either red, green or blue. Unlike the output of a sensor, measured in pixels (and where each pixel contains RGB), the photosite records only one color each, and it's intensity (how bright it is). A photosite can not distinguish colors, which is why there is a Color Filter Array (basically a prism) above them to filter the colors and send information to the photosite if 's a R, G og B color. See illustration below. In a monochrome sensor (as in the Leica M Monochrom and the Phase One Achromatic), all photosites are recording intensity of light only as there is no concern which color it is, and there is no color filter.
The ratio of photosites to pixels is not a given. Each block of 4 contiguous photosites contains one photosite sensitive to low wavelengths (blue), one photosite sensitive to high wavelengths (red), and two identical photosites sensitive to medium wavelengths (green). So four photosites would be the minimum to create one 'full-color' pixel. Apart from that, depends on the sensor specifications, which is different from brand to brand. Sometimes four photosites (two Green, one Red and one Blue) makes up one pixel, at other times it's more photosites to one pixel; and there is also pixels sampled from photosites across (sort of overlapping patterns).
Pixel - Made up word from Pix (picture) and el (element). A pixel is the smallest full-color (RGB) element in a digital imaging device. The physical size of a pixel depends on how you've set the resolution for the display screen. The color and tonal intensity of a pixel are variable, meaning that each pixel contains RGB. This is different from a camera sensor's small eyes (photosite) that are an intensity of either red, green or blue. You could say that the digital sensor's photosite (where each unit collects just one color; red, green or blue) is the input technology, whereas the pixels on a screen (where each pixel contains red, green and blue) is the output device. So while sensors are measured in megapixels (mega = million), it's their output unit of pixels, and not the input unit of photosites that is measured and stated. See illustration below.
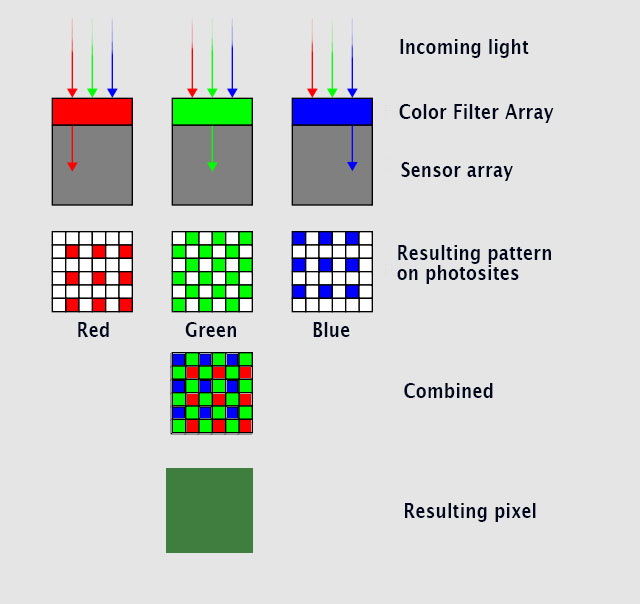
Here's an illustration of how light goes through a color filter that enables the underlying photosites to each record if it';s an R, G or B color - combined - makes up one pixel containing RGB. © Thorsten Overgaard.
RF
(R)ange (F)inder - the mechano-optical mechanism which allows M Leicas to focus.
Alternative meaning - RF is also shorthand for Hexar RF , Konica's motorised "M-lens-compatible" rangefinder camera released in 2000.
S = Single image. When the ring by the shutter release on top of the camera (or in the menu of a digital camera in case it does not have this ring on the ourside) is moved from OFF to S, the camera takes only one photo at the time (Single). The other possibility is Continuous where the camera takes pictures continiously as long as the shutter release button is helt down. (see above).
Saturation: How colorful, intense or pure the color is. Less saturation would be less colorful, more saturation would be more colorful. In today’s photography, de-saturating a photo on the computer will gradually make it less and less colorful; and full de-saturation would make it into a black and white photo.
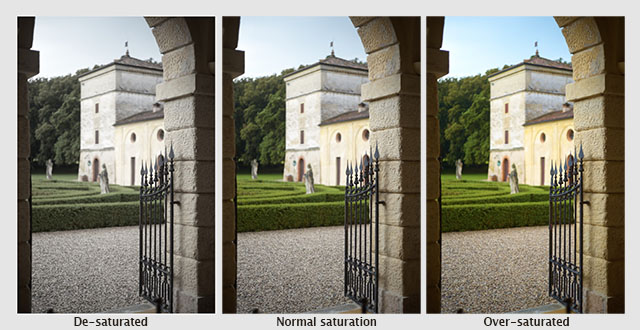
A photo from Verona, Italy de-saturated, normal saturated and over-saturated. © Thorsten Overgaard.
Sensor = A device that detects a physical property (like light) and records it. A camera sensor is a plane plate with thousands of small “eyes” with (photosites) a lens in front of each (CFA, Color Filter Array), which each individually records the amount of red, green and blue light rays that comes through the lens. Together, Red, Green and Blue form all colors of the spectrum, which becomes a pixel. Sensor comes from Latin sens- ‘perceived’.
SDC = Software Distortion Correction. A correction of lens distortion (not straight lines) applied in the camera and which is part of the DNG or RAW file. In Lightroom or Capture One Pro the SDC of the camera file is applied automatically (and cannot be removed), in software like AccuRaw one can open the DNG file without the SDC correction. Sean Reid Reviews have written a good article on what SDC is and does in "Software Distortion Correction".
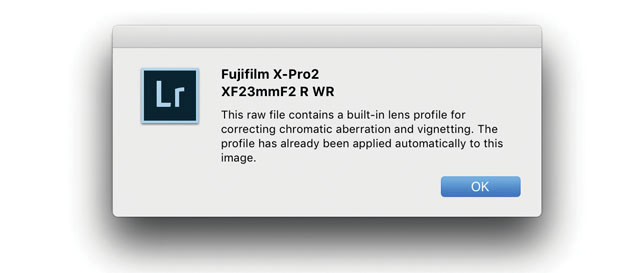
SDC (Software Distortion Correction): In Lightroom the correction profile for the Fujinon 23mm is applied automatically and cannot be turned off. If you go into Develop mode in Lightroom and look under Lens Correction > Profile, you will see a message in the bottom with an exclamation mark. When you click on that, you get the message above.
Sharpness - See “Focus”
Shutter speed dial - The dial on top of the Leica M where you can set the shutter speed manually. It can also be set to A which stands for Aperture Priority (where the camera suggests a shutter speed; or when you move the dial away from A, the camera will show arrows in the viewfinder, suggesting which direction to change the Aperture to, to get the correct exposure).
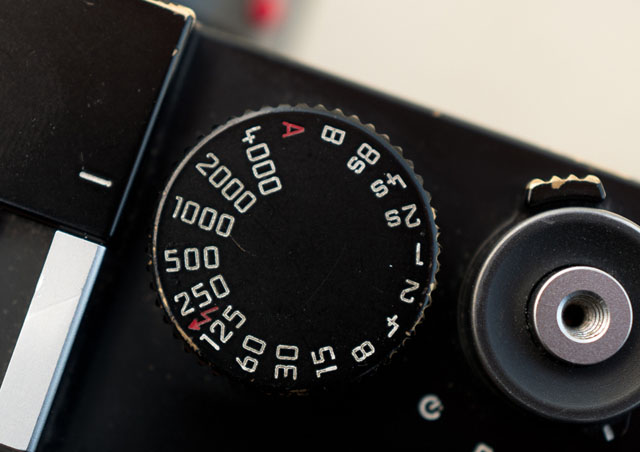
Shutter speed dial set to 1/1000 of a second.
SLR = Abbreviation for Single-Lens Reflex; the lens that forms the image on the film/sensor also provides the image in the viewfinder via a mirror. Newer camera models has aen EVF (Electronic Viewfinder) that displays in the viewfinder what the sensor sees in real-time.
| |
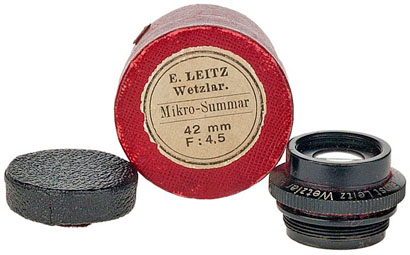 |
| |
Leitz Wetzlar Mikro-Summar 42mm f/4.5 lens anno 1910 might be the first lens carrying the name Summar. |
Summar - (or a story of name development)
The 1933 lens 50mm f2.0 Summar: It started out as Summar(f2.0), then the Summitar (f2.0 in 1939), then the Summarex(f1.5 in 1948), then the Summaron(35mm f.2.8 in 1948, then later f2.0, f3.5 and f5.6 lenses), then the Summarit (f1.5 in 1949 and used again for the 40mm f2.4 on the Leica Minilux in 1995, then again for the 35mm, 50mm, 75mm and 90mm Summarit f2.5 in 2007) then the Summicron(f2.0 in 1953 for the collabsible 50mm) and finally the Summilux(50mm f1.4 in 1959).
ORIGIN of Summar is unknown.
Summarex
The great thing about being a lens designer is that you get to name the lens. Dr. Max Berek who worked for Leitz from 1912 till his death in 1949 named lenses after his two favorite dogs. One was Sumamrex named after his dog Rex, the other Hektor named after his dog Hektor.
Summarit
Refers to the maximum lens aperture - here f/1.5.
Summicron = Refers to the maximum lens aperture - here f/2.0 . There are many guesses how this name came about, a popular one being that the "summi" came from "summit" (summit means the highest point of a hill or mountain; the highest attainable level of achievement) while the "cron" came from "chroma" (ie. for colour). Not so: The name (Summi)cron was used because the lens used Crown glass for the first time, which Leitz bought from Chance Brothers in England. The first batch of lenses were named Summikron (Crown = Krone in Deutsch). The Summi(cron) is a development from the orignal Summar (the 50mm f2.0 lens anno 1933). Vario-Summicron, Vario-Elmarit is Leica Camera AG's name for zoom lenses, for example the Vario-Summicron f/2.0 as the one that is on the Leica Digilux 2.
Summilux = Refers to the maximum lens aperture - here f/1.4 , "-lux" added for "light" (ie. the enhanced light gathering abilities). In Leica terminology a Summilux is always a f/1.4 lens and a Summicron is a f/2.0 lens.
Telyt
Lens nomenclature - short-hand for " telephoto " (tele- is a combining form, meaning to or at a distance) and used in names of instruments for operating over long distances : telemeter. The name has been used for a number of tele lenses from Leica.
ORIGIN: from Greek t?le- ‘far off.’
Televit
rapid-focus device from Leitz that was made from 1966 through 1973, in both R and VisoflexIt was originally designed for use with the 400mm f5.6 Telyt and 560mm f5.6 Telyt. Beginning in 1970 (with serial 2340953) the Televit could also be used with the 280mm f4.8 Telyt-V by using adapter 14138.
Thambar
Leitz Thambar 90mm f.2.2. At most about 3000 were made, probably in eight batches, starting with 226xxx (actually built in 1934) and going through 283xxx, 311xxx, 375xxx, 416xxx, 472xxx, 511xxx, and 540xxx (about 1939/1940).
Today they are staggeringly rare and extremely expensive: you would be lucky to get away with much less than $1500 for the lens without accessories (center spot, shade, cap), and you could easily pay twice that for a good, complete example with clean glass.
Known to be a legendary soft-focus portrait lens that 'make a woman look 10 years younger.' A glass filter with a black spot in the middle, about 13mm (1/2”) in diameter cuts out the central (sharpest) part of the image and makes everything even softer.
(Source: Roger W. Hicks)
Here are some advice from a Thambar user, Theodor Heinrichsohn, who have used it mainly for portraits using an Leica M5 and Leica M6:
1. The results are more or less unpredictable. Best practice is to shoot many times and pick the one you like best.
2. Shots against the light are generally more effective than with the light behind you.
3. The most pleasing results to my taste were with center filter at medium apertures. With luck portraits took on the "dreamy" look that the lens is famous for.
4. I never used the Thambar for anything except portraits.
The lens has been rumored to be slightly radioactive due to the process of producing the glass.
Here are some sample photos of Koichiro Itamura Photography.
Here are some more sample images from Blue Penguin.
Origin of the name is currently unknown. Suggestions has been made that the name Thambar was derived from Greek, meaning “something that inspires wonder”. Also close to the English word Tamper (with) which is to meddle, damaging or altering something.
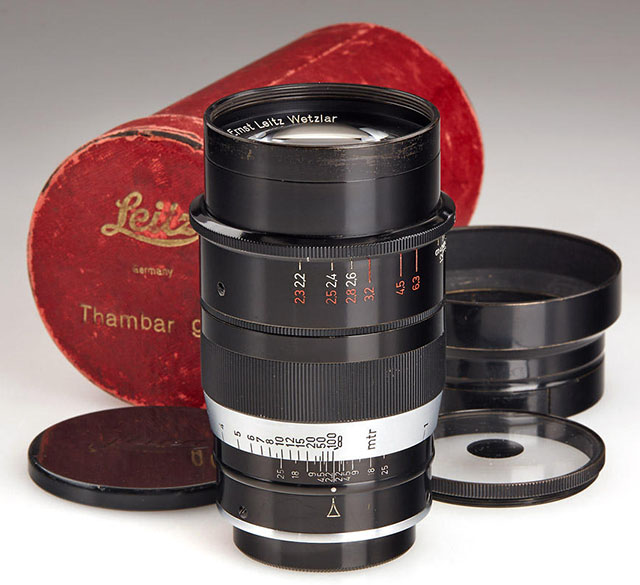
A complete set of a Leitz 90mm Thambar f/2.2 consist of the original red box, lens cap, lens shade and the special soft focus filter with a black dot in the middle. They exist in both a Meter and a Feet edition (the focusing scale). Only 3,500 or less were made from 1934-1940, from serial number 226001 to 540500. Read my article on Leica 90mm lenses.
Thick / Thin
The first 90mm Elmar that came out in 1930 was called "Thick" of "Fat" When the smaller Elmar came out in January 1933 it was called "Thin".
Three-dimensional = Having the three dimensions of height, width and depth. In photography and lens design, three-dimensional effect is also the perception of even small micro-details; the texture of skin can appear flat and dead or three-dimensional and alive. Also, selective focus (foreground and background out of focus) can change the perception of depth. Also see Perspective.
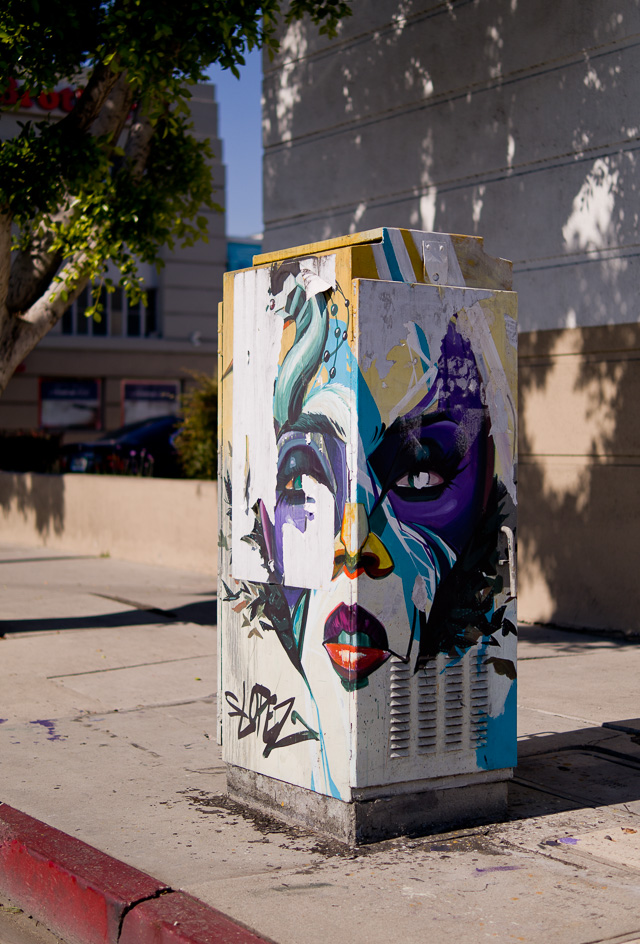
Three-dimensional = Having the three dimensions of height, width and depth. Melrose Avenue in Los Angeles. Leica TL2 with Leica 35mm Summilux-TL ASPH f/1.4. © 2017 Thorsten Overgaard.
Ventilated Shade - A shade is a hood in front of a lens that provides shade from light going straight onto the lens from outside what you are photographing, which could cause internal reflections like flare, which would make the picture less contrasty.
The ventilated shade has holes so it doesn't obstructs the view from the viewfinder. In many of today’s mirrorless cameras where there is no viewfinder looking ver the lens, so there is no actual need for a ventilated shade; but they are considered classic or vintage looking and are still in high demand. It makes no difference for the purpose of the shade (to create shadow) if it is ventilated or not.
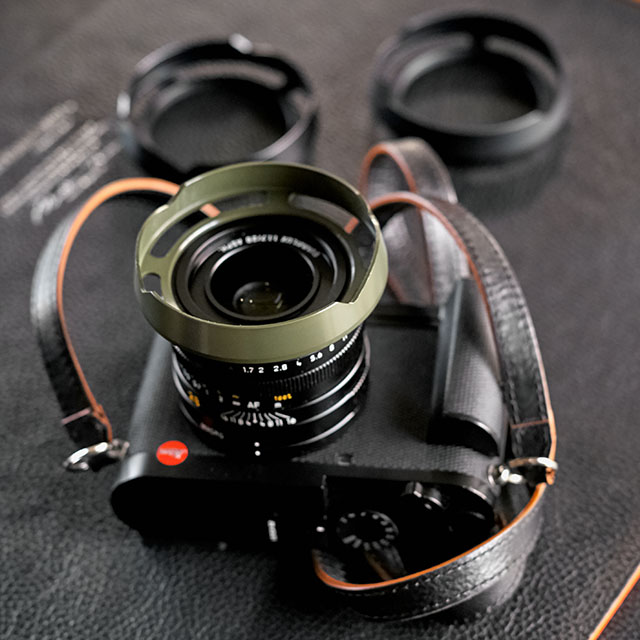
Ventilated Shade for the Leica Q. I make ventilated shades for most lenses and sell them from here.
Viewfinder a device on a camera showing the field of view of the lens. Also known as the German word "Messucher" (or Meßsucher).
1) A built-in viewfinder in a camera that simply show the frame you get when you look through the viewfinder.
2) A rangefinder viewfinder which is also used to focus the lens. In Leica M cameras two pictures has to meet and lay 'on top of each other' for the picture to be in focus.
3) An external viewfinder, usually on top of the camera in the flash shoe, so as to show the field of view of lenses vider than what the built-in viewfinder can show (15mm, 21mm, 24mm, 28mm etc viewfinders exist)
4) Very simple "aiming-devices" on top of a camera that is simply a metal frame without any optics. Just a frame, as for example very old cameras (the original Leica), or when using cameras in diving where you can't look through the camera.
5) A Electronic Viewfinder (EVF) that shows what the sensor sees "live".
Visoflex
A device mounted between the Leica M camera and a lens, containing a mirror mechanism like in a SLR camera, thus allowing the M user to 'preview' a picture using a tele lens larger than 135mm which is the maximum covered by the framelines in the Leica viewfinder.
Ø - Diameter. As in Ø49 for example which means that the filter diameter is 49mm for this lens (or if a filter is Ø49, it is 49mm in diameter and fits that Ø49 lens). Leica uses E to express their filters sizes, as in E49 for a 49mm filter size.
Suggestions for further reading ...
Facebook Leica M Monochrom User Group
"Henri - The Leica M Monochrom" article by Jono Slack who - likewise as he did with the Leica M9 prototype back in 2009 - took the prototype Leica M Monochrom to China and made a beautiful simple article about his experiences. Jonathan Slack has also made some of his DNG files available.
Ming Thein does some very interesting reviews and have started a three-part of the "Leica M Monochrom review" on his blog.
White Smoke Studio blog with wedding photographs taken with the Leica M Monochrom
"Leica M Monochrom as a travel camera" by Jaap Vleeskruijer / Daniel Kestenholz (November 7, 2012)
Erwin Puts has made a very short and precise account of what kind of milestone the Leica M Monochrom and the accompanying new 50mm APO-Summicron-M ASPH f/2.0 lens is. His "Leica Monochrom" article is here
Also Sein Reid Reviews www.reidreviews.com have had the Leica M Monochrom prototype out for testing and have written a good review. This is for subscribers so you may want to subscribe (33$ per year).
David Farkas have done a review as well on the Red Dot Forum of the Leica M Monochrom. He has also done a ISO comparison between the Leica M9 and Leica M Monochrom.
Luminous Landscape also have tested the Leica M Prototype and have written about it here.
Steve Huff and guest readers also have written about the Leica M Monochrom.
The street photographer and blogger Eric Kim has written an article about Leica M Monochrom for street photography.
Finally, but not least, British based World Press winning photographer and Leica M9 shooter Edmond Terakopian have written the blog post "The King of the Tones?" with a short hands-on review.

The KLCC Tower in Kuala Lumpur, Malaysia. © Thorsten Overgaard, December 2012. Leica M Monochrom with Leica 50mm Noctilux-M ASPH f/0.95. 3200 ISO.
|