Using an external light meter for accurate, failproof metering
By: Thorsten Overgaard. September 3, 2012 (Updated October 30, 2015)
Add to Flipboard Magazine.
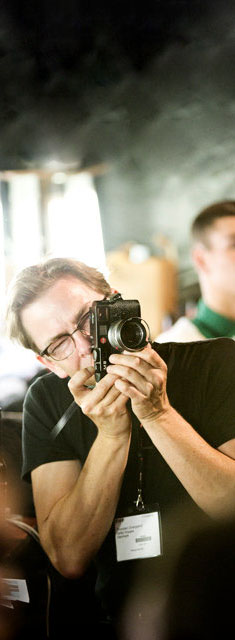
The advantage of using an external light meter is that you deal with an absolute reading of what light there is, not what the reflection is from some default background.
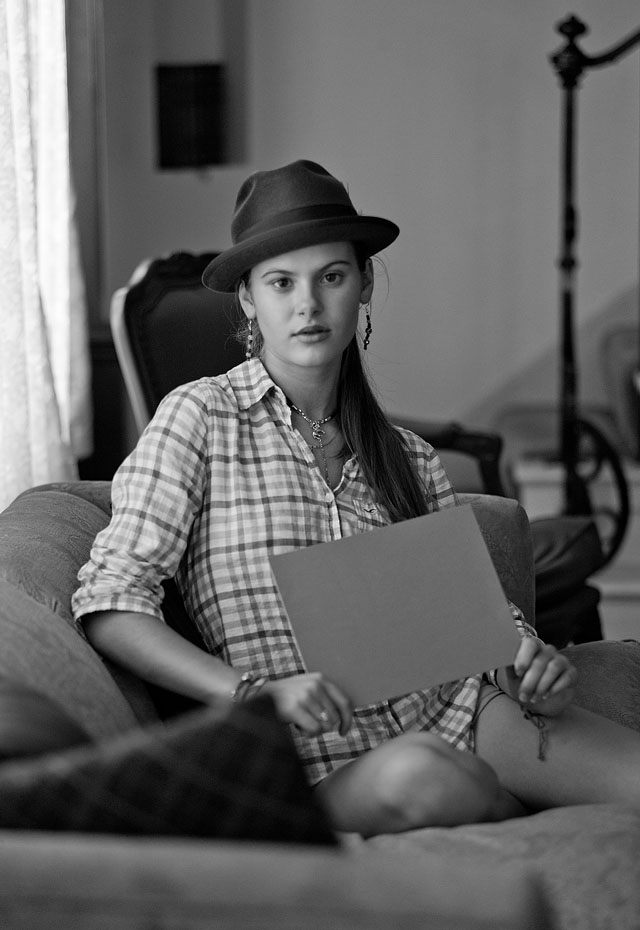
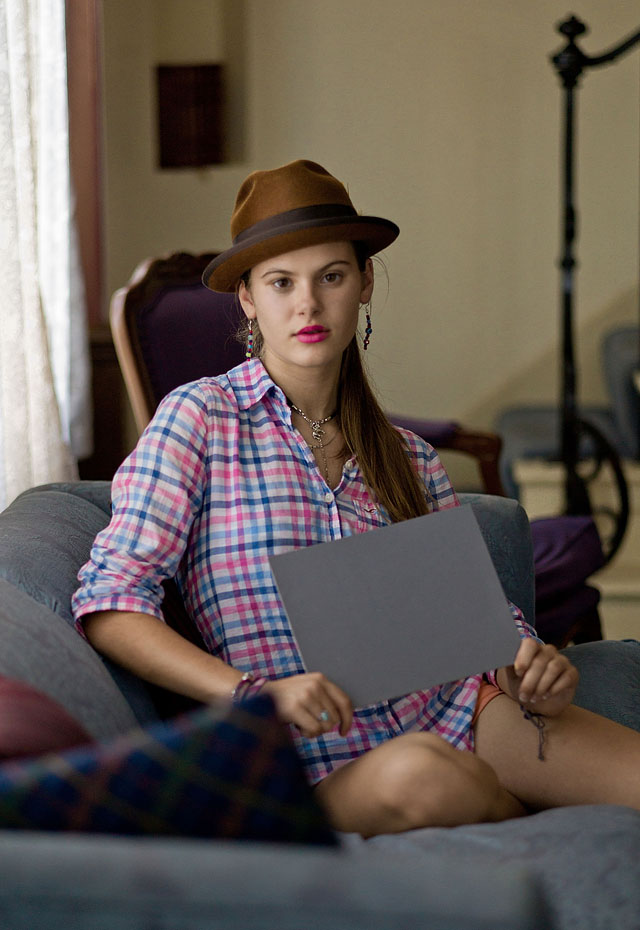
The light meter - here held in front of the grey card to illustrate this point; that it measures the light that hits the subject, not what reflects from it. So in a way, with the lightmeter you get that exact measurement of luminence (light) that is. And which would be the same as if you measured the reflection from a middle grey card in that same spot.
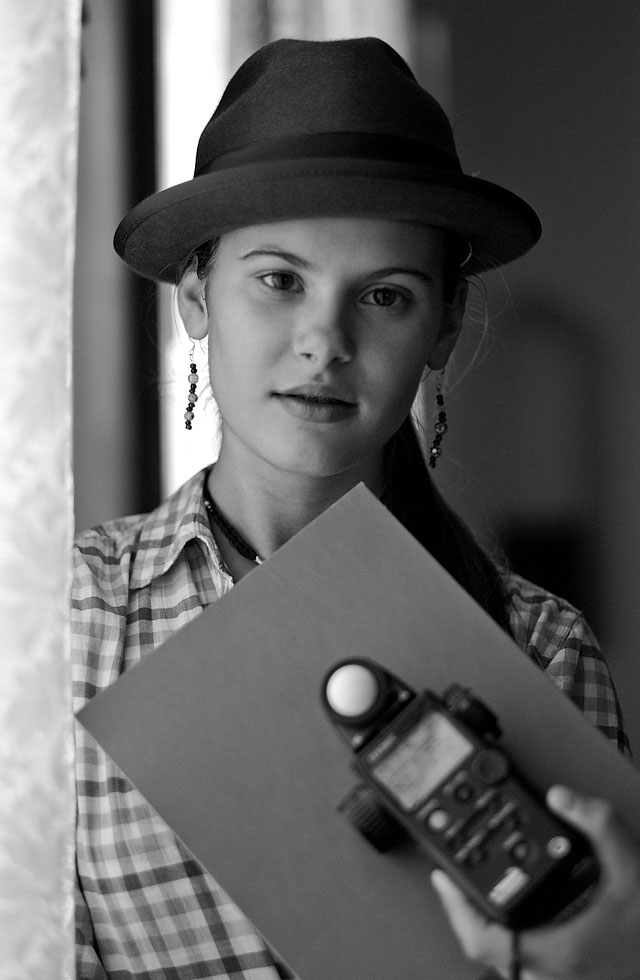
Important: If you look at the white bubble on the lightmeter you can see that it is held in an angle so the light and shadow on each side equals the light on the face (the window highlight to the left and the shadows from the room to the right).
It is an artistic decision where to hold the light meter, because if you tilt it a bit to the left in this picture it will pick up more light from the window and give a slightly darker exposure. If there is strong light coming in from the window that would be an idea as you then make sure the bright side of the face is correctly exposed, whereas the shadow side of course till be darker (as the whole exposure gets darker).
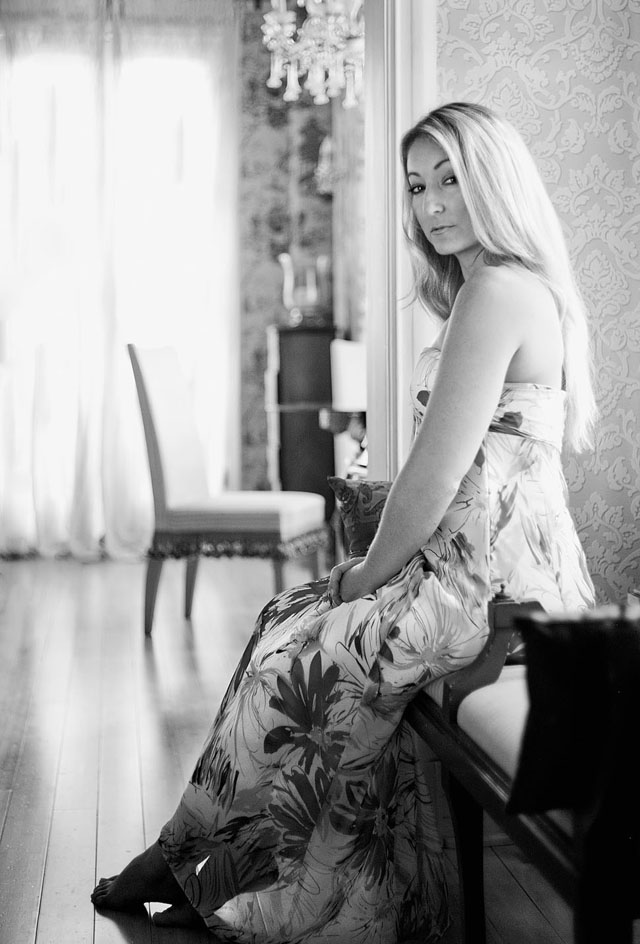
Los Angeles, August 2012. Leica M9 with Leica 50mm Summicron-M (Version II). Soft light from a window with a soft gold reflector on the left side of the model. Light metering to the bright side of the face.
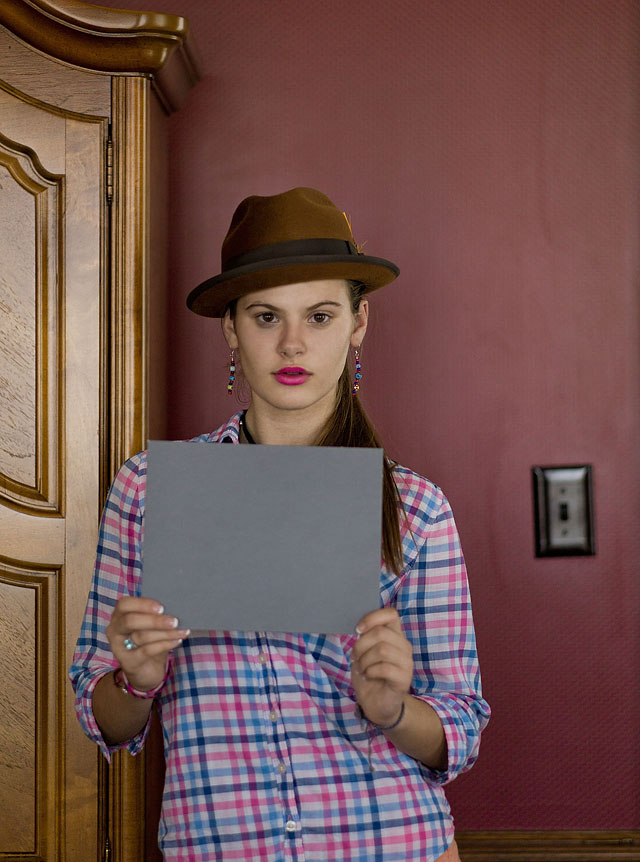
But the artistic decision that you can make is, "Do I want the bright side of the face to be correct skintones or do I want to let the skin overexpose so as to get more detail on the shadow side?". Or another possibility could be, "I will expose the skin tones on the bright side correctly, but open a door in the room or use a reflector so as to get a bit more light to hit the shadow side of the face and soften up the contrast." And in that artistic decision lies the answer to the so often asked question, "Why can't my automatic camera get it right every time?".
Because your camera is not an artist.
You are!
Read more about light metering in these articles:
- Page 17 : "Light metering with the Leica M9, Leica M9-P and Monochrom"
- Page 31 : "Learning the new Leica M Type 240 - Light metering in the Leica M 240"
Which traditional light meter to get..?
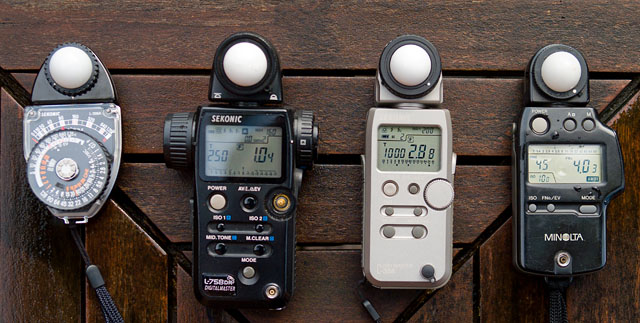
My collection of light meters or flashmeters. To the right "The Mother of Light Meters", the Minolta IVF (pronounced Minolta 4F) which is has the classic form, is compact and light. Simple to use, all buttons sit in the right places. Unfortunately the Minolta meter died when I had to glue the white plastic bubble onto it. I looked at getting a second-hand but they all seemed very expensive (like 350$ and Minolta had stopped producing them).
So my current is number two from left, the Sekonic L-758 DR with spot-meter built in for about 800$. It started falling apart a month after I got it. First the rubber on the eyepiece of the spot meter. Then the memory-button on the left side, and finally the wheel on the front where you set the exposure/f-stop/ISO. I am currently waiting for spare parts from Japan (if they would ever answer). $620.00.
The batteries goes from full for a long while, then to almost empty, and shortly after it's out. I recommend buying an handfull of spare batteries "CR123A" and have one or two handy in your bag at all times (once it goes low, yopu have two days left of usage).
The Sekonic L-758 DR is disciontinued as of 2017 and replaced withj he Sekonic L-858 DR with digital screen.
And whilst I do so I got the Sekonic L-358 (no 3 from left, whoch was $350 when still available) as spare meter that is more compact. I thought that would be my new preferred meter, being more compact and simpel, but it has several minus-points: The white text on it can't be read in most light conditions. The wheel has a communications-delay so it responds 10 seconds later. And somehow it jumps from 2.8 to 4.0 on the scale (which is annoying when you use a f/3.4 lens). this lightmeter is now out of production but still available from some stock, as well as second-hand.
The Sekonic
far left is the classic and beautiful Sekonic L-398 which works without battery. It comes with a warning not to use it nearby peacemakers because of the magnetic field in it. I saw it ... and had to have it. My original thought was that it would be nice to have a battery-less meter that is very compact. Unfortunately it is very heavy and as you can sense on the picture, compared to the others, the dial is very hard to read: Digital numbers are far easier and more precise to read (the Sekonic L-758 has light in the display when it gets dark).
My conclusion is that the Sekonic L-738 is the best of those meters, despite the bulky size and that it is falling apart (all Sekonic light meters are build as if they were not supposed to leave the studio). $200.00
I never liked the design of, hence never tried, Gossen or other light meters. My preference was the Minolta IVF because how easy and natural it works, so when I was looking for a replacement I was looking for what came closest to that. Some times I consider getting one of the used Minolta IVF Flashmeters that are on eBay and are usually sold for around 250$.
Another light meter that is compact and inexpensive is the Sekonic L-308S light meter. I have a lot of students who have that and are happy about it. It does the job, is compact and simple. I wouldn't use it because it can't be set to Aperture Priority (why you will have to measure the light and then use arrow up/down to find the aperture you are using. It can be done, but if you always shoot Aperture Priority ... don't get the L-308S). $194.00
The lightmeter I would recommend:
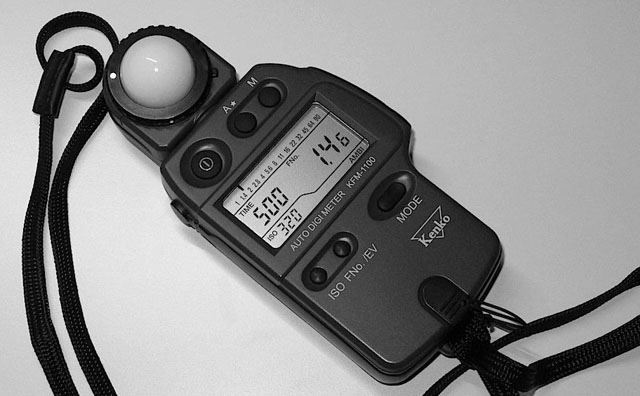
Another possibility I have tried but haven't bought myself yet, is the KENKO KFM-1100 which is a licenced copy of the Minolta IVF Flashmeter. It is selling for around $248 and is an exact, slightly updated copy of the Minolta IVF. Photo by Matthias Frei. This lightmeter is probably the one I would recommend to anyone looking for a simple lightmeter.
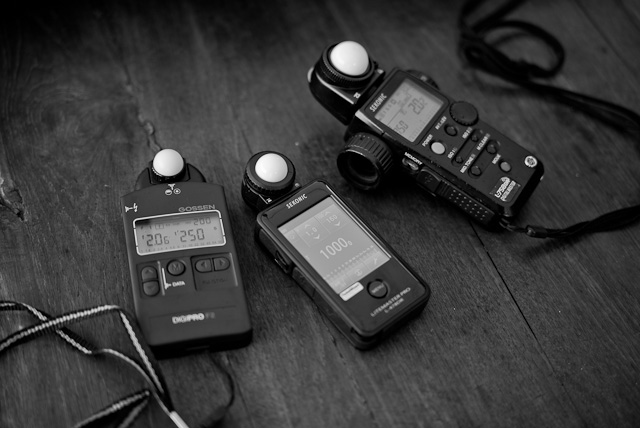
Lightmeter meetup in Paris. Gossen Digipro F2 ($325), Sekonic Litemaster Pro L-478DR ($385.00) and Sekonic L-758 DR ($620.00).
Making it simply work, the LUMU
Despite the fact that light metering is not exactly space technology, lightmeters tend to be too bulky and too complicated. The LUMU lightmeter changed this in 2013 when they came out with a simple to use, accurate and compact - perhaps even trendy - opackage that works with your iPhone. For a price of only $149 is is even less than most other lightmeters.
Unfortunately they kept complicating their App for the iPhone so I no longer can stand using it. I wrote to them, and they actually said (September 2015) that they would come out with a simple App again soon (as well aas color metering built-in).
One of the things that traditional lightmeters do to complicate things, is that they give aperture for example f/2.03. or f/8.04. Not only is it confusing, it is also not applicable on any lens to set the aperture to f/2.03.
The LUMU came out without these complications ... but then added them along with lots of other things. It's not that it doesn't work, it is just that I don't want to deal with a newly updated App every time I use a lightmeter. I want it to sit in the fingers and make sense. Simple and logic.
In the many talks about lightrmeters I have had with people, what I learned is simply that the best lightmeter is the one you are used to. Which is why I still use the biggest and most expensive I got. It doesn't read any different than any other lightmeters, but it's the one I am used to!
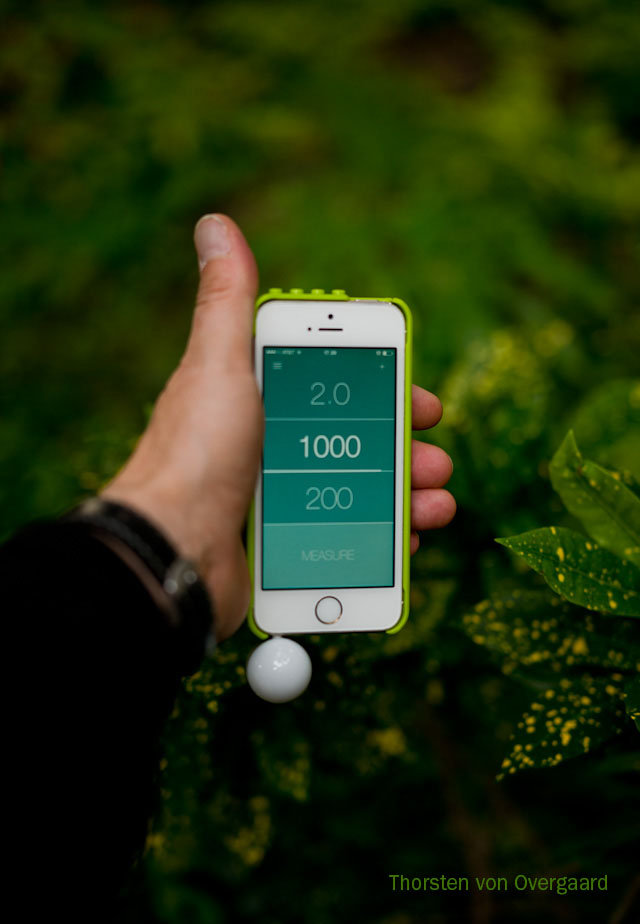
The new lightmeter for 2014 and forward, the LUMU. You press the parameter you want to measure, in the photo it is the exposure time. The 200 ISO and the f/2.0 doesn't change, only the shutter time. Nice.
Forget about aperture priority or shutter priority when you buy a lightmeter. In the LUMU app on the iPhone you simply lock the ISO and the aperture so as to only allow the lightmeter to figure out an exposure time.
Or you lock the exposure time and the aperture, letting the LUMU only give you the ISO. That's pretty bright, simple and as it should always have been.
It is compact to bring with you, provided you have an iPhone with you as well. Traditional lighmeters has the same size as a camera (at least if you are using a Leica M). The LUMU is the size of the cap of a water bottle.
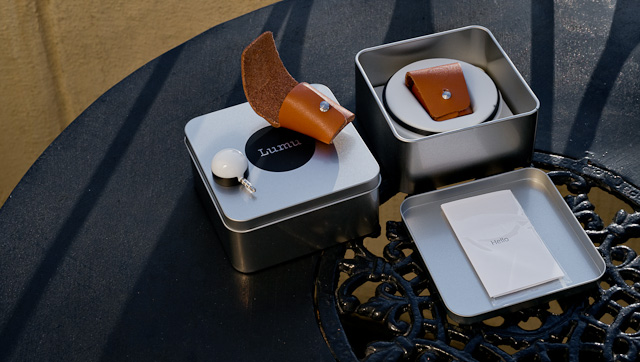
The LUMU comes in wither black or silver, in a well-designed package with a tiny manual,
and two ways of carrying the LUMU meter: Either around the neck in the Lumuneck strap or in a small leather pouch. Price is only $149 and is shipped internationally so it arrives in a few days.
Aperture Priotiry Mode - [F]
I would always use a lightmeter in Aperture Priority Mode which means that I set the f-stop to for example 2.0 as, then the ISO to for example 160 ISO, and then the meter tells me what the shutter time should be.
The reason I use this mode is that on the Leica M9 I use either ISO 160 (outdoor) or ISO 800 (indoor) (the Leica M Monochrom and the Leica M10 can go higher, so the indoor/evening ISO can be higher there; and the M Momochrom has a base ISO (natural sensor ISO) of 320 ISO why that would be your daylight/outdoor ISO).
| |
|
|
|
|
| |
Buy this New eBook by Thorsten Overgaard
|
|
| |
|
|
|
|
| |
 |
|
In this easy to read and apply eBook, Thorsten Overgaard takes you on a journey to see, understand and simply use light.
"One of the most important ways to get an aesthetic and pleasant picture is to find the good light."
"Finding the Magic of Light"
eBook for computer and iPad
Only $47


Order now - Instant delivery.
40 pages. Easy to use, lots to learn!
|
|
| |
|
|
|
|
Mainly the Aperture determines the look of the image, so that is the most important to me, and mostly I use f/1.4 on f/1.4 lenses, f/1.0 on f/1.0 lenses, f/2.0 on f/2.0 lenses, and so on. ISO is important to the light sensistivity, and secondly the noise and correct tones/colors. So that leaves the Shutter time as the least important in that sense that it doesnt change a portrait if shot at 1/125th of a second, or 1/4000th of a second.
Unfortunately, for the Sekonic L-758DR the Aperture Scale (as seen in the image to the right down below) can not be displayed in the Aperture Priority Mode where I would actually really need it, or at least see it as a welcome feature.

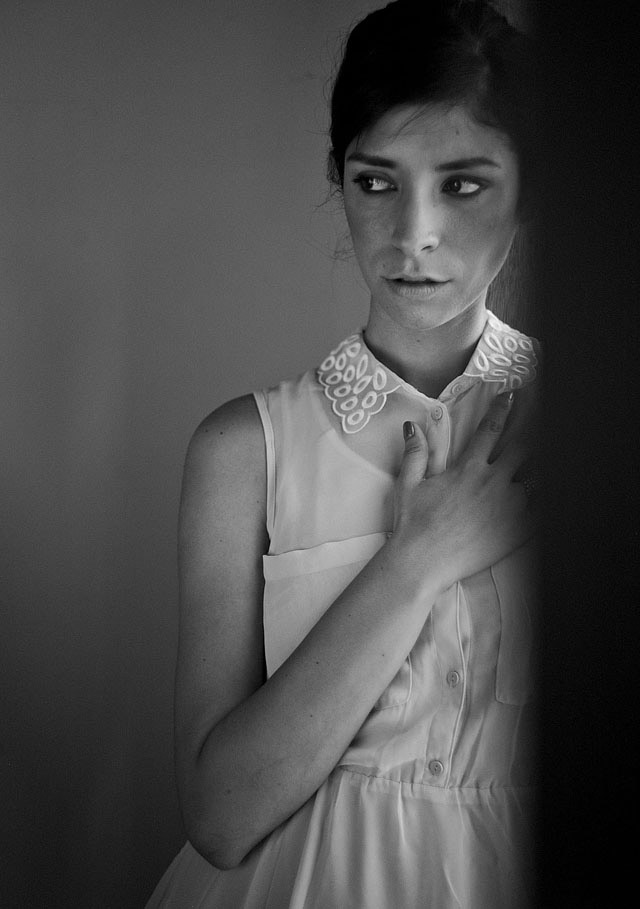
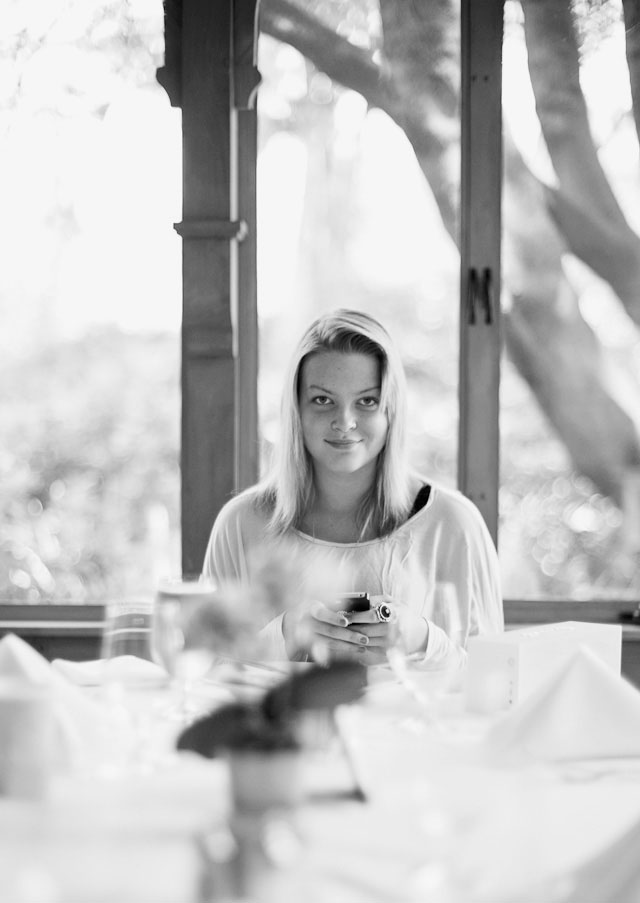
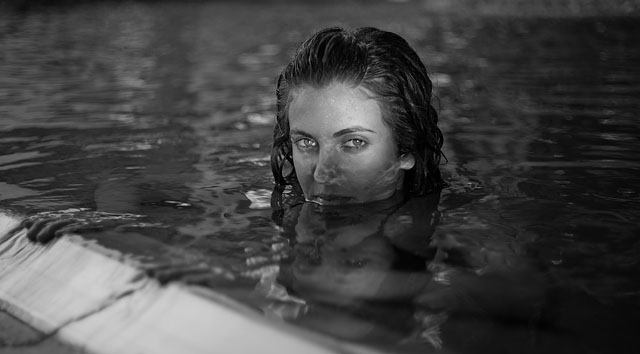
Leica M9 with Leica 50mm Noctilux-M f/1.0. External light meter to get the face and dress right (light measured on the model, inside the glass - see more on external light meter down the page).
Spare battery
A note on light meters: Always have a spare battery. They tend to go from having battery to not having. Just like that. And when you notice you are out of battery is when you use it! So always have a spare bettery because they don't have this special type in the local 7Eleven.
Display information
| |
Complication versus simplicity:
 |
| |
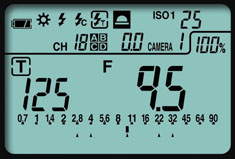
Sekonic L-758DR: Easy to see all you need in one display: ISO is set to 25, f-stop is f/9.5 (which is basically f/11) why the shutter time must be 1/125.
(The lightmerter is in T-mode, Shutter Priority Mode in this picture) |
| |
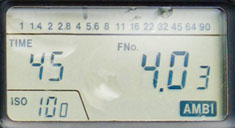
The Minolta IVF has all three informations, as well as a very useful aperture scale in top where it is shown what the F-stop must be - in this case f/4.0 and a half stop. And then not a lot of irrelevant information.
(The lightmeter is in F-mode, Aperture Priority Mode in this picture) |
One more important note on light meters: You have to have all three parameters on the display: ISO, Shutter time and f-stop. The Minolta has the whole f-stop lineup in the top with a small arrow pointing to the selected f-stop. That is very practical as the Sekonic meters show a big f/2.88 which basically means f/3.4. So you have to read not just the 2.8 but the 2.88. As your camera has f/2.8 and f/3.4 and f/4.0 and so on it is a great mysteryto me why Sekonic introduced the f/2.88..! It would be practical if the light meters used the same scale and terminology as cameras.
Aperture scale is helpful
The Minolta IVF has a very small scale in the top (see image to the right) where there is a mark for the shutter time. In the picture the shutter should be f/4 + 1/3 stop,or simply between f/4.0 and f/5.6. Which you can see on the f-stop scale.
Do I need a spot meter..?
No, you have very little use for a spot meter as it is just a limited reflective measurement of light against a middle grey surface. If you photograph mountains and want to measure the light on the mountain over there, yes, it would be nice to have a spot meter.
But ... the whole point in the above meters is the white bubble with which you measure how much light there is. Very simple and extremely accurate. Practical.
Most small digital cameras have a built-in spotmeter why this will work the same way. In fact you can download an app for your iPhone that will turn it into a reflective light meter; so you can go close to the middlegrey surface and measure.
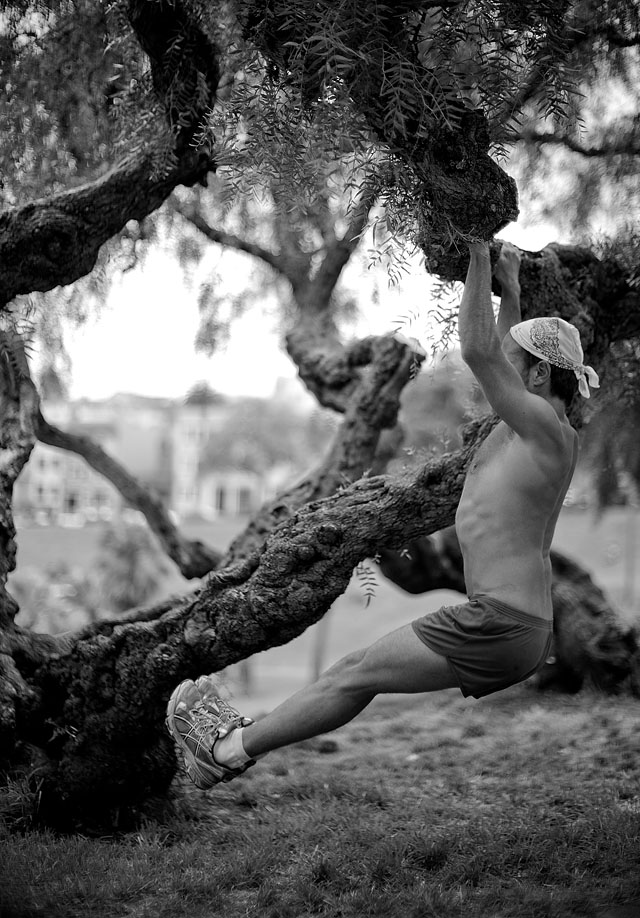
A fanatic runner performs a few athletic routines in a park in San Francisco. Leica M9 with Leica 50mm Noctilux-M f/1.0 and B+W 8X ND-filter.
Middlegrey is the basis of all light metering
The light meter in a camera is really not very intelligent. And that goes also for the so-called intelligent light metering methods where a camera measures a number of different points.
The light meter measures only luminence and never actually "look at pictures", so the light meter and the camera have absolutely no idea what is in front of the camera. You can point the camera towards a mountain or an airplane, or an elephant or Ford Mustang. The camera don't know the difference.
Reason is that the standard for light metering is a middle grey surface. No matter the size of the metering area, what the light meter calculates from, is the correct exposure of a middle grey surface, as if the target is a middle grey area.
A middle grey card as this was used in the past (not much more) to measure the light. That level of reflection is what the all light meters are tuned to measure from and the light meter in the camera has no idea what you are pointing your camera at. You rlight meter was made for parties with grey people only. So if everybody is wearing white or black, the exposure will be wrong.
If you put a middlegrey card as that in the scene and measure the reflections from that, your exposure will be perfect. Becasue then you are talking the same language as the light meter. However, we don't carry cards like that around anymore, so we have to find ways to get the correct exposure, also when the scenery is dark or bright.
For many types of subjects that is correct: A normal street photo in most places, with the sun behind you, or on a grey day, will be a mix of colors and contrasts that will be very close to middle grey.
Stand with the sun behind you and put your eyes out of focus, and what you will most often see, will be a mix that looks kind of middle grey. Hence that is the standard.
Trouble starts when you turn around and shoot against the light, or if what you are pointing you camera towards is actually a house painted in dark colors.
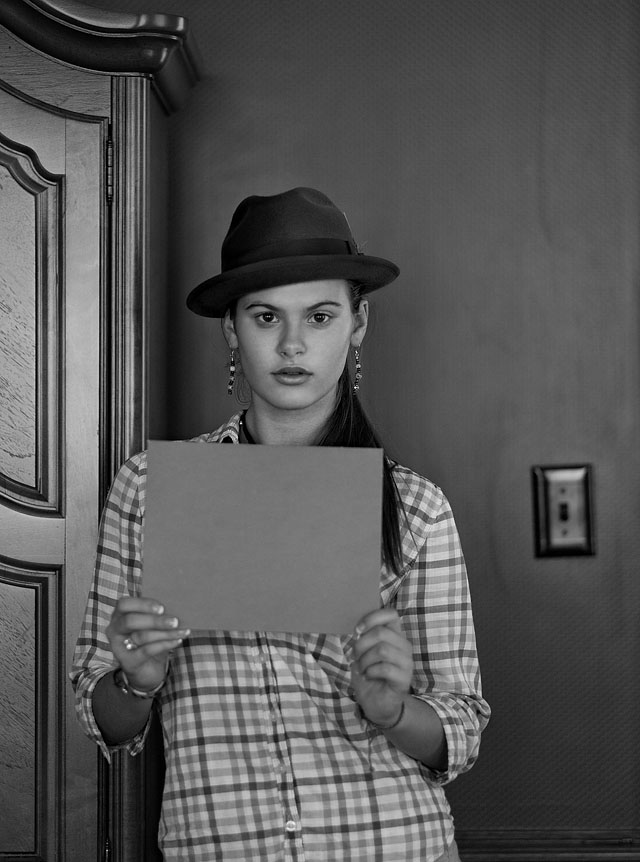
My daughter Caroline in Los Angeles, July 2012. Light metered in front of her face. Leica M9 with Leica 50mm Noctilux-M f/1.0
So start with distinguishing between the source of trouble: When you are looking at a fairly normal tourist photo scenery, chances are that it will be a mix that makes up middlegreay. No problem! But when you want to do some creative photography like a person in a livingroom, with a window behind him, the person may be middle grey in his over all appearance, but the bright window behind becomes part of the lightmeters calculation. And that is how the subject becomes a black silhouette and the window looks well exposed.
It is actually very simple.
It just means that you have to think for the lightmeter.
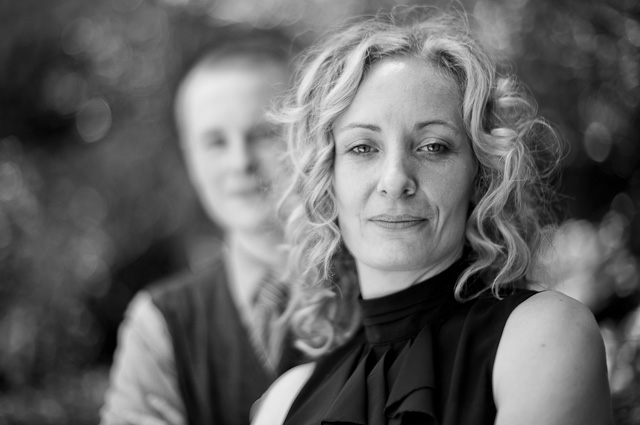
Mother and son, Los Angeles July 2012. Leica M9 with Leica 50mm Noctilux-M f/1.0. Light metered on the bright side of her face.
And when we say "Grey" we mean middle tones in any color
The light meter measures luminence, not colors. Hence it is not so much the word "grey" in middle grey as the word "middle" that is important.
To give an idea how middlegrey compare to colors, here are two examples of how the room is full of middlegrey.
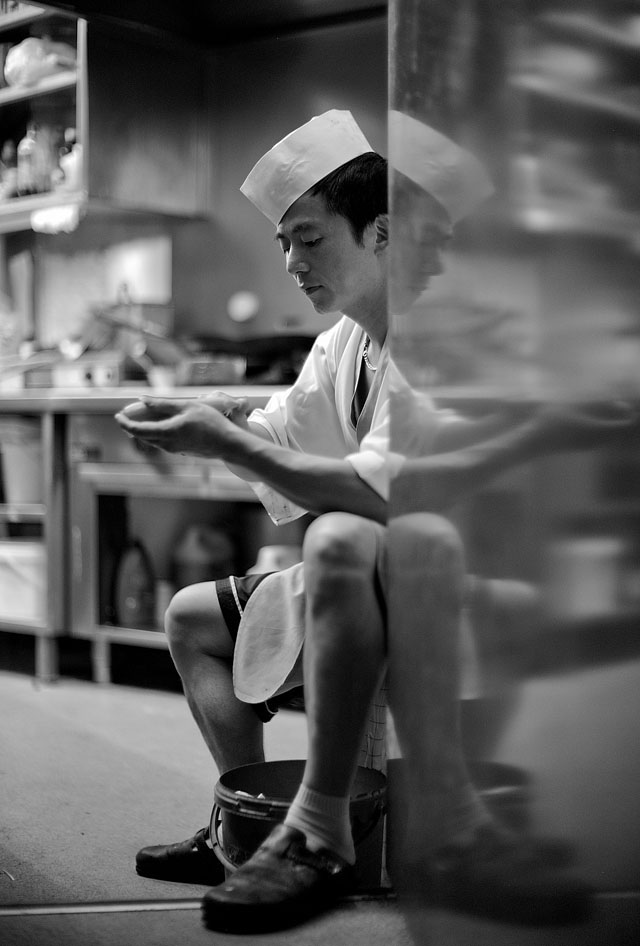
Inside the kitchen of a Chinese restaurant in Vienna, Austria, June 2012.
Light falls down, mostly
Take a note. In the city, in the street, and in most buildings, the light falls down from above. There is much more light from above than from the sides. The exception is when you have nice big (panorama-) windows in a room, or in a city street early and late in the day where the sun is low and reflections are thrown back and forth between window glass, walls of buildings, cars, people and even reflected up from the street.
But in most homes and offices, the light is installed in the ceiling and falls down on the subjects. And the taller buildings in a city, the more extreem is the difference in luminence (light) between the top and the sides of a person walking in the streets.
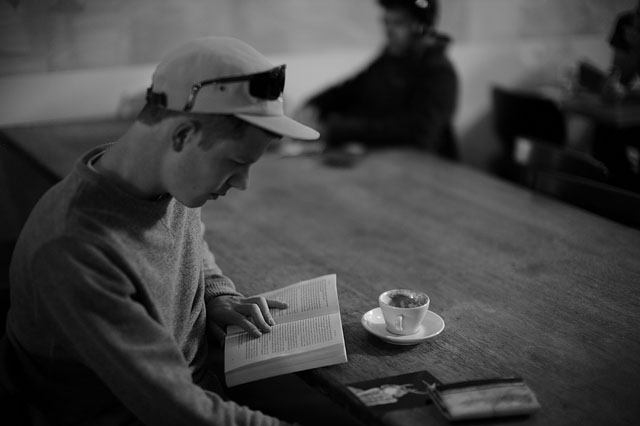
Leica M9 with Leica 50mm Noctilux-M ASPH f/0.95 and B&W 8X ND-filter. Leica M9 with Leica 50mm Noctilux-M ASPH f/0.95 and B+W 8X ND-filter. San Francisco espressobar, July 2012.
On a sunny day the contrast is very largeb, in grey overcast days the difference is much less - though even on grey days there can be a lot of light in the sky. If you look at light, you will see. But mostly we just walk around and wait for the sun to shine becasue it looks so dull and grey. But in fact there is still much more light from above than from the sides. A lot.
And in general, light that looks dull for the human eye is detailed and contrasty for the camera sensor that has much less dynamic range (ability to capture a broad range of tones in one image).
How to find horizontal light
Apart from the fact that the light is softer and gives more aesthetic and detaild images when it is from the sides (as in early and late in the day where the sun is low), it also makes photography less complicated in terms of correct exposure.
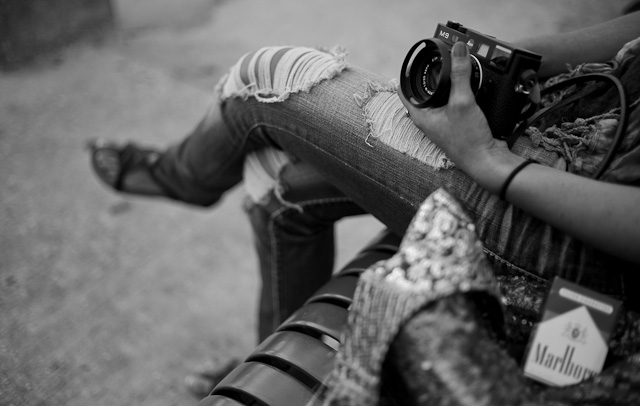
Leica M9 in good hands in Miami, April 2012.
In the office building where the light 'falls down' on the subjects face and make the bald head look really dominant and creates shadow eyes and wrinkles in the face, the way to go about is to look for softer light. Or use the windows to soften up the image (by simply moving the subject to a window that throw nice soft light in from the side so you get soft light on the face (no wrinkles) and light into the eyes).
Australian actress Sonia Carroll in Hollywood, August 2021. Leica M9 with Leica 50mm Summicron-M f/2.0 (II). Light metering in front of nose with external light meter.
A good example of good light is under a tree, because here you don't have any light from the top but a 180° panorama-light coming in horizontal. Very nice light for portraits. (only watch out for trees where the light comes through the leaves as this light will be green-yellow mixed with daylight coming in horizontal: very tricky to get the right skin tones why you will want to find a three that closes out the vertical light almost completely so you don't get odd colors. In black & white it doesn't matter, the soft green/yellow vertical light may even make the black & white photo more pleasing to look at).
Leica M9 with Leica 50mm Noctilux-M f/1.0 and B&W 8X ND-filter. San Francisco, July 2012.
How to find sparkling light
Sparkling ligh is the type of light that bring the eyes, the skin, the cars, the colors, the flowers alive. You will recognize it when you learn to see it. But where to find it is usually where light is reflected from many windows, walls and other surfaces, even wet streets. And mostly without any direct sunshine (thought direct sunshine with direct sunshine reflections from for example shop windows can make things glow and sparkle as well).
Sparkling light is not a lot of light and can even be very low light (with high ISO the camera see better than you do). But it has that quality that it brings things alive that is put into it. It brings out details! If you walk in the street of a major city and look at people and their faces, the cars, the trees and the buildings, suddenly you will see a spot where people look energized and alive, whereas other areas look grey. That is the spot with quality light. That is your "stage".
I'm just mentioning it becasue it is part of working with light. One thing is to get the correct amount, next thing is to get nice light. It's easy when you know it, and perhaps a bit theoretical when I talk about it. That's what we look for in my workshops. It's quite fun!
(For more on the quality of light and how to work with it, read my article "Quality of Light")
Cape Town, January 2012. Leica M9 with 60mm Konica Hexanon f/1.2 (available light and no reflectors)
What is light..?
Even I work with light and I am very aware that what make me stop and take a photo is when I seet a certain atmosphere made of people and/or light that I want to capture in that moment, I never really have given much thought to what light really is.
Einstein and many other philosophers and scientists have through about light, and none of them have come up with an answer. Even if it consist of wawelengths or particles - or both in some cases, has been unresolved.
Quite intersting, isn't it, that what we have all around us, we really doesn't know what it is.
Light and brightness seem to attract life. Not only animals and insects, but also people are drawn to the spots with most light. If you hang bright light over a spot in the supermarket, people will go to see what is there.
And when we wake up in the morning and the sun is shining, we "know" it will be a good day. Why is that? Nobody really knows.
Love is admiration, and the sun has been compared to that that flow of admiration. The physical universe's parralel to the love and admiration between two people.
For my part, the two elements I seem to always have in my pictures, is the life spirit of human beings and/or light that creates atmosphere and life. So in a way, my answer would be that light is a form of life or life support.
| |
|
|
| |
"For the rest of my life I will reflect on what light is"
- Albert Einstein (at age 38 after he had devised the theory of relativity twelve years earlier) |
|
| |
|
|
To be continued ...
|