Leica M9 Digital Rangefinder Camera - Page 13 Index of Thorsten Overgaard's user review pages on Leica M9, Leica M9-P, Leica M-E, Leica M9 Monochrom, Leica M10, Leica M10-P, Leica M10-D, Leica M10-R, Leica M10 Monohcrom, Leica M11, Leica M11-D, Leica M 240, Leica M-D 262, Leica M Monochrom 246, Leica SL, Leica SL2, Leica SL2-S, Leica SL3, Leica SL3-S as well as Leica TL2, Leica CL, Leica Q, Leica Q2, Leica Q2 Monochrom, Leica Q3 and Leica Q3 43:
Learning the simplicity of the Leica M9
By: Thorsten Overgaard
I thought it might be useful to go over some of the starting points you may like to know about when you have unpacked the Leica M9 and wants to get into action immediately. So I've collected some of the points I've stumbled over with students again and again when I do photo seminars around the world.
As you may have noticed, this "review" has been written over a long stretch of time of actual field use, and we so happen to get into the actual "how to unpack a Leica M9" on page 13 (and the next pages).
Fact is, if you returned to photography again after you retired your good old trusted film camera many years ago, and the Leica M9 is your first digital camera, you need to know a few of the things that has in fact changed since then. But also - and perhaps more surprisingly - if you have been using a semi-pro or professional dSLR camera for some years, you need to re-learn how to photograph so you can get that scared look off your face when you try to focus. I'm making fun of it, yes, but then again I'm telling the truth.
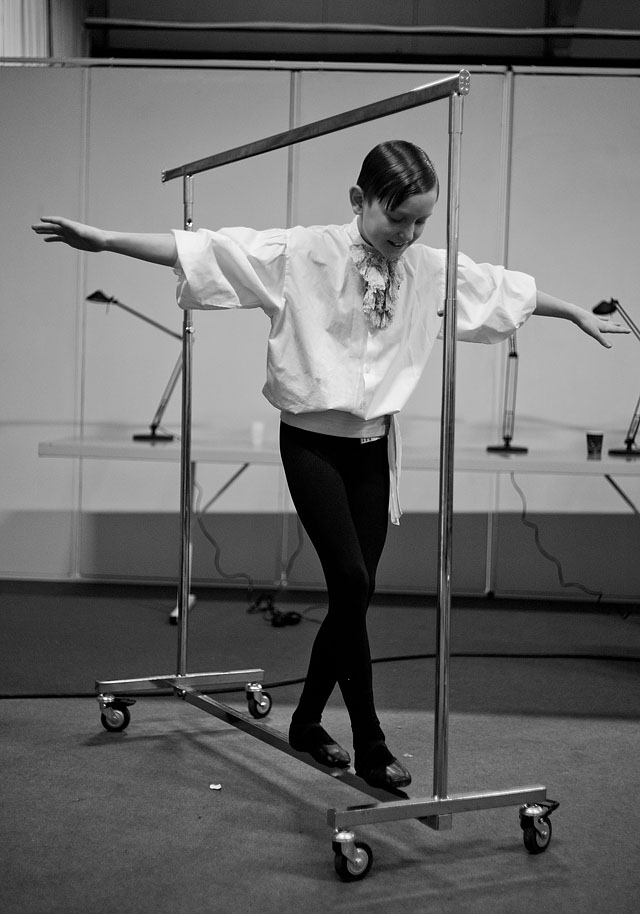
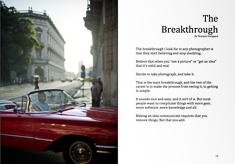
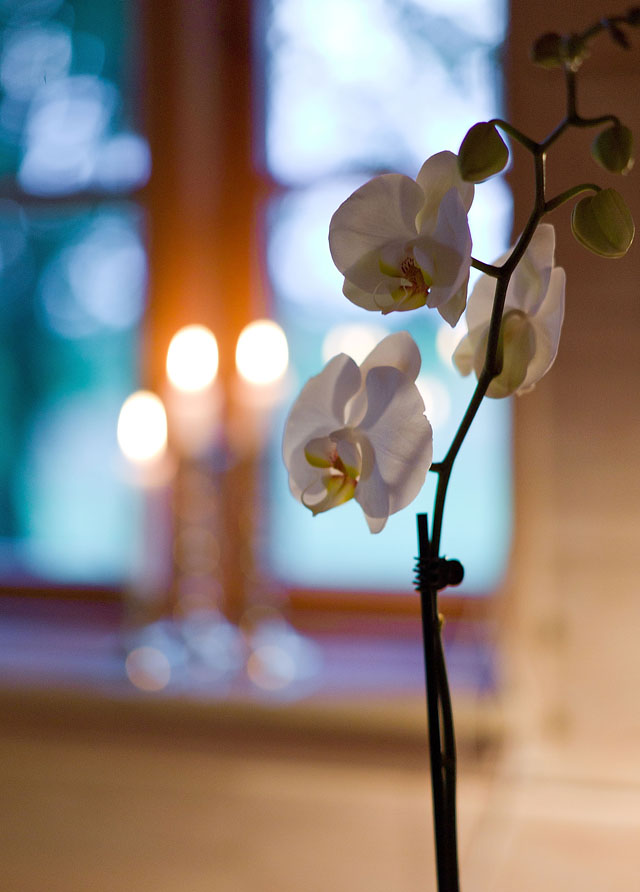
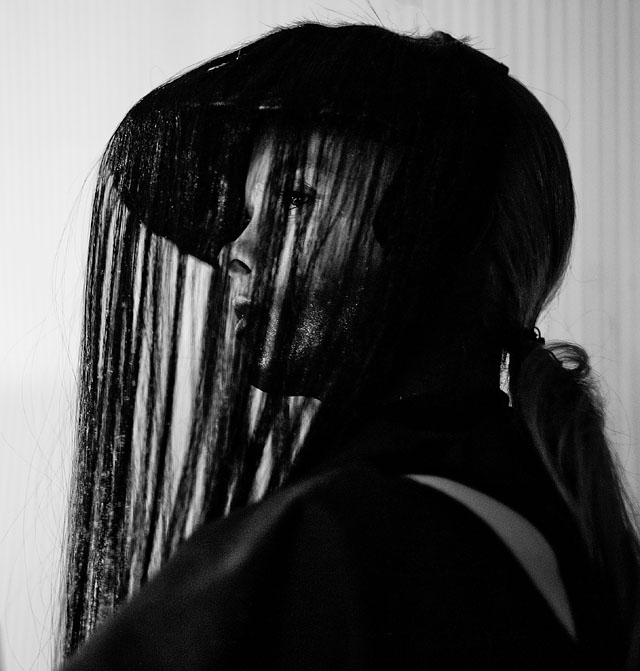
Backstage the childrens fashion show at Copenhagen Fashion Week. Leica M9 with 50mm Summicron-M f/2.0 (Version II)
The good news: You are back in control of the camera
The bad news is, you might not have a cloue what to do then. Since the clever Japanese camera-producers introduced SLR camras in the 70ies, and with those an avalanch of new useful features such as auto focus, built-in lightmeter, focusing screen and auto-rewind, camera producers seem to have reached the conclusion that any new feature is good for camera sales. Hence we get all sorts of new fancy technoligies stuffed into cameras, like the ability to have "live view" on the screen of your dSLR so you can hold out the camera in stretched hands while admiring the screen.
But while busy inventing all these new things, they have forgotten the essential things a camera must have to be a camera, and which coincidentally are the points you actually need to be a photographer - and I shall return to these points in a second, because it's not a joke.
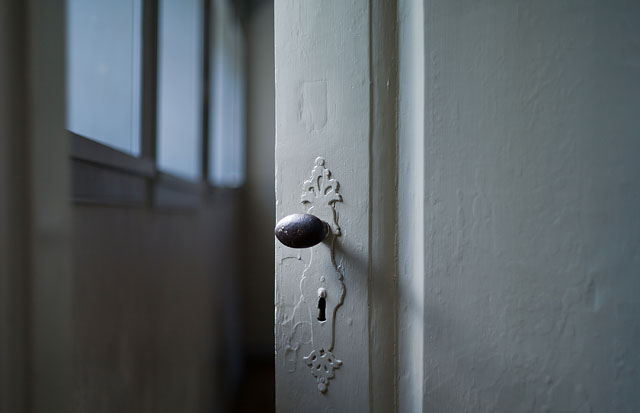
When you have the Leica M9 in your hands, you feel it. You know this camera is right, though you may not realize why it feels so right. It just does, oh yes, and you know you got to own this little baby despite that the price is staggering.
Your control of the camera extends even to the focus. This is an area most people have come to believe is a skill beyond human ability. "How could I possible tell if anything was in focus?" But you can, and you may in fact discover that you can get images more in focus with manual focus than with sophisticated auto focus.
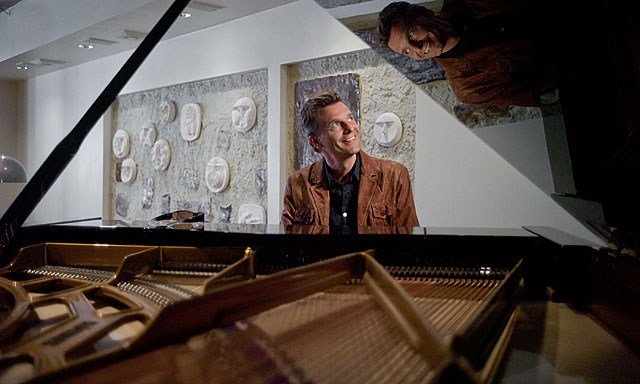
Danish singer-songwriter Ole Boskov at Jazz House Montmartre in Denmark. Leica M9 with 50mm Summicron-M f/2.0 at 800 ISO.
What a camera is
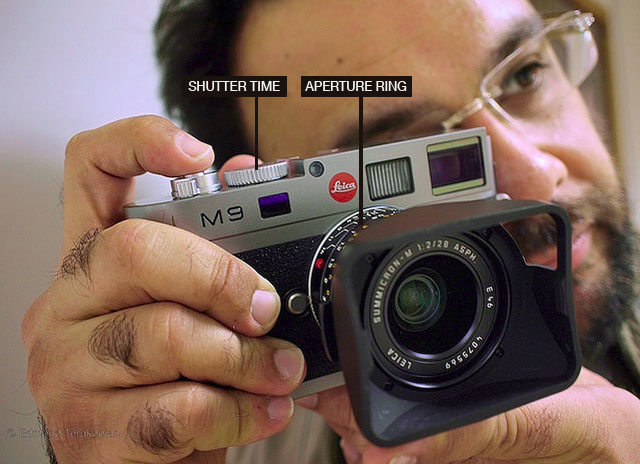
The camera housing is basically a walking darkroom with a few dials and buttons to control the light intake. All a camera need is the three light control mechanisms, which are 1) Shutter release that is the curtain in front of the sensor that let light hit the sensor for a certain amount of time, the 2) Aperture inside the lens that controls the amount of light that passes through to the sensor, and 3) the ISO, which is the light sensitivity of the sensor.
| Shutter |
|
Aperture |
|
ISO |
 |
|
 |
|
| |
AUTO ISO |
|
PULL 80 |
|
ISO 160 |
|
| |
ISO 200 |
|
ISO 250 |
|
ISO 320 |
|
| |
ISO 400 |
|
ISO 500 |
|
ISO 640 |
|
| |
ISO 800 |
|
ISO 1000 |
|
ISO 1250 |
|
| |
ISO 1600 |
|
ISO 2000 |
|
ISO 2500 |
|
|
 |
|
|
|
|
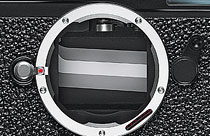
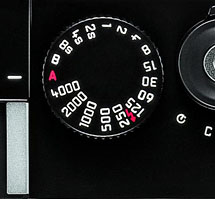
| The shutter curtain is metal blades covering the sensor so it's dark inside. As soon as you press the shutter release button on top of the camera, the curtain goes up, for example 1/250 of a second and let in an exact amount of light, then down. The time the curtain is up is set in the shutter speed dial on top of the Leica M9. |
|
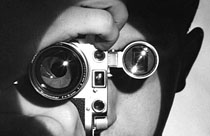
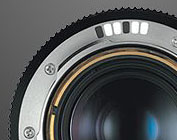
Aperture is the metal blades inside the lens, visible in this famous Andreas Feininger photograph.
Each click on the lens' aperture ring reduces the light intake to half of the previous step. Usually a lens has 7 steps, making it possible to reduce the light intake from 100% to 1.75%. |
|
ISO: As seen on the display menu of the Leica M9:
ISO is simply an International Standardization Organization standard for how sensitive to light the sensor or film is. In film it's a chemical sensitivity, in digital camera it's a software generated sensitivity. |
|
|
|
|
|
These three controls are what enables you to control that the amount of light that hits the sensor is just right to get the correct exposure of the scenery in front of the camera. And that is all the camera body is there to enable you to do. The camera also include a mechanism that helps you focus the lens so your correctly exposed image will be in focus.
World Press Photo winner Edmond Terakopian with Leica M9, photographed by Antje Bormann.
Now, this is what you need, and it's quite essesntial in photographing. And thus the Leica M9 have these controls readily available for you to use. But the really really weird thing is, that very few cameras have these controls visible. Instead they offer a few hundred other ones that are much more useful for their marketing department than for you as a photographer.
So this is what makes the Leica M9 a real camera, and the right camera. In case you didn't know, the worldwide camera sales went up with with 4% last year, whereas Leica Camera AG's sale went up 200%. That is how right the philosophy behind the Leica M9 is.

Leica M9 with 90mm Summarit-M F/2.5, 800 ISO.
Three controls, but use only one
| |
 |
| |
All you need to use is the shutter dial. Leave the ISO at 160 ISO or 800 ISO and the Aperture fully open. |
| |
|
It may seem a little complicated with the three controls for light, at least reading about them. In practical use, they all are halving and doubling of the light, so at least they work together as LEGO bricks in the aim to ensure correct amount of light: If you want faster shutter time, you need more light; so you compensate by increasing the ISO, and voila, the exposure is the same.
But it is even easier, because with a Leica you should not use the Aperture. At least that is my opinion. If you got an f/1.4 lens, use it at f/1.4, and if it's a f/2.0 lens, use it at f/2.0. That is how they are designed, for fully open use and photographing in low light. You only use aperture if you want more depth of field sharpness. The reason Aperture Priority Exposure (controlling the light intake by using the aperture ring only) has become so widely used is because that was how you could integrate light meters in the cameras in the 70ies: You had to have one type of control the user could adjust so as to get the arrow inside the viewfinder to hit the center, and that control was the aperture ring. But as I will touch on later (another page), aperture is an artistic tool and a way to compose in the third dimension, not an actual light control.
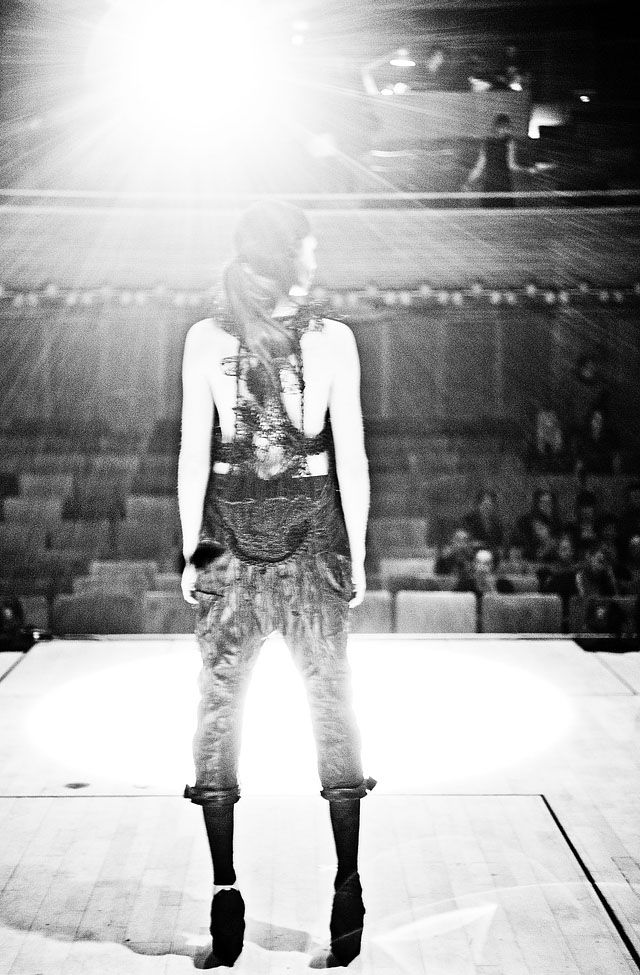
Leica M9 with Leica 50mm Summicron-M f/2.0 (Version II), 80 ISO, silk screen and reflector.
The ISO you leave at either 80/160/200 ISO for daylight, and 800 ISO for indoor and evening photography. The point is: Leave the ISO set so that part is under control. If every of the three parameters, Aperture, ISO and Shutter time is in play, you can't recalculate any necessary changes. With only the Shutter time in play that is the only parameter you adjust. Very easy to adjust the exposure up or down when it's only one control you need to use.
So that leaves shutter time as only variable. When the shutter dial wheel on top is set to A, the internal light lmeter will figure out the right shutter time and show it in the display with red numbers. And the shutter time is also in the top left corner of the preview on the display. So if you want to change it, you simply turn the shutter time dial on top of the camera to the shutter time you want. And the camera will do exactly that.

Leica M9 with 28mm Elmarit-M ASPH f/2.8, 800 ISO
| |
|
|
|
|
| |
Buy the new eBook
"A Little Book on Photography"
by Thorsten von Overgaard |
|
| |
|
|
|
|
| |

Order now - Instant delivery.
More info
★
★
★
★
★
★ |
|
It's a humorous understatement to call this
new eBook by Thorsten Overgaard for
"A Little Book on Photography".
It's a grand book, a history lesson, life experience, a biography and poetry book and brilliant photo book!
All in one beautiful package of 180 pages
to fire you up and get you to love
photography ... unconditionally!
"A Little Book on Photography"
eBook for computer, Kindle and iPad.
New release March 2017.
Intro price only $47 - 180 pages.
| |
|
|
| |
Buy Now

Instant Delivery |
|
| |
|
|

|
|
| |
|
|
Learning how to photograph, again
If you have come from a modern dSLR camera, those few buttons are all new to you. You most likely have developed a habit of either trusting the camera, or you have developed a skill of adjusting the exposure with a plus/minus EV wheel. Because the aperture ring and shutter time dial has been omitted on modern cameras.
The new thing is that you are now in control. Not only can you easily read the settings on the aperture ring on the lens and on the shutter time wheel on top of the camera, but by golly!, you can also change them. And no matter what you do, no automatic feature will step in and override your choice. If your choice makes the image under-exposed, you can notice the settings and change them, and by a miracle you will be responsible for all the right choices. Isn't that groovy?
Focusing with the Leica M9
The rangefinder mechanism is clear and bright, and everything is sharp. The way you focus is by matching the small bright frame in the center so it lays exactly on top of what you want to be sharp.
Move the camera to catch what you want in focus, then recompose and photograph.
It goes without saying that it's seldom the center of the frame you want in focus. So you have to reframe to the subject you want in focus. You move the focusing square to the object that should be in focus, make the images lay on top of each other, then recompose so you have in the frame what you want in the frame.
You also need to find something that is recognizable, something with a pattern and a contrast you can tell when is exactly on top of each other.

Some times it's a difficult background of repeating patterns. So you have to refocus to find some edge of contrast to use for focusing. For example tilt the camera so you can focus easily:
 |
|
 |
| Choose an easy edge with high contrast |
|
... so you can easily see when you have focus. |
| |
|
|
When you shoot people or portraits, you want the eyes to be in focus. It's much easier to tilt the camera very quickly, focus on the edge of the eye, then recompose to the frame you want and shoot.
 |
|
 |
| The edge is easier to see than they actual eyeball |
|
... so you get that and it's going to be all right |
| |
|
|

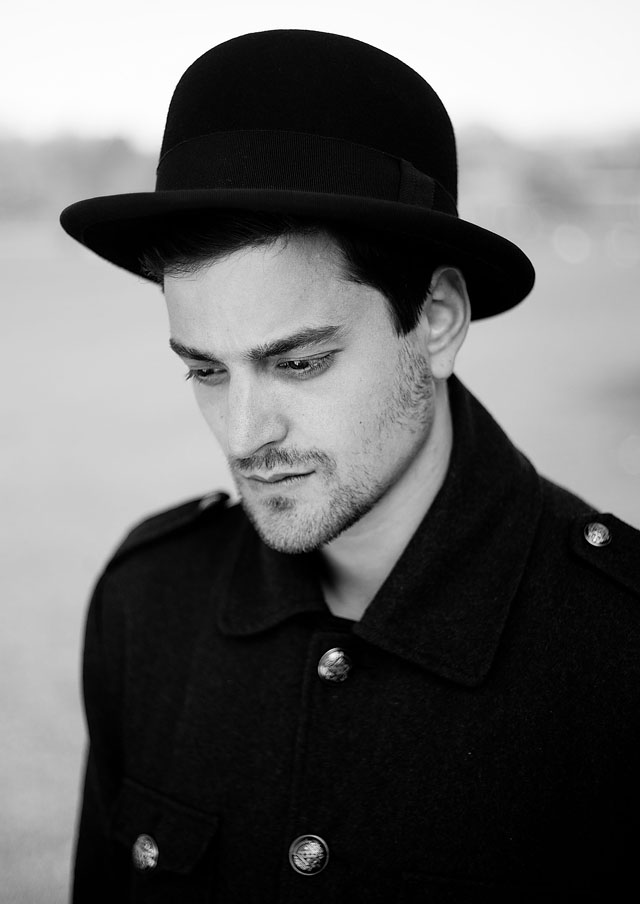
British actor Michael Koltes, Leica M9 with 90mm Leica Summarit-M f/2.5, silkscreen and silver reflector
Trust your focus instinct
Some times, and with some feel for the camera, you may focus on for example the edge of an shoulder or use the nose, and then compensate a little. Because you "know" how much you need to turn the focus to get the actual desired focus.
Thing is, a lot of the operation will start becoming something you just know so well you don't even know. You just do it, and it works. I had a lens that was uneven and stiff in focusing, but it worked well. So when I had it cleaned and lubricated, it was suddently so smooth I had to think to focus. Somehow my fingers just "knew" those uneven bumps to a degree so it was part of sensing where on the focus scale the lens was.
| |
|
|
|
|
|
|
| |
Preorder these two new eBooks
by Thorsten von Overgaard |
|
| |
|
|
|
|
|
|
| |
 |
|
 |
|
| |
|
|
|
|
|
|
| |
Composition in Photography
- The Photographer as Storyteller
This book will inspire your photographic eye and make you wonder about all the possibilities you can now see.
In this exciting new book Thorsten Overgaard expands and simplifies the subject of composition. It's elevated from theoretic geometric classroom discussions of the 18th century to futuristic practical use of space, rhythm, time, colors, emotions and intuition in your photography.
This book will not to teach you to analyze photographs but teach you to become a great storyteller through photography. |
|
The Freedom of Photographic Expression
- Mastery of Fundamentals and Equipment.
Of all books, this entertaining book is the one to start your photographic adventure with. It is the one that will re-boot yourinterest in photography and make it fun and adventurus!
Thorsten Overgaard takes you through the history of photography from the pinhole camera to today and amuses us with stories on how photograph, even though a kid can do it, became a subject requiring a long education, thick glasses and a lot of equipment!
This book will teach you the fundamentals you need to pick up a camera and simpy make great photographs. |
|
| |
|
Only $148. Preorder now. Expected delivery May 2015. |
|
Only $68. Preorder now. Expected delivery May 2015. |
|
|
| |
|
|
|
|
|
|
| |
|
Preorder the two eBooks
right now as a bundle and
save 30%
Two books for the price of one. Total $151.20.
Order now. Expected delivery May 2015.
|
|
|
| |
|
|
|
|
|
|
| |
|
|
|
|
|
|

My son Oliver iPadding on Kafe Atlas in Brooklyn. Leica M9 with 50mm Summicron-M f/2.0, 800 ISO at 3200 Kelvin.
But when you focus, your hands and fingers works in different angels, and you tend to just learn to register those and use them as part of "knowing how to focus."
Focusing has a lot to do with confidence. You turn that focusing ring, and somehow you know how manny millieseconds it will take before you will reach exact focus and thus when to shoot. So focusing and shooting becomes more a matter of predicting and planning than actual focus confirmation, in the same manner as if you are trying to capture a car driving or a dog running: You know when it will arrive at a certain spot, hence you know when to shoot. You don't need a green blinking dot to tell you when it's time, you know already before it happens, when it happens.
If you focus, then refocus to see if it may get sharper, then try to focus again now that you know the first one was probably the best focus ... then you will get more out of focus images than if you simply just do it.
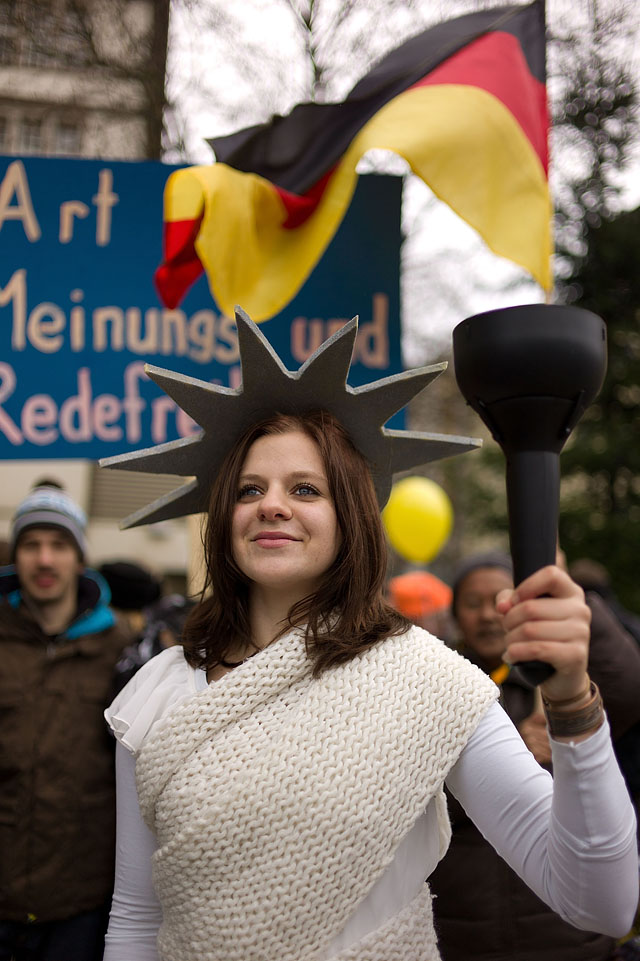
Human rights march in Münich. Leica M9 with 35mm Leica Summilux-M ASPH f/1.4 (Version V)
Move focus instead of focusing
When you work at close distances suchs as portraits it's easier to set forcus and then move slightly backwards and forwards with the camera to your eye ready to nail it for each photo. Also the person(s) may move, so you want to keep track of the focus while shooting. And by the way, the more you shoot, the greater chances you have to get that one image that you need that is both in focus and where the subject looks good. If you hesitate to make sure focus is right, too little is happening and the subject "dies waiting" and you may end up with a dead sharp portrait, but a dead subject. Portrait photography is high production with the one aim to get one image that looks great. With a living specie in front of the camera it's a lottery, and the aim is to get your timing right - shooting when the subject looks right and rest in him- or herself. You are not waiting for focus to be right but the person to look right.
Don't mind the 30 or 60 frames that are out of focus or where the person closes the eyes - as long as you have one in focus where the person looks brilliant, you got a winner. Mission accomplished.

New York, December 2010. Leica M9 with 50mm Summicron-M f/2.0 (Version II)
Zone focusing
| |
 |
| |
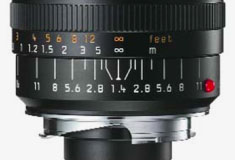
The lines next to the focusing distance indicates the depth of field at the different apertures. |
You can see on the lens the lines indicating how much of the field will be sharp at the different f-stop settings. Zone focusing is where you set the lens focus to for example two meters, and with an f-stop of f/8 you can see that everything from 1.2 meters to 3.5 meters will be in focus. So this way you don't have to focus for sharpness when shooting anything in that range - everything will be sharp in that range. And if you eye out something at 5 meters distance, you look down and turn the focus ring to about 5 meters (and have sharpness from say 2 meters to 8 meters with that setting) and then lift the camera, frame and shoot).
The Leica 21mm f/3.4 is quite interesting for zone focusing becuase when you stay at fully open aperture at f/3.4 and set the distance to 3 meters, everything from 1.5 meter to infinity will be in focus. And at 1 meter distance everything from 0.8 to 1.2 meter will be in focus at f/3.4.
If you then turn to f/11, everything from 0.55 meter to infinity will be in focus. So that is quite an interesting lens to use out and about in museums and in the streets. Especially as you also will be using a 21mm viewfinder for framing, and you hardly have to look through the cameras own viewfinder to find the focus.
Leica M9 with 50mm Summicron-M f/2.0 (version II)
Pre-focusing
Focusing can be done in many ways. One thing is that most photographers develop a feeling for the lens based on simply the feel of the lens' shape. I also had that lens that was so dry that the focus ring moved very uneven (and even made sounds from time to time), and I simply could feel (unconsciously) where it was on the focusing scale. Not unlike how you shift gear in a car or turn off the light on the light switch: You simply know where it is.
In any case, some always turn the focusing ring to infinity when walking about (so they know where it is), others turn it to closest focuing (I do that as I mostly work in the range from 1 to 4 meters).
But actual pre-focusing is when you look at the focusing ring and then focus to what is the approximately distance to the subjet you plan to aim at. And then you raise the camera and a) does the last focusing by the help of the viewfinder, or b) simply shoot because you are always right.

Leica M9 with Leica 50mm Summicron-M f/2.0, 80 ISO.
On a film set and in many television settings where you have a camera moving around, or actors moving in front of the camera, there is a "focus puller" at work as assistant to the cinematographer or videographer. As no movie cameras or large video cameras have auto focus, the assistant, the "focus puller", changes the focus based on what he sees, either by rotating the focus on the lens directly, or via a remote control while standing on the side of the cinematographer. Some times the focus pouller on a film set has measured the distances beforehand and the actors have marks on the floor where to go next, but for example in live television the focus puller is usually next to the videographer with a remote control and simply uses his eyes to get the distance right.
Many of the well-known photographers have entertained them self with rehersing prefocus in their living rooms and hotel rooms by standing in front of the wall, guessing the distance and pre-focus the camera, then lift it to the eye and see if they had it right. Often done as a game between two or more photographers this can be an interesting game that trains the eye to a level where you know the lens and distances so well you can hit focus with even Summilux lenses. And it doesn't require film in the camera.
Leica M9 with 21mm Super-Angulon-M f/3.4
Read "Focus adjustment of the camera - once in a while" on page 7 of this article to know more about the actual focus adjustment of the Leica M9, Leica M9-P, Leica M-E and Leica M Monochrom.
A short note on DOF - Depth Of Field
| |
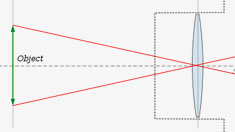 |
| |
The depth of field of the object is the same, only the angle of view differs. |
I will get into DOF later as an artistic tool to compose in 3D, to emphasize a message and more, as well as the actual function of it. But basically all depth of field is the same as it is relative to the scale of what you photograph. Meaning that if you examine a photo taken with a 21mm lens at f/5.6 and zoom in on the center of that image that is equavilent to what a 1600mm lens f/5.6 would capture, the depth of field in that area alone will be the same for both the 21mm lens (whihc has a 90° angle of view) and a 1600mm lens (which has a 1.5° angle of view).
What changes the actual depth of field is the aperture, not the angle of view. And the depth of field for a given aperture is the same for all lenses. But more on that, later. Jens Arnspand of Esbjerg in Denmark has supplied me with a great deal of research on this and I am trying to translate it into something meant for photographers rather than engineers.
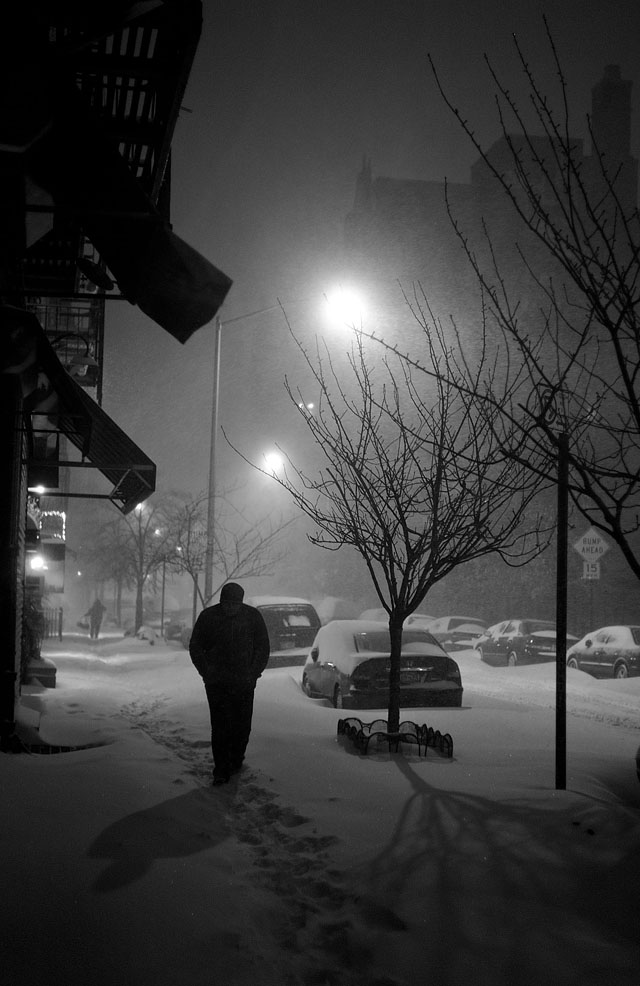
Snowstorm in New York, December 2010. Leica M9 with 50mm Summicron-M f/2.0 (Version II), 800 ISO.

Problems with focusing
Clean your camera from time to time. I usually clean the camera body and glass with a diamond cloth like the one you get at an optician for your glasses. It a good thing going over the camera with a cloth as it doesn't only clean it but also make you familiar with it and you notice if something it not right.
The small window next to the M9 logo on the cameras front is the focusing vindow. If it is dirty with fingerprints your focusing square will be less visible. Also, some times you will have a hard time focusing because your finger is in front of that window.
It goes without saying that the viewfinder window both on front and on the back has to be clean if you want a clear and bright view (and you do because it's easier to focus then). Always carry a microfiber cloth (also referred to as a "diamond cloth") as the one you can get from any optician for glasses, and use it to clean basically all surfaces of the camera from time to time for dust and fingerprints. Think of yourself as a Russian spy about to leave a motel room with three dead CIA agent bodies. Remove all prints and signs that you have been there. Your Leica M9 may be worn down to the brass, but clean it must be.

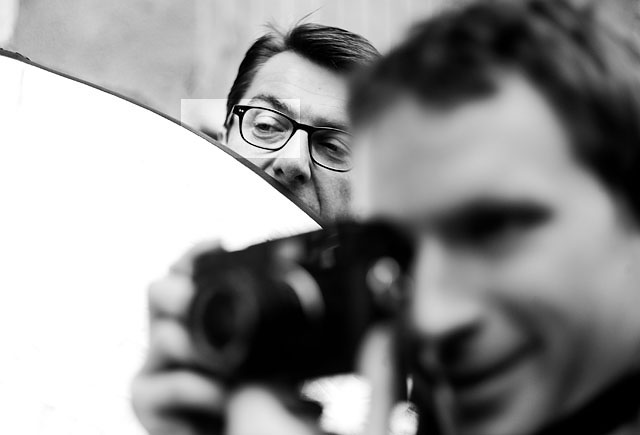
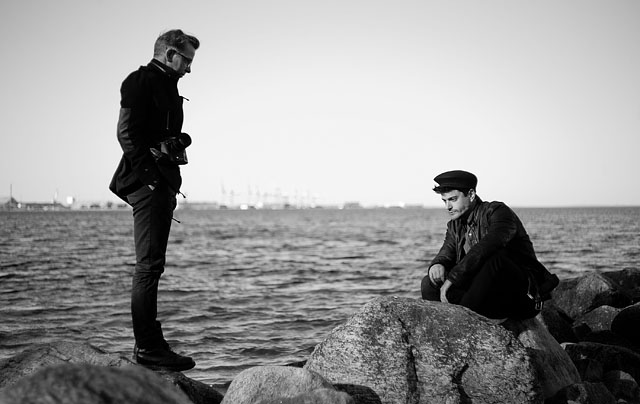
Not a Russian spy, though the does use a microfiber cloth to clear his tracks and the Leica M9 viewfinder: Matthias from Zurich shot with Leica M9 and 90mm Summarit-M f/2.5.
Focus adjustment of the Leica M9
If in doubt about if the focus of a lens or camera is right, you can check the focus adjustment simply by setting the focusing to infinity and point to the horizon or some distant object. If that ain't in focus, the focus if off. It will affect the close focusing the least and the infinity the most.
It can be the camera or the lens, or it can be both. Some service facilities exist around the world, such as Leica Store Ginza Tokyo, Leica Store Mayfair London and others, but else you send it in to Leica Camera AG Customer Service in Solms. If you happen to visit Leica Camera AG in Solms you may also drop off the lenses and cameras at Customer Service and take a tour of the factory while it gets adjusted (highly recommended).
The advantage with having camera and all lenses checked and adjusted to factory standards is that you know it works. Whenever you get an out of focus image, it's you or the subject that moved, or you simply made an error. But when you do it right, the sharpness will blow you away.
Did I focus on the first or the second flower? is a question that will drive you nuts. When you get the camera and lenses focus adjusted at Leica Customer Service from time to time you know it's precise and the only error you can make is to focus the wrong place or move sligrhtly after you focused. Leica M9 with 50mm Summicron-M f/2.0.
The Leica M cameras and lenses are not some exotic tools that require each camera to be calibrated to your precious lenses. When your camera has been adjusted to factory standard it will perform 100% with any lens out there that is adjusted to factory standard.
Having said how wonderful focus adjustment is, I have used a Leica M9 for three-four months that was very much off focus after a hard fall to a floor. I managed to take great images with both Noctilux and Summilux lenses. So a camera being out of adjustment isn't a game stopper, it's just so much nicer with equipment that is in top condition.

Brooklyn, New York. Leica M9 with 50mm Summicron-M f/2.0 (Version II)
What does the lens coding do?
| |
 |
| |
A 6-bit code on a Leica M lens |
| |
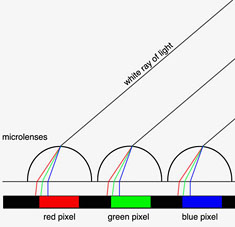
How the light rays arrive to the sensors micro-lenses. The wider the lens, the less straight they arrive, and that is one of the things the 6-bit coding try to fix. |
The Leica M9 supports the 6-bit lens codings that all new lenses comes with, and many older lenses can be updated with. But even when using lenses that doesn't have the 6-bit code engraved, one can use the system by simply choosing the lens in the menu.
What the 6-bit code tells the camera is which lens is connected, and one can read that in the EXIF file. For me that is a helpful information for later as I always try to keep track of which lens I used for which picuture. But for some of the lens profiles, also an in-camera adjustment happens. Unlike film, a sensor has small "eyes" or lenses that look straight forward. So the Leica M9 sensor is a special developed sensor with "tilted" sensor eyes in the side so as to be used with the very short space between the lens and the sensor in a Leica M, those eyes need to be told a few things to get it right. The light rays comes from the focus center of the lens* why they don't arrive from straight forward. So said in a popular way, the software tells the eyes on the sensor which direction to look to get the light arriving straight.
(* The focus center for the lens is basically what defines if a lens is a 35mm, 90mm or 135mm; because the focus center is always 35mm from the film/sensor surface on a 35mm lens, always 90mm from the film/sensor furface on a 90mm lens, and so forth).
While the example below may look impressive (from a 21mm wide angle lens), rest assured that with most lenses, a everyday image of people and places will look quite ok. Real worry doesn't happen till you start photographing even grey or white test-surface, or zoom very hard into highlight details of an image. In other words, an image cann look quite pleasing even when not corrected!

The coding of the lens simply bring order by trying to attempt to fix "italian flag" phenomens (that the image has green/white/red sections), red corners, blue/purple fringing by hightlights, as well as other phenomens.

My uncorrected daughter enjoying the sunroof despite the fact that the lens correction is turned off. Leica M9 with the 1964-model Leica 50mm Summicron-M f/2.0 (Version II).
What the 6-bit code does not tell the camera is what distance was used for focusing or which aperture was used. If you simply take the lens off the camera you will notice there is absolutely no mechanical or electronical connection from the lens to the camera telling the camera which aperture or focus is in play. If you look at a dSLR camera on the other hand you will notice a mechanical coupling of the aperture that on one hand enables the aperture to stay wide open (so you get light enough through the lens so you can see the image in the viewfinder) and close to the aperture when you press the shutter release button. The coupling on the dSLR simply tell the lightmeter what aperture is chosen so it can figure out the right exposure. In the Leica M the lightmeter reads the actual light coming through, and as you are looking through the always bright and clear viewfinder, there is no reason not to maintain the aperture on the lens wide open: In clear words, when you change the lens' aperture, it's changed and the lightmeter notice in real time that there is now less or more light. This is a small advantage in that the lightmeter reading is the acutal light, whereas with a dSLR the lightmeter reading is the fully open aperture plus a calculated difference when you shoot and the aperture coupling steps in. Also, the lack of a mechanical coupling in the Leica M to activate the aperture when photographing means that there are no vibrations from that function in a Leica M. In a dSLR the movements and vibrations are noticeable in shutter speeds slower than 1/250.
| |
|
|
|
|
| |
Buy my "New Inspiration Extension Course"
|
|
| |
|
|
|
|
| |

Need more info?
Read this article. |
|
Get inspired and rebooted!
This extension course if made for you! It can be done at home and travel at your own pace. I have taught workshops for years and the Overgaard New Inspiration Extension Course is my experience compressed to a package of training, articles, drills, assignments and video tutorials that will inspire you and take your photography to the next level! For a limited time my course includes something you cannot get anywhere or anytime else:
A portfolio-review by Thorsten Overgaard.
| |
|
|
| |
"The Overgaard
New Inspiration
Extension Course"
For computer and iPad. 181 p eBook. |
|
| |
Only $798 |
|
| |
|
|
| |
|
|
| |
|
|
| |
|
|
| |
|
|
Order now - Instant delivery. |
|
| |
|
|
|
|
But if you then wonder why in Lightroom your images anyways contain an aperture stop infromation, and that that aperture information more often is wrong than right, the reason for this is that it's a calculated aperture. The software simply take the lens information (or lack of information) and try to figure out what the aperture might have been. So when it's right, rejoice! and when it's not, ignore. It would be a nice information, but it's not essential. What is essential is the actual lightmeter reading during photographing, and that one you got.
In general lens codings are good to have. One option is to send the lens to Leica Camera AG and have it done (along with the general service check, focus adjustment, cleaning and lubrication that comes for free with the lens coding). Another way to do it is with ink or thin black tape. Or simply go manual by choosing Manual lens detection in the menu.
Backstage Copenhagen Fashion Week, Leica M9 with 50mm Summicron-M f/2.0 (Version II), 800 ISO.
Not all lenses are supported by lens coding. On one side Leica Camera AG may have found it to much work to define calibrations for all lenses since the first screw mount lenses. They they all work on the Leica M (the screw mount lenses work perfectly well using an adapter). But perhaps they have also looked at the actual reality which is that many older lenses can't be 6-bit coded because the place on the lens where the 6-bit code has to be engraved is simply occupied by a small screw. In either cases they don't have the spare parts for the lenses why they generally refuse to play around with them (risking having a lens taken apart where one part is missing). Third part repair places may do this, and if possible there is absolutely nothing wrong with the coding.
Maybe all lenses will get a 6-bit code in the future. At least rumor has it that Leica Camera AG will include any and all old and new lenses in the next update of the Leica M9 firmware (to be released on June 21, 2011) so even your old lenses can't be 6-bit coded, you can manually choose their "virtual" 6-bit code on the camera. If it happens it's a miracle that will bring about (as) perfect (as possible) images from 81 year old lenses, and the prices of old Leica lenses will most likely go up and refuse to go down for another millenium. Good if you have them, an interesting game if you don't. If it doesn't happen in 2011, it may happen some time in the future, either by Leica Camera AG doing it, or some other persons fiddleing with this and supplying a firmware crack for the Leica M12 or something. It's bound to happen, because the old lenses wants to be used.
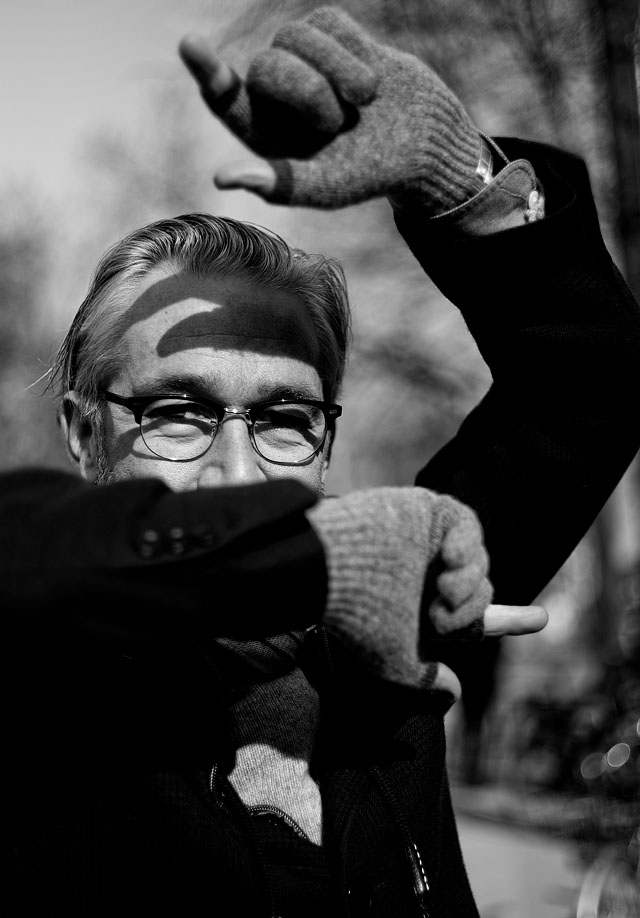 Leica M9 with 50mm Summicron-M f/2.0. The gloves by the way, are from Monochrome in Berlin and are camera gloves available in different matching colors for 29.90 €. Leica M9 with 50mm Summicron-M f/2.0. The gloves by the way, are from Monochrome in Berlin and are camera gloves available in different matching colors for 29.90 €.
Counting the actuations on the Leica M9
After having had a Leica M9 for a while you may have come to reset the file numbering and have no idea how many shutter actuations the camera actually had. You can of course count the images in you rarchive, but here is an easier way.
How to count it:
• open image file in Potoshop or other image program
• open file info (alt + cmd + shift + i)
• copy Unique Image ID value (it's under EXIF data, 32 decimals)
• open the calculator.app
• switch view to "programmer" (cmd + 3)
• switch to decimal system (click the "10 button" on the calculator)
• paste hexadecimal value from Unique Image ID into the calculator.
Voila - you now have the actual actuations of your digital Leica M
You can also do it the easy way and download this free software to view data on Leica M9 files (also exist for Leica M8/M8.2).
The answer to the question you may have is 70,113. This is the number of images I have shot on my Leica M9 since September 11, 2009. An average of ca. 110 images a day.

Koh Tao, Thailand. Leica M9 with 90mm Summarit-M f/2.5
Dust on the sensor
One of the problems I've never really had is dust on the sensor. Now, if you step down the aperture on a lens you will see dust much more easily than when you use it fully open. So that is one reason I don't have problems with dust, I hardly ever change the aperture from fully open. But if and when I see some dust on the image, I simply set the shutter dial to B and blow some air on the sensor from my mouth. That usually handles it. But if you live in a sunshine state where you must stop down the aperture because there is too much light, you may want to invest in a sensor cleaning kit, or look out for a Pro service facility that offers sensor cleaning (any Pro camera dealer in the area may offer such a service for any digital camera).
You can get a cleaning equipment, and it works. Some times it may ruin the sensor, and if Leica Camera AG is nice, they will replace it without charging. But after all, it's your sensor. So I would ask somebody who knows how to clean a sensor to do it.

British actor Michael Koltes, Leica M9 with 50mm Leica Summicron-M f/2.0 (Version II)

Now to something different: "The tiplist"
Jeffrey Rovner from Laguna Beach sent me a "tiplist" he had made based on my Leica M9 article so far, and it's quite good. So with his permission, here it is with my comments for comparison. Not that I disagree or that I am more right on this. I think it's a great list and that you should basically use it to check your settings, habits and "shooting policies" and then make your own "tiplist":
Setup in all situations:
· Set auto off to 1 minute, and leave camera on all the time
· Use lens hood
(my comment: I always use lens hood for protection of the lens and camera. If you hit something, it's the lens hood that get bend and you can always get it replaced. I don't use UV-filters or other to protect the glass; because I simply like the look of the lens without and don't ever needed more protection than the lens hood. Of course the lens hood is supposed (originally) to make sure you don't get unwanted light into the lens - and it does that as well! In the same note I should add that I would never, never, never protect the lens by using a lens cap. Always keep the camera ready).
· Set white balance to manual
· Carry WhiBal plastic card in wallet
· Hold camera level when shooting, unless a special effect is desired
(my comment: this is perfect !)
· Strive to produce a histogram that is weighted to the right, but without blown out highlights.
(my comment: I never use histogram, I don't even look at it. But if you learn to understand them, it will work to use as you can't always see the display properly depending on the amount of light. But the histogram you can always read)
· Strive for minimum shutter speed of 1/250, but not at the expense of an ISO over 800.
(my comment: I alwyas have the lens fully open, so the shutter speed may go from 1/4000 and as slow as I can hold it; unless I want a special effect such as freesing a walking person (1/250 minimum) or want motion blur from persons or cars moving (in whihc casse the shutter speed should be down around 1/8 - 1/60)
· Keep shooting finger flat on the shutter release button, not pointed down
(my comment: Never thought of that or how I did, it's a good idea to develop a technique to minimize the impact)
· Put shutter on discreet mode
(my comment: I always have it on discrete, but as I always shoot C (continious) that overrules the discreet mode. Only if I actually want discreet, I will turn to S (single) mode).
· Set auto preview to happen when shutter button is kept down (my comment: I don't, but if you shoot discreet mode it's a very good idea as you then keep holding the camera still my continuing to press the shutter).
· Set auto preview to show histogram.
· Take both compressed DNG raw images and JPGs. Set color saturation in camera to black and white for the JPGs, to make it easy to identify which of the raw images are likely to look good in black and white (my comment: Right on, and when you import in Lightroom the black and white JPGs will then be next to the color DNGs so you can compare and decide if it's a black and white or a color photo (make sure you go into the menu . Another approcah is to shoot DNG and JPGs but set the preview to "desaturated color" so as to get a look on the display that may look more like the final results (the normal can look a bit too colorful on the display). If you do this, set Lightroom to not import the JPGs as you don't need color DNG and color JPG files of the same photos).

Leica M9 with 50mm Summicron-M f/2.0 (Version II). The reason you get these "Noctilux-like" shape of the background is that the lens is focused at 1 meter and used fully open at f/2.0.
Outdoor Artistic Shooting (Shallow DOF)
· Set ISO to 200
(my comment: or 80 ISO if it is sunny. If you have a fast f/0.95 or f/1.4 lens you may need to add a 6X ND (neutral density) filter to be able to shoot within 1/4000 second exposure at 80 ISO wide open).
· Set lens wide open
· Press shutter to turn on camera
(my comment: This is right. As the camera is always on and you have set the time off to 1 minute in the menu, you simply press the shutter to turn on the camera whenever there is a chance you will shoot something. If you press the shutter in the instant you grab the camera to take it to your eye, the camera will be ready before it reaches the eye)
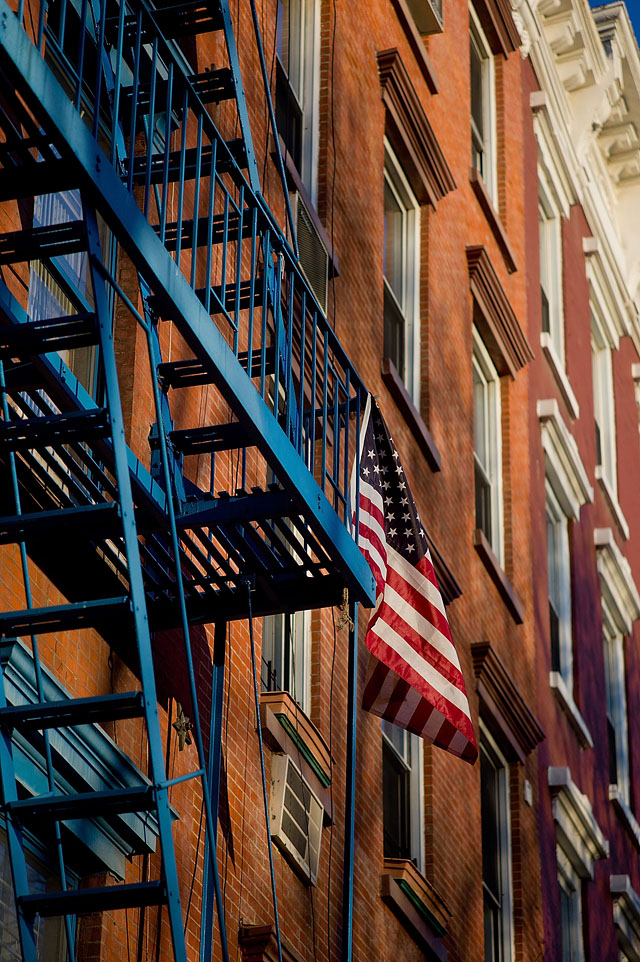
New York. Leica M9 with 90mm Summarit-M f/2.5
· Set shutter to A and take shutter speed reading on subject. Then set shutter manually to that setting. If light will be changing frequently, stay in A mode and choose shutter speed for each shot.
(my comment: this is the right approach [unless you use an external light meter like the Seikonic L-308S in whihc case you get a very precise reading from the external light meter and set the cameras shutter time accordingly], and on the preview you can see both the result of that exposure, as well as the shutter time used in the upper right corner of the preview.
Based on this you can set the shutter dial to the same time (if you liked the result), or set the shutter dial to a shutter time higher or lower so at to adjust the exposure. When I do this, I look for the right exposure of what is essential in the image: If I shoot for example a group of persons around a table I want their faces to be exposed correctly; and then I will set the shutter time for that.
This enables me to shoot in any direction, no matter how strong light there is behind the persons - the exposure of their faces will still be right.
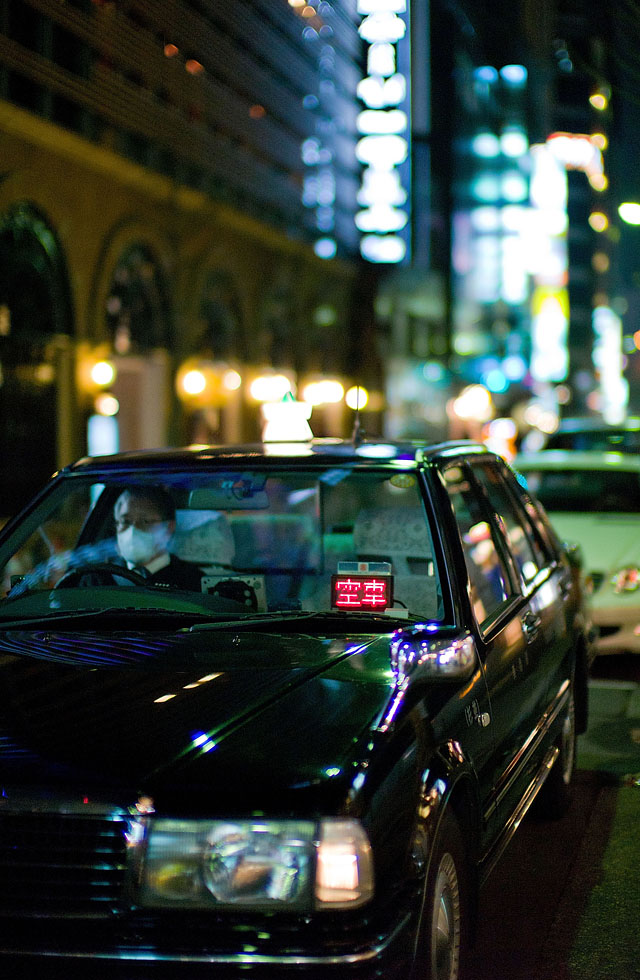
Tokyo taxi. Leica M9 with 50mm Noctilux-M ASPH f/0.95
Locking exposure with the shutter release button: Another technique I also use with this is to set the shutter speed dial on top of the camera to A [Aperture Mode] and then when I for example want to photograph a face on the street where there is a bright sky behind, I point the camera downwards to the street or the persons body or any other surface that has the same tone as the persons face, and then lock that exposure by pressing the shutter release button half down. This way I "trick" the built in light meter in the Leica M9 to figure out another and more correct exposure than if I pointed it to the persons face where the strong light behind him would trick the lightmeter to underexpose so as to compensate for the bright background. The result will be a correct exposed face, and that was what I aimed for.
The same technique can be used to adjust the exposure up or down in any location. The Leica M9 lightmeter uses a center of the viewfinder to measure light, and it doesn't take a science degree to figure out exactly how large a center circle it uses or how it all works: You simply do it, and after a number of times you get the concept and just work that way.
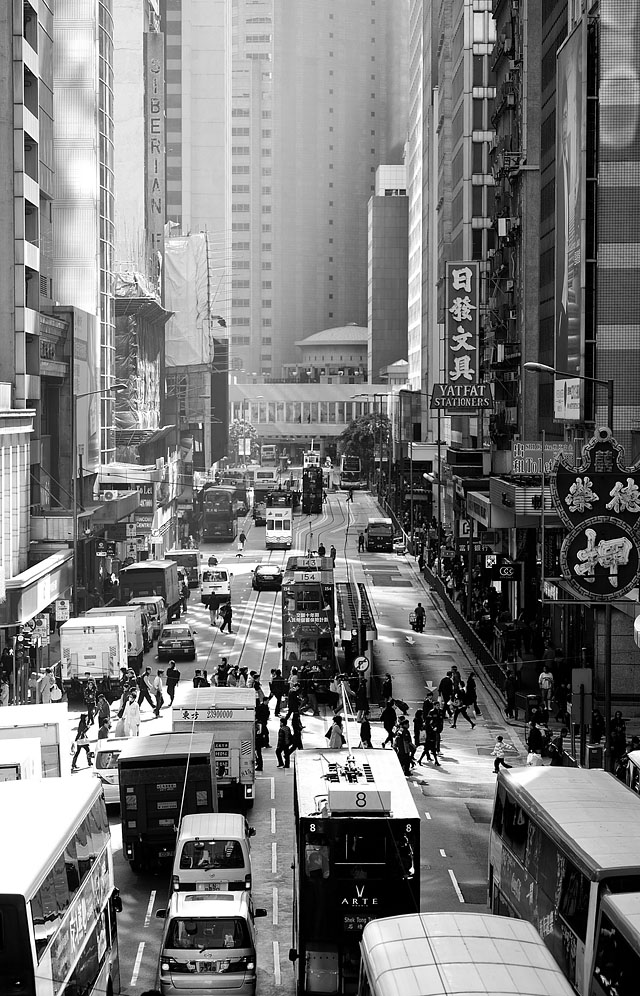
Hong Kong. Leica M9 with 90mm Summarit-M f/2.5
The shutter time is shown inside the viewfinder, so if you point it to that person on the street with the strong backlight and it says 1/1000, you point the camera to his body and it might say 1/250 which you then lock by pressing the shutter half down, and then you point the camera at the face and shoot.
If the preview is too dark or bright, you can adjust by using the shutter dial on top of the camera to set it at the shutter time you think is more appropiate - or you (still only want to use one hand for the camera and thus) keep it on A but now point and lock at something different that will give the desired shutter time. As you can see the shutter time in the display, you simply just move the camera till the desired shutter time is there, say 1/500, and then lock that (doesn't matter what you point at, you just want that shutter time so you can lock it). So at the same time as it is a lightmeter, it's also a way to get a desired exposure by using one hand and don't having to change the shutter dial (if you're a really experienced street shooter you can turn the shutter dial with the same finger as you use to shoot with, but you would still have to move your attention from the viewfinder to the shutter to set the shutter time manually. So that is an advantage of "point and lock exposreu time", that yu can maintain your attention in the viewfinder where all informations are).
Now, you got to have the camera near by and try this to get it. It's very simple and not as compolicated as when you read it. And by the way, this (pointing and locking exposure time) is also how to use a small dinky camera with no controls, or one of those advanced dSLR cameras where they have hidden the important controls in the menu).
· Use set … set … to take white balance off card in the shade
(my comment: The reason you would read the WhiBal greycard in the shade - well, it depends on your likings - would be to get daylight colors in shade and warmer colors in the sun when you shoot scenes with both sunlight and shade. I feel that is a more natural and nicer look than if you read the WhiBal in the sun which would give you daylight colors in the sun but bluish cold colors in the shadow.
If you only shoot main subjects in shadow, you set it for shadow, and if you only shoot main subjects in the sun, you set it for daylight in the sunshine).
· Focus on subject through the viewfinder

Maurizio Beucci from Italy taking "street shooting" to a whole new level at our photo seminar in Berlin. Leica M9 with 50mm Summicron-M.
Outdoor Street Shooting (Long DOF)
· Set ISO to 200
· Set lens to f/8 or f/11
(my comment: I wouldn't do that as I like DOF also for street. But it's a good idea if you want more depth of sharpness to work with. And especially if you use zone focusing it is a good idea: You can see on the lens the lines indicating how much of the field will be sharp at the different f-stop settings. Zone focusing is where you set the lens focus to for example two meters, and with an f-stop of f/8 you can see that everything from 1.2 meters to 3.5 meters will be in focus. So this way you don't have to focus for sharpness when shooting anything in that range - everything will be sharp in that range. And if you eye out something at 5 meters distance, you look down and turn the focus ring to about 5 meters (and have sharpness from say 2 meters to 8 meters with that setting) and then lift the camera, frame and shoot).
· Press shutter to turn on camera
· Use set … set … to take white balance off card in the shade
· Use scale on lens to set focus to approximate distance of most important subject
Leica M9 with 50mm Summicron-M f/2.0 (Version II), 800 ISO.
Indoor Shooting:
· Set ISO to 800
· Set lens wide open
· Use set … set … to take white balance reading off card
|
Leica M9 with 50mm Summicron-M f/2.0 (Version II), 800 ISO.
"Thirteen pages and I still don't understand why a Leica M9 is worth $ 7,000"
If you don't get it, maybe the Leica M9 is just not for you. As simple as that. Mind you, this is not a review about a camera, comparting it to others. I never compare cameras, and I never test anything I wouldn't use. I only write about experiences with cameras and lenses I've used and found useful. And the interest is only how to utilize it better for me and for others.
| |
"The imperfections are what makes it kind of fun"
- David Burnett
(about the Holga camera where the back would fall off and the film fall out) |
|
| |
|
|
The Leica M9 is a choice of camera and lifestyle and this is about how to get the most out of it. How to utilize one camera and one lens and get it to work the most for you. Hence, the price compared to other camera alternatives is pointless. If you don't want to carry two Canon bodies through airport security or carry them through the city for a day, then the price of them is irrelevant. If you on the other hand get sweaty hands and you hearth starts beating like a drum when you see a Nikon body, then why worry about the prices of Leica. Always choose camera with your hearth. The love factor is more important to get the camera that you will want to use than what dpreview wrote about noise factor and price.
It's certainly true that some who has the Leica M9 also have other cameras, some have a great number of cameras and some even buy one or two of any slightly intersting new camera that comes out.
But the core Leica M9 users prefer to use just that one camera, even when they have a closet full of others.
The price is 7,000$ and there are no alternatives. So why worry.

Leica M9 with 90mm Summarit-M f/2.5, 800 ISO.
On the next pages I will get into A walk-through of the Leica M9 menu, more on White Balance, something about metering and exposure control on the Leica M9, the science of the Leica M9 battery charger, how Kodachrome is the ideal look, the lack of AA filter, the secret behind Leica, some theory of how low shutter speed can you hold your breath, and more ...
Leica M9 with 50mm Summicron-M f/2.0.
|