When the first Noctilux lens was made as a 50mm f/1.2 in 1966, it was the introduction of the most unique lenses made in the history of photography. Soon after it became an f/1.0 model, and in 2008, Leica broke their own speed of light record with an f/0.95 version.
By the end of 2017 Leica announced the first of what I presume to be a series of legendary Noctilux lenses outside the 50mm range: The first is the 75mm Noctiliux, which is the one I will write about today.
I've been using the 50mm Noctiliux-M ASPH f/0.95 for many years, which you can read about in this article, "Noctilux - King of the Night".
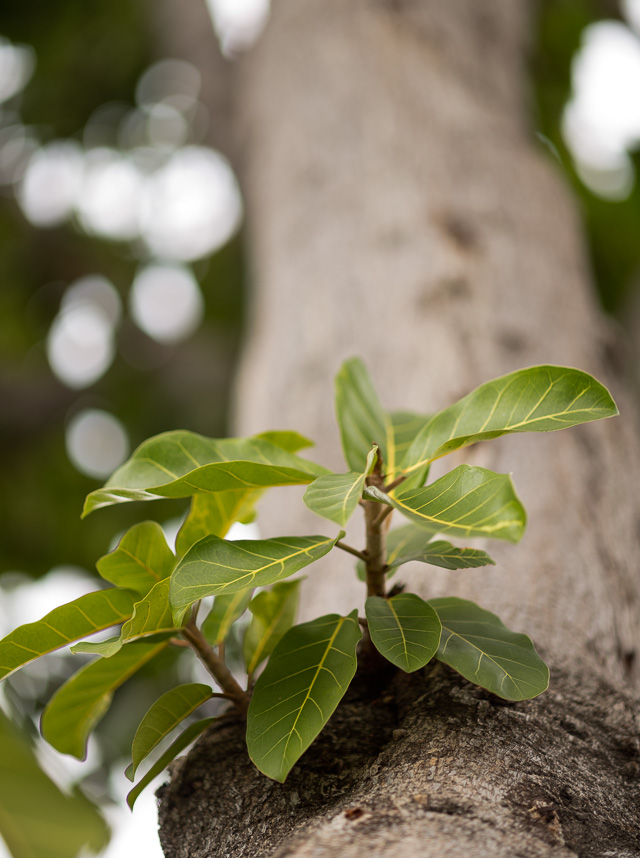
Conclusion: Beyond everything, and something you will discover within the first hour (or minutes) of taking on the 75mm Noctilux, is that the overall optical performance in extreme low-light lens design has taken a step up. The contrast of what is in focus has increased, giving the impression that the lens is much sharper.
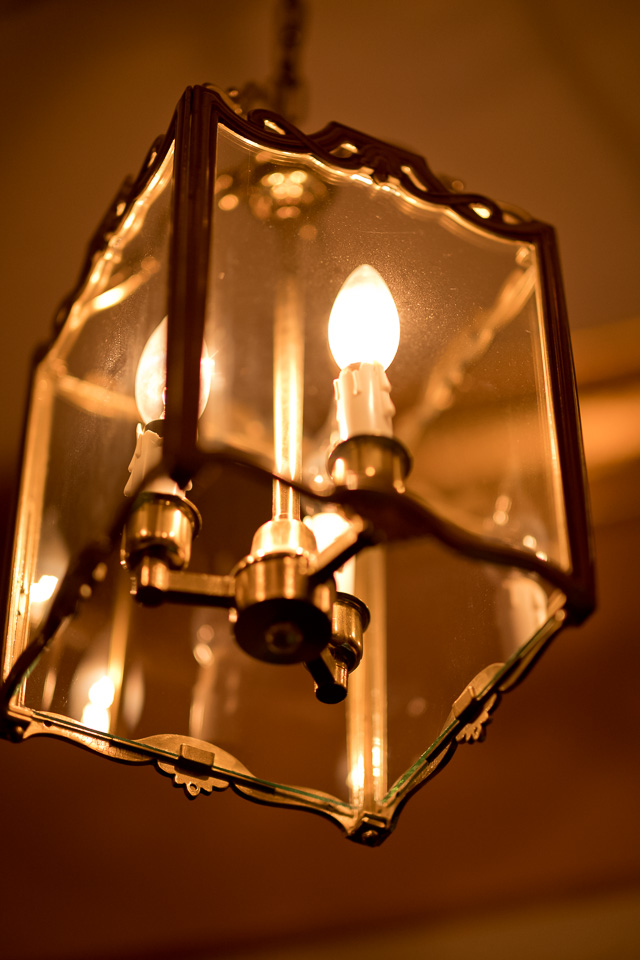
The sense of micro details you can touch and feel (when in focus) is extreme. The clarity of colors is almost better than what you see with the eye (which only the 90mm APO and a few others perform). The out-of-focus areas have become smooth and silky - as much as you would think is possible for a Noctilux lens. Maybe almost too nice and silky.
Textile of details you can touch.
Silky out-of-focus areas
Most miraculous is the fact that purple fringing is gone! It makes you immediately think, "When does the next 50mm Noctilux come out?" (which is not promised or even rumored to happen). Most likely, a 35mm Noctilux is due next, then maybe in some years, a newly updated design of the 50mm Noctilux.
The demand on the user of this lens is how to work with the out-of-focus areas that have become eventless in the sense that they are smoky soft without sharp edges, as well as less contrasty than the in-focus areas of the frame. The 75mm Noctilux has become a civilized version of the 50mm Noctilux. A 50mm APO on steroids.
King of the Night
Noctilux means"light of the night" [from Latin 'nocturnus' of the night, and 'lux' light]. The Noctilux surpasses the speed of the human eye somewhat four times (which can see as wide as f/2.1 in the dark and f/8.3 in bright daylight).
Originally, when the first Noctilux lens was introduced in 1966, it was at a time where the race was about how to make a really fast lens that would be able to photograph in the dark with 100 ISO or 400 ISO film. Today we have 6400 ISO commonly on cameras, so even a f/2.8 lens could work for low light.
But with the wide open aperture comes the extremely narrow focus, and with that a dreamy bokeh (the shape and visual quality of the out-of-focus areas). But also a lens that balances so much on what is physically possible that it becomes a lens with which to create art. A lens that has such a different take on handling light that it opens up a world of new possibilities to make the everyday look like a fantasy.
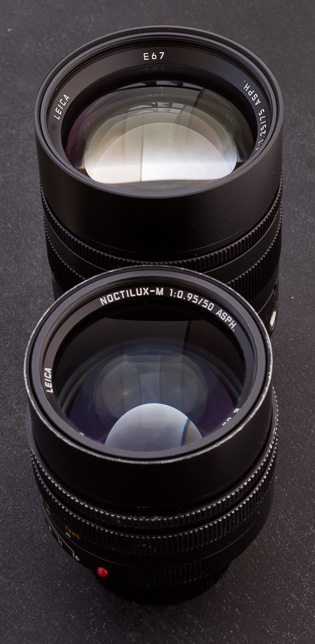
The 75mm Noctilux is 1 mm wider in diameter compared to the 50mm Noctilux.
The 75mm
The 50mm
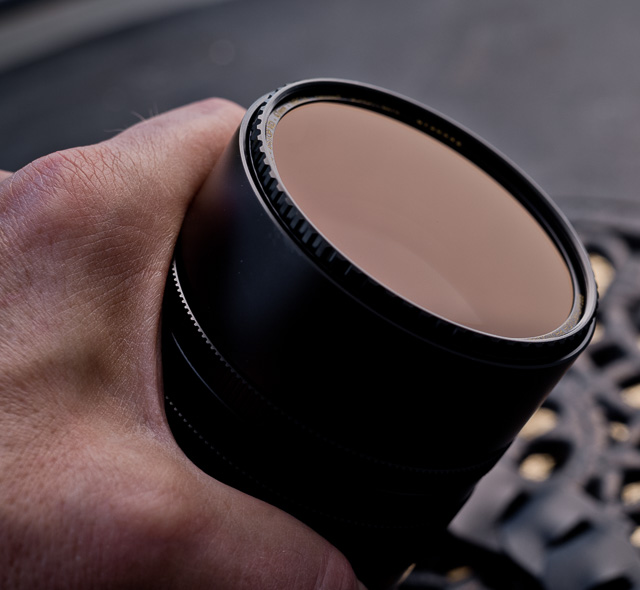
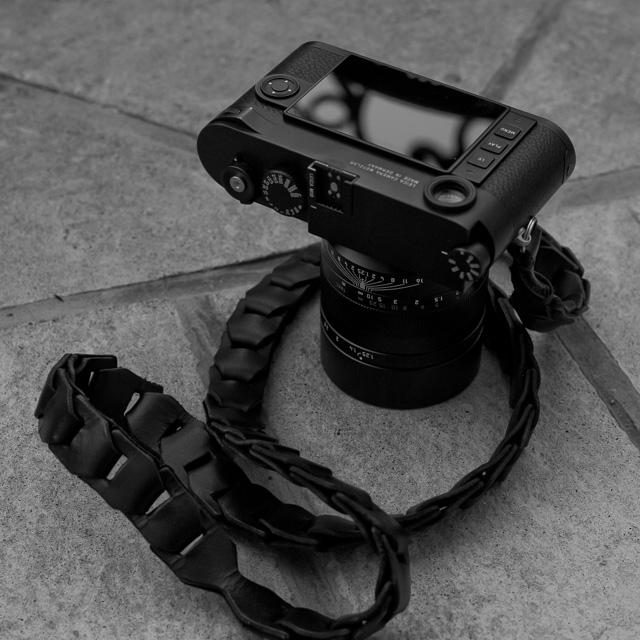
The Noctilux looks far larger in photos than it is in the hand, or on the camera. The same goes with the weight. Going from a 50mm Noctilux to the 75mm Noctilux is not a large step, though you do check your camera strap an extra time to make sure it's safe.
If you notice, the 75mm Noctilux uses 67mm filters, whereas the 50mm Noctilux uses 60mm filters. If you study the front of the two lenses, you'll realize that the tube is slimmer on the 75mm: That alone accounts for 5-6mm of the 7mm difference in filter size between the two.
It also means that filters are so far out from the 75mm lens opening that the filter frame doesn't influence the corners of the photo.
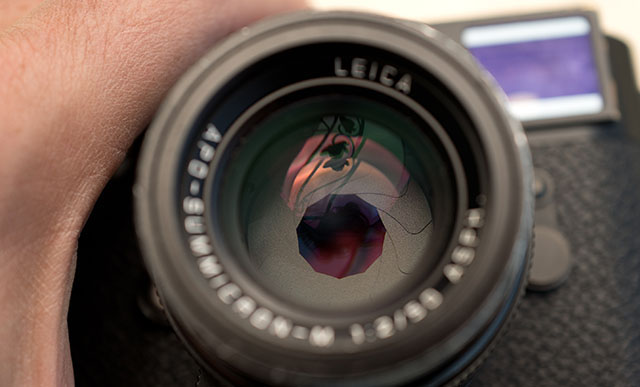
The "hole through" of a 50mm Noctilux f/0.95 is 53mm, and the "hole through" in a 75mm Noctilux at f/1.25 is 60mm in diameter.
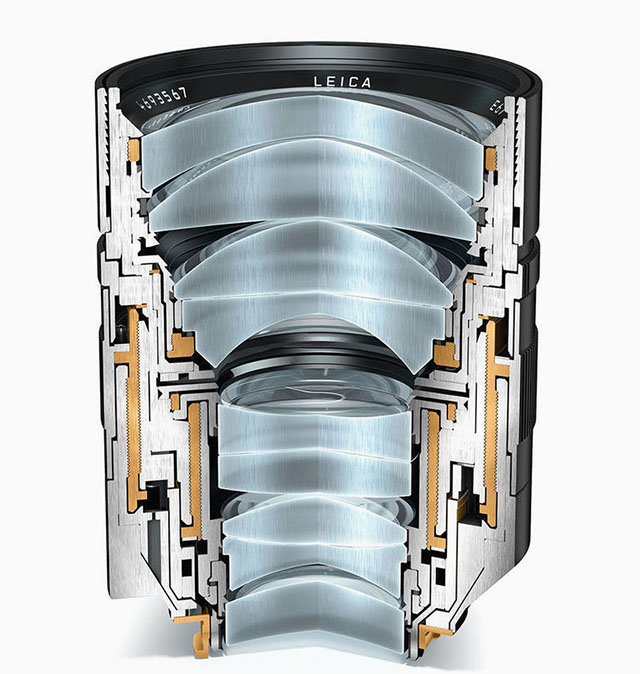
Overall, it's a remarkable masterpiece that the lens designers have managed to pack that much glass and wide open aperture inside a barrel that measures just 1mm more in diameter (the 75mm Noctilux lens barrel is 74mm and the f/0.95 Noctilux is 73mm in diameter).
Leica M is a very compact lens design in any regard. Comparatively, the Leica 75mm Summicron-SL f/2.0 is 73mm in diameter, despite the fact that it's a 1.5 stop slower lens than the 75mm Noctilux. The Leica 35mm Summilux-TL f/1.4 is 70mm in diameter for a lens where the "hole through" is only 25mm.
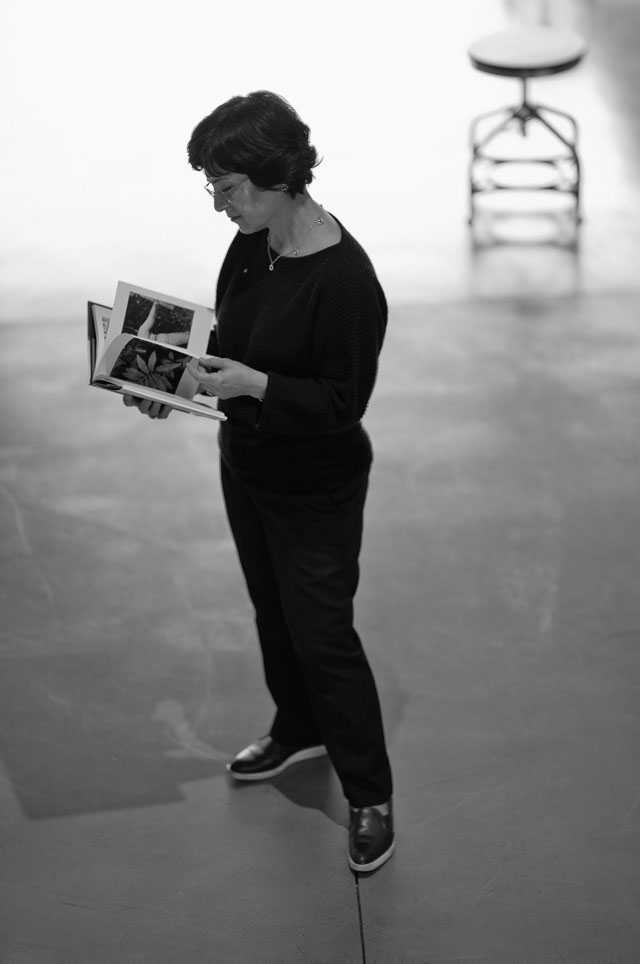
With the 75mm Noctilux, I felt performance fear. The bare touch of the lens… and you know it can perform, but can you get it to look as good as the lens was made to do? Will the face look as dreamily perfect and beautiful as the lens was intended to do? Will all my photos be slightly out of focus?
You can easily mess it up and take photos that are not perfect. If you forget that it's light and aesthetics that you are aiming for, why, if a photo has nothing in it, it doesn't matter what lens you used. To make it shine, you must find beauty.
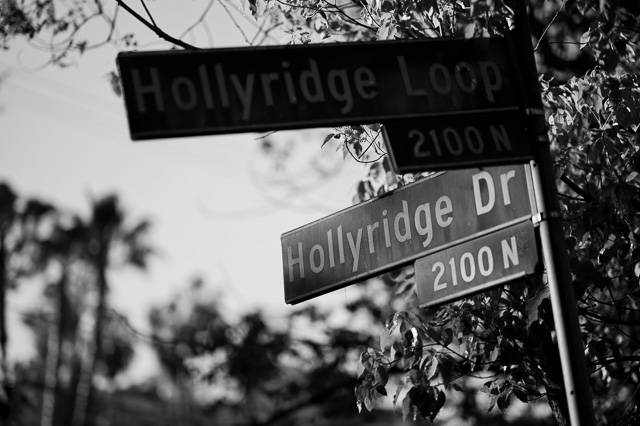
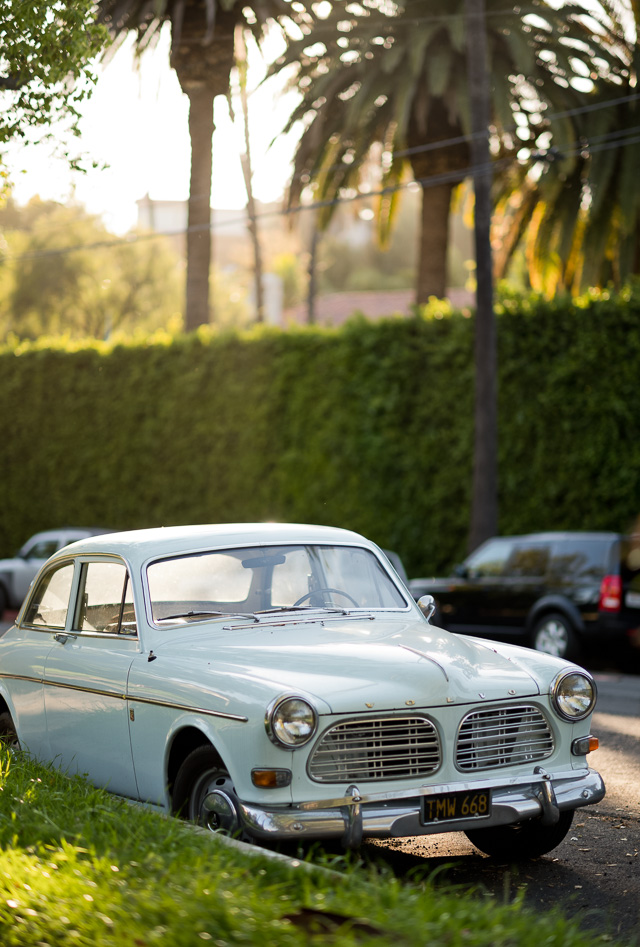
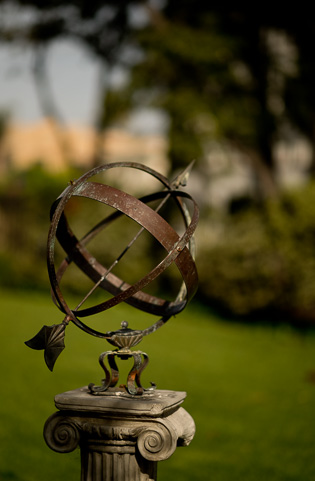
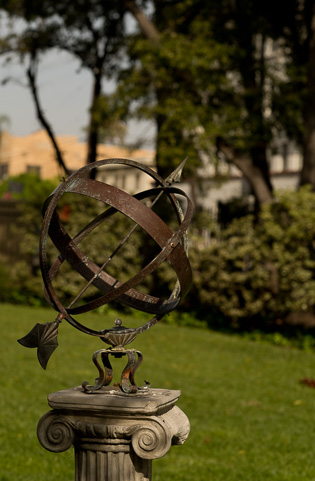
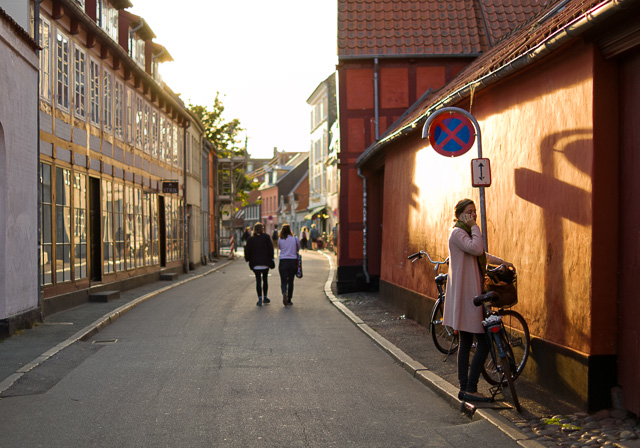
Look for the magic of light, and take plenty of photographs. That's how you do it. Taking a new camera or lens out into the garden, or in a hallway in the evening when you first have it... it's seldom going to create masterpieces.
You need to take a good long walk for a reasonable chance of getting something that is actually photogenic. Don't take five photos. Take two hundred.
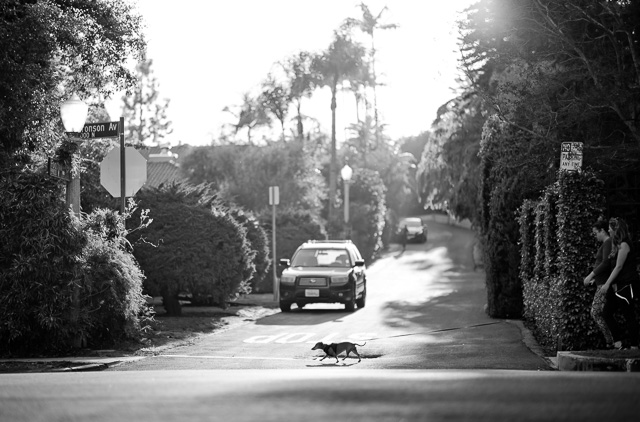
What you will likely realize is that some scenes just aren’t going to look great, no matter what you do. But others will. When the light is right, and the subject is right, it is actually possible to make magic. Without a subject, and without great light, nothing great will come out of it.
I make it a point that when I am learning a new camera or a new lens, I seek things that don't move fast. If they stay in place, I can examine my result, change settings and do it again. Once I’ve got the controls, I can go seek action and challenging focusing.
I found it relatively easy to focus the 75mm Noctilux with the rangefinder the first time I tried. I didn't have an EVF with me, so the choice was easy. I had to get the focus right, and I did.
The basics of focusing with a rangefinder are that the viewfinder must be clean on the back and front, and that the focusing eye must be clean.
Next thing, you must know that if you haven’t got contrast, you can't focus. You need contrasty lines and edges to match in the rangefinder. It just isn't possible to match something that isn't there to see, such as for example a dark edge on a dark surface.
The secret sauce to focusing with a rangefinder is: be sloppy! Focus like you know how to do it, be reckless about it. The harder you try, the harder it gets.
It means that you turn the focus ring (usually clockwise, as seen from behind the camera), and the moment the focus matches, take the photo. Then either move slightly back and forth with the body until you see that it matches again, then take another photo. Or, turn the focusing ring counter-clockwise back, then clockwise again until you see it matches, then take the photo.
Don't turn the focusing ring back and forth to "nail the focus" or "test where the most focus is", because it's not an old safe that will open magically when you hit the right combination. Trust what you see, and when you see that the focus matches, press the shutter.
The result of this will likely be that some photos will be in focus, and some won't. But you just need one that is in focus, and that's why you may take a few to make sure you get it. Don't think that it's supposed to always work with just one single photo, and that if you can't do that, you have failed the test to enter the Leica Cult.
Here's how it works: You put on the EVF to get a Live View of the scene, and as you focus, the EVF 10X's the view so you can really nail the focus. Then you take the picture. Ah, this is the way to make sure you don't mess up this focusing thing, you think.
What do you know? Some times that works, some times that doesn't work. "That's strange", you think. "I really have no talent for this manual focusing".
Stop blaming yourself. Take some more photos instead! What happens is that you focus, and before you take the photo, the subject moves, or you do, or you accidentally turn the focusing ring a tad as you take the photo. It doesn't really matter what it is, but that's the way it is. To make sure you get one or two that are as much in focus as intended, you take a few and re-focus for each.
You don't refocus, take the photo, then check the screen of the camera. No, you focus, take the photo, refocus and take another one.
Never check that screen for other than the exposure. Even when it is really sharp, it doesn't look as sharp on the screen. And often when it looks really sharp on the screen, it isn't (but is just high contrast that makes the picture on the screen look really crisp).
Let's repeat: Be sloppy. Focus, take a photo, re-focus and take another. Keep doing just that.
When I was doing a workshop in New York and we were sitting and editing, Lars from Sweden stands behind my screen, and he says "Man, I wish I could get my Noctilux in focus as you can". I told him what was true, which is, "That's because you only see the ones that are in focus".
By the way, the Noctilux is not about focusing. It's about how dreamy can you make it without losing touch.
New from Thorsten Overgaard:
Leica M Video Masterclasses
Enjoy this easy to use video class with
Thorsten Overgaard going over the Leica M10. More than one hour one-on-one with Thorsten on the camera, the menu, shooting outside, focusing and more.
For computer, iPad, smartphone and Kindle.
Thorsten Overgaard
Leica M10 Masterclass Video Course
Only $398.00
100% satisfaction or 100% return.
Order now. Instant delivery. #1801-0917
Enjoy this easy to use video class with
Thorsten Overgaard going over the Leica M 240. Almost two hours one-on-one with Thorsten on the camera, the menu, shooting outside, focusing and more.
For computer, iPad, smartphone and Kindle.
Thorsten Overgaard
Leica M 240 Masterclass Video Course
Only $398.00
100% satisfaction or 100% return.
Order now. Instant delivery. #1844-1017
Buy both and save $300.00
Leica M10 Video Masterclass and Leica M240 Video Masterclass ONLY $498.00
Using EVF: Turn Off the Red Outline (Focus Peaking)
If you use an EVF with a lens with narrow depth of field (which is basically all f/1.4 and f/1.25 and f/0.95 lenses), you likely miss the real focus if you have turned on Focus Peaking, which is the red outline that supposedly shows when you hit focus.
The focus aid works by contrast, so when there is high contrast, there is a red outline. If there is no high contrast, the red outline will never appear.
The reason I turn off the red outline is that it disturbs the focus. I cannot see the thing that is supposed to be in focus with red lines over it. And with narrow focus, the red outline will show up before you have actually gotten 100% focus.
If you put on a "simple lens" as the Leica 28mm Summilux f/1.4, you will be able to easily notice that the red outline turns on way before you get the actual focus: You focus on a person sitting by a table at an outdoor restaurant, and now the person, the wall behind and the cars in front of the restaurant lights up with red outline.
It isn't that it doesn't work or is extremely inaccurate, it's just that you can much easier see in the EVF whether something is in focus or not - by simply looking at it.
Turn on your eyes instead of obeying a piece of electronics.
This is very true for the Leica M10 with the Visoflex EVF 020, and also true for the less resolution EVF-2 on the Leica M240 and Leica M 246.
The best description of the Leica 75mm Noctilux, is a 50mm APO on steroids. It's accurate, detailed, exercises extreme control with light, but unlike the 50 APO it has some bad-boy qualities. The 75mm Noctilux is walking on a thin line between being as perfect as the 50mm APO and being reckless. Without losing any of the perfection.
The perfection is almost breathtaking in the 75mm Noctilux, at least on paper. In any low-light lens that you use wide open, the term "corner sharpness" is almost a joke. Who cares what's going on in the corners of the lens when all you want is selective focus on the main subject, and as much bokeh and out-of-focus for the rest?
Yet, the 75mm Noctilux boasts an even performance across the full field, to even "the most extreme corners" of the image field. While it might not be visible very often, it sets a standard for the lens. The designer has taken such extreme care to control all factors that it is not just the center of the lens that is great, but all of the lens.
When we talk f/1.25, that's quite an accomplishment. An f/1.25 lens is not just twice as hard to control in optical design as an f/2.0, it's ten to twenty times more difficult. In other words, it requires ten to twenty times more precise design and assembly.
So much glory for the lens designers. Back behind the camera, we actually couldn't care less, because the aim for the photos made with a f/1.25 lens is to break the laws of physics. In the same way as a Formel 1 driver needs a perfect car to break the record, the photographer needs a perfect lens to tweak reality.
If you want pretty, get the 50mm APO which can make excellent colors, micro details and all - but it can't play with depth of field like a Noctilux. It can't break the rules.
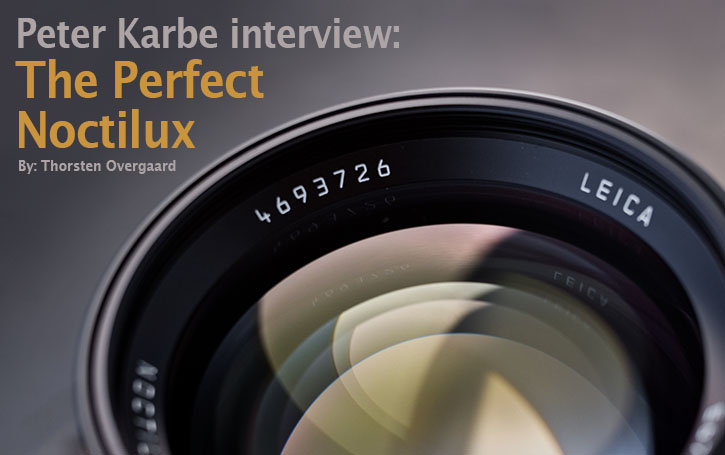
If you are all new to this and unfamiliar with the 50mm APO, "The World's Best 50mm" released in 2013, read my article on the 50mm APO and the intverview with the designer behind the APO and the Noctilux, Peter Karbe.
The lens designer Peter Karbe who made this Noctilux and most of the current lenses in the Leica M range, has said many times that aperture is for control of depth of field. Leica lenses are designed to be used wide open. If you want less open aperture, get a lens with less open aperture.
As an example, Peter Karbe has stated that the only difference between the current 28mm lenses (image quality, sharpness and everything considered) is the f-stop. So, no matter if you buy the 28mm f/1.4, the f/2.0 or the f/2.8, you get the same image quality. The wider you go, the more light, and the more narrow focus you get.
Likewise, the 75mm Noctilux was designed to be used wide open. "Stopping down will increase the performance, but in most cases it is not necessary except for reasons of image composition with depth of field", as the manual of the 75mm Noctilux says.
Reasons of image composition would be when three people ask if you can take a photo of them together. In that case, the composition demands that you stop down so all three people will be in focus.
Where most composition theory deals with composing a photograph as a two-dimensional concept (hight and width), starting to work with light-strong lenses wide open, you enter the art of composing in the third dimension. Now you have depth of field, selective focus, artistic bokeh, blurred out and exploding masses of undefineable light and an overall "unexplainable" visual array of effects to play with.
Then of course there's composition in the Fourth Dimension, but that's a story for another day and my upcoming Composition in Photography book.
As soon as you start using the aperture for light control, the depth of field changes. Many admire the photographs made with dSLR cameras because of the blurred background. It looks cool, and it focuses the viewer on the subject in focus.
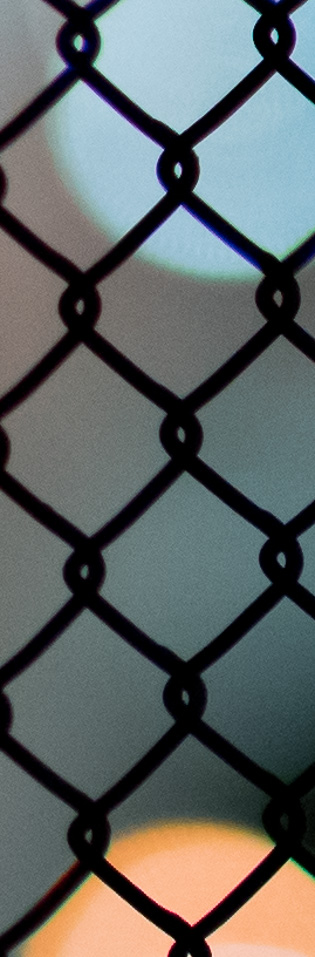
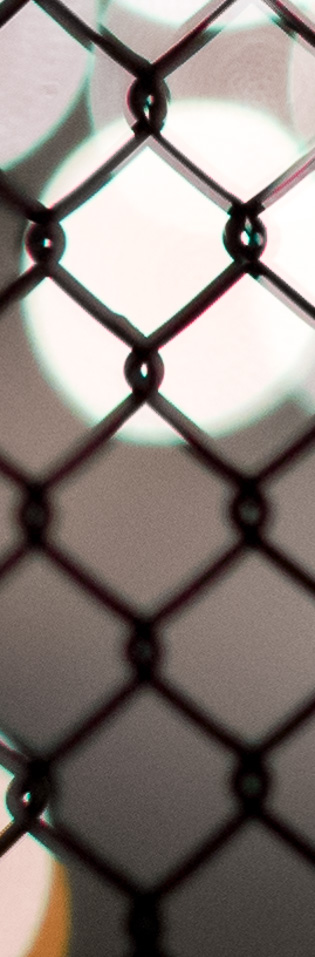
In the case of the 75mm Noctilux the out-of-focus background is to die for. If you don't think so, don't get one.
The lens wide open has selective focus; the background is out of focus.
f/1.25
When you stop down the aperture to f/8, the background is also more in focus.
To be able to keep using the 75mm Noctilux wide open on a Leica M, you need a 3-stop ND filter. The minimum ISO of the Leica M10 is 100 ISO, and the maximum shutter speed is 1/4000 of a second. In sunshine, any lens that is wider open than f/2.0 will overexpose. On a Leica M240 with a base ISO of 200, the aperture has to be reduced to f/2.8. On a Leica M Monochrom where the base ISO is 320, the lens has to be stopped down to f/3.4.
(On a Leica SL, Leica CL and Leica TL2, the shutter goes to much faster speeds (thanks to an electronic shutter), making the need for ND filters unnecessary even in sunshine).
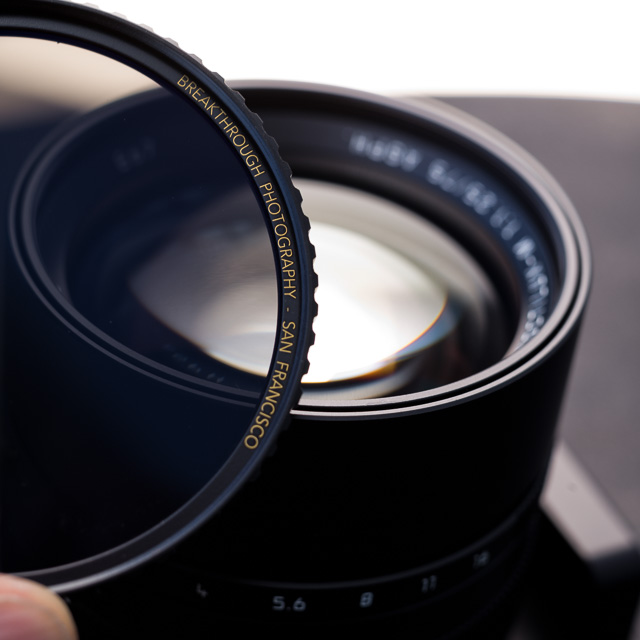
How to make believe the f/1.25 lens is an f/3.4 lens, even though it is still wide open at f/1.25 aperture: Add a 3-stop "X4-ND" filter from Breakthrough Photography.
To reduce the light going through the lens, you need an ND filter. ND stands for Neutral Density, so it's neutral. It doesn't add contrast, it doesn't change colors. It only reduces the strength of the light. The 67mm 3-stop ND filter from Breakthrough Photography ($149) will fit the 75mm Noctilux and reduce the amount of light 3 stops, which equals f/3.4.
In the case of the Leica M Monochrom, you might want to consider getting Leica's ND-filter, which is 4-stop. Thus you won't be balancing on the edge of over-exposure in sunshine at the 320 ISO.
My preference is the Breakthrough Photography "X4-ND" filters because they are the best filters made. Period. On the Leica M10, I will set the ISO to 200 when using the ND filter. When on a walkabout in sunshine, you also encounter shade, and you want as fast exposure as possible in the shade. 200 ISO works well with the "f/3.4" of the lens in sunshine, and it prevents slow shutter speeds when working in the shade.
On a normal day the M10 with this setup will be 1/4000 in sunshine and 1/250 - 1/750 in shade.
Getting darker ND filters than 3-stop and 4-stop is a bad idea. In sunshine it makes no difference, but in the shade you will suddenly find yourself working at 1/30th and 1/60th second shutter speeds, creating motion blur and camera shake.
The 3-stop ND-filter reduces the light going through the lens 3 stops, so wide open, when the lens is in fact at f/1.25, it will take light in as if it was at f/3.4 while the lens remains the narrow depth of fieldof f/1.25.
I recommend "X4-ND" 3-stop filters from Breakthrough Photography.
As lens design improves
What's the difference between old and new Leica lenses?
Generally speaking, the newer a Leica lens, the more resolution (as in details recorded per mm), contrast, clarity and correct colors. Newer lenses use optical design and (mainly) lens coatings to control reflections and (skin) colors.
In high fidelity, watches, cars and other things most would expect that the older the item, the better the quality and the more care that went into the details. That's true for much manufacturing, but not in the case of Leica lenses. Unlike most brands, Leica will deploy the most expensive raw materials they see fit, extreme care in hand-assembled production, and an overall extreme reach for the highest quality, despite the costs.
The extreme quality is a Leica tradition since 100 years ago, only changed for the better by the improved precision in production, more accurate precision-assembling, grinding of the optics, and computer-aided design. Many of the optical qualities are the same: The idea of how the image must look is the same, but as we have moved forward from 100 years until today, the overall precision has improved.
So much to love: Two extremes that are in the same family and have many of the same qualities. The $400 - $1,800 50mm "Rigid" from 1956-68 (left), and "The World's Best 50mm Lens" from 2013, the 50mm APO-Summicron (right) in a limited "LHSA" edition for $9.595.
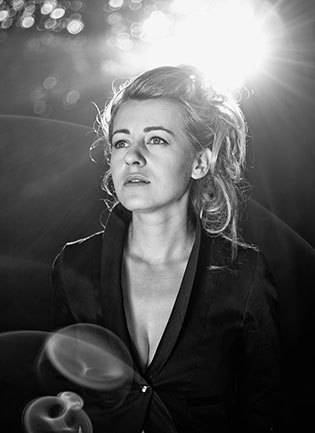
If you want flare with modern lenses,
you add it later (as in the movie "gravity")
If you compare the two lenses shown above, the 50mm "Rigid" from 1960's and "The World’s Best 50mm" from 2013, the fundamental aesthetical qualities are much the same. But in comparison, the newer lens has extreme micro-details and extreme control of light, resulting in clarity, correct colors and higher contrast (even with strong backlight). If you imagine a photo taken with a cheap plastic lens, all highlights will have a strong halo. With a quality lens, there is no halo - no overflow of light. Light is light, shadow is shadow. Period.
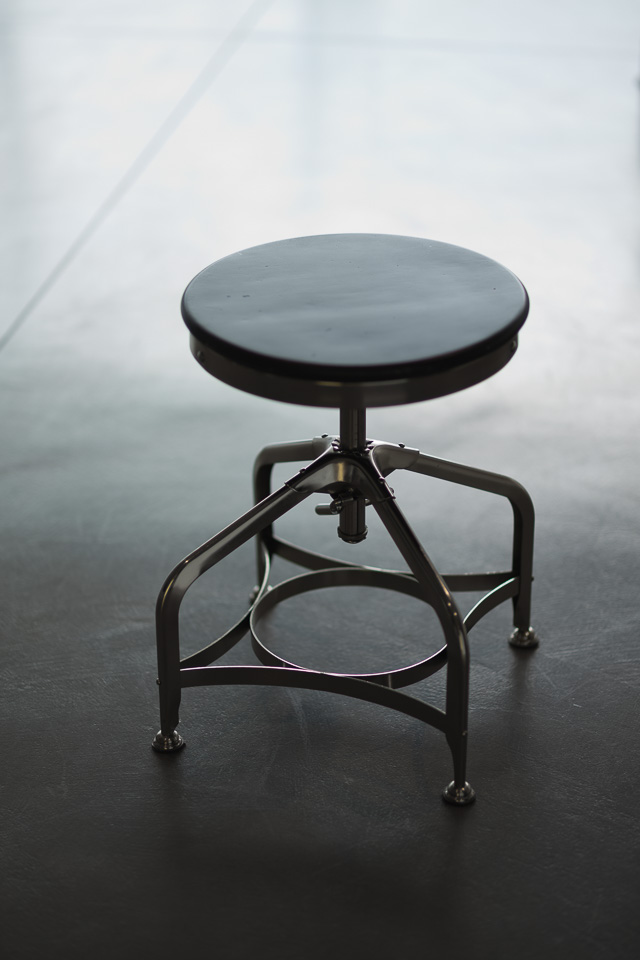
75mm Noctilux cut-through.
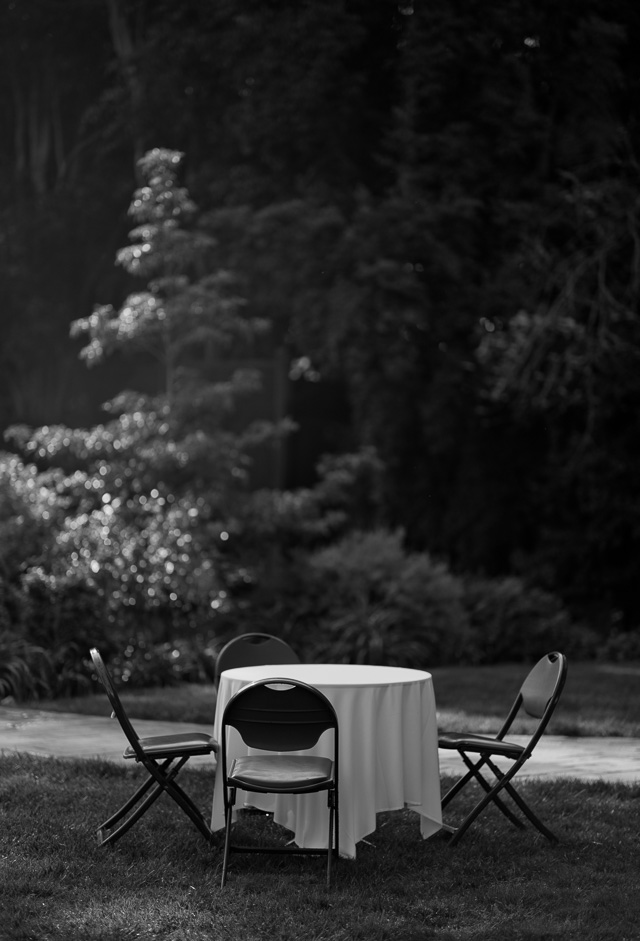
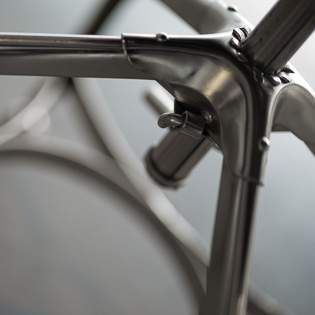
Even between extreme lenses like the 50mm Noctilux f/0.95 from 2008 and the 75mm Noctilux-M f/1.25 from 2018, the extremely well-made optical design of 2008 has improved ten years forward to 2018: Tighter control with light, colors and contrast (see chair detail below).
Almost all Leica lenses have the "Leica look", which may be described as "soft, detailed and alive". They further have some qualities that defy words. You recognize it when you see it.
This philosophy behind the special Leica look is described by lens designer Peter Karbe in my interview with him on the 50mm APO lens here.
75mm Noctilux
50mm Noctliux
In this detail you may sense the overall tightness of the 75mm Noctilux's control of light in a scene with high contrast and backlight.
While I haven't made direct comparisons between the 75mm Summilux f/1.4 and the 75mm Noctilux f/1.25 (and have no intention to do so), the difference in look is obvious even from the small review screen of the camera already when you have taken the first photo with the 75mm Noctilux.
The contrast of the 75mm Noctilux (2018) is way above the Summilux (1980-2007). There are many differences between a 38-year old excellent lens design compared to a current excellent lens design. The control of light (flare and ghosting), the accuracy of colors (the glass doesn't add warm or cold tones to the colors, thanks to advanced glass types and advanced coatings to control colors and reduce reflections), the clarity of colors by control of light rays (that makes you suspect it's an APO lens design), the application of modern lens design where Peter Karbe and his team designs the look towards high contrast in the focal plane and "fast falling contrast" in the out-of-focus areas.
The 75mm Summilux is a great lens for color photography when not disturbed by ghosting or flare light, and it is a beautiful lens for monochrom photography where the "soft and rich in details" look seems to feed the Leica M Monochrom with more tonality than you can explain.
Both lenses, the 75mm Noctilux and the 38-year older 75 Summilux have the richness in details that makes you wonder how this is possible. The face being photographed by either lens will love the detailed skin that looks healthy and alive, while the "soft" look doesn't age the face unnecessarily (which an over-sharpened look will). Leica lenses give you the skin details (texture), but not the wrinkles (lines), so to speak.
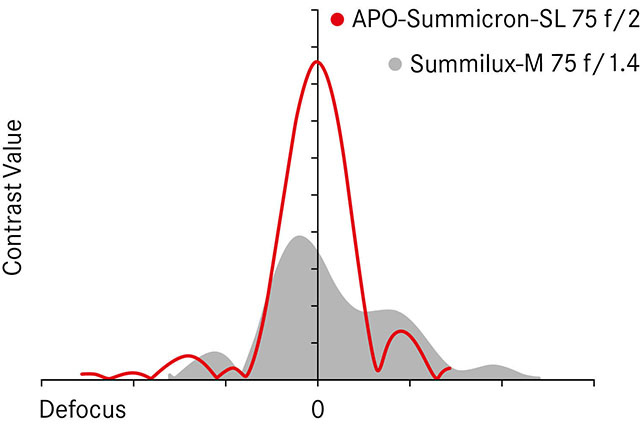
While I haven't made direct comparisons between the 75mm Summilux f/1.4 and the 75mm Noctilux f/1.25, this comparison of the 75mm Summilux and the 75mm Summicron SL illustrates the effect of high contrast in the focus area, and fast downfall in the out-of-focus area in front and behind the subject in focus.
Ghosting = Secondary light or image from internal reflections between (and within) lens elements inside a lens. The reflected light may not always be in focus, so overall it looks like a "milked out" image. A subject in focus has brightened patches in front of it that come from reflections inside the lens. the most elementary look of ghosting is when you look in a rear-view mirror in a car at night and you see doubles of the headlights behind you (a strong one and a weaker one), because the headlights are reflected in a layer of clear glass on top of the mirror glass.
Degrees of ghosting from strong sunlight entering from outside the frame. To the right the outside light has been shielded with a shade.
Flare = Burst of light. Internal reflections between (and within) lens elements inside a lens. Mostly, flare has a characteristic "space travel" look to it, making it cool. Particularly in older lenses with less or no coating of the glass surfaces to suppress this, it can be a really cool effect. In newer lens designs, the coatings and overall design try to suppress flare and any reflections to a degree, so that there is seldom any flare to be picked up (moving the lens to pick up a strong sunbeam), but instead a "milking out" (or "ghosting") of a circular area of the frame; meaning simply overexposed without any flare-looking flares.
Sunlight creating flare in the bottom right quadrant of the image.
I always look to see how a lens handles light coming straight into it. It's my way of playing with it and learning how to create something unique with it. I always do that with lenses, it's my way of learning how they work with extremes.
When I first heard of the 75mm Noctilux, I was certain I wanted to have one, try it and not keep it.
Now I'm not that certain anymore. I think it's a keeper.
The f/1.25 of the lens (rather than f/0.95) to begin with, seemed a "half solution", but in practical use and results, it's a well-thought step. The size of the lens and the final look of the images makes sense when you have used it for a while.
A 75mm f/0.95 would have been revolutionary, but extremely heavy and something like 95 mm in diameter.
The results of the 50mm Noctilux and the 75mm Noctilux are similar. There seems little sense in using both, one of them will win and it could be the 75mm for image quality, or the 50mm for being more compact and for being able to work closer to the subject. We'll have to figure that one out on our own.
Two days after I had found my 75mm Notilux on the website of PopFlashin California (with 3-year passport warranty), I got an email from Leica Salzburgthat they had gotten one for me too (which they might still have if you are fast). While the wailing list is very long in many places, there are 75mm Noctilux being shipped, so you’ve got to find the stores that don't have a 5-person, or 30-person or 150-person waiting list.
The bottleneck in the 75mm Noctilux, the 50mm Noctilux and 50mm APO is not just production capacity. These three lenses, along with the Cine Lenses, are hand-assembled, tested, re-adjusted and tested endlessly for hours by a handful of specialists in Wetzlar who can fine-tune a lens to extreme tolerances.
Leica lenses are in any case exclusive, expensive and from a small factory. With the 75mm Noctilux, we likely face the same scenario as when the 0.95 Noctilux was introduced in 2008, which means waiting lists and small drips of lenses during the first year or two.
"I have just been reading your eBook last night, which opened my eyes for more than
I have been thinking about before. You have a great sensitivity that I feel
connected with, and I enjoyed every word."
"I am reading your book, Finding the Magic of Light. Exactly what I crave."
"I find your books very helpful and thought-provoking."
"A must have. Personally useful for street photography."
In this easy to read and apply eBook, Thorsten Overgaard takes you on a journey to see, understand and simply use light.
"One of the most important ways to get an aesthetic and pleasant picture is to find the good light."
"Finding the Magic of Light"
New 2nd edition (April 2015)
eBook for computer and iPad. (87 pages) Only $47
Order now - Instant delivery. (Note: If you bought the first edition of this book, this new edition is free. Simply send an e-mail for your free update).
While the Leica SL does really well with Leica M lenses (and most likely better than the Leica M in the case of the 50mm APO-Summicron), the Leica CL and Leica TL don't handle Leica M lenses just as well as Leica M camera sensors.
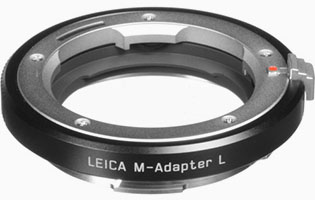
Leica M-Adapter L for using Leica M lenses on the Leica SL, Leica TL2 and Leica CL.
I would say that the 75mm Noctilux-M ASPH f/1.25 is equally good on the Leica M and Leica SL, which are both full-frame.
On the Leica TL2 and Leica CL ... nah, I don't think so. The crop factor makes it onto a 115mm lens, and the sensor can't handle the image quality as well as the M and SL. If you're going to get a $12,500 lens, save the adapter and buy a Leica M or Leica SL for this lens.
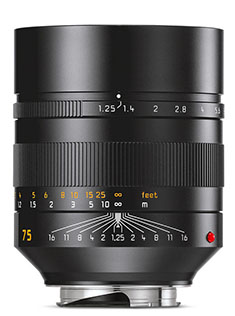
A walk-through of the Leica 75mm Noctilux-M ASPH f/1.25 FLE.
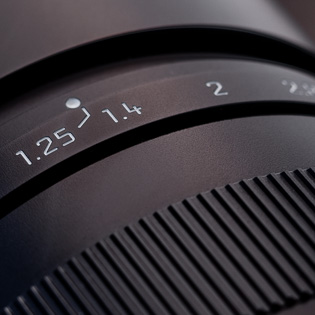
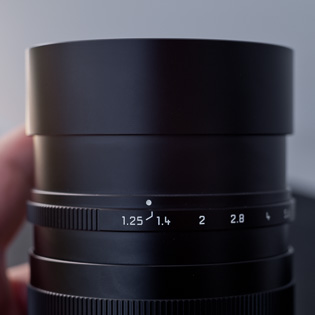
f/1.25
The aperture ring for the Leica 75mm Noctilux features an f/1.25 as the widest opening. Simply for space reasons the 1.25 is placed to the left of 1.4 and the actual position on the scale is marked with a white line.
Aperture normally goes from f/1.0 to f/1.4 to f/2.8 and so on, with each step reducing the light to half of the previous step.
f/1.25 is mid-way between f/1.0 and f/1.4; a "half-stop".
Aperture ring is sometimes called diaphragm ring (dia=through, phragma=fence) as it controls how much light comes through the lens.
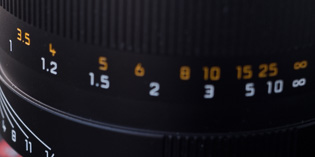
Infinity-symbol (∞)
and distance scales
The manual focus scale goes from 2.8 feet / 85 cm to "infinity", which is marked with the ∞ symbol.
The focusing barrel has two scales. An orange for feet and a white for meters. Before 1950, some Leica lenses had only one scale, so there were models for some countries shown in meters and other models for other countries shown in feet. At some point some genius figured both scales could be on the lens.
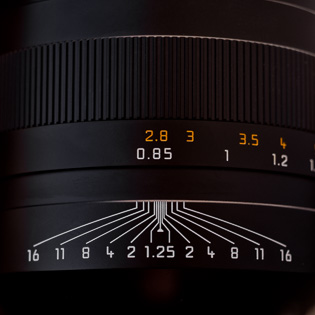
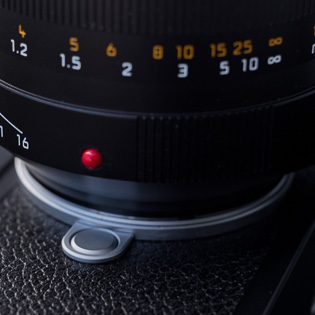
Depth of Field Scale
The many lines "meeting in the center" shows how deep a field will be in "acceptable focus" at any given f-stop and distance.
At closest distance, the 1.25 lines shows that basically a hair-line will be in focus at f/1.25.
At closest distance, if the aperture is set to f/16, the area from 75cm - 90cm would be in focus.
As the subject in focus is further away, a greater depth of the field would be in focus: If you look at the picture above, at f/16, everything from 10 meters to infinity would be in focus. In other words, the closer you move to a subject, the more critical (thin) becomes the focus. You want the background more blurred? Go closer!
By the way, the ∞ symbol is infinity. If you stop down the lens to f/16, the midst of the ∞ symbol would be above the f/16 line (which would make the distance from 4 meters to infinity in focus). Take a lens and play with the depth of field scale to grasp it easily.
"Acceptable focus" is a term from the film days and basically means this area will look really sharp.
At close focus there is a great distance from 1 - 1.2 meters on the focusing ring, whereas the distance from 5 to 10 meters is relatively short. When you bring the depth of field scale lines into this, you see that the depth of field becomes more narrow the closer you go.
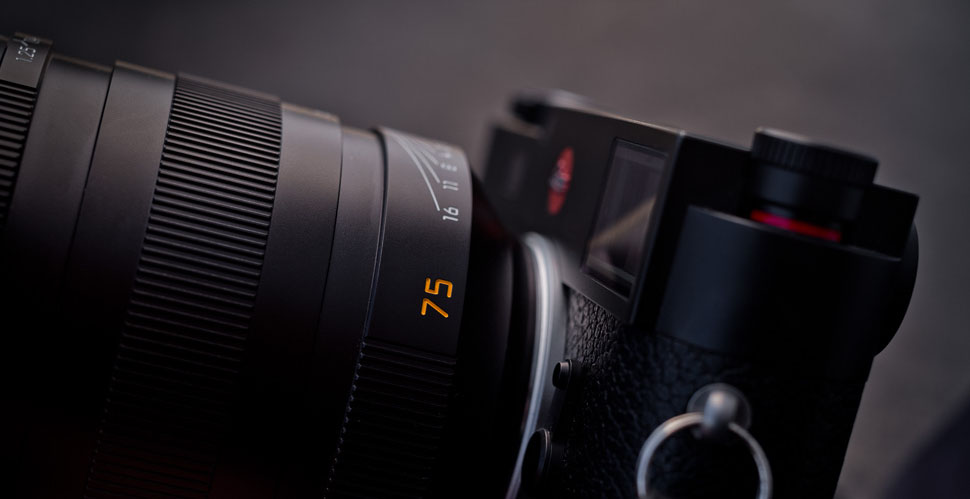
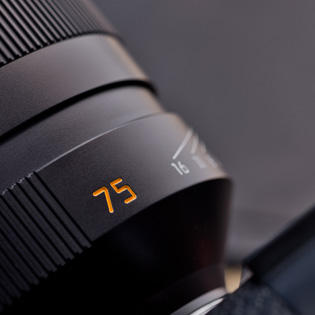
Focal length marking
In recent years, all Leica lenses have gotten an orange marking on the barrel with the focal length so the user can see which lens is mounted on the camera. In this case a 75mm lens.
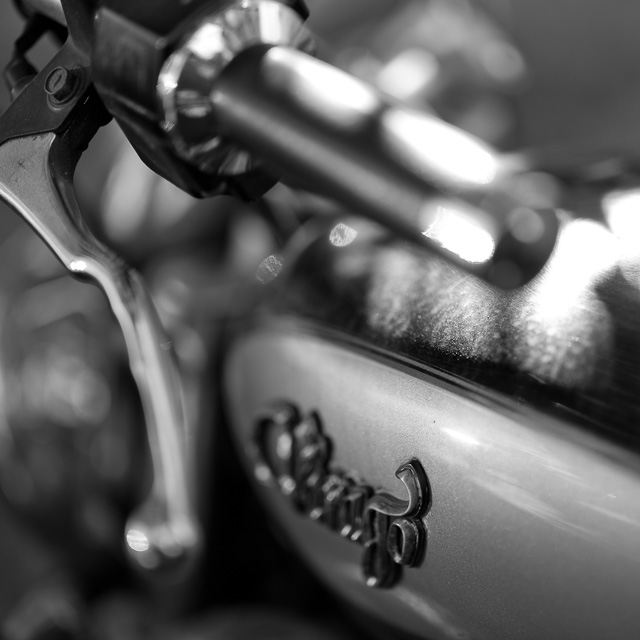
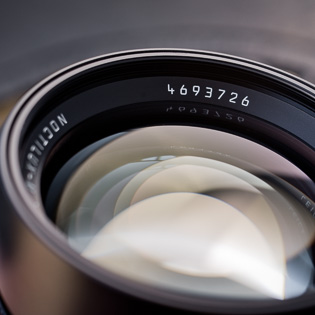
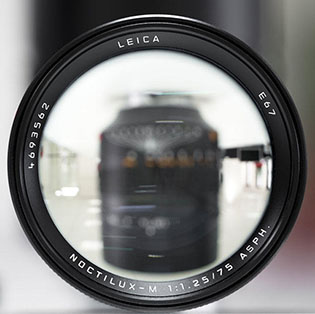
Serial number
The serial number of most Leica lenses is engraved on the front. In some cases, lenses have the serial number on the side of the lens barrel.
You can refer to my Leica Lens Compendium for what year a lens (approximately) was produced (down towards the bottom of the page).
Twist lens hoods
When you turn the built-in lens hood it extrudes. It's very easy to move the hood out.
Below you can see the difference between the hood in and out.
Besides offering a natural protection for the glass against bumps, it shades for light from the side that eventually would cause unwanted reflections in the lens, which would cause the image to "milk out".
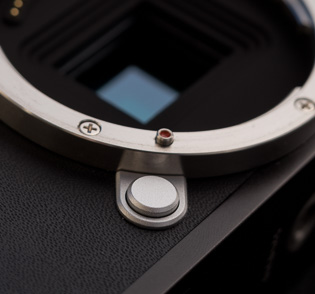
Lens release/lock
The silver button on the camera, next to the lens bayonet, is the release button. You press it and turn the lens counter-clockwise until the red dot is above the silver lock. Then you can take it off.
Red alignment button
The red button goes straight above the release lock when the lens is mounted, then you twist the lens clockwise until the lens "clicks" into lock (see below).
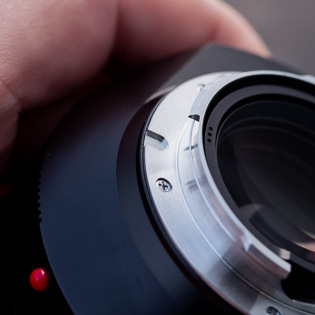
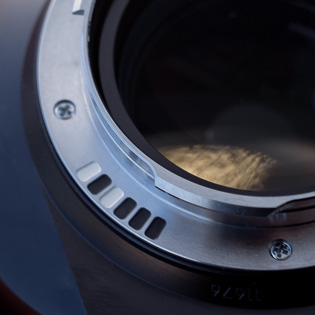
Bayonet lock
On the back of the lens you can see the small tab that the camera locks into to make sure the lens stays on the camera.
The three small holes you may be able to spot on black part of the lens back is for mounting in the factory (special tools, don't try this at home).
6-bit code
The white and black lines on the back of the lens bayonet is not a message from aliens. It's the individual code on each lens model that tells the camera which lens is mounted.
This is how you can see on the display of the camera which lens is mounted; and the information is also recorded in the EXIF data of each picture.
The lens profile in the EXIF data allows Lightroom and other software programs to apply lens corrections to the file (straighten lines, etc.).
Older lenses from before 2003 don’t have a bit code, but it can be engraved by Leica Camera AG.
Lens model
On the 75mm Noctilux the model number is really well hidden.
Mostly the model number of a lens is engraved on the outside of the barrel, on the bottom, closest to the camera.
The Noctilux model number (which is Type 11676) is tiny and almost below the lens. But it's there!
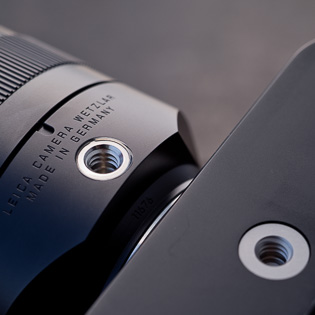
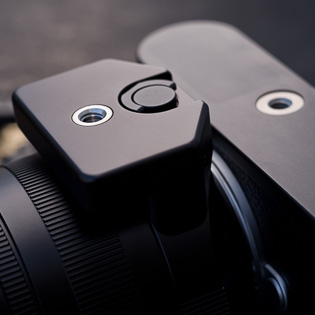
Tripod mount
Below the 75mm Noctilux is a 1/4" tripod mount that you do not mount the lens on! You use the accessory enclosed (see next picture below).
The instruction manual on the lens say it is "not permitted" to use the lens thread. Offenders go to prison and the lens goes back to Leica.
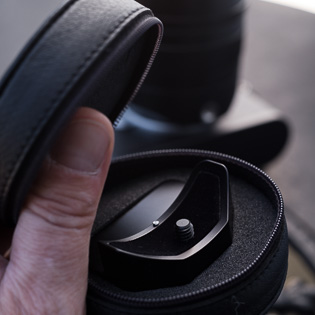
Tripod accessory for Noctilux
To make a perfect balance of camera and lens on a tripod, the tripod accessory is attached to the lens. It further stabilizes the whole set and prevents the lens from being damaged. Leica traditionally always has tripod mounts on larger lenses.
The tripod accessory is free with the lens and is enclosed the box in a protective leather pouch.
Nice tripod adapter for optimum stabilization when doing video or ling exposures.
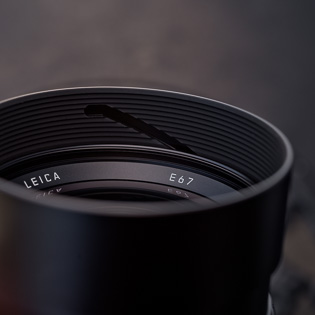
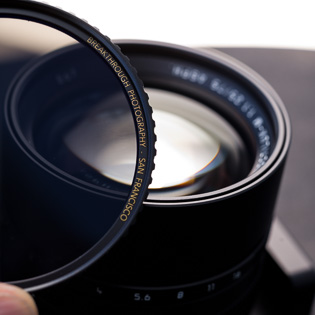
E67 filter thread
The front of the lens says E67, which is the Leica designation for 67mm filters.
For a 1.25 lens one should get a 3-stop Neutral Density filter (ND-filter), which works like "sunglasses" for the lens so you can use it in sunshine.
A 3-stop ND-filter reduces the light going through the lens 3 stops, so wide open at f/1.25 it will take light in as if of f/3.4 but remains the narrow depth of field of f/1.25.
I recommend "X4-ND" 3-stop filters from Breakthrough Photography.
The manual specifically says the 75mm Noctilux is optimized for f/1.25 and using the aperture to stop down should only be done for depth of field control.
I hope you enjoyed my article on the 75mm Noctilux. I will be writing more on other cameras and lenses, so sign up for my free newsletter to stay in the know.
As always, feel free toemail me any comments, suggestions or questions.
Leica Definitions:
AF = Auto Focus. The idea is that the camera does the focusing itself (the word auto comes from Greek "self").
Aperture = (also written as f/) = The metal blades inside a camera lens that regulates how much light passes through the lens. On a f/1.4 lens, the lens is "fully open" at f/1.4. At f/2.0 the aperture inside the lens makes the hole through the lens smaller so only half the amount of light at f/1.4 passes through. For each f/-stop (like f/4.0 - f/5.6 - f/8.0 - f/11 - f/16) you halve the light. The f/ fundamentally means "f divided with": The aperture of the lens is basically the focal length divided with the f/-stop = size of the hole (50mm divided with f/2.0 = the hole is 25 mm in diameter, or 50mm at f/1.4 is 50mm divided with 1.4 = the hole through is 36mm. ). ORIGIN: Late Middle English : from Latin apertura, from apert- ‘opened,’ from aperire ‘to open’.
The aperture blades inside the lens is clearly visible in this photo.
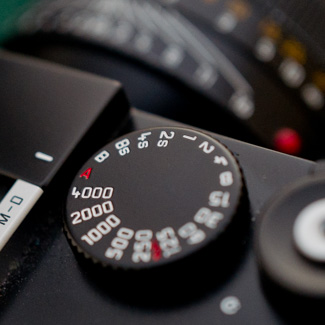
The camera in Aperture Priority Mode
Aperture Priority Mode. When the shutter speed dial on top of a Leica camera is set to A, it is short for “Aperture Priority” and allows the user to set a specific aperture value (f-number) while the camera selects a shutter speed to match it that will result in proper exposure based on the lighting conditions as measured by the camera's light meter. In other words, you set the aperture as priority (f/1.4 for example), and the camera calculates a shutter speed (1/250 of a second) that matches that. If you change the aperture to f/2.0 by changing the aperture ring on the lens, the camera will re-calculate the speed to 1/125 so as to get the same amount of light to hit the sensor (f/2.0 is half the light through the lens as f/1.4 and 1/125 if twice the amount of light on the sensor as 1/250).
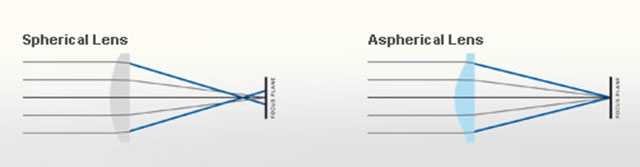
ASPH = stands for "aspheric design".
Most lenses have a spherical design - that is, the radius
of curvature is constant. These are easy to manufacture by
grinding while "spinning" the glass. This design
however restricts the number of optical corrections that can
be made to the design to render the most realistic image possible.
ASPH lenses, however, involve usually 1 element that does
*not* have a constant radius of curvature. These elements
can be made by 1) expensive manual grinding, 2) molded plastic,
or 3) Leica's patented "press" process, where the element
is pressed into an aspherical ("non-spherical")
shape. This design allows Leica to introduce corrections
into compact lens designs that weren't possible before. Practically,
the lens performs "better" (up to interpretation)
due to increased correction of the image, in a package not
significantly bigger than the spherical version. Sphere: ORIGIN Middle English : from Old French espere, from late Latin sphera, earlier sphaera, from Greek sphaira "ball".
Normal spheric lens (grinded)
ASPH (note the shape of the glass as result of pressing rather than grinding)
Auto- means “self”. The idea is that when a camera has auto-(something), it does that (something) by itself.
Bokeh = The visual quality of the out-of-focus areas of a photographic image, especially as rendered by a particular lens: It's a matter of taste and usually photographers discuss a 'nice' or 'pleasant' bokeh (the out-of-focus area is always unsharp, which is why the quality discussed is if one likes the way it renders or not by a particular lens). The closer you get to something, the 'more' bokeh' you get (in that the focus becomes less for the background and foreground at close distances than at long distances). ORIGIN from Japanese 'bo-ke' which mean 'fuzzines' or 'blur.'.
Camera -is today’s short name for Camera Obscura (meaning “a dark room”). CamerameansChambre and was used only as a Latin or alien word, actually only for Spanish soldiers’ rooms, until popularized in connection with photography in 1727: “Camera Obscura”. In 1793 the slang term “camera” was used by Sterne Tr. Shandy: “Will make drawings of you in the camera” and by Foster (1878), “The eye is a camera”. Camera Obscura was described by Iraqi scientist Ibn-al-Haytham in his book, “Book of Optics” (1021) and by Leonardo da Vinci in 1500; popularized and made widely known in 1589 by Baptista Porta when he mentioned the principle in his book “Natural Magic”. Johannes Kepler mentions Camera Obscura in 1604.
Camera = chambre (room), Obscura = dark (or cover).
Contrast - The degree of difference between tones in a picture. Latin contra- ‘against’ + stare ‘stand.’
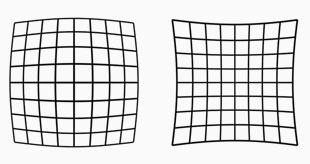
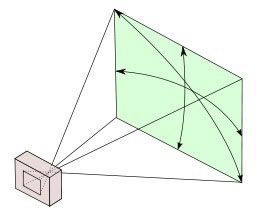
Lens distortion looks like this. The lines are not straight. Our eye uses distortion correction. Lens designers can design lenses so they have very little distortion, or they can make less complicated lens designs and "fix" the distortion in software.
Distortion = In photo optics/lenses: When straight lines in a scene don't remain straight because of optical aberration.
Lens designers can correct for distortion to a degree so the whole image field is perfect corrected and all lines remain straight. In modern lens design many designs rely on Software Distortion Correction (SDC).
The eye adjusts for distortion so we always see vertical and horizontal lines straight when we look at things. Even when you get new prescription glasses (if you use such), you will often experience distortion in your new glasses. After a few days they eyes have adjusted for the glasses and the distortion you saw to begin with is now gone. Software Distortion Correction (SDC) is far behind what the human eye can perform of adjustments. (Also see my definition on Perspective for more on the eye and optics)
DNG = Digital Negative, an open standard developed by Adobe. It is a single file that contains the raw image data from the sensor of the camera as well as date, time, GPS, focal length, settings, etc.
The alternative is a RAW file + XLM file where the RAW file contains the image information and the XML contains the rest of information about where, how and when the picture was taken.
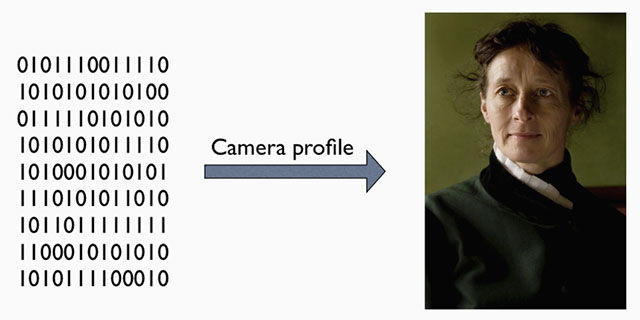
A Camera Raw profile (that is specific for that camera) in the computer helps the software program, for example Adobe Lightroom, to translate the RAW data into the image.
A raw file (or DNG) is simply the full recording of digital data (1's and 0's) from the sensor. In the computer, the sensor data is translated into the exact colors, via a camera profile.
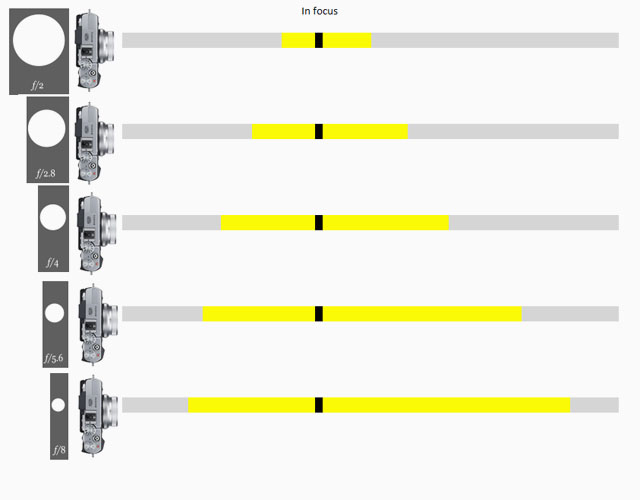
DOF = Depth of Field. This is how much of the image will be in focus. Shallow DOF is a generally used term in photography that refer to lenses with very narrow focus tolerance (which can be used to do selective focus; for artistic reasons or for specific storytelling, like making irrelevant subjects in the foreground and background blurry so only the subjects of essence are in focus and catch the viewers eye).
Depth - Distance between front and back. Distance from viewer and object.
Dynamic range. The grade of ‘contrast range’ (or number of tones) a film or sensor, or simply a photograph, possess between bright and dark tones. The human eye is said to have a dynamic range of 10-14 ‘stops’ (but because we scan area by area and compile a concept of the overall scene, they eye is often thought to have a much higher dynamic range), Film used to have 7-13 ‘stops’ and some modern sensors have up to 15-17 ‘stops’.
Elmarit = Refers to the maximum lens aperture - here f2.8 . The name is obviously derived from the earlier (and slower) "Elmar" designation. Not every f/2.8 lens is called an "Elmarit" though, the most obvious current exception being the 50mm f2.8 Elmar-M collapsible lens which for nostalgia and marketing reasons has kept the original 1930's Elmar name (the 50mm f3.5 collapsible Elmar, manufactured 1930-59, was one of Leica's most famous and popular lenses). Vario-Elmarit is Leica Camera AG's name for zoom lenses.
EVF = Electronic ViewFinder. The Leica M10/T/TL/TL2 uses the Leica Visoflex model 0020. The Leica M240 and M246 uses the Leica Visoflex EVF-2.
f/ (f-stop, also knwn as aperture).
f- (focal length).
f/1.25 is the size of the "hole through" the lens, the aperture. f/1.25 means focal length divided with 1.25. In the Leica 75mm NoctiluxM ASPH f/1.25, the "hole through" the lens at f/1.25 is 60mm in diameter. At f/1.4 the "the hole through" is 53.5mm in diameter. At f/4 the "hole through" is 18.75mm in diameter.
Each step smaller from f/1.4 to f/2.0 to f/2.8 to f/4.0 and son on is a reduction ofthe light to half for each step. The Noctilux f/1.25 therefore lets 50% more light in through the lens than a 75/1.4 Summilux.
Flare = Burst of light. Internal reflections between (and within) lens elements inside a lens. Mostly, flare has a characteristic "space travel" look to it, making it cool. Particularly in older lenses with less or no coating of the glass surfaces to suppress this, it can be a really cool effect. In newer lens designs, the coatings and overall design try to suppress flare and any reflections to a degree, so that there is seldom any flare to be picked up (moving the lens to pick up a strong sunbeam), but instead a "milking out" (or "ghosting") of a circular area of the frame; meaning simply overexposed without any flare-looking flares.
Sunlight creating flare in the bottom right quadrant of the image.
The camera moved slightly to avoid the flare.
Focus, in - Sharp and clear in appearance. Focus - “The burning point (of a lens or mirror)”. In Latin the word focus meant fireplace or hearth. The word was probably first employed outside of its Latin literal use as “the burning point of a lens or mirror” in optics, and then came to mean any central point. The German astronomer Johannes Kepler first recorded the word in this sense in 1604.
A 28 mm lens has a 74° viewing angle
Focal length = (also written as f-) = On the Leica 35mm Summilux-TL ASPH f/1.4 it is 35mm and originally referred to the distance from the sensor (or film in older days) to the center of focus inside the lens. Nobody uses that measurement, except those who construct lenses! For users of lenses, focal length refers to how wide the lens sees. The viewing angle, which is often given in for example 90° viewing angle for a 21mm lens, 74° viewing angle for a 28mm lens, 6° viewing angle for a 400mm lens, etc.
Each human eye individually has anywhere from a 120° to 200° angle of view, but focuses only in the center.
The Leica TL2 has a APS-C sensor, which "crops" the traditional focal lengths with 1.5X, reducing the angle of view of view with 1.5X.
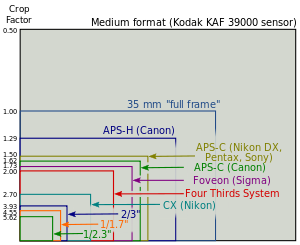
Full Frame is "king of photography"
Full Frame (FF) = The size of the sensor is 24 x 36mm which is the format Oskar Barnack and Leica Camera AG invented with the first Leica that was introduced in 1925. Many other formats invented since, such as APS, APS-C and all usually refer to Full Frame ratio, by which it means what size they have compared to Full Frame.
The 24 x 36mm Full Frame format is so "king of photography" that it has continued to be the ideal for all cameras. Besides this, there exists Large Format cameras such as 4x5" (100 x 125 mm) and Medium Format 6x6 (60 x 60mm amongst other sizes in that area).
Ghosting = Secondary light or image from internal reflections between (and within) lens elements inside a lens. The reflected light may not always be in focus, so overall it looks like a "milked out" image. A subject in focus has brightened patches in front of it that come from reflections inside the lens. the most elementary look of ghosting is when you look in a rear-view mirror in a car at night and you see doubles of the headlights behind you (a strong one and a weaker one), because the headlights are reflected in a layer of clear glass on top of the mirror glass.
Degrees of ghosting from strong sunlight entering from outside the frame. To the right the outside light has been shielded with a shade.
ISO = Light sensitivity of the camera sensor is given in ISO (International Organization for Standardization). It's a standard that was used in film and is now used in all digital cameras also. The base ISO for the Leica TL2 sensor is around 100-150 which means that this is what the sensor "sees". All other levels are computer algorithms calculating the effect as if the sensor could "see" more (hence noise at higher ISO levels).
ISO goes in steps of doubling: When the ISO is raised from 100 ISO to 200 ISO, the camera only need half the amount of light to make the same picture. For each step in ISO to 400, 800, 1600, 3200, etc. the light sensitivity is doubled for the sensor (and the camera sensor only need half the light of the previous ISO to record the same image).
JPEG = A standard for picture format made in the 1990's by Joint Photographic Experts Group). Mostly referred to as JPG as in L1003455.JPG which would be the name for a JPG file from the camera.
Leica = A compound word derived from " (Lei)tz" and "(ca)mera". Apparently they were originally going to use "LECA", but another camera company already used a similar name in France, so they inserted the 'i' to prevent any confusion. Before that the brand name was Leitz.
Lens - A piece of glass or similarly transparent material (like water or plastic). It has a shape so that it can direct light rays. The word “Lens” is used both for single piece of glass as well as a camera lens with several lenses that works together. From ‘lentil’ because similar in shape.
Lens hood = A tube or ring attached to the front of a camera lens to prevent unwanted light from reaching the lens and sensor. ORIGIN Old English hod; related to Dutch hoed, German Hut 'hat,' also to hat.
Light = Tiny particles called photons that behaves like both waves and particles. Light makes objects visible by reflecting off of them, and in photography that reflecting off of subjects is what creates textures, shapes, colors and luminance. Light in its natural form (emanating from the sun) also gives life to plants and living things, and makes (most) people happier. So far, nobody has been able to determine exactly what light is. The word photography means “writing with light” (photo = light, -graphy = writing). Read more about light in my book Finding the Magic of Light.
Live View = This is the ability to see the image the sensor see, live, via the screen, or via an electronic viewfinder (EVF).
MACRO = Macro lens. The Leica 60mm APO-Elmarit-Macro ASPH f/2.8 is both a 60mm lens for portraits, landscapes, etc. as well as a near focus macro. The word macro comes from Greek makros ‘long, large.’
Maestro II - A processor developed first as Maestro for the Leica S2 and upgraded to Maestro II for the Leica S (Typ 007). The Leica Q has a Mestro II (Leica Q edition) processor developed by SocioNext Inc. based on Fujitsu's Mibeault architecture.
mm = millimeter(s), as in a 50mm lens. (Earlier in lens history lenses focal length was given in cm = centimeters; as in a 5 cm lens). For anyone used to centimeters and millimeters, it’s no wonder. But if you grew up with inches, feet and yards, you may have had a hard time grasping what a 50mm lens was. But as lenses were designed first in Europe, the metric system with centimeters and millimeters was used to describe lenses.
The reason a 50mm lens is a 50mm lens is that there is 50mm from the focus plane (the film or sensor) to the center of focus inside the lens. When photography was a young subject, it was engineers who made it all, and the users were expected to understand. The engineers were so into the making of the lenses, that it apparently never dawned upon them that today’s users would think of a 21mm lens as a wide angle lens rather than a lens where there is 21mm from the sensor to the center of focus inside the optics.
Noctilux = Also known as "King of the Night" because "Nocti" means Night and "Lux" means Light. The f/1.0 lenes from Leica are named "Noctilux". The first Leica Noctilux lens was the 50mm Noctilux f/1.2 which shortly after it's introduction was improved to the 50mm Noctilux f/1.0. In the current model the f-stop has been improved further to f/0.95.
"Noctilux" refers to the maximum lens aperture - here f1.0 . "Nocti" for nocturnal (occurring or happening at night; ORIGIN late 15th cent.: from late Latin nocturnalis, from Latin nocturnus ‘of the night,’ from nox, noct- ‘night.), "lux" for light. The Leica Noctilux 50mm f1.0 is famous for enabling the photographer to take photos even there is only candleligts to lit the scene. See the article "Noctilux - King of the Night"
Optic = Eye or vision. From French optique or medieval Latin opticus, from Greek optikos, from optos ‘seen.’
Perspective - The way objects appear to the eye; their relative position and distance. Also, selective focus (foreground and background out of focus) can change the perception of perspective (also see Three-dimensional). A wide angle “widens” the perspective and makes objects further away appear smaller than they are to the eye, and objects nearer, relatively larger than they are to the eye. A tele lens will “flatten” the perspective and often objects further away will appear relatively larger than nearer objects, compared to sizes in real life. A 50mm lens is the one closest to the perspective and enlargement ratio of the human eye.
S = Single image. When the ring by the shutter release on top of the camera (or in the menu of a digital camera in case it does not have this ring on the ourside) is moved from OFF to S, the camera takes only one photo at the time (Single). The other possibility is Continuous (see above).
SDC = Software Distortion Correction. A correction of lens distortion (not straight lines) applied in the camera and which is part of the DNG file. In Lightroom the SDC of the camera file is applied automatically (and cannot be removed), in software like AccuRaw one can open the DNG file without the SDC correction. Sean Reid Reviews have written a good article on what SDC is and does in "Software Distortion Correction".
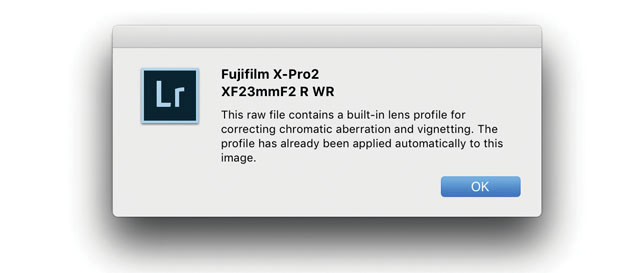
SDC (Software Distortion Correction): In Lightroom the correction profile for the Fujinon 23mm is applied automatically and cannot be turned off.If you go into Develop mode in Lightroom and look under Lens Correction > Profile, you will see a message in the bottom with an exclamation mark. When you click on that, you get the message above.
Sensor = A device that detects a physical property (like light) and records it. A camera sensor is a plane plate with thousands of small “eyes” with a lens in front of each, which each individually records the amount of red, green and blue light rays that comes through the lens. together Red, Green and Blue form all colors of the spectrum. From Latin sens- ‘perceived’.
Saturation: How colorful, intense or pure the color is. Less saturation would be less colorful, more saturation would be more colorful. In today’s photography, desaturating a photo on the computer will gradually make it less and less colorful; and full desaturation would make it into a black and white photo.
Sharpness - See “Focus”
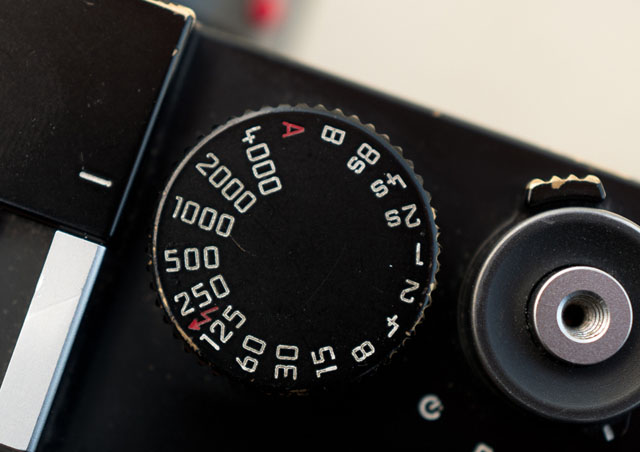
Shutter speed dial - The dial on top of the Leica M where you can set the shutter speed manually. It can also be set to A which stands for Aperture Priority (where the camera suggests a shutter speed; or when you move the dial away from A, the camera will show arrows in the viewfinder, suggesting which direction to change the Aperture to, to get the correct exposure).
Shutter speed dial set to 1/1000 of a second.
SLR = Abbreviation for Single-Lens Reflex; the lens that forms the image on the film/sensor also provides the image in the viewfinder via a mirror. The Leica Q has no traditional viewfinder and no mirror. the image seen in the EVF is what the sensor sees.
Summicron = Refers to the maximum lens aperture - here f/2.0 . There are many guesses how this name came about, a popular one being that the "summi" came from "summit" (summit means the highest point of a hill or mountain; the highest attainable level of achievement) while the "cron" came from "chroma" (ie. for colour). Not so: The name (Summi)cron was used because the lens used Crown glass for the first time, which Leitz bought from Chance Brothers in England. The first batch of lenses were named Summikron (Crown = Krone in Deutsch). The Summi(cron) is a development from the orignal Summar (the 50mm f2.0 lens anno 1933). Vario-Summicron is Leica Camera AG's name for zoom lenses f/2.0 as the one that is on the Leica Digilux 2.
Summilux = Refers to the maximum lens aperture - here f1.4 , "-lux" added for "light" (ie. the enhanced light gathering abilities). In Leica terminology a Summilux is always a f/1.4 lens and a Summicron is a f/2.0 lens.
Three-dimensional = Having the three dimensions of height, width and depth. In photography and lens design, three-dimensional effect is also the perception of even small micro-details; the texture of skin can appear flat and dead or three-dimensional and alive. Also, selective focus (foreground and background out of focus) can change the perception of depth. Also see Perspective.
Vario- is the Leica Camera AG name for zoom lenses. Vario-Elmarit and Vario-Summicron and so on.
Viewfinder a device on a camera showing the field of view of the lens. Also known as the German word "Messucher" (or Meßsucher).
1) A built-in viewfinder in a camera that simply show the frame you get when you look through the viewfinder.
2) A rangefinder viewfinder which is also used to focus the lens. In Leica M cameras two pictures has to meet and lay 'on top of each other' for the picture to be in focus.
3) An external viewfinder, usually on top of the camera in the flash shoe, so as to show the field of view of lenses vider than what the built-in viewfinder can show (15mm, 21mm, 24mm, 28mm etc viewfinders exist)
4) Very simple "aiming-devices" on top of a camera that is simply a metal frame without any optics. Just a frame, as for example very old cameras (the original Leica), or when using cameras in diving where you can't look through the camera.
LEItz CAmera = LEICA
Founded 1849 in Wetzlar, Germany.
Thorsten von Overgaard by Robert Farrands.
Thorsten von Overgaard is a Danish-American multiple award-winning photographer, known for his writings about photography and Leica cameras. He travels to more than 25 countries a year, photographing and teaching workshops to photographers. Some photos are available as signed editions via galleries or online. For specific photography needs, contact Thorsten Overgaard via email.
You can follow Thorsten Overgaard at his television channel magicoflight.tv.
I am in constant orbit teaching
Leica and photography workshops.
Most people prefer to explore a
new place when doing my workshop.
30% of my students are women.
35% of my students do
two or more workshops.
95% is Leica users.
Age range is from 16 to 83 years
with the majority in the 30-55 range.
Skill level range from two weeks
to a lifetime of experience.
97% use a digital camera.
100% of my workshop graduates photograph more after a workshop.
1 out of 600 of my students have
asked for a refund.