A walk-through of the Leica M9 and Leica M9-P menus
It is good to get a grip on what the menus are and decide what your personal settings should be. It's not a hugely complicated menu on the Leica M9 and Leica M9-P. In fact there is less than 30 things to set, and only few of them are really important.
The menu on the Leica M9 and Leica M9-P are the same.
The White Balance can be set to Auto by default but really should be set Manual whenever possible.
White Balance is very possibly the menu point you will be using the most.
White Balance comes about as all photography is based on daylight, which is white light. But as light is a temperature, it changes during the day, from sunshine to shadow, from different artificial sources, and even geographical.
In the film days one dealt with this with colored filters where for example a blue filter in front of the lens would change tungsten light to white daylight. And when light is daylight white, colors are clear, natural and true. And true is beautiful. Ther exist color meters that can measure the color temperature and give you a list of the filters you need to apply.
In digital photography - thankfully - we do not need to deal with filters in front of the lens but can adjust the color temperature back to white digitally. The Auto White balance in a camera is simply that the camera look for neutral grey and white (and some times black) areas: It measures what the temperature o the light hitting these surfaces and figure out the correction of light temperature to bring them back to neutral white or grey. And thus the temperature of the full image is adjusted to daylight white and things will look natural.
Color temperature is given in Kelvin because it was the British physicist William Thomson Kelvin (1824-1907) who defined the Kelvin scale. He did several scales of when metal becomes liquid and such, and to make sure he would live forever, he named all his scales Kelvin. But as long as the Leica M9 doesn't melt, the only scale we pay attention to is the one for temperature of light. Amongst photographers simply referred to as "Kelvin."
The human eye has always done this Auto White Balance, so even light in fact does have temperatures, we never saw them as anything else than daylight white.
Buy the new eBook
"A Little Book on Photography"
by Thorsten von Overgaard
It's a humorous understatement to call this
new eBook by Thorsten Overgaard for "A Little Book on Photography".
It's a grand book, a history lesson, life experience, a biography and poetry book and brilliant photo book!
All in one beautiful package of 180 pages
to fire you up and get you to love
photography ... unconditionally!
"A Little Book on Photography" eBook for computer, Kindle and iPad.
New release March 2017.
Intro price only $47- 180 pages.
Buy Now
Instant Delivery
But light goes from warm red-orange to cold dark blue - and in the middle we find white daylight.
The accuracy of the Auto White Balance, which would be the default choice in the Leica M9 and Leica M9-P, depend on the camera seeing white and neutral grey spots in an image and adjusting the whole image based on that.
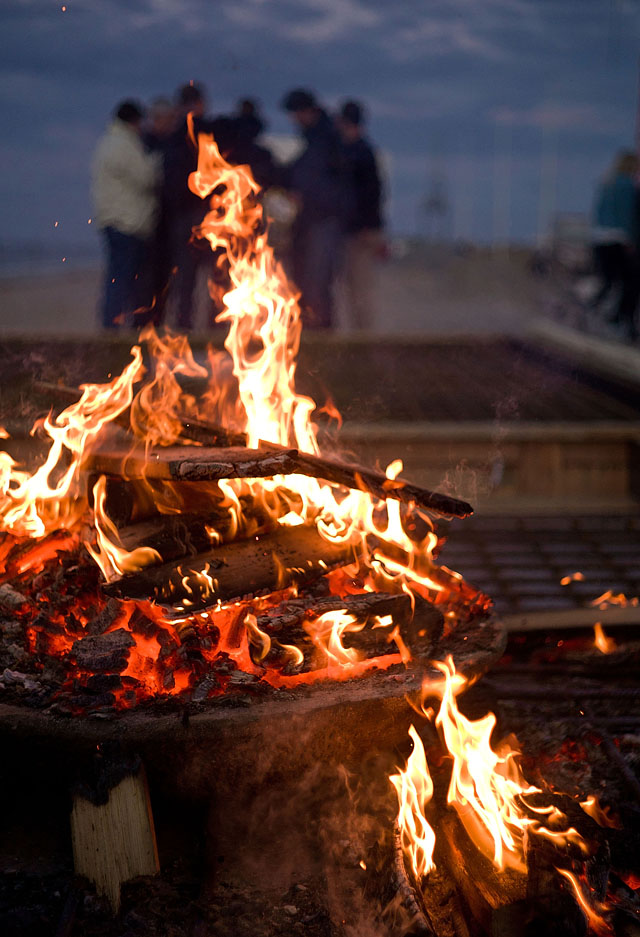
But some images don’t contain such grey or white spots because it for example is a red sports car, a brown carpet or a camp fire you are photographing. And other images contain several light temperatures at the same time; for example daylight through the window and tungsten light indoor. But even more relevant, white isn't always white. You will notice how white paper and white paint just isn't the same white. Some is bluish and some is warm yellowish. Hence you get inaccurate white balance.
To remedy this, presets exist in the camera, and you may use these with some success. These are the Tungsten, Shade, Sunshine, etc.
One setting you can use with success is to always set the Kelvin Setting on the camera to 3200 Kelvin whenever you go inside a place where artificial light is the key light (main light source). This goes for offices, shops, cafés and also concert photos where it is usually a 3200 Kelvin tungsten light that is sitting in the spot, even when there is a blue, red or yellow filter in front of that light to create color effect (you don't do a white balance to make red light in a concert white; you want it to be that red, and that is done by using 3200 Kelvin).
But whenever you want precision, you will want to do a Manual White Balance Setting by using a WhiBal card or other neutral white or grey card. So if you do a portrait indoor, you hold a WhiBal card up in front of the persons face (so it captures the same light as his face) and set the White Balance Manual by shooting that. And when you walk about outside in sunshine or shadow, you set the White Balance Manually. Each time the light changes.
It may sound like a lot of work, and perhaps it is. But it's how you get precision in colors. Look at it like changing a watch every time you arrive in a new time zone.
Digital photography, and even grey cards for white balancing, has largely been advertised as "you can fix it in the computer," but that is rubbish. It's much easier and a much more consistent workflow to do it on site so you get the image right in camera.
Don't tell me you invested in the best camera and the most precise color calibrated lenses available for then to "fix it in the computer" when you can produce beautiful and precise colors right on site, in the camera.
To many this is a whole new concept, and you are free to disagree. But before you do so, try and shoot an image with Auto White Balance and then with the Preset White Balance you feel may be the correct one, and then shoot an image where you have set the White Balance Manually with a WhiBal card or a piece of white paper. And then do what is the most convincing. You can try it outdoor in daylight as well as in artificial light in a living room.
The White Balance presets
The Leica M9 and Leica M9-P offers preset settings for white balance. Only for the Florescent 1 and Florescent 2 have Leica given information about the Kelvin. The Kelvin settings for Tungsten, Daylight, Shade, etc. are not defined by Leica.
To the right is how Photoshop and Lightroom (which bot use Camera Raw to translate the DNG and RAW files) sees the Kelvin, versus their Kelvin figures in the Leica M9 and Leica M9-P.
As can be seen, even a manual setting to 3200 Kelvin for Tungsten (in the bottom), is translated to 2900 Kelvin in Lightroom and Photoshop. Nevertheless it works well in practical use.
The Manual setting from 2000 to 12800 Kelvin in the Leica M9 is translated to 2000 to 8800 Kelvin in PS/Lightroom. The long and short of it is that Kelvin is not the only value. As can be seen in Lightroom there is also a Tint value (mix of color with white/black), so adjusting Kelvin alone usually won't give the precise colors we are looking for. This all speaks for Manual white balance setting. The only reason presets exist (in cameras at large) is to try to give the means to adjust colors, to an audience who never really understood white balance.
There is a lot to understand, but no reason to try to understand the full subject. Just use Manual white balance setting and you will get accurate colors!
The important thing is that when you point the camera towards a white surface or neutral grey, that surface has to be hit by the light you are adjusting for!
It's not any white surface, it's the white surface picking up that light.
SET
White Balance
Manual
Compression
DNG & JPG Fine
Resolution
18MP
Exposure comp.
-1/3
Exp. bracketing
Off
Set user profile
-
Compression can be set to simply DNG (RAW images where you record the full range of data the sensor collects). DNG stands for Adobe Digital NeGative and is fundamentally the same idea as RAW [which means raw; it's simply the raw data from the data you have in a file], only DNG is an open standard created by Adobe .
You may also choose DNG & JPG Fine as the Leica M9 and Leica M9-P in any case create a JPG file to show on the preview display. Hence the speed difference is just what it takes to write the JPG to the card. I have set my JPG Fine to be in black & white (see later how to do that) which serves a two-fold purpose: I get a black & white preview on my display that shows me the vital information about exposure (and I get depressed by the colors of the display anyways), and when I download the images to Lightroom, I get the color DNG and the black & white JPG next to each otter. This makes it easy for me to see if I like the image better in color or black & white.
The filmstrip in Lightroom with color DNG and black & white JPG Fine next to each other make it easy to see what works the best. The Leica M9 and Leica M9-P has a nice way of rendering the black & white JPG why you may in fact prefer that look to what you could change the color DNG into if you tried.
Another possibility is to set the JPG Fine to the desaturated Medium low colors, which will give you a more natural looking color preview on the preview screen.
If you want just a normal preview in color on your screen there is really no reason to shoot DNG + JPG Fine as you would then just have two color photos (one DNG and one JPG), and you should use the DNG files for their possibilities. There is a small learning curve in handling DNG/RAW files in Lightroom, but as soon as you get the hang of it, the results and definition of details are so much better you will never want a JPG again.
(See further down for how to set preview to color or black and white)
SET
White Balance
Manual
Compression
DNG & JPG Fine
Resolution
18MP
Exposure comp.
-1/3
Exp. bracketing
Off
Set user profile
-
Resolution should be set to 18MP. No reason to ever make your images less than you can. In the future 18MP will be useful and won't be considered a large file.
A 18MP file in DNG is 18.3 MB, 4.4 MB as black and white JPG and 3.4 - 5.2 MB as color JPG.
When you shoot 16GB cards you will have space for plenty of those.
SET
White Balance
Manual
Compression
DNG & JPG Fine
Resolution
18MP
Exposure comp.
-1/3
Exp. bracketing
Off
Set user profile
-
Exposure comp(ensation) can be set to -1/3 or simply 0.
When the Leica M9 came out in September 2009 there seemed to be an agreement that -1/3 was the best setting, and as I have used that since, I have gotten accustomed to this.
But I would say that setting it to 0 is almost as good. The idea of the -1/3 setting is that you slightly underexpose the images so as to maintain more details in the highlight.
But the point of course is that one can set exposure compensation from 1/3 to 3/0 EV in this menu, plus or minus. And as can be seen further down, one can change this rather easily via the command wheel or other (see the menu point Exp. comp. setup), depending if one want a continious exposure compensation (for example in snow landscapes) or want to use it as a control mechanism a la carte for individual photographs.
SET
White Balance
Manual
Compression
DNG & JPG Fine
Resolution
18MP
Exposure comp.
-1/3
Exp. bracketing
Off
Set user profile
-
Exp(osure) bracketing is that you can set the camera to shoot different exposures in a series. It's easier done by changing the shutter time manually (or the aperture). If you shoot a series of three bracket photos, you will have to count your exposures because the camera will then shoot three different exposures of any three exposures following each other. So keep it in mind for something special tripod work shooting the moon, but stay away from it for daily use.
SET
White Balance
Manual
Compression
DNG & JPG Fine
Resolution
18MP
Exposure comp.
-1/3
Exp. bracketing
Off
Set user profile
-
The user profile is something you really don't want to get into unless you actually share the same camera between several people or have special resons to do so.
If you can, you are better off with using the actual controls of the camera. Much more simple operation as the user profile would else be like taking a new camera for each profile. Because what it does is that it allows you to set your entire settings in a profile, then change to another profile and do an entire set of different settings. Part of the glory about the Leica M9 and M9-P is that you always know where everything is. And with several profiles in play, you don't know.
Then again, if you use special lenses (from Voigtlander or so) you may want to optimize their performance by dedicating a user profile for a lens, so that when you use that lens, you can simply change a lot of settings by changing user profile. If relevant, you can probably think of specialized uses you may use the camea for where it would make sense to have "a different setup" with one click.
The ISO is very easy: It basically goes in steps of 1/3 stop, but more interestingly each coloumn is 1 stop doubling and halving the sensitivity of the sensor. I prefer the "old" thinking of ISO from film that went 100, 200, 400, 800, 1600, 3200 but each column is the same.
If you read page 13 of this review, you will see the logic in talking about "halving and doubling" of light as that is what shutter time and aperture does. Hence you can calculate changes by increasing one parameter, decreasing another, and end up with the same correct exposure..
Because the base ISO of the Leica M9 is 160 ISO the 160 ISO should thoretically be the best setting with the least alteration and most clear quality possible. The dynamic range at 160 ISO is 11.7 EV. This quality may not be expressed in the everyday photo, but more in the photo you wan to stretch in exposure or colors. Because the 160 ISO must be the most pure data to work with, whereas any other setting is already an alteration of the original pure data.
80 ISO is called "PULL 80" because it is an artificial reduction of the sensors sensitivity to half - or one could call that a buil-in ND filter [ND=Neutral Density, a grey filter reducing light; usually put in front of the lens], except it also reduces the dynamic range with 1 stop from 11.7 to 10.7 EV [Reduction of 0.5EV is not normally noticeable, but if you want to work with high contrast or extreme highlights, you may want to use a real ND filter to reduce the light and stay at 160 ISO]. This choice is relevant when using Noctilux f/0.95, Summilux f/1.4 and Summicron f/2.0 lenses in strong sunshine:
ND Filters (Neutral Density filters; grey filters to reduce light with 3 or 6 stops)
An f/2.0 lens at 160 ISO in strong sunshine require an exposure time at 1/8000, a Summilux f/1.4 an exposure time of 1/16000 and an Noctilux f/0.95 a exposure time of 1/32000. As the Leica M9 and Leica M9-P only goes to 1/4000, you will need an 6-stop ND filter to use the f/0.95 Noctilux in sunshine.
Alternative is to use the aperture and reduce the f/0.95 opening on the Noctilux to f/3.4 at 160 ISO, or f/2.8 at 80 ISO. But the idea with the Noctilux is usually to use the f/0.95 aperture for the artistic look of this lens.
But then again, the sensor is a 160 ISO sensor, so anything not 160 ISO is a calculation based on what the 160 ISO sensor actually sees (meaning it is algorithms [calculations based on rules] in software increasing or decreasing colors and tones based on what a 160 ISO sensor senses). So a setting to 640 ISO is pretending that the 160 ISO sensor sees 4x the light there is . It doesn't, hence the noise at higher ISO settings: The higher ISO, the farther the wanted ISO becomes from the actual ability of the sensor to see, and only helped by the capabilities of the software algorithms is is possible to raise the ISO. And these software becomes better and better.
Back to the matter: Auto ISO is not a great idea for a manual camera as the Leica M9 where the point is that you know every setting and can change and control it. The easy way to work is to decide a daylight ISO of for example 160 ISO (or 80 ISO if you have too much sunlight) and then in evening and low light 800 ISO. You may go higher but it will create problems in certain light conditions where the colors will start to wander off in weird directions, resulting in magenta skin colors or such. My policy is that I want to be able to use any picture I take, so I have no interest in taking chances with wrong colors. I'd rather hold the camera still longer at a slow exposure time, rather than being helped by a higher ISO.
For black and white you may go higher, but you should test how far you want to go in terms of noise, and then make a rule for your self what your maximum should be. Some go as high as 2500 ISO.
As software in Lightrroom and Aperture improves you may be able to re-process older high-ISO images and reduce noise and obtain better colors. When Lightrroom 3.2 was released it improved the ISO with about one stop. In theory what was 800 ISO in color should now be 1600 ISO in color.
When the release button is set to Continuous it always shoot as Standard. Only in Single mode will the discreet or soft take effect.
The largest menu on the Leica M9 and Leica M9-P is also the one you use the least. It contains 28 menu points, and here is a run-through so as to get them set right and get shooting.
The menu system is very brilliant in that you always return to the point of the menu where you left the last time.
Lens detection
Auto
6-bit code on the lens
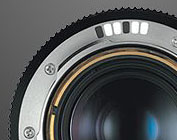
Lens detection should be set to Auto if your lens has a 6-bit code. This way the information about which lens is used for an image is saved in the EXIF file. Thus you can always see in the image file which lens was used.
In some cases the lens 6-bit code also activates a correction for that lens (Read about this on page 13 "What does the lens coding do?").
If your lens does not have a 6-bit lens code, you can choose Manual and choose which lens in a list that include all new Leica lenses - and "new" in Leica terminology is somewhat 30-50 years.
Save user profile
Several of the menu points are in fact commands or information, and not settings. So is the Save user profile, which is a command to set the current settings as a new user profile.
You activate the user profile you want to use, in the SET menu.
Advance
Discreet
Advance should be set to discreet. When the camera is set to C (continuous) shooting this setting is bypassed, and only when in S (single) mode, the discreet means that the camera shoot when you press the shutter release button, and then doesn't rewind till you release the shutter. Hence you can shoot very quietly, turn around or walk away, then release the shutter and make some more noise.
I shoot mainly on Continuous why the operation is Standard. I do so because I can then choose to shoot a single shot, or shoot continious. And only if I actually want a discreet sound, I will turn to Single and get that setting.
Question of course is, if you sit in the London Underground and shoot a fellow passenger, won't the release and rewind sound divided into two separate sounds make it more obvious than just one sound?
Soft is another possibility whereby the shutter release will release the shutter by a shorter pressure on the shutter release. The reason not to use this is that the soft position release on the shutter release is also where you would normally lock the exposure. So when you activate soft release, you can't lock exposure.
In the old days the self-timer was a metal arm in front of the camera. Now it is an electronic setting, and you can select 2 seconds or 12 seconds. This is the delay from when you press the shutter release button till the camera take a picture.
To use the self-timer, the shutter release must be set to the self-timer symbol to the left of Continuous. Then when you press the shutter, a red lamp will blink from top of the viewfinder window on the front of the camera whilst the display performs a count-down on the back. And after 12 seconds the camera shoots one picture.
The 2 second release may be used for night-photo where you want the camera to shoot without being touched and doesn't have the patience to wait 12 seconds for each shutter release.
AUTO ISO setup
1/60s / 800 ISO
With reference to the ISO menu point AUTO ISO, this is where you set the rules in case you should choose to let the camera decide the ISO. This setting would also apply in "Snapshot profile" (see down the page).
You simply define what is the lowest comfortable shutter release time should be, for example 1/60 second, and then the highest comfortable ISO, for example 800 ISO. These are the two critical things as low shutter time will cause motion blur, whereas high ISO will cause noise. So what are your limits, this is what you set here.
In any case, even definition of these limits is to prefer from the camera going all the way to the top in ISO and so forth, the whole idea of letting the camera decide anything by itself - is wrong.
I have set the AUTO ISO setup to the above values for the possibility that I should accidently turn the ISO to AUTO ISO.
The sharpening is only applicable when you shoot JPG in camera and should be set to Standard. In general, don't improve or change the original look at this point. The pictures you take will last many years, and as software improve to increase sharpness and computer screens tend to present images sharper and sharper (whilst at the same time having more and more data on one screen), there are many reasons why you want to stay as close to original capture as possible.
For the RAW/DNG images you capture, the sharpness in what it is, and when imported to a RAW workflow tool as Aperture or Lightroom, the sharpness is then defined there: I have my Lightroom set to default sharpening, and I never increase sharpening beyond that in Lightroom. For the reasons mentioned above. I do though have other workflow tools to improve web-images for example, so that they are improved to optimum presentation on a screen. But this is a post-processing tool not a tool in the camera where you create and save the actual file.
Color saturation
Black & White
This is where you change the setting of the JPG files, hence the possibility of having a Black & White preview, or a less saturated preview on the cameras screen.
In the Leica M9 and Leica M9-P you can choose which preview you want on the display. Normal color, medium low saturation, Black & White (as illustrated above) as well as even lower saturation, medium high saturation, very high saturation and Vintage Black & White.
Low
Medium low
Standard
Medium high
High
Black & White
Vintage B&W
The DNG/RAW file will always be a recording of the raw data the sensor records, so DNG simply doesn't come in black or white or desaturated. It's always all the data, and for the Leica M9 and Leica M9-P it is a color sensor, so color you get.
But the choice of Color saturation, along with the menu choice in the SET menu of DNG+JPG Fine, gives you the possibility of changing the JPG file whihc also delivers the preview on the screen of the Leica M9.
As you select to get a JPG Fine along with the DNG file, you also get to import it into Lightroom or Aperture. And in the case where it's a Black & White, you will be able to compare the same image in color and Black & White. Which is the setting I use.
The contrast (of the JPG image) sharpening is only applicable when you shoot JPG in camera and should be set to Standard. As in sharpening, no reason to alter images in cameras unless you have a very specific reason to do so.
Bracketing setup
3 / -/0/+ /0.5 EV
This is the setup of bracketing with reference to the SET menu item bracketing. Here you set what type of bracketing you would like, in case you set it to shoot bracketed in the SET menu. Bracketing is simply that the camera produces a series of images with different exposures so that one of them are likely to be pleasant.
My setup is 3 / -/0/+ /0.5 EV where 3 refers to three frames (can be set to 5 and 7 as well), -/0/+ refers to the sequence of the bracketing (underexposure -/ normal exposure 0/ overexposure +) and finally 0.5EV refers to how much the bracketing should go in step from each exposure. In my settings only a half stop.
So if you choose
bracket of for example 7 and steps of 0.5EV it would start with -1.5EV, then -1EV, - 0.5E, a normal exposure, and then three steps of increasing overexposure.
This might be applicable for some things, but mostly you have better control of it by simply using the shutter time dial and do manual bracketing.
When the camera is set to Single exposure and bracketing of 3, it will produce a series of three exposures in a row with 0,5 seconds between them, whenever you take "one" picture.
Exp. comp. setup
SET menu only
The Exposure compensation setup menu is where you can choose how to control exposure compensation on the Leica M9 and Leica M9-P. I've tried them all and have returned to the default, Set menu only which is that you change exposure compensation via the SET menu (where mine is set to -1/3 EV).
You can choose to set it to
setting ring, and then you simply can turn the setting ring to change exposure. Problem of course is that the setting ring is easily turned unknowingly as you move about with the camera, and then your exposure can basically end up being anywhere. For more control you may use the setting ring in combination with the shutter release button, which turns out to also have a risk of random exposures as you may touch the setting ring while shooting.
Only if you have developed the bad habit of controlling a camera (for example a dSLR) via a +/- EV wheel, this might be handy. But else the Leica M offers very direct ways of adjusting exposure via the aperture ting and the exposure time dial. So one should avail oneself of these classic virtues rather than a control via wheels.
Monitor brightness
Standard
The monitor brightness should be set to Standard unless very special conditions exist. One of the things you can actually see on the display is if the exposure is right. So when you change the monitor brightness, you change the preview. So however you set it, stay with it as that as that is how you may judge the exposure.
Histogram
Standard
A histogram is a graphic representation of the brightness in the image. As everything in camera technology is tuned to daylight and achieving a middlegrey photo, the ideal histogram would be one where the "pyramid" is in the middle (as that would show that the most pixels are of medium brightness). If you shoot with the sun behind you, and what you are pointing the camera is all together midldegrey, this would be "perfect exposure." If you shoot stars at night, the "pyramid" should show underexposed by being to the left. And if you are shooting white houses in Greece, the "pyramid" will be to the right and show overexposed.
Some use histograms, some don't. I don't. But if you do, you can learn to read the histogram and see if it looks right.
The Leica M9 offers a Standard histogram (visible when you press PLAY to see a preview, then INFO to see the preview and other info about the photo) which will show one pyramid, and then RGB which will show three pyramids in colors so as to illustrate how the Red Green and Blue exposures are.
Finally you may choose a Clipping setup that can show either overexposed areas or both over-and underexposed areas. If you choose this, the preview of the image on the display will show red and blue areas to indicate what is over-or underexposed.
Again, this is in a way all based on the idea that "correct exposure" is middlegray and without underexposed and overexposed areas. But if you shoot against the light, you are bound to get overexposed areas. So it is a matter of shooting style if you can use the Histograms.
One advantage with the Standard histogram is that is can be read no matter the light conditions. Whereas it can be hard to judge the preview on the display in sunshine, the histogram can be read no matter the light conditions for viewing the screen.
The histogram can be part of the review INFO, but you may also set the Preview (see below) so you get the histogram as part of the preview).
The folder management can be used to choose between folders on the SD-card, create new ones with job numbers, the photographers name, location or other. By default it will create a folder called LEICA and do a continuous numbering of images.
However, if the SD-card is used and/or formatted in another camera, the numbering and folder names may change. For example will the Leica S2 automatically rename the folder on the card to LEICA S2 and so forth. In other words, it's not rocket science but a neat feature one can manage if one feels like it.
Naming a card and folder ones name could be useful if one often hangs out with other photographers or hands over cards to a picture editor or so (it's so very hard to write a name on the outside of an SD card!).
This is also the menu where one can reset the numbering and start all over from 0.
The actual shutter actuations can be seen via the camera menu or via a software, as described on page 13, "Counting the actuations on the Leica M9". The number of the image itself is not the number of photos taken (as the numbers can be reset or jump when cards are swopped between cameras).
Auto review is how long a preview will be shown on the screen on the back of the Leica M9 right after the photo was taken. I have mine set to 1 second, and some times I see it, often I don't. So it's more of a habit that I have it, and that I notice out the side of my eye that the screen does a preview - and then I know it is working.
I will also often press the shutter release button slightly which will turn off the review. I do that when I don't want it to light up and make me the center of interest for people around. But also when someone is behind me in an audience and I don't want them sit and watch my screen previews over my shoulder.
The preview can be turned off totally, which some like - you can always press PLAY to see it - or set to 1, 3 or 5 seconds, and even constant.
Another possibility is to set it so that when you keep the shutter release button down, it presents a preview. I find that option confusing in practical use.
The Auto review menu point is also where you decide if you want the Histogram or Clipping Info shown as part of the preview.
The preview itself contains of course the picture, but just as interesting the shutter speed. In very dark locations where you can't see the shutter time dial on top of the camera, you can look up the preview and see what the time was, and then fumble in the dark to adjust the shutter time dial to where you want it.
One of the real important settings is the Auto power off, because if it is not set, your camera will drain for battery in very short time. I recommend 1 min or 2 min, which is enough working time to get the shot. And the rest of the time the camera should be ready by your side, and when you want to shoot, you press the shutter release slightly to turn on the camera. Then the camera is ready by the time it reaches your eye for focus.
Turning the camera completely off when not using it is not necessary. Leave it on C(ontinuous) or S(ingle) at all time, and let the Auto power off take care of the battery management.
When set to 1 min or 2 min a battery will last for a day (plus/minus) of active shooting. I can walk around for 6-8 hours and shoot 3-400 pictures on one battery.
Flash sync
1st curtain
Flash sync is setting when an eventual flash shall go off. In the beginning or the end of the exposure. Usually one would choose 1st curtain as the is when you shoot. If you set it to 2nd curtain it will shoot the flash when the exposure is ending.
Curtain refers to the shutter curtain, the metal blades that cover for the sensor and goes up for 1/125 of a second and exposes the sensor for light in just that period when you shoot at 1/125.
When you attach a flash to the Leica M9 or Leica M9-P and set the shutter speed dial on top of the camera to A, it will automatically switch to the setting in the Auto slow sync menu (this one you set here).
In this menu it is possible to set the flash sync to slower, for example when using flash as fill-in or other purposes, flashes with slower sync speed than 1/180, etc.
You may also set the shutter speed dial to the flash indication on the dial, which is 1/180 second. And then it will use that shutter speed of 1/180 which is the normal. Hence in the menu you can set it to Off (1/180s). If you set a faster shutter speed on the shutter speed dial, the flash will not go off.
Getting good results with flash on Leica M9 and Leica M9-P is easy as soon as you get the hang of it, and the menues Flash Sync and Auto slow sync enables you to use other intersting flash techniques. But it is a subject I'm not an expert on, so you will have to experiment your self and read up on it elsewhere.
With the Leica SF 24D flash you simply set the shutter speed dial to 1/180 (the flash symbol) on the M9 and then the flash to TTL on the unit itself, and you're reday to make perfect exposures. You can see some examples Seal did at the Oscars in this thread at Steve Huff.
Color managem.
Adobe RGB
Color management only applies to the JPG files if and when you shoot those. The correct setting would be Adobe RGB as this is the largest color space (best quality due to more possible color tones*). The other setting is sRGB which has a compact color space but is the most videly used on computesr screens.
But as you will import to Lightroom, all your DNG files will be in 14-bit and maximum color space, and the JPG should be Adobe RGB.
Lightroom works with the highest possible resolution and color space, till you export, which you would mostly do in 8bit and sRGB. So yourecord your work in better resolution and quality than most screens can work in, but when you export your images and want them to communicate with a world that mostly works in sRGB, you export in 8bit and sRGB.
But for future use where screens may be able to show 16bit and more colors (som screens already can do this, like some of the Eizo screens), you want to shoot in highest quality possible.
Only if you are palanning on sending your JPG images straight from the camera out to somebody in the world you should set the Color management to sRGB in the camera.
* If you want to become an expert on this some more study is required: Both sRGB and Adobe RGB works with 256 colors per channel, but the Adobe RGB is wider and the sRGB is more compact. Hence, Adobe RGB could be said to spread the colors more, leaving some empty spaces in between - whereas sRGB could be said to be more welldefined, but within a more compact space [Thanks to Olaf on the Leica User Forum for clarifying this].
The DNG setup should be set to Compressed. This speeds up the buffer operation and gives twice the space on the SD card. Now, this compression is a Leica made compression which basically take the original 14 bit image and remove all "empty information" (or insignificant information) so as to make a smaller file. The postulate is that it will not affect the image quality as no visible information is removed in the compressing.
If one believe that, set it to compressed.
If one is concerned that later technology may make you able to get more image quality out of an Uncompressed file, set it to Uncompressed.
As DNG is an open standard, it will work as long as someone think it's worth using. It's out there, so to say, and only lack of usage can kill it over time (which is different from a standard owned by someone and used as long as they see fit).
One should pay attention to the fact that your image files are your responsibility and it's up to you to keep them working. So making choices about using standards, compressions, let a software program manage files, etc is something one should consider in each case. My philosophy in that regard is that I use DNG and export as JPG in highest resolution, and I make sure all data about editing (XMP) and metadata/keywords (IPTC) is written into the files. And that I keep my files in my archive (not a software programs archive). If one have worked with some of the great software of the 80ies or 90ies which are no longer around to open those precious text files, spreadsheets or graphic designs "everybody used to do in those programs," you get a sense of how lost you can get even when you follow the crowd. So be aware and make sure you keep your images your images that you can control, and preferable in a format that does not need to be translated (to often) in the future.
Definitions:
[XMP = Extensible Metadata Platform. This is the info about cropping of images, adjustment of white balance, exposure changes, etc. you do in Lightroom. It can be written to the file so that if you open the file in another software as Photoshop, it reads those changes and start from that point].
[IPTC = International Press Telecommunications Council. This is the geotagging, keywords, subtitles, copyright info, etc you add to a file. It may also be specialized info about whihc persons are in a photo, where the photo is organized in folders, etc. In Apple OSX all files, including their IPTC data is indexed so that you can search for them via Spotlight. Google also uses the IPTC data in image files to index pages and images].
This is a command to reset the camera back to factory settings. Normally there is no reason to do so, but if life becomes too confusing, this might be the solution: to go back to start. I also recently saw a Leica Digilux 2 behaving very strange with a lot of noise. Everything looked normal and as it should, but after a reset, the image quality improved dramatically back to how it should be (and used to be). So this gives an idea about what this command may be used for.
Sensor cleaning
This menu is a command that opens the shutter curtain so one can clean the sensor without risking it closes in the midst of the cleaning (and is bent or something by the cleaning instrument).
Using this requires that one insert a fresh fully loaded battery.
Date and time is the ones that go into the EXIF file. It does not only tell you when the photo was taken, but also more interestingly is used to put the image in sequence in many relations, such as in Lightroom.
If one is using several cameras for the same event, setting time is very important so that when the mixed camera files are imported, they lie in correct sequence. It's really annoying jumping back and forth in files to determine which shot is the best of a series, so it's very important that the time is the same on all cameras so that the files lies in same sequence as the event happened.
Acoustic signal
The Leica M9 should be soundless, so you will want to set this to off and avoid any sounds when operating the camera. Even when the SD card is full you don't want to hear a sound (the display will tell you anyways).
Language
English
The Leica M9 menu can be set to several languages. A lot in fact, and even some I don't know what are because it's signs I don't understand. It's very impressive, but mine is set to English.
In general it's not recommended using a USB cable to load images off the cameras SD-card. But if one has to, PTP protocol would work. If it doesn't, the other choice is bulk storage where the camera will appear as an external disk.
When I say it's not recommended, it's because so many errors may arise if the computer lacks power to support the USB-connection, if a hub is used ... or whatever. And it used your batter on the camera. But mainly it's faster to offload images via an SD-card reader.
Format SD card
With this command you can erase and format the SD card. Either overwriting all data or simply formats it. I normally never use this function as I delete the images in the image folder on the SD card on the computer when I have finished downloading and know I got them.
However, handling SD-cards can be a religious matter, so some always format SD-cards after every download of images. So whatever works - that's what you do every time.
This menu point is simply information. The Firmware 1.162 is the current that was released in June 2011. Whenever a newer firmware is available, one download it from Leica Camera AG's website and put it on an SD-card. There is an exact instruction to follow and when updated this info point in the menu will display the software version the camera is using. The firmware is inside the actiual camera, independent of the SD-card.
So this was the menus of the Leica M9. If new to Leica M9, let these be your standard settings, and as you move on you may want to read it again and see if you want to change anything. Have fun with it!
It can be a bit confusing that User Profiles are in both the SET and in the MENU. However, the User Profile is (defined and) saved in the MENU and from the SET menu you select which user profile. Or the "Snapshot profile":
"Snapshot mode" or "Snapshot profile"
The Leica M9 and Leica M9-P is equipped with a "Snapshot profile" that is supposed to enable the photographer to shoot with the camera without much knowledge about what is going on: The AUTO ISO will be enabled so as to help the user get the right exposure under most conditions without any knowledge about exposure times (shutter times) and ISO settings (sensors sensitivity to light).
To get into Snapshot Profile (SET > Set user profile > Snapshot profile > SET)
From the SET menu you can select the Snapshot profile in themenu Set user profile
To get out of Snapshot Profile (SET > YES) When you are in the Snapshot profile, simply press SET and you will be asked is you want to leave the Snapshot profile. And you press YES and you are out of the Snapshot profile.
When you have saved no user profiles, the only available choice is the " - " (no profile). If you don't have any specific use for User profiles, I recommend you don't define any.
The battery charger and Leica M9 and Leica M9-P batteries
It's more complicated than one would think. Leica Camera AG states that a fully charged battery will last for about 350 pictures. My experience is that a fully charged battery will last almost a full day of shooting and can do more than 500 photos. And I have four of them, so I would rule out luck. My settings are simply that the camera Auto power off after 2 minutes, and my Auto review is set to 1 second.
It will take 2 hours to charge a Leica M9 battery to 80% of its capacity, hence the 80% light will turn on after two hours (so one light will be blinking, indicating it is charging, the other is constant on indicating it is at 80% or above capacity). The battery can not be overcharged, so one can leave a battery in the charger overnight or as long as one want. When the battery is charged 100% the blinking LED will stay on, hence when the battery is fully charged, both lights are on.
It is usually a good idea to take the charger out of the contact so as to reset it, before you start charging another battery. The charger seem to have a communication delay why it can mistake the new empty battery for the one it just charged (which is not an unique Leica thing but is the same with other chargers).
I have experienced problems with getting batteries fully charged in the US and UK. I suspect there can be difference in electricity causing this. Whenever I am home in Denmark I have no problems.
These specifications for the original Leica battery, and one should be aware that third party batteries exist and can have very varying performance. And that at one point third-party batteries was sold as extra batteries in the US because someone though the original batteries was to expensive. So if it doesn't say LEICA on the battery, it's a third party battery.
Li-ion Battery 3.7V / 1800 mAh / 6.7Wh for Leica M-cameras. Leica Camera Ag part no 14464
As a a side note, the Leica M9 and M9-P batteries works with the Leica M8 and M8.2 as well though the M8 seem to use more battery than the M9 and M9-P.
Rare battery issue: In August 2011 Leica Camera AG reported that they had encountered 15 issues where users would get a Batter low warning in the midst of using a battery that was not low. This error was traced back to a default electronic component that Leic Camera AG will replace if needed. But as mentioned, only 15 cameras have shown this issue so far.
I had one person I know whose charger broke down while in some distant location. I only have one but have promised my self to get one more ... last time I did so was when I forgot my charger in a hotel (but got it back some hours later). But it's a charger that is hard to replace with any other than the original, meaning that if it breaks down in some distant location, you don't have one.
Leica M battery charger. Leica Camera AG part no 14470. This is the compact charger, smaller than the charger that came with the Leica M8 originally but the one that came out with the Leica M8.2. It comes with EU and US power cord, as well as a cigar lighter cord for the car or aircraft.
I started out with the Sandisk 16GB 30MB/SEC card which exist under both the name ExtremeIII and Extreme. Other speeds exist under those names, so I was looking for another 30MB/SEC card from Sandisk when I wanted a backup card. I had tried three Sandisk 8GB cards, and all failed after some days in that the computer could see them, but the camera could not. Sandisk gave me the money back.
I recently experienced a fellow Leica M9-P shooter who had bought a handful of Sandisk 8GB cards, and they seemed to cause the camera to freeze, and one of them couldn't be read after use. I have experienced several with problems with 8GB cards. Without any further investigation I would just avoid 8GB.
The Sandisk 16GB 45MB/SEC cards and the Sandisk 32GB 45MB/SEC cards will also work nicely in the Leica M9.
Leica Camera AG have acknowledged that there is a problem with certain cards, one can read more about this here, but the cottom line is that SD-cards are different from model to model, and from brand to brand. If one visit the Sandisk website, or any other manufacturer, there is a (too) long list of which cameras are supported by which cards. In other words, an SD card is not just an SD-card.
The long and short of it is that when you have a card that works, stay with it. I tend to use the same always and keep the other as backup. It's almost religious, and I deleted the images on the card in the computer after I have downloaded them to Lightroom. Others delete them in camera, others again format the whole card every time they put it back in the camera. Do what works, and do the same, and don't change horses in the middle of it all!
On another note, the fastest and most secure way to empty a card is with an SD-card reader. Don't use the USB cable from camera to computer. Get an external SD-card reader, unless your computer has a slot for SD-cards. And even if it have, get for example an external Kingston multi-card reader so that you have another card-reader if the one in the computer fails (and you will find love and admiration whenever you meet fellow photographers who forgot their card reader; hence the multi-card reader as we also want to help the helpless Nikon and Canon shooters whenever it is in our power).
The WiFi SD-cards don't work with the Leica M9, at least not at the moment (March 2011). Or rather, it does work, but as the card is a little thicker than what may be good for the Leica M9 SD-card slot, it's not recommended (as it may damage the slot). Also, due to the metal buttom of the Leica M9 the WiFi card doesn't work over very long distances. Some have reported 40-50 cm. But in short; if you want to play with it, do so. I've tried it and somehow it's something some of us just have to try to get over it.
You can get an SD-card reader for the iPad so that you can stick the SD-card into that and load images directly onto the iPad. It's wonderful if you have a single image from the Leica M9 you want to post to Facebook immediately, or want to send by e-mail. I've also seen people handle their entire shootings on iPad with image software where they can edit, but I would recommend doing it right in Lightroom. The SD-card reader for iPad fits onto the iPhone 4 but doesn't work on that.
One of the classic things on the Leica M9 is the Image Field Selector. It is prominently located on the front of the camera and is of no practical use for the actual image-taking.
You can use it so look through the viewfinder and see the different pairs of framelines inside the 0.68 viewfinder: 28mm/90mm frames, 35/135 frames, 50/75 frames.You can change the framelines and thus decide which lens would capture the scenery you are looking at.
It's part of the classic Leica M design incorporated on all cameras since the Leica M3 in 1956. There used to be a similar on the left side of the lens as well (seen from the front) which was the self-timer (from Leica M3 1954 to M5 1971).
When you put a lens onto the Leica M9 or Leica M9-P, the camera senses which lens it is and use the appropiate frameline set.
Thorsten von Overgaard is a Danish-American multiple award-winning photographer, known for his writings about photography and Leica cameras. He travels to more than 25 countries a year, photographing and teaching workshops to photographers. Some photos are available as signed editions via galleries or online. For specific photography needs, contact Thorsten Overgaard via email.
You can follow Thorsten Overgaard at his television channel magicoflight.tv.


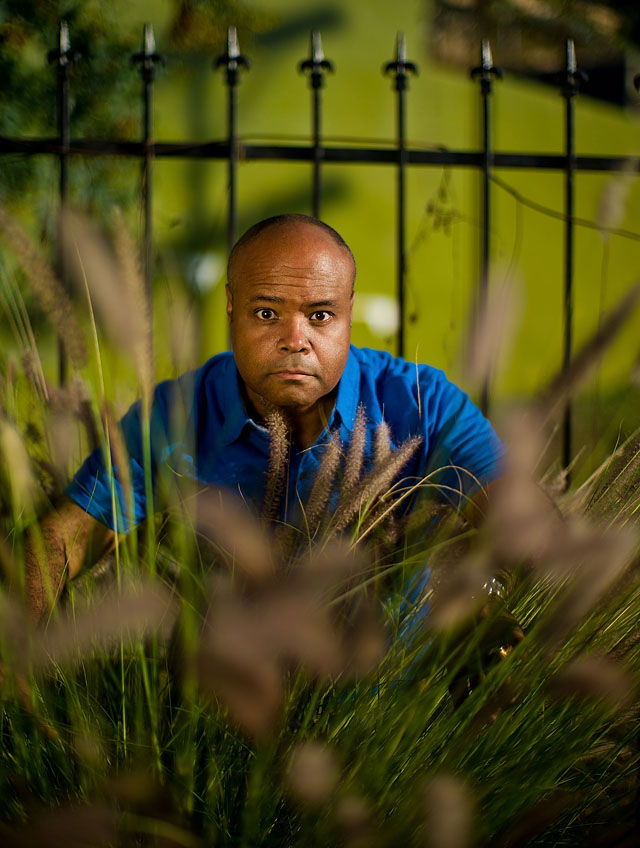


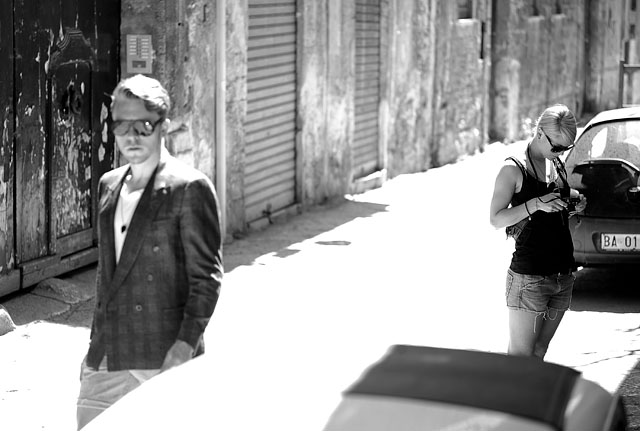
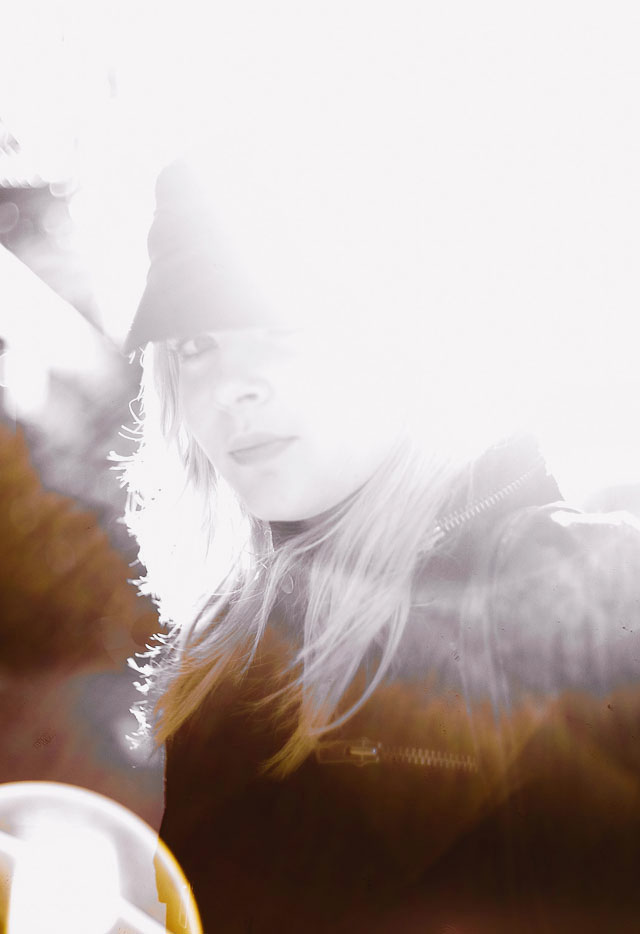
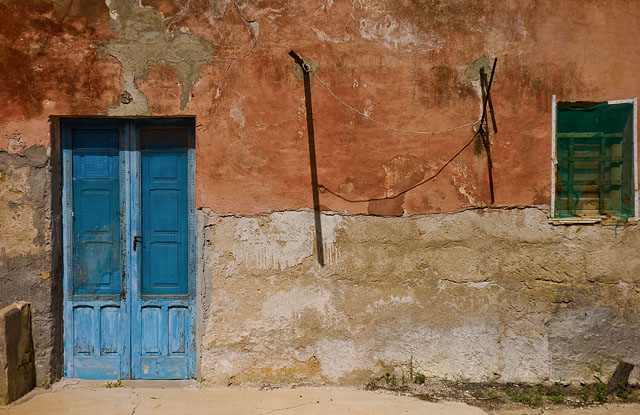
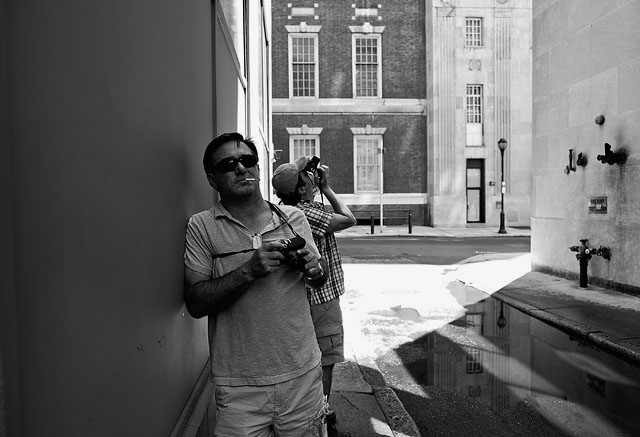
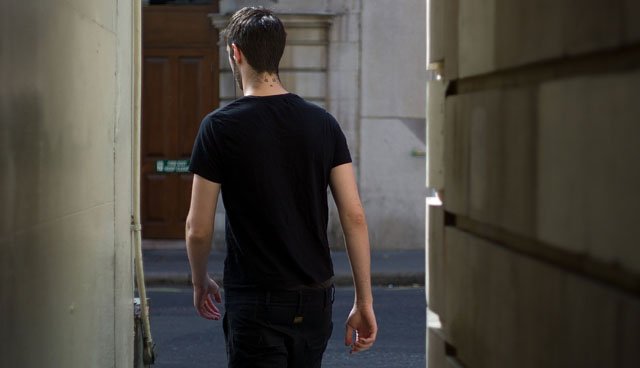 Here is a series of images from Brydges Place in Westminster, London, which is a narrow passage where a fellow photographer and I recently entertained our self playing with the light and contrast of this location. Leica M9 with 50mm Summicron-M f/2.0 (II).