Leica M Type 240 Digital Rangefinder Camera - Page 43
Index of Thorsten Overgaard's user review pages on Leica M9, Leica M9-P, Leica M-E, Leica M9 Monochrom, Leica M10, Leica M10-P, Leica M10-D, Leica M10-R, Leica M10 Monohcrom, Leica M11, Leica M11-D, Leica M 240, Leica M-D 262, Leica M Monochrom 246, Leica SL, Leica SL2, Leica SL2-S, Leica SL3, Leica SL3-S as well as Leica TL2, Leica CL, Leica Q, Leica Q2, Leica Q2 Monochrom, Leica Q3 and Leica Q3 43:
The Decisive Moment - Focusing the Leica M - Part 2/5
By: Thorsten Overgaard. July 20, 2016. Updated August 15, 2023.
Add to Flipboard Magazine.
Focusing with a Rangefinder / Meßsucher
When the rangefinder was invented about 100 years ago, it opened up for a completely new precision in camera focusing.

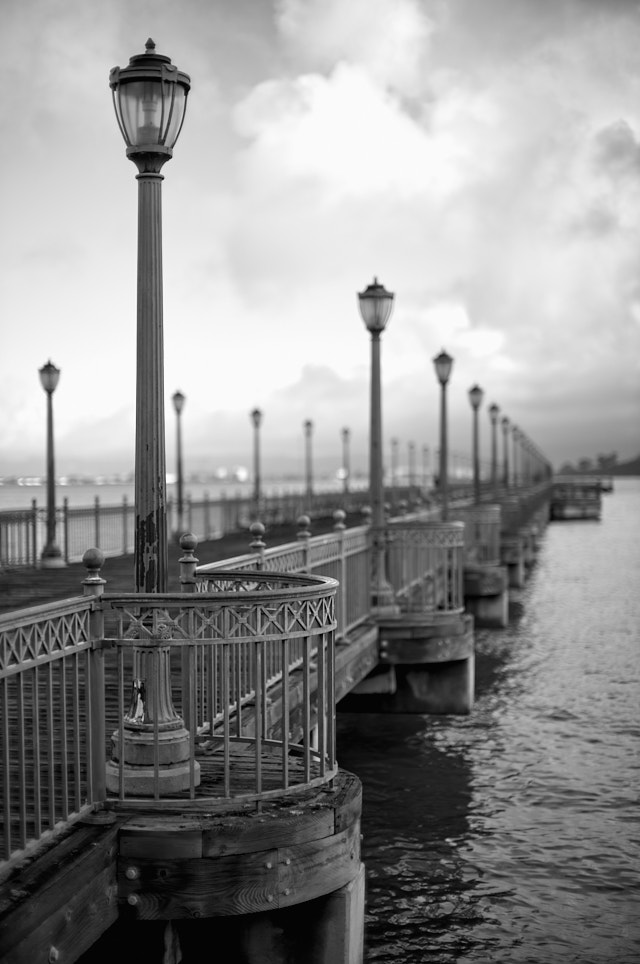
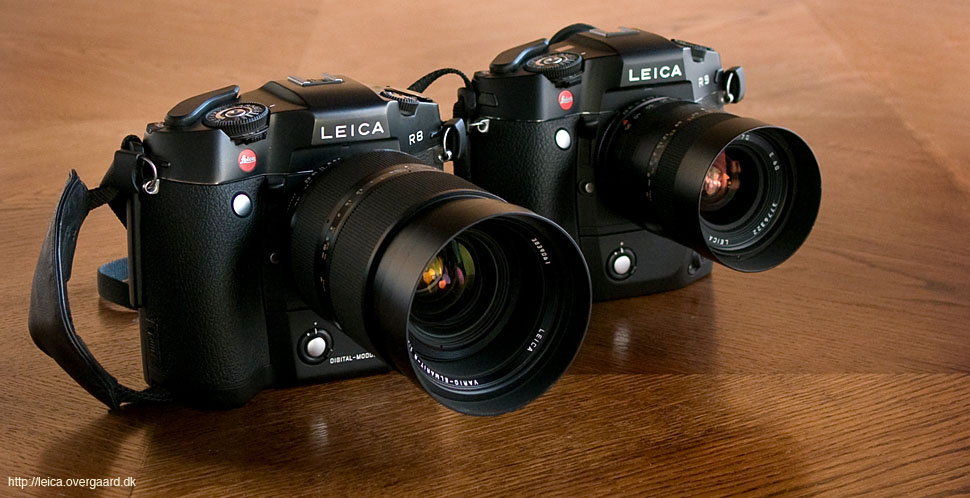
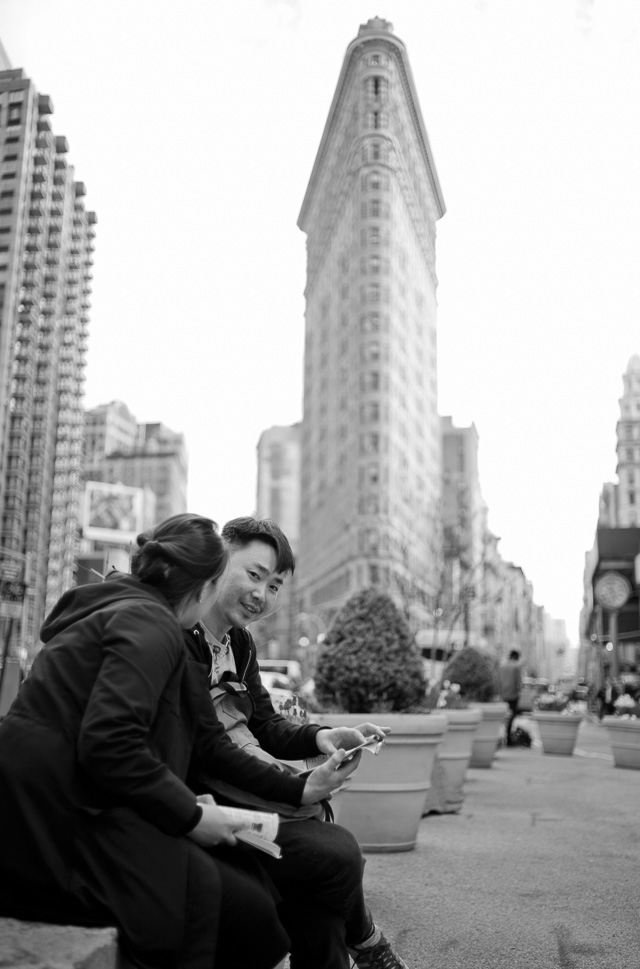
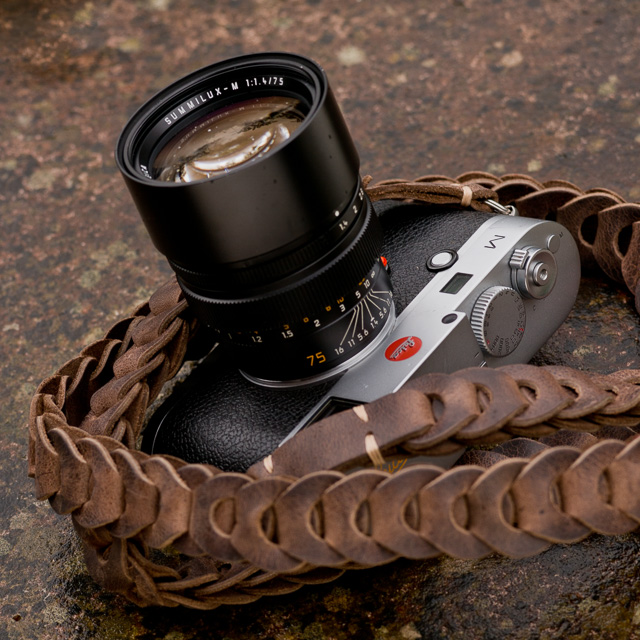
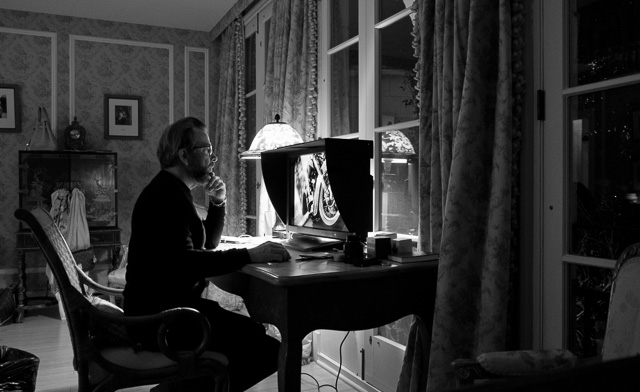
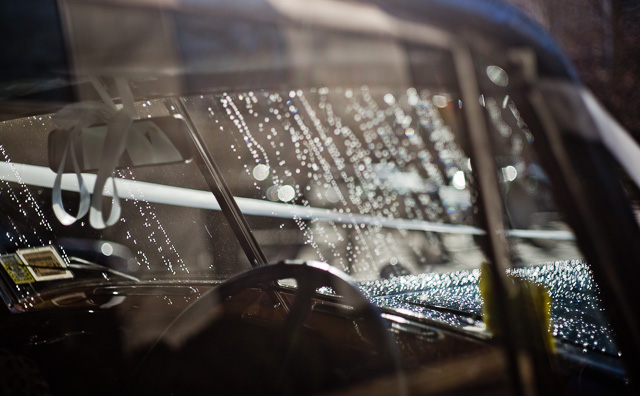
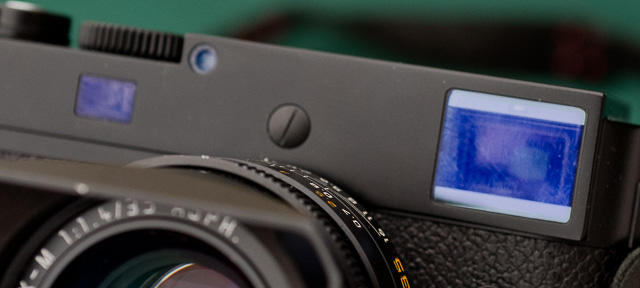
Leica M 240 with Leica 90mm APO-Summicron-M ASPH f/2.0. © 2014-2016 Thorsten Overgaard.
|
|
| |
Simple focusing: Holga lens with portrait, family, group and mountain (far right) as the focus options. |
|
|
Before the rangefinder camera was invented 100 years ago, a camera simply had a measurement on the lens and then the photographer had to figure out the distance to the subject by looking, rotating the focusing ring on the lens with engraved distance numbers to the distance that seemed most correct. Some times the focusing was made simple, with just a few settings, illustrated with a face, a house and a mountain.
Sometimes the camera had a viewfinder eye to "see" the frame, other times just a frame-finder.
This worked well, but it wasn't as precise. It definitely didn't allow one to use shallow depth of field.
So the rangefinder, or optical distance finder, using two eyes on the front of the camera to make two images that had to match, was a genius invention for precision.
Frame-finders, viewfinders and rangefinders
| |
|
|
|
|
| |
 |
|
| |
|
|
|
|
| |
Full Leica M240 Pack:
Video Masterclass
+
Street Photography Masterclass
All about the Leica M240 video instruction masterclass (17 videos)
+ Street photography video masterclass
filmed in New York (11 videos).
+ 8 Bonus videos
+ Styles for Capture One for Leica M240
+ Lightroom Presets. for Leica M240
Normal price $1,192.00
Save 60%
Only $476.00
USE CODE: "ILOVEM240"

Order now. Instant delivery.
100% satisfaction or money back.
Item #1844-1848-0823 |
|
Leica M240
Video Masterclass
Two hours of video class
with Thorsten von Overgaard
+
20-page checklist for learning
every corner of the Leica M240.
For Computer, iPad or smartphone.
More info
Only $398.00
Order now. Instant delivery.
100% satisfaction or money back.
Item #1844-1017 |
|
| |
|
|
|
|
Leica M 240 with Leica 50mm APO-Summicron-M ASPH f/2.0.
| |
|
|
|
|
| |
Buy the new eBook
"The Freedom of Photographic Expression"
by Thorsten Overgaard |
|
| |
|
|
|
|
| |
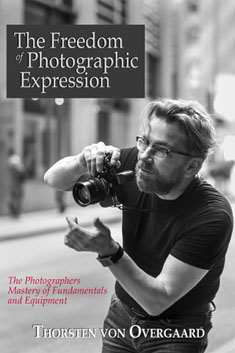
"The Freedom of
Photographic Expression"
eBook for computer, Kindle and iPad
Released March 2024.
First editon: October 2016
Now 303 pages. |
|
In this easy-to-read and easy-to-apply eBook,
Thorsten Overgaard takes beginners and experienced photographers through the basics of controlling the light and the camera.
This book covers the technical side of photography from beginners level to semi-pro, features a number of photographs by Thorsten Overgaard and chapters on his philosophy on photography.
Only $248.00
| |
|
|
| |
Buy Now
Instant Delivery. |
|
| |
|
|

|
|
| |
"I've bought the new book - made a start reading it - it is really interesting.
I know it’s basic at the beginning but it isn't written in a patronizing way. I have been taking photographs for many years and have been lucky enough to be paid to take them for the last seven years; but it's always good to be taken back to the start"
P. S. (UK) |
|
"Really enjoy your writing and teaching"
D. K. (USA)
"I love your insights on photography."
D.B. (USA)
★
★
★
★
★
★ |
|
|
The Cult of Rangefinder
| |
 |
| |
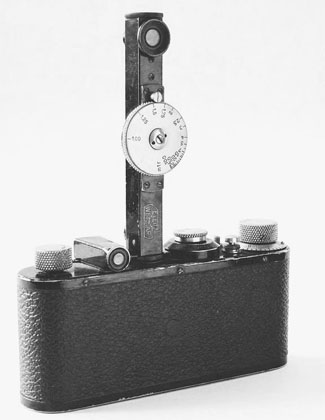
The first distance finder (or rangefinder) Oskar Barnack made was this model FOFER. It had one eye on top and one in the bottom of the stick. Next to it is the optical viewfinder. The distance finder wasn't connected to the lens but was merely a device to measure the distance to the subject precisely. Later the distance-finder was integrated in the camera, and connected directly to the lens' focusing ring. |
| |
|
The German word for rangefinder is Meßsucher. The word means measurement finder, or distance finder. It was what made the Leica M unique, and in many ways it still does.
Rangefinder was so much the new black when Oskar Barnack patented the first Leitz models in 1931-1932 that nobody seem to have bothered to update the name "rangefinder" since.
The original range-finder from 1926 was a two-eyed instrument on top of the camera to measure the distance. You still had to adjust then lens' focusing ring separately to match the distance you found using the range-finder. Next to it, the first Leica cameras had an optical viewfinder to preview the frame.
A few years later, from 1932, it was again refined: the distance-finder was integrated in the Leica II camera and coupled with the lens' focusing ring.
Since the Leica M3 model from 1954 it was all integrated into one view: The viewfinder that allowed one to see an area in front of the camera, with an overlapping frame in the center; and when that overlapping frame is on top of the other, the image is in focus.
Some times there will be flame wars on camera forums, discussing if a camera is a "true rangefinder" or not. I personally don't understand why it is so important if it is a real 100 year old technology, or if it has been refined.
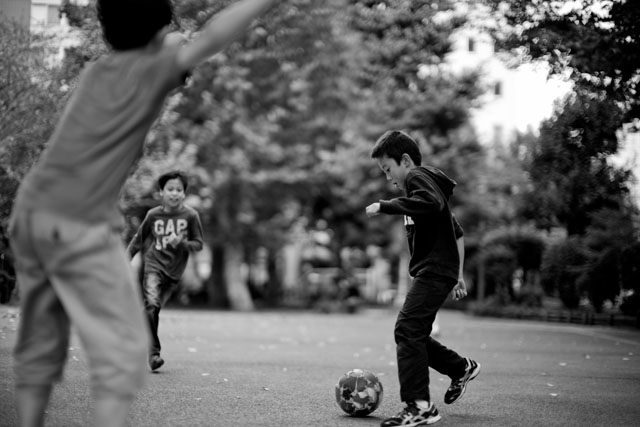
Kids playing footbal lin Kayabacho, Tokyo. Leica M 240 with Leica 50mm Noctilux-M ASPH f/0.95. © 2015-2016 Thorsten Overgaard.
A History of the Leica Rangefinder
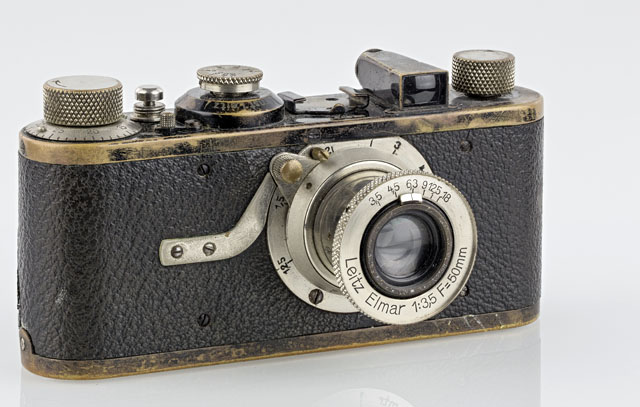
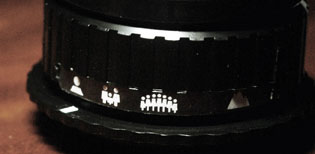
Leica I (1927) had no rangefinder. It had an optical viewfinder on top of the camera to give an idea of the image framing. To set the focusing scale (the scale on the camera, around the lens), you had to guess the distance.
1932 - The first built-in Meßsucher:
Leica II (1932) was the first Leica with a built-in rangefinder (the two small round windows on the front) and a viewfinder next to it (the square eye above the lens).
1954 - The first viewfinder-integrated meßsucher:
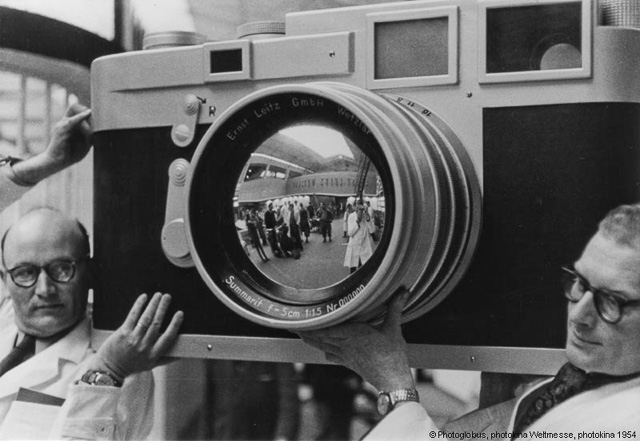 From 1954, in the model Leica M3 the rangefinder and viewfinder was integrated in the same view. A proud moment for Leica Camera AG, I'm sure. Here's a model of the camera being carried into Photokina in 1954. From 1954, in the model Leica M3 the rangefinder and viewfinder was integrated in the same view. A proud moment for Leica Camera AG, I'm sure. Here's a model of the camera being carried into Photokina in 1954.
2006 - The first electronic viewfinder:
To the right is the Leica M4 film rangefinder from 1966 with the "real" rangefinder mechanism. To the left is the Leica Digilux 2 "digital rangefinder" from 2006 that has no direct view through a viewfinder. (On top it has a 21mm viewfinder for show; in case you use a super-wide 21mm lens). Where the viewfinder traditionally sits, there is an electronic "eye" for the auto focus, and from the other side the user looks through a small (electronic) viewfinder and sees a digital preview of what the camera's sensor sees.
2013 - Meßsucher and Electronic Viewfinders:

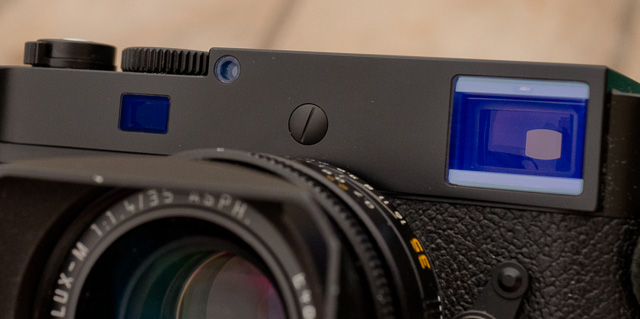
To the left is the Leica M 240 digital rangefinder camera (2013) with rangefinder built-in and the EVF-2 (Electronic ViewFinder) on top. In the middle is the Leica M-D 262 digital rangefinder (2016) from 2016 with the "real" rangefinder mechanism. To the right is the Leica Q "digital rangefinder" (2015) that has no direct view through a viewfinder: The user looks into an electronic viewfinder and sees a digital preview of what the camera's sensor sees.
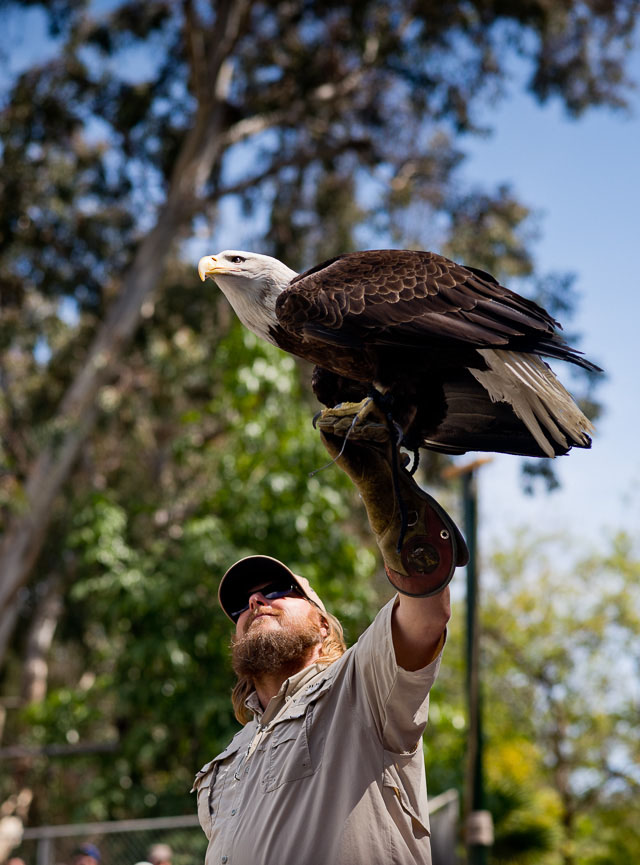
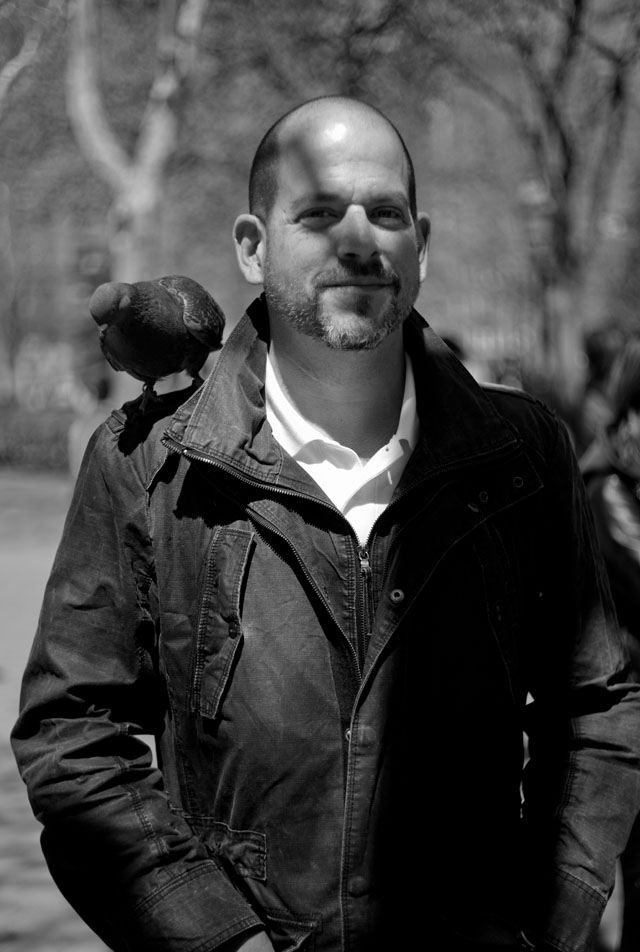
Bird show at Glendale ZOO, Los Angeles. Leica M 240 with Leica 90mm APO-Summicron-M ASPH f/2.0. © 2016 Thorsten Overgaard.

The "real rangefinder"
Technically speaking, the "real rangefinder" is one that works with this mechanism of using an extra eye placed at a distance from the viewfinder. The human eye works the same way, sort of. We have two eyes, and the difference between what they see from their slightly different viewpoints makes us able to figure out the distance.
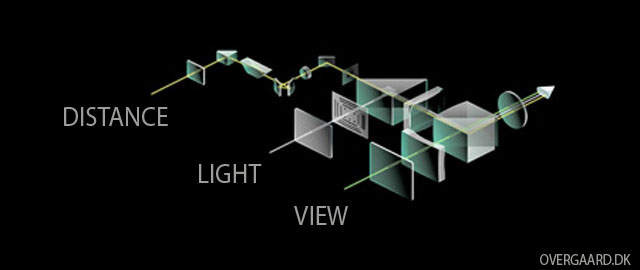
The user has a straight VIEW through viewfinder optics to the subject. Another prism mirrors into the user’s view the DISTANCE view - which is illuminated with LIGHT by the help of the center window on the camera. This middle window is also what lights up the frame lines to give the user an idea of how large an area of the view will be in the final photograph. In the Leica M 240 the middle window has been omitted and replaced with electronically lit up frame lines that adjusts for the outdoor light so the frame lines are extra strong in sunlight and less strong in the dark.
The word "rangefinder camera" is also often used about cameras that view the image through a separate viewfinder (and not through the lens). I think it is fair to categorize a camera as a "rangefinder camera" if it has a viewfinder and looks like a rangefinder camera from the outside. I don't believe it is something we should fear will ignite a 3rd world war.
I just mention it in case you should wonder what the heated discussions are about.
Raul Velvarde in Hollywood. Leica M 240 with Leica 75mm Summilux-M f/1.4. © 2016 Thorsten Overgaard.
| |

A look through the viewfinder where you see the frame lines (lit up corners) and the focus mechanism in the middle.
|
| |
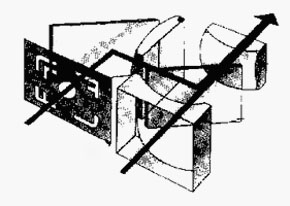
This old illustration gives a very simple and easy to understand idea of how the viewfinder works. The second view via a mirror and a mirror-glass places the frame lines in the viewfinder.
In the Leica M 240, this function has been replaced by an LED-lit frame. |
| |
|
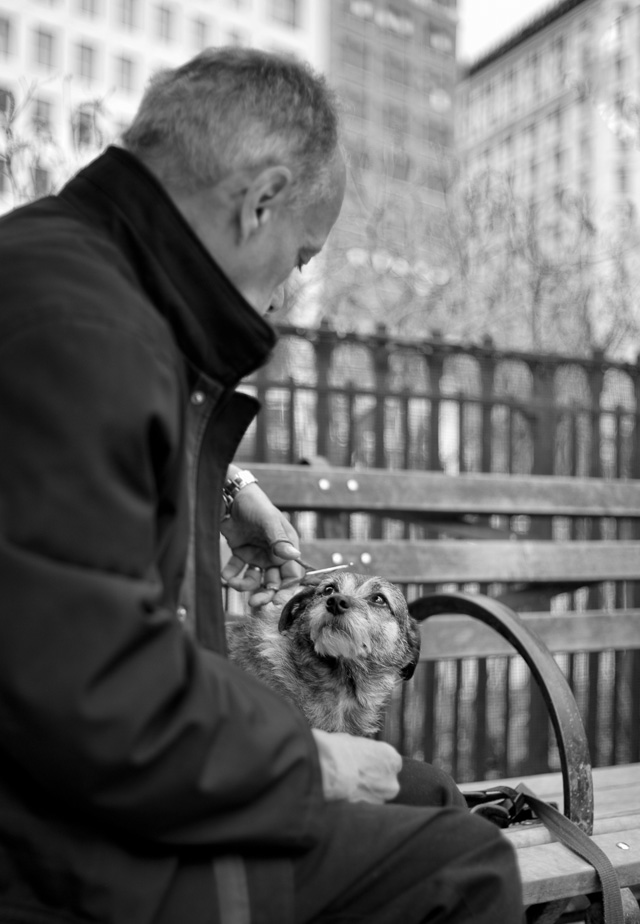
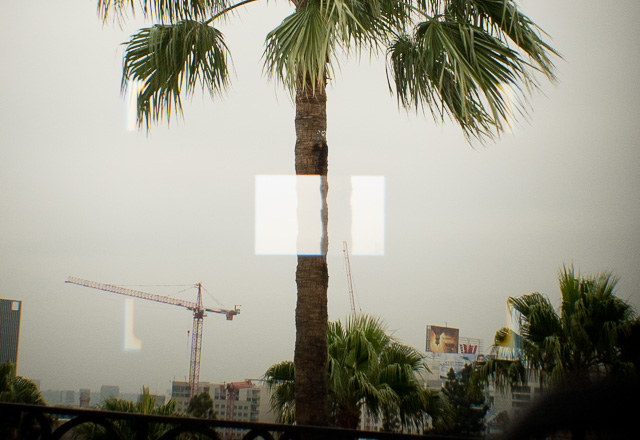
Focusing with a rangefinder
You move the camera so the center of the frame is pointed towards the thing you want to focus on. In the picture to the right you see that the palm tree is not matched: When the palm is in focus, the two images will be on top of each other.
Often the thing you want in focus is not naturally in the center of the frame, so you move the camera and use it as a rangefinder. You turn the focus ring on the lens till the two images are overlapping exactly.
Then recompose the frame to include what you want in the frame and exclude what you don't want in the frame.
Then you press the shutter release.
If everything worked out, what you aimed to be in focus will be so. That's how it was designed to be.
There is a chance that when you move the lens to recompose, the focus changes slightly. That's just part of it, and the more you think about it, the worse it gets. There's not much you can do about it.
I remember rangefinder cameras from when I was a teenager where the whole frame was two overlapping images. It was nice, but it was not as precise as the Leica.
In the Leica it's just a small square in the center. So you have to move the focus center to the subject you want to focus on, then recompose.
Here's a good view of a Leica M film rangefinder camera's viewfinder with the two sets of framelines and the focusing field in the middle. © Leica Camera AG.
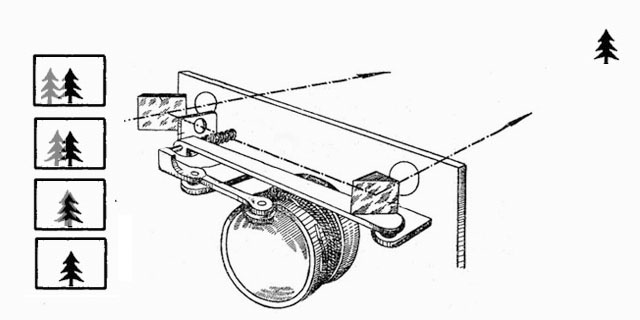
The idea of a rangefinder basically adopts the idea of using two eyes to judge the distance; just like your use your own two eyes. Unlike the eyes, you have to turn the focusing ring to make the two images match into one. In this illustration, the tree in front of the camera (upper right corner) is "double" and then, as you turn the focus ring on the lens, the two images overlap: that is the exact focus distance.
For you as the user, you are matching two overlapping images by turning the focusing ring on the lens, and when they are on top of each other, the image is in focus. More on that, later.

The object is "mirrored" by the optics and placed at the distance you turn the lens' focusing ring to. When the object is placed at the same distance as the object actually is, you see the image in the viewfinder and the overlapping "mirrored" image snap into one.

Manual focusing with the Leica M Rangefinder
Manual focusing is quick and intuitive as soon as you have gotten the hang of it. It triggers your imagination and creative freedom - it is you who makes the picture. It gives you total control of the focus of the image. But even if you have used it for 30 years you will sometimes go completely wrong because the only indicator of focus is what you perceive in the center split field.
When you master it, it is extremely precise.
|
 |
|
 |
| Out of focus with the two unmatched overlays in the center of the image. |
|
Focused with the overlay in place in the center of the image. |
Pros:
- You decide where the focus is.
- The focus range stays where you set it; which useful and fast for a series of photos.
- You can make an image out of focus.
- Very fast and intuitive when you get the hang of it.
-
You see outside the actual frame, not just what is in the image.
- Bright and very clear view of colors and details.
- You don't preview the photo. The creation is in your mind, but the image you see is normal and all sharp.
- No battery needed.
- Incredible superior engineering and optics.
- The Leica M 240 focusing mechanism has been improved in the rebuild of the Leica M camera and is much more stable than those of the M9 and MM (once adjusted the M 240 stays adjusted, much longer so than the M9 and MM used to).
|
|
Cons:
- Takes getting used to.
- Sometimes you misjudge and it's all a blur.
- You don't preview the photo. Everything is sharp.
- The camera's focus mechanism can go out of adjustment and needs re-calibrating.
- Can be hard to see the focus center in dark.
- The longer tele, the smaller the part of the image you get; The image size you see is always 24-28mm and the frame lines tell which part of the image you capture (hence the tolerance of sharpness increases even the focus area is much larger relatively to the image).
- For wider lenses than 28mm you need an additional viewfinder to see the full frame. |
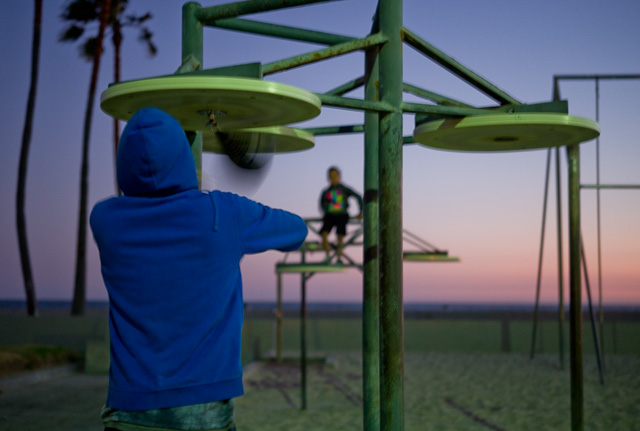
Personalizing a thrunk. Leica M 240 with Leica 75mm Summilux-M f/1.4. © 2015-2016 Thorsten Overgaard.
Getting back into manual focusing
The problems involved in focusing a Leica M are consistently brought up by people. With the traditional rangefinder of the Leica M9, Leica MM, Leica ME, Leica M 262 and Leica M240 (and all previous Leica M film models) the focusing depends on the user.
I've met people so fascinated by the Leica that they bought one right on the spot and came home with the new wonder before they realized that focusing a Leica M is very different than other cameras. Auto focus is so common that they thought all cameras had it.
The manual focusing of a camera is something most camera manufacturers haven't offered for 30 years or so, and which many professional photographers haven't done for just as long.
If you haven't done manual focusing for 30 years, you could easily think it's your eyes and fingers that have become so old they don't know how to. That is seldom the reason: A modern Nikon or Canon may be many nice things, but a bright and clear viewfinder isn't one of them. And even if you can see the matte screen in there, you can't trust that it was precision-placed to do manual focus. No expensive and excellent calibrated prism is needed when all the photographer is expected to see, is the framing and the AF takes care of the rest.
New York. Leica M 240 with Leica 35mm Summilux-M ASPHERICAL f/1.4 AA. © 2016 Thorsten Overgaard.
The Leica M camera is still built with a bright viewfinder and a very precise mechanism to focus on a single hair.
What this means is that a lot of other things are not needed. Going from a modern digital wonder to a classic Leica M is like taking off Google glasses from your eyes (that have filled your viewing field with all sorts of information in real-time) and simply viewing the world with your own eyes.
It may still not answer the question: “Why is this so great and so difficult at the same time?” My reason for this article is in part to solve all the problems that people keep complaining about , concerning the use of this precise device.
In most cases there is nothing wrong with you, just a lack of basic understanding of how simple and precise it really is.
Getting a haircut in Madison Square Park, New York. Leica M 240 with Leica 35mm Summilux-M ASPHERICAL f/1.4 AA. © 2016 Thorsten Overgaard.
Focusing the Leica M with the rangefinder mechanism
When you buy a Leica M-P 240 or Leica M 240 (or Leica M8, Leica M9, Leica M9-P, Leica M-E or Leica M-D 262), my estimate is that $1,500 - $2,500 of the retail price is paid for the precious rangefinder mechanism itself. That's how precious a piece of optics engineering the rangefinder is.
You should be able to appreciate this rangefinder and get good results with it. Spend some time learning to understand it and use it with speed and certainty.
The rangefinder mechanism is clear and bright, and everything is sharp. Unlike an SLR camera with a matte screen, you see everything clearly. Everything is in focus, so to say, so you have to imagine how it will look in the final picture where parts of the foreground and background will be out of focus.
The rangefinder focus. Everything is sharp in the viewfinder. The focus center in the middle has to match the subject for it to be in focus. You can see here how the palm tree is "double". The overlying brighter area has to "lay on top" of the palm tree for it to be in focus. The corners you see are the 90mm frame lines.
The only two features the rangefinder offers is an indication of the approximate frame and then the focusing. You focus by matching the small bright frame in the center so it lies exactly on top of what you want to be sharp.
Inside the rangefinder window is also information about the exposure compensation you have to do with the aperture, or when the camera is set to Auto, the shutter speed of the camera.
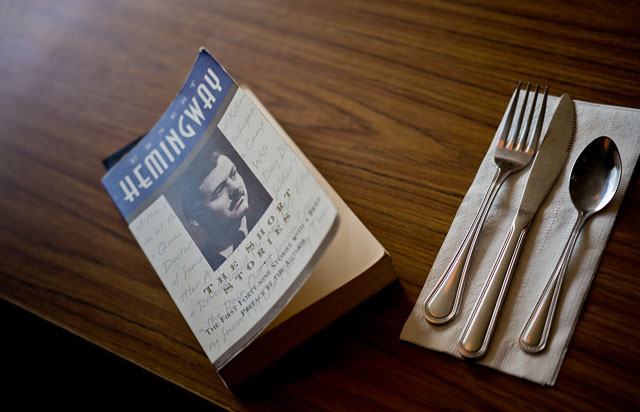
Hemingway Short Stories in the diner. Leica M 240 with Leica 50mm APO-Summicron-M ASPH f/2.0. © 2016 Thorsten Overgaard.
The focus stays where you put it
One of the big advantages of the rangefinder and manual focusing should become obvious now: You decide exactly where the focus is, and if you want to frame a scene and wait for a certain moment of expression, nothing happens to the focus.
It stays where you set it. With a rangefinder and manual focus everything stays in place and is the same until you change it.
It also means that should you decide to not have something in focus, that choice is yours too.

Newborn baby. How did I get the focus? I set it and then moved back and forth to adjust it fast enough. Leica M 240 with Leica 50mm Noctilux-M ASPH f/0.95 and Macro adapter. © 2016 Thorsten Overgaard.
The decisive moment
It may not seem like anything major, but it has a lot to do with the decisive moment: the exact moment when you want to take the photo.
This is different from an auto focus camera where you have to redirect the frame again and again to get focus between each shot. Or where you need to rely on the auto focus to be able to figure out what part of the photo you want in focus.
D-Nice (Derrick Jones) in Hollywood. Leica M 240 with Leica 50mm Noctilux-M ASPH f/0.95. © 2016 Thorsten Overgaard.
In other words, on an AF camera, you can't really prepare focus and the frame as easily, and you can't maintain it. Further, the AF-camera may misunderstand what you wanted to be in focus and decide that a face or something else (like the frames of glasses instead of the eyeball) is more important to be in focus.
Automatic is such a tempting word but basically translates to mediocre. If you want mediocre results, depend on automatic.
Very often I set frame and focus, and then wait for the subject to enter the frame, or the subject sitting by for example a table to make the gesture I'm waiting for.
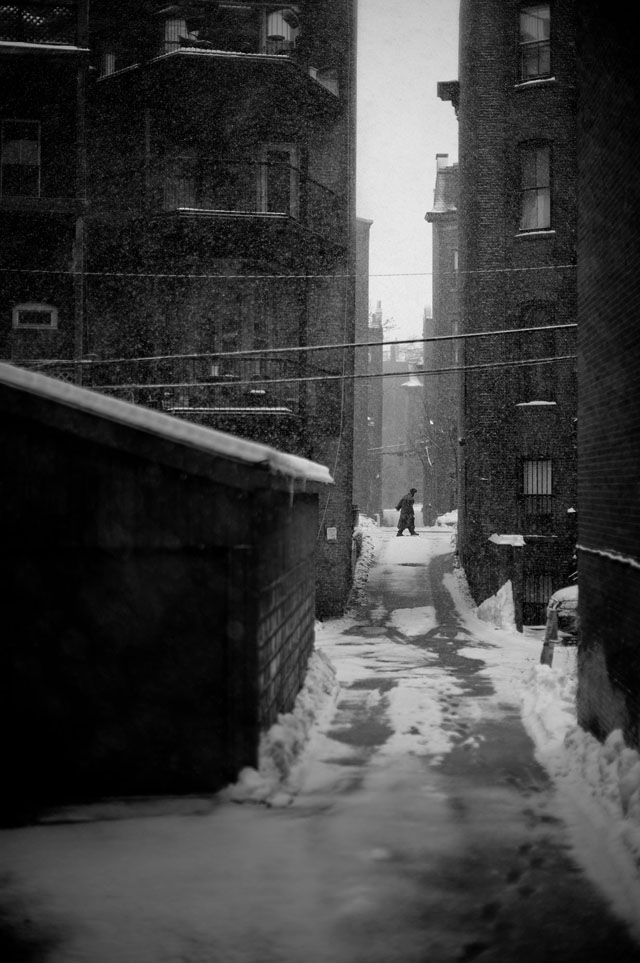
Boston snowstorm. I was waiting for somebody or something to make the picture intersting. It was very wet, and very cold, but it worked out after some minutes of waiting. Leica M 240 with Leica 50mm Noctilux-M ASPH f/0.95. © 2014-2016 Thorsten Overgaard.
Drunken focus
I have heard stories about how war photographers in the 1960's would spend time in their hotel rooms, competing who could get the focus most precise by using their eyes to judge the distance to a wall and then set the focusing ring accordingly.
The one who had the most in focus on a film roll obviously was the winner.

Burbank war hero with Purple Hearth. Leica M 240 with Leica 35mm Summilux-M ASPHERICAL f/1.4 AA. © 2016 Thorsten Overgaard.
I'm sure they had fun with this and a bottle of Whiskey, and it may be useful too if you have to take pictures so fast that you don't have time to focus through the rangefinder.
It is also happens to be the way you had to do it before the rangefinder was invented. Back then you had to guess the distance and set the focusing ring on the lens. Most lenses were f/4 or f/8 or something, you didn't fight with narrow focus, so often there would simply be a symbol for portrait, house and mountain on the focusing ring.
The precise rangefinder allowed for low light lenses with narrow focus, as well as tele lenses with narrow focus to be used with high precision.
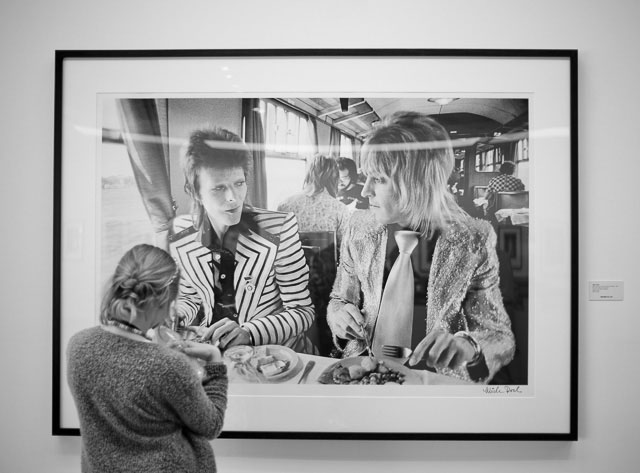
Robin Isabella at the David Bowie expo at the Taschen Gallery. Leica M 240 with Leica 35mm Summilux-M ASPHERICAL f/1.4 AA. © 2016 Thorsten Overgaard.
Expanded view outside the frame
It's one of the things people keep saying is unique (in an awesome way) about the rangefinder cameras, the fact that you see what is going on outside the frame.
In a SLR camera you only see exactly what will be captured and will be unaware of what is going on outside the frame.
The Warner/Friends'n'Family Pre-Grammys Party at Quixote Studios. Leica M 240 with Leica 35mm Summilux-M ASPHERICAL f/1.4 AA. © 2016 Thorsten Overgaard.
Frankly, I have used rangefinder so much I can't recall if I find it an advantage. I never speculated that I was missing some expanded view when I used SLR.
I think it’s something some marketing department indoctrinated us with long ago. Most likely in the 1970's when the rangefinder market was under heavy pressure from SLR cameras.
In practical use, I actually doubt anyone appreciates it that much, or would miss it if it weren’t there. After all, it's not that you cannot lift your eye and see what is in front of you.

Hollywood diner late night. Leica M 240 with Leica 50mm Noctilux-M ASPH f/0.95. © 2016 Thorsten Overgaard.
The irony is that the Leica Q camera that came out in 2015 is a compact Leica with a fixed Leica 28mm f/1.7 Summilux lens on it.
To answer the obvious objections, "Why isn't it a 35mm?" or "I would prefer a 50mm lens." Leica Camera AG did something brilliant: They made electronic frame lines so you can add frame lines for 35mm or 50mm. You have a complete 28mm view in the electronic viewfinder, but with a simple press of a button you can get a 50mm or 35mm lens.
In reality, you see and capture the 28mm frame, but when you open the image in Lightroom you see only the 50mm frame. The 28mm frame is still there, so you can actually change the crop to include more or move the 50mm frame around within the captured 28mm frame.
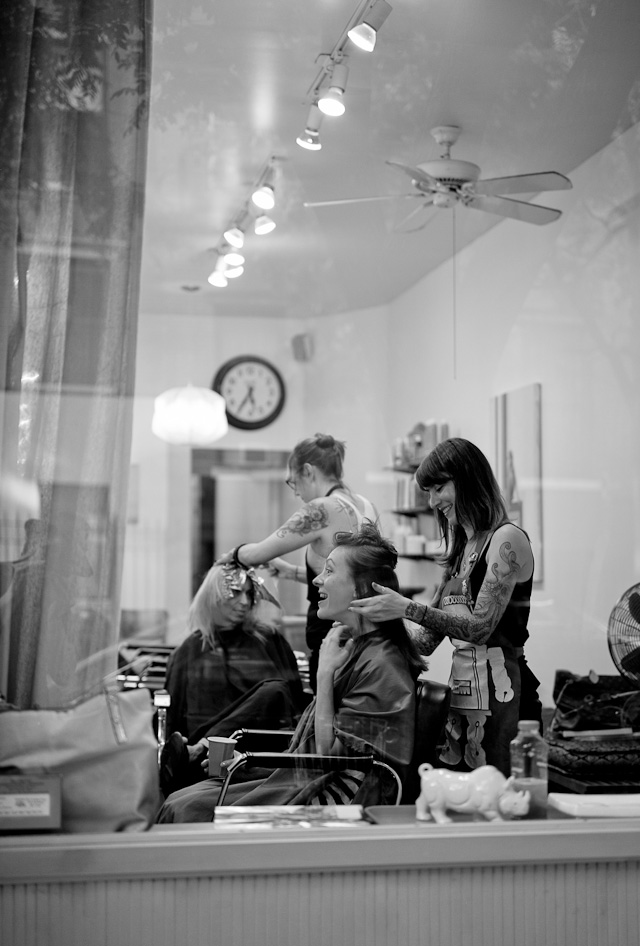
Hairdressers. Leica M 240 with Leica 50mm APO-Summicron-M ASPH f/2.0. © 2016 Thorsten Overgaard.
The lens designer at Leica Camera AG, Peter Karbe, even made the Leica Q lens sharper so that the cropped frame would still have the same sharpness as the Leica M lenses.
Now, two things happened with this brilliant invention, and they both show we are hypocrites:
1) Most people feel they are being cheated for their inventory by cropping a 24 MP sensor. They want the full sensor to be engaged, not just part of it. That the reduced MP is plenty doesn't matter, it's the MP that is not in the picture that seems to get all the attention.
2) Nobody has marveled that the 35mm or 50mm frame lines in the Leica Q allow you to see what is outside the frame. Nobody!
From this I personally conclude that the expanded view doesn't matter in reality. I seldom notice, and I never marvel nor think "Wow, it is so nice to see what is outside the frame."
I find that I move the camera around to see and select the framing, just as I am used to moving my eye around to see the whole frame inside the viewfinder.
Reviewing the iPhone photos of the
Flat Iron Building. Leica M 240 with Leica 35mm Summilux-M ASPHERICAL f/1.4 AA. © 2016 Thorsten Overgaard.
Always the same view
When you look through the viewfinder of a Leica M, you always see the same 28mm view (0.72 viewfinder). Only the frame lines change as you put on a different lens.
You have to get used to "knowing" which frame is for the lens you use. I find that when I put on my 75mm lens, I often forget that it's the inner frame I am working with. But after a while I get it.
You used to be able to order a Leica M camera with different viewfinders, 0.58, 0.72 and 0.85. You still can for the film cameras, but for the digital there is no choice.
In the 0.58X viewfinder you would see a very wide view, somewhat a 24mm lens. That is the good news. The bad news is that if you mount a 90mm lens, the part of the viewfinder that is captured by the 90mm is relatively small.
The 0.72 viewfinder is what Leica Camera AG settled for on the digital cameras. That allows you to see somewhat a 28mm frame.
The 0.85 viewfinder would bring you a close view on a 135mm or 90mm frame when you put on such a lens. The bad news is that it would limit the view inside the viewfinder to a 35mm frame.
Inside the Grammys. Every year all guests attending the Grammys have to pick up their tickets at this office at The Staples Centre, and almost without exception they ask for extra things like drive-on access, red carpet access and all the other very limited treats. Leica M 240 with Leica 35mm Summilux-M ASPHERICAL F/1.4 AA. © Thorsten Overgaard.
Frame lines explained
When you look through the viewfinder of the Leica M, you see two sets of frame lines.
The viewfinder itself basically shows you what a 28mm lens would capture, so to show you what will be captured with the lens attached, there is frame lines.
Since back in old times, the frame lines are triggered by the bayonet of the lens when it is attached to the camera.
Everything was done mechanically, so to make it work relatively simple, the designers made three set of frame lines, each showing two frames.
One set of frame lines are 50mm and 75mm.
One set of frame lines are 35 and 135 mm.
One set of frame lines are 28mm and 90mm.
| |
|
|
|
|
| |
 |
|
| |
|
|
|
|
| |
The Full
Street Photography
Bundle
(The three items illustrated below)
"Street Photography Masterclass" $698.00
"This is Street Photography" $298.00
18 video classes with PDF work book
and illustrated eBook,
Normal price $1,296.00
More info
Normal price $1,296.00
Save 65%
| |
|
|
| |
Only $448.00

|
|
| |
|
|
Buy Now. Instant delivery.
100% satisfaction or money back.
Item #2148-0522 |
|
"This is Street Photography" Illustrated eBook
+
Video Masterclass
(The two items illustrated above)
For Computer, Kindle,
iPad or smartphone.
Code applied: "ILOVESTREET"
Was 498.00
Today only $298.00
Buy now. Instant delivery.
100% satisfaction or money back.
Item #2148-0422 |
|
| |
|
|
|
|
| |
 |
|
| |
|
|
|
|
Bright frame lines
The frame lines in the Leica M 240 are lit up with LED light. You will see they become brighter or more muted as you move the camera.
The very little round eye in front of the Leica M measures the light, so if there is a lot of light, the frame lines inside the viewfinder becomes very bright, and if it is dark, they mute so as to not disturb the view.

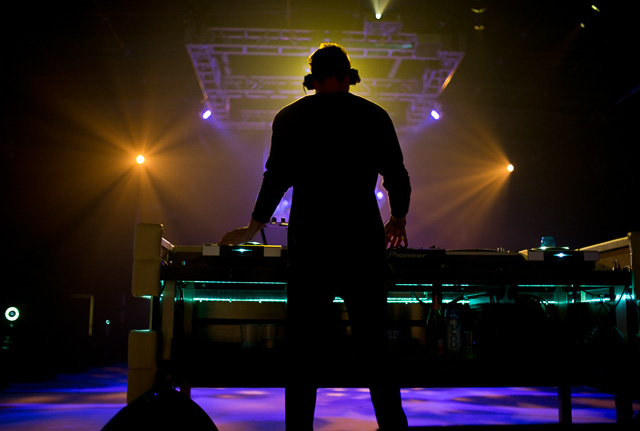
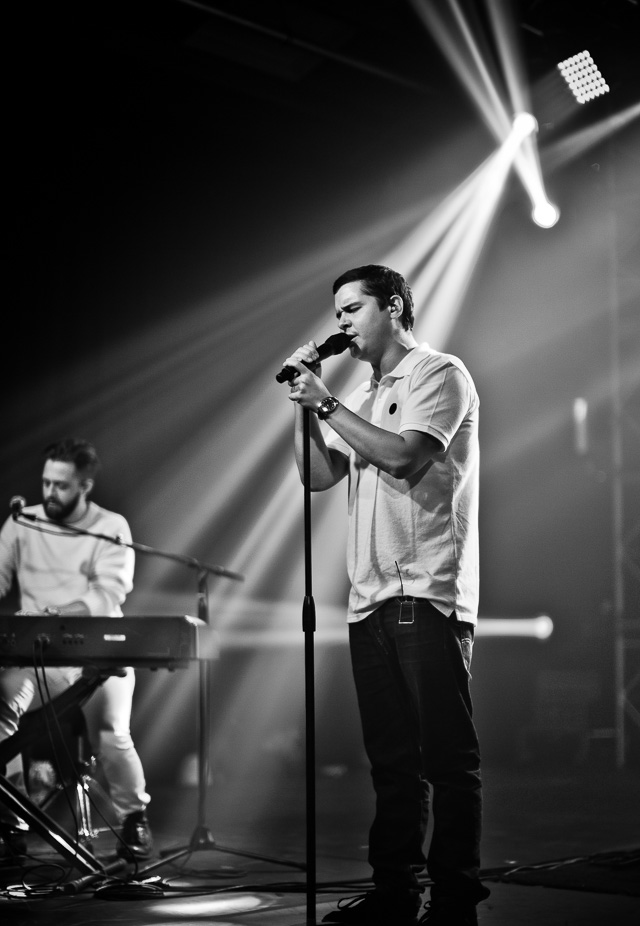
Alyssa Suede performing. Leica M 240 with Leica 90mm APO-Summicron-M ASPH f/2.0. © 2016 Thorsten Overgaard.
In previous versions of the Leica M cameras, the frame lines were illuminated by the window you see next to the viewfinder. Obviously, the more light that hits that window, the brighter the frame lines become.
The invention of the LED lit frame lines came from the Leica M9 titanium where the Audi designer Walter de'Silva got to play with the somewhat old-school ideas on how a rangefinder camera should work. I think he liked the cleaner front of the camera, as well as the precision LED frame lines added to the Leica. Oh yes, and then he made the frame lines red instead of white.
In the Leica M 240 and Leica M-P 240 that has been developed to a choice you can make between red or white frame lines.

The Leica M-P 240, Leica M 240 and Leica M-D 262 (above) has no center window to light up the frame lines. Instead they are lit up electronically by LED light.
Intuitive
The great thing about the Leica M is how intuitive it works once you get used to handling the focus.
Ideally, it's like there is no camera. It's that freedom and simplicity you seek and want.

Age is just a number: I met Viola who is 105 and have been visiting the Renaissance Restaurant (in our hotel) for the last 25 years. Leica M 240 with Leica 35mm Summilux-M ASPHERICAL AA f/1.4 AA. © 2016 Thorsten von Overgaard.
Prescription glass and the viewfinder
And this brings us to the questions about prescription glasses. Of course, if you wear glasses (like I do), your eye is not as close to the rangefinder as without.
For me (and others who wears glasses) this means that you can't see the whole 35mm frame. Leica states in their brochures that you can, but I know I can't. Without glasses you can basically see the full 28mm frame, but with glasses it's reduced to somewhat 40mm or something. Some will claim the viewfinder shows somewhat a 24mm view, and it might; the widest framelines are 28mm and you will be able to see wider than that.
Bali. Leica M 240 with Leica 50mm Noctilux-M ASPH f/0.95. © 2015 Thorsten Overgaard.
This is something you get used to very quickly. Just as you move your head to orient yourself inside a car where mirrors and window frames reduce your view, you quickly adopt to move your eye slightly from side to side when looking through the viewfinder so as to get oriented where the edge of your picture will be.
If you use a 50mm with prescription glasses, you won't be missing a thing, it's only when you use 35mm, 28mm or 24mm lenses that you’ll notice this.
Ben Quorn in Overgaard Workshop in London. Leica M 240 with Leica 50mm Noctilux-M ASPH f/0.95. © 2015-2016 Thorsten Overgaard.
To wear prescription glasses or not using a rangefinder
The answer to this question is very simple: Yes, you should use your prescription glasses also when you use a Leica M.
When you look through the viewfinder of a Leica M, you are seeing the world at the actual distance, just as if you look straight at it.
That is one of the reasons your eyes doesn't get tired of using a rangefinder. With a SLR camera, you are looking through prisms at a screen a few centimeters in front of your eyes.
My other Leica M 240 with the Leica 75mm Summilux-M f/1.4 lens on it. Strap is the Rock'n'Roll leather strap from rocknrollstraps.com.
Some get the great idea to leave the prescription glasses at home and put on a diopter on the Leica M. That's a small correction lens that is supposed to compensate for eyesight.
The solution with a diopter sounds and looks great on paper but usually has a life-span of two weeks. Then the user discovers that the diopter doesn't really work that well for their eyesight (because no camera store or eye doctor knows which one to suggest).
But mainly you realize that now that you left your prescription glasses at home, you can't see a thing. Mainly the screen on a digital Leica M is essential to set the camera.
Now you’ve got a diopter for the camera, and now you need reading glasses to change the ISO or any other item on the menu! This is the sure route to start viewing yourself as too old and weak to use a rangefinder.
You are not, but you managed to make something very simple into something very complicated.
Prescription glasses (like those you would wear when driving) are the ones you would use for a rangefinder. You can see things sharp at a distance as well as close by. And likely you have a reading field in the bottom of the prescription field which helps you read books and your iPhone – as well as camera screens!
LA Fashion Week. Leica M 240 with Leica 35mm Summilux-M ASPH f/1.4 FLE. © 2016 Thorsten Overgaard.
What's wrong with your eyesight, is you!
The majority of people don't have such bad eyesight as to warrant all the problems and excuses that they come up with.
The solution is very simple. It is to focus the best you can and take pictures.
It's amazing how often that cures focusing problems in a few hours!
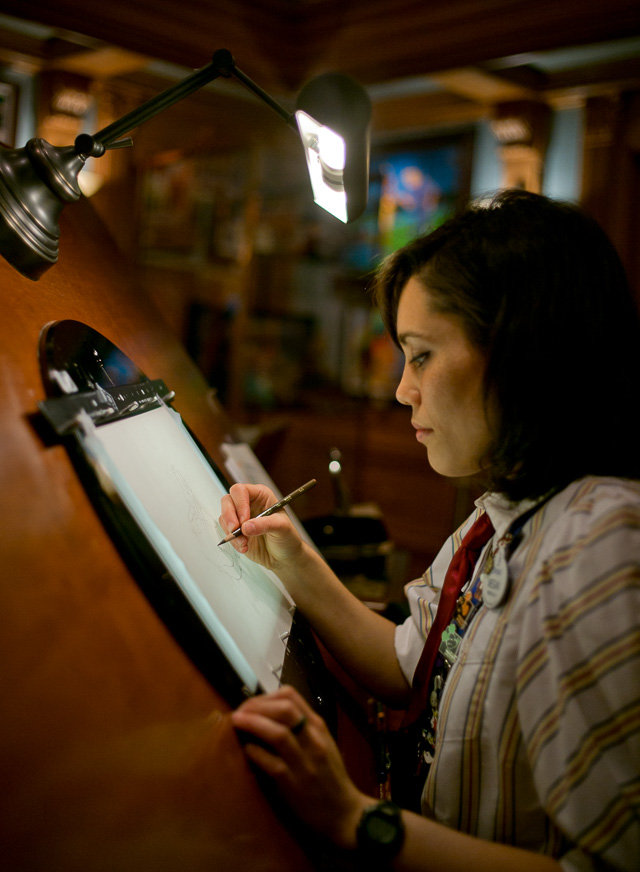
Ms. Megan Matsumoto working by the drawing tabe in Walt Disney's original office in Disneyworld, California.
Leica M 240 with Leica 35mm Summilux-M ASPHERICAL f/1.4. AA. © 2016 Thorsten Overgaard.
Thorsten Overgaard guide for Leica M users:
How to focus a Leica M 240 rangefinder
It goes without saying that it's seldom the center of the frame, which you want in focus. But it's the center of the frame that the two overlaying pictures are, which you use use to focus.
You point it at the subject in the composition which you want to be in focus, adjust the distance so the two images lay on top of each other. Then (very important for the composition) you now reframe to the desired frame.
This is very easily said, and even easier done – when you have become used to it.
Muscle Beach in Los Angeles. Leica M-D 262 with Leica 50mm APO-Summicron-M ASPH f/2.0. 3200 ISO, 1/15 second. © 2016 Thorsten Overgaard.
There is only the square in the middle of the viewfinder you can use to focus with. You have to move that middle part to the part of the subject you want to measure the distance to - or should I say focus.
If I take it in slow motion, I see a few reasons why this would cause most people a problem coming from auto focus.
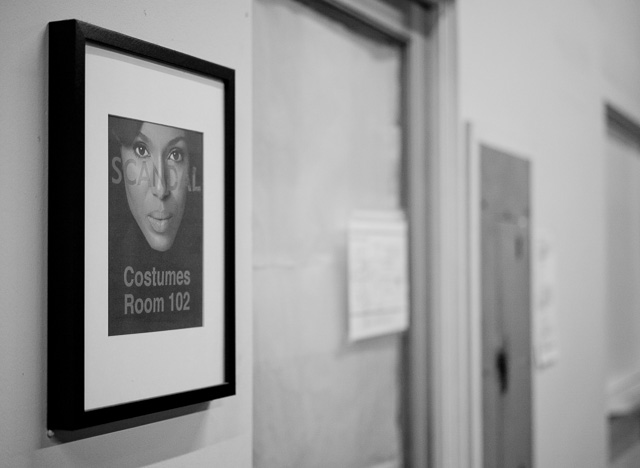
Outside the costume department of Scandal television show at Sunset Gower Studios in Hollywood, California. Leica M-D 262 with Leica 50mm APO-Summicron-M ASPH f/2.0. © 2016 Thorsten Overgaard
Some will complicate matters and want that you can move the focusing field so you can focus without moving the viewfinder. Well, I can tell from experience this wouldn't be such a good idea. The strength and freedom of the Leica M is the intuitive and uncomplicated use. In the new Leica SL with electronic viewfinder you have exactly that; a joystick that you can move to tell the AF where to focus. This is anything but intuitive and simple. It's a lot of work to get the camera to do something you could easily do yourself.
It seems to be human nature to request features that will do more for you. One of the real freedoms of the Leica M is that it's kept so simple.
First off, you have to realize that it is you and not the camera (auto focus) who is doing the work. You have to decide what part you want in focus and then turn the focus area to that. For some reason, making a decision about focus is difficult without a camera telling you it is right.

Singer Jesse Stevenson. Leica M 240 with Leica 50mm Noctilux-M ASPH f/0.95. © 2016 Thorsten Overgaard.
Secondly, many people have developed the bad habit to point a camera like it is an aiming device. What I am talking about is to point the camera so the center of the viewfinder is pointing at the area that has to be in focus and then take a photo.
Most cameras have a cross or a circle in the middle of the viewfinder that intuitively makes you place the center ... at the center of interest.
What is omitted is composition. The word composition comes from Latin "put things together". That is why the word composition is used in both photography, painting and music. It is putting stuff together within a frame so it tells a story and creates a desired emotion. As well as omitting from the frame what would reduce the clarity of the message.

Leica M 240 with Leica 50mm Noctilux-M ASPH f/0.95. © 2016 Thorsten Overgaard.
Focus and (re-)composition
I see focusing and composition as two steps. Not only with a Leica M rangefinder, but with a dSLR or an iPhone. Most people focus and shoot, which is a bit like tuning a guitar and starting to play randomly.
When you have the instrument tuned and in focus, that's when the storytelling starts.
This, by the way, is also the reason that photography is best taught using a point and shoot camera or simply a piece of thick paper with a frame cut-out in the middle: Because it takes away the focusing and the only step you have to do is composition. Unfortunately it is so un-sexy that even kids won't work with such a simple camera or piece of thick paper. They want a real camera.
Oh well ...
| |
|
|
|
|
| |
Buy the new eBook
"A Little Book on Photography"
by Thorsten von Overgaard |
|
| |
|
|
|
|
| |
Order now - Instant delivery.
More info
★
★
★
★
★
★ |
|
It's a humorous understatement to call this
new eBook by Thorsten Overgaard for
"A Little Book on Photography".
It's a grand book, a history lesson, life experience, a biography and poetry book and brilliant photo book!
All in one beautiful package of 180 pages
to fire you up and get you to love
photography ... unconditionally!
"A Little Book on Photography"
eBook for computer, Kindle and iPad.
New release March 2017.
Intro price only $47 - 180 pages.
| |
|
|
| |
Buy Now
Instant Delivery |
|
| |
|
|
|
|
| |
|
|
Composing with the Leica M 240 rangefinder
Let's concentrate on the first step - focusing - which can be difficult enough in itself. The composition part is a whole book (which I will cover in my upcoming book, "Composition in Photography - The Photographer as Storyteller").
There are a few tricks that will help you.
You move the focusing square to the object that should be in focus, make the images lay on top of each other, then recompose so you have in the frame what you want in the frame.
You also need to find something that is recognizable, something with a pattern and a contrast you can tell when is exactly on top of each other.
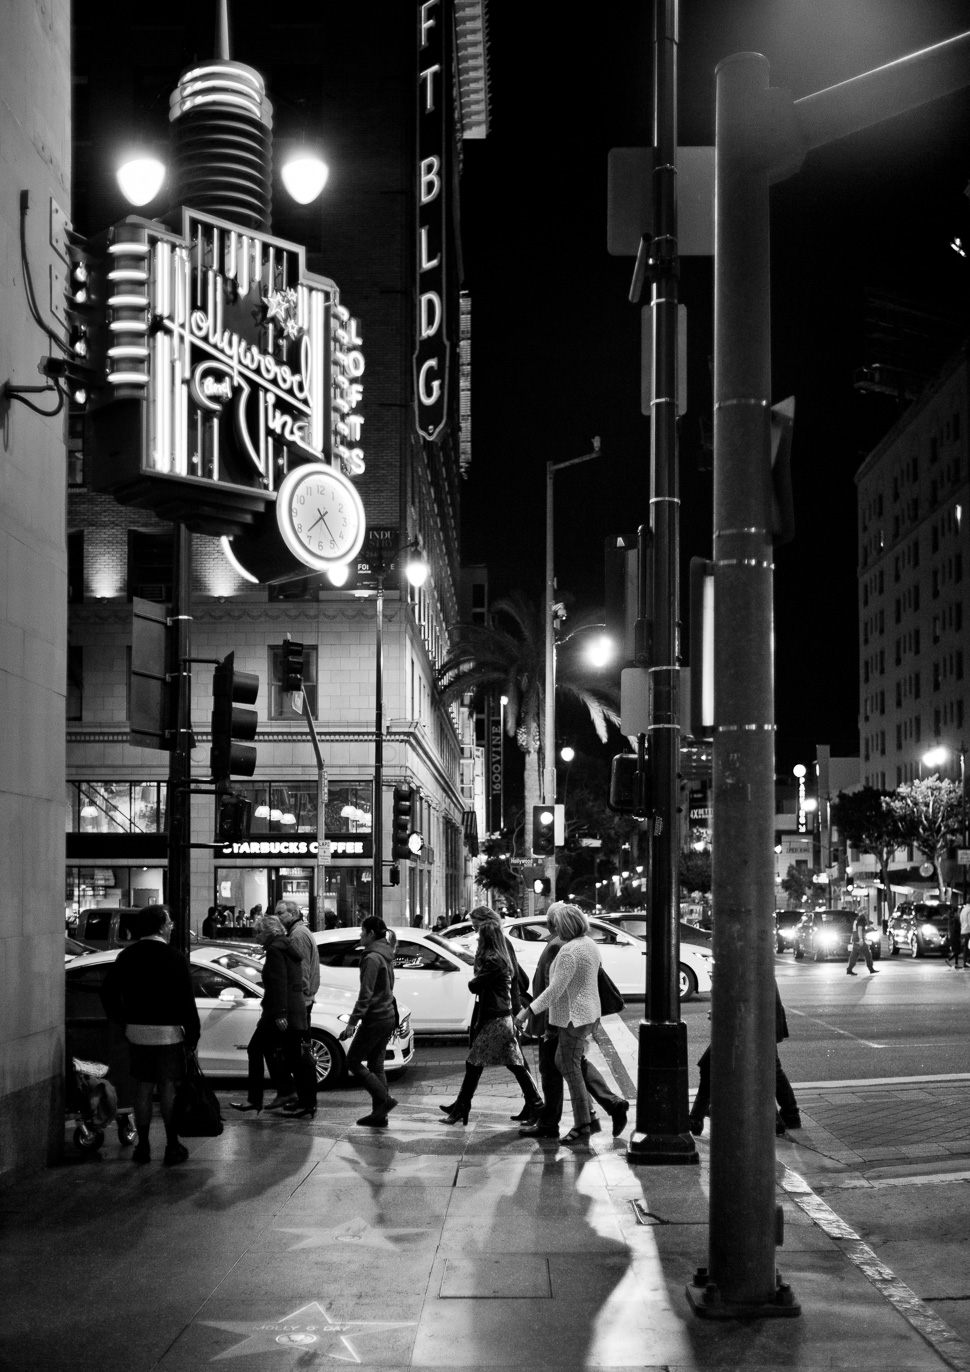
Some of the cool neon signs in Hollywood has been remade. This is the one on the corner of Hollywood and Vine, for Hollywood & Vine Diner. Leica M 240 with Leica 35mm Summilux-M ASPHERICAL F/1.4 AA. © 2016 Thorsten Overgaard.
Without a contrasting edge or line of some sort, you can't easily focus. It's not a miracle machine this one. It is a rangefinder and you need to be able to see what you are doing.
When people often complain that their eyes are not good enough, it is usually because they try to focus something where not even a teenager's perfectly fresh eyes would be able to see it.
Find the contrast
Find a contrasting edge. Always!
New York skyscrapers. Leica M 240 with Leica 50mm Summicron-M f/2.0 II. © 2016 Thorsten Overgaard.
An error that is not occurring very often, thought I too often find myself doing it, is trying to match two overlaying images where there are several of the same thing. It's a stupid error, and mostly I don't discover it till I get confused focusing and see that it the wrong tree laying over the right tree, the left side of the door lying over the right and so on.
When you know what the problem is, it's easy to solve. When I realize I have similar patterns, I tilt the camera a little, or I choose another thing to focus at, or I turn the camera from horizontal to vertical to focus fast and easy. If you think you are supposed to be able to focus in the dark or with repeated patterns, you're wrong. You may have been given the idea that other people can.
Well, I'm telling you: They can't do it either.
So don't try to be an expert on something nobody can do. Choose the easy way. Pick a contrasting edge and avoid the repeating patterns. And if it is actually too dark to see; do your best.
Some times it's a background of repeating patterns. You will easily make the mistake that it looks like the pattern is overlaying, but it's not.
So you have to refocus to find some edge of contrast to use for focusing. For example tilt the camera so you can focus easily:
 |
|
 |
| Choose an easy edge with high contrast |
|
... so you can easily see when you have focus. |
| |
|
|
Vertical focusing
Some people say they can't focus with the camera vertical. I vaguely remember somebody saying there is an optical explanation. If there is, or it was somebody inventing a reason, I don't know.
For me there is no difference.
I think, try it and see if it isn't just training your brain to see when it is in focus.
In focusing, I think, there is too much time spent on talking about it, time which could be put into more productive things such as taking pictures. Take one, focus again and take one more. Then focus again and take one more.
David Hartcorn in the Overgaard Workshop. Leica M 240 with Leica 35mm Summilux-M ASPHERICAL f/1.4 AA. ©
2016 Thorsten Overgaard.
Focusing on the eyes
When you shoot people or portraits, you want the eyes to be in focus. It's much easier to tilt the camera very quickly, focus on the edge of the eye, then recompose to the frame you want and shoot.
 |
|
 |
| The edge is easier to see than they actual eyeball |
|
... so you get that and it's going to be all right. |
| |
|
|
This is probably the hardest part of the transition from SLR and AF to a rangefinder: That nobody and nothing tell you when you have achieved focus. We are used to the fact that devices beep and blink when it's good.
With the Leica M and manual focusing, you have to make the judgment and press the shutter release. It also gives you the unusual freedom that you can choose where to focus, as well as remain focused on that spot till you change it. Unlike an AF camera where you have to "help the AF" by trying to lead the electronics to where you would want the focus.
If the camera is out of adjustment it will be difficult to focus. Hence the most likely explanation for out of focus is "my camera might be out of adjustment".

Two sisters in macro. Leica M 240 with Leica 50mm Noctilux-M ASPH f/0.95 with macro adapter. © 2016 Thorsten Overgaard.
How I cure focusing trouble
I had a workshop student in London some time back who was sure his Leica M with Leica 50mm Noctilux-M ASPH f/0.95 was out of adjustment, because "none of my photos are in focus".
I've heard that one a few times before.
So we took the camera outside and pointed towards the BT Tower which was far enough away to be at infinity on the focusing scale of the lens: The rule is that if you can focus beyond an object at infinity (such as a building, mountain or tower), or can't reach infinity (the object is double and just can't be caught with the focusing), the focus mechanism of the camera is off. When the lens is all the way at infinity focusing, things far away should be in focus.
When the focus mechanism is off, it's usually the camera. It's seldom the lens that needs adjustment, except for some versions of the Leica 75mm Summilux where the cam needs adjustment. The cam is the metal on the bottom of the lens you can see moving when you turn the focusing ring on the lens (and you hold the lens up in front of you without camera attached).
As a side note, the cam is very fine-tuned for every lens. It's not just rotating by a screw thread. It's adjusted even more than just that. And the rangefinder mechanism in a Leica M, by the way, was built and optimized for 50mm lenses all the way.
But back to London and the BT Tower: We checked and his camera was ok. The BT Tower was in focus at infinity, it wasn't in front or behind the infinity focus.
So I told him to simply focus and stop worrying. Even with a camera out of adjustment I would actually say the same. What else can you do? I once shot with a f/1.0 Noctilux for three months while my focus was out of adjustment. Actually, the prism needed to get glued, so it was really out of adjustment. I didn't have any other choice than to focus and shoot, and it actually worked. So that's why I say, just shoot. No matter what.
Weekend shadow in Brooklyn, New York. Leica M 240 with Leica 21mm Summilux-M ASPH f/1.4. © 2013-2016 Thorsten Overgaard.
To focus a rangefinder you turn the focusing barrel usually from close focus towards infinity till you get the focus. In the moment it is in focus, you take the picture. If you then go back and forth to see where the best focus might be, you can be sure your hit rate of correct focusing will drop dramatically.
What you do is that you trust your instinct. Your muscle memory, along with your brain, will know in advance that when you have turned that barrel for a few more millimeters, for this long, and with so much movement, it will reach focus. It's predictable. Your mind will know this happens in 3/10 of a second with the current speed of your fingers and the movement of the focusing field inside the rangefinder.
 |
NEW VERSION 11.3 |
|
| |
 |
|
| |
|
| |
|
|
|
|
| |
|
| |
|
|
| |
Buy Now. Instant delivery.
New Version 11.3
ONLY $698.00
Now includes
4+ hours of
video tutorials.
100% satisfaction
or 100% refund.
More info.
|
|
| |
#2130-1121-3 |
|
| |
|
|
| |
Update to Version 11.3
Apply
code "UPDATE113" on checkout to get this complete version 11.3 update.
$298.00
Updates all previous Surival Kit versions since 2009. |
|
| |
|
|
Buy the complete new
Lightroom Survival Kit 11.3
The Legendary Tutorial for Photographers
Brand-new JUNE 2022-version.
Now with brand-new 4+ hours of video tutorials.
New sections on compostition and storytelling.
How to edit color photos.
How to edit black & white photos.
How to do keywords logical and easy.
The most successful photo editing kit ever
Photographer Thorsten Overgaard first released the Lightroom Survival Kit in 2009 and have honed it with new and fresh updates. This Version 11 is the most radical updated and renewed version ever, four years in the making.
Professional workflow experience made simple, logical and easy to use.
Master editor makes it simple to understand
The Survival Kit is unique and one-of-a-kind being made for photographers for photographers. When someone understands their subject, they can explain it so it is easy to understand. The hallmark of Thorsten Overgaard is to make expert knowledge shown and told in a way so anyone can apply it.
Hands-on advice that works
With a 450 pages workbook and 4+ hours of video, every element of digital photography is touched on, in handy chapters and pre-flight checklists. Editing of color vs black and white photos, keywording, cropping of images, fine-tuning of tones, color balance and color control, export of originals, printing, archiving and backup, and much more.
Comes with the Overgaard Leica Presets (Value $48)
The Lightroom Survival Kit comes with Thorsten Overgaard's special-made Lightroom Presets for all digital cameras and for Leica digital cameras.
Understand all from camera to the final print
Chapters in this version goes over the background for High Dynamic Range (HDR), digital raw files and how to set up a professional photography workflow, from calibrating the screen to editing in Lightroom, and to making a final print. And more ...
10+ years experience in one package
No need to spend years figuring out the smartest way to do things when you can tap into the best way of doing things right here. The workflow of Thorsten Overgaard as been refined through years of field work with more than a thousand workshop attendees.
This method of workflow now used by thousands
The Survival Kit has been taught to thousands in workshops and in this Survival Kit. What does it do? It make you enjoy taking and making photos, and it increases your production considerabely. Most important of all, it'll give you back ownership of your files (which you will understand why is so important, once you have bought the Survival Kit and started applying its methods).
| |
|
|
| |
"Thorsten's methodology is perhaps not what hardware-, software- and cloud-companies want us to do, but as a former IT engineer I can only acknowledge his views about preserving our digital heritage. This workflow explained is for me the best I have ever seen".
★★★★★ |
|
| |
|
|
Video tutorials, image files, presets, checklists, definitions, tutorials of Lightroom, that boils down years of experience to a workflow you can implement in less than one day.
Start working in minutes. |
|
|
| |
|
| |
|
| |
|
| |
|
| |
|
| |
|
|
|
|
|
|
|
It's like walking towards the stairs. You know how long it will take and somehow your mind figures out when to lift one foot up so it reaches the first step. If you start thinking too much about how your feet will reach the first and the next step, and how you can be sure your feet will actually hit the step, you will fumble and eventually fall!
Focusing works the same way. I know it take a while to get used to it, but the beauty of a Leica rangefinder is that once it sits in your fingers, it sits there.
There are a lot of things I do that I don't know how I do. It's only because I have workshop students that ask me that I have to rewind and play it in slow motion to figure out how I do it, or how I learned it.
So you turn the focusing barrel, and then you shoot. Don't think about it. Then you turn the barrel slightly back before it was in focus, then turn it into focus again. And you take another photo. And once again.
You shoot when it's in focus. And you shoot several times where you re-focus each time. Don't fumble, just do it as if you knew how to do it. Truth after all is that there is no electronics, no small motors or anything else to get it done than you.
Focusing with your feet
You may also move your body and camera slightly back and forward to get the focus, without turning the focusing barrel. You will "re-focus" this way as you can see in the viewfinder when it falls in focus.
I use that a lot for portraits. I had the focus just before and now the person moved slightly. So I move back a bit, then forward till I see the focus "clicks" on the eyes.

Doing portraits at the Thorsten Overgaard Workshop in London. Leica M 240 with Leica 50mm Noctilux-M ASPH f/0.95. © 2013-2016 Thorsten Overgaard.
While you wait for 100% perfection, read this
You will realize that you will never have 100% of your images in focus. You may not believe this, and if that is the case, I invite you to read this again in 30 years.
You will have enough that are in focus. And this goes for anyone who has used a Leica rangefinder for 10 minutes or 30 years.
The important thing is to take photos, and then more photos. Some will be exactly in focus, others will - for reasons nobody can really explain – be slightly out of focus. Some will be really out of focus.
Denmark. Leica M 246 Monochrom with Leica 75mm Summilux-M f/1.4. © 2015-2016 Thorsten Overgaard.
Don't just try
An error in focusing, and in photography in general, is to take a photo and then move on. Walk slowly with a sharp eye, and when you feel there is something, stop and take a photo.
But here's what's going to happen next: you are not going to walk on. No, you are going to stay there and take more than one photo. Focus again and take one more. Maybe reconsider the composition and try something different.
You may even look at your screen to check the exposure is right. Then take more.
Some people behave like it's a test and they are not able or supposed to make it work. The thing is that there will be absolutely no change in the next 30 years. What you miss today you will still be able to miss (or unable to make go right) in 30 years if you don't take it seriously.
With seriously, I mean that when you feel you see a photo, you must trust that you saw something. That's why you are not going to try to take it. No, you are going to make it, and often it takes a few photographs. Some times 20 minutes and a lot of photos.

Berlin, September 2014. I saw these kids coming and had fairly good time to kneel down, set the focus and prepare the frame I wanted. Leica M 240 with Leica 50mm Noctilux-M ASPH f/0.95. © 2014-2016 Thorsten Overgaard.s
Focusing moving objects with a manual focus rangefinder
I wasn't always able to get moving objects in focus. I started trying to manual focus models walking on a catwalk for some years. The first thing I learned was that if the shutter speed is slower than 1/250, you will get motion blur. Models on catwalks walk very fast. For a normal walking person on the street you can freeze the person at 1/125. And a car is also 1/250 from the side and faster shutter speed when it is moving towards you.
A trick, if there is not enough light, is to photograph the models when they stop in front of the cameras, just before they turn around and walk back.
That was the first thing I learned: 1/250 second.
Fashion Week. One way of doing it is to photograph the model when she stops in front of the cameras, just before the model turns around and walk out again. Leica R9 with DMR digital back, Leica 35-70mm Vario-Elmarit-R ASPHf/2.8. 200 ISO, 1/250 sec. © Thorsten Overgaard 2011-2016.
The next thing I tried to do was to follow-focus as the model walked towards me. I was very good at it, except that most of the pictures was out of focus. The model had moved a feet or two closer to me in the instant between I pressed the shutter and the shutter of the camera got activated.
At other times I had the focus wrong. Either behind the model, or in front (in which case they would actually be sharp!).

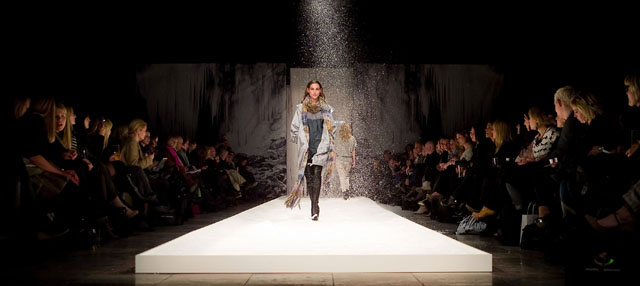
The Blonds fashion show at New York Fashion Week 2015. Leica M 240 with Leica 50mm Noctilux-M ASPH f/0.95. 200 ISO, 1/1500 second. © 2015-2016 Thorsten Overgaard.
In-between this I learned that when you do a fashion show, you have about 60 looks. There may be 10 or 20 models, and they walk back and change and then come out again in a new look. What I realized was that it was very difficult to make a set of 60 looks where the model had the same size in the frame when I photographed them far away and others close. The solution was to focus on one spot on the catwalk and then take 2-3 photos each time a model approached that spot.
Leica S2 with Leica 70mm Summarit-S f/2.5. 640 ISO, 1/250 second. © 2010-2016 Thorsten Overgaard.
This way all 60 photos looked similar and I could crop them very quickly the same way and get on. Also the light would be the same in that spot.
This was the second thing I learned. Let the subject come to your focus point instead of trying to chase them.
Fashion Week. Leica R9 with DMR digital back, Leica 35-70mm Vario-Elmarit-R ASPHf/2.8. 200 ISO, 1/250 sec. © Thorsten Overgaard 2011-2016.
A side effect of this is that it's very easy work with a predictable rhythm. You see the model walk into focus and you take the photo. Then you have a great deal of time before the model comes up to you, turns around and goes back. Then there comes the next one. Snap, and you can actually enjoy the show in-between.
The stress of trying to focus all the time was over and it was easy.
There is also the fact that the catwalk photos will be seen by an audience who want to see the designs. They don't expect creative, exiting looking photos with all sorts of movements and angels. So good light and sharpness that make the viewer able to examine the designs. That's what it is about.
The creative photos I could do backstage and in-between shows. And while there aren't a lot of memorable catwalk-photos, there's a lot of the creative backstage and atmosphere photos in my archive.

Kenzo Fashion Show. Leica S2 with Leica 70mm Summarit-S f/2.5. 640 ISO, 1/1000 second. © 2010-2016 Thorsten Overgaard.
"I need auto focus to capture my children"
With children the first dSLR often enters the household for those who are serious about their photography and want to combine their passion for photography with the ideal of capturing the children growing up.
The first lessen learned is that it's a lot of work to raise children. And a lot of things to carry. If you add a big dSLR to it, it becomes incredibly complicated and hard.
What seemed like a good idea at first turns out to be a disappointment and the backpack with the dSLR gear sits as a dark cloud of regret in the closet. It may surprise the marketing department at Leica Camera AG, but children is one of the major reasons many Leica M users give as the reason to look for a small quality camera.

Zoe with her hat and horse. Leica M 240 with Leica 50mm Noctilux-M ASPH f/0.95. © 2016 Thorsten Overgaard.
Photographing children (and other fast-moving objects)
People ask me often, "How do get the focus right on children?" or more often they simply state, "I can't focus fast enough to photograph my kids."
The truth is that nobody can.
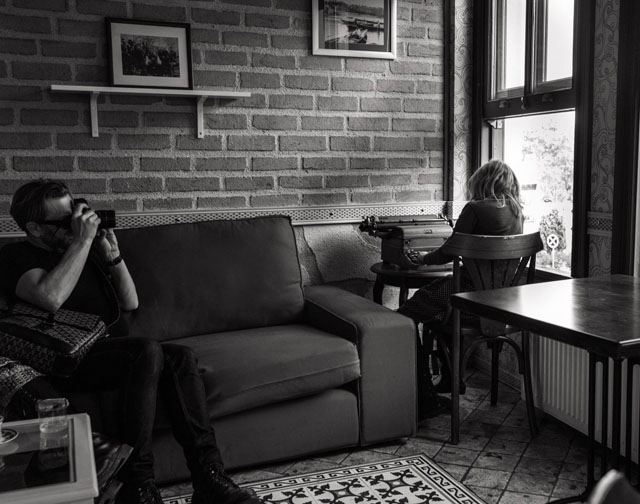
Photographing my daughter Robin Isabella in a cafe in Istanbul while she is busy with a typewriter.
What I do is that I don't expect to get the focus right (at all) on children. But when I do photograph children, I usually have set aside 20 minutes for the shoot. Mostly I do it in their own home. I pick the spots with good light, which are often the kitchen/living room where they are used to be, as well as the children's own room.
It's the light that is the most important, and that there is freedom with barriers. That's why I never set up a studio session or pick some location that "looks good". Those locations would be awkward for the kid and would be too much of a restraint on their movement. Sometimes I will arrange that we meet in a cafe or restaurant, or a large park (with lots of space and no cars) so there is space to move, but with natural boundaries.
With spaces like that I can work with the kids and keep the parents out of the frame. Any dangerous location with cars or Chinese vases, or a very restrained location in a studio on one certain spot, that's asking for a heart attack.
Brothers and sisters helping out on photograping the whole family. Denmark. Leica M 240 with Leica 50mm Noctilux-M ASPH f/0.95. © 2016 Thorsten Overgaard.
What happens with children when you photograph them is that they don't want to be photographed, but then they want it, and then they don't want it.
I picke a space where they can move around in, then I notice what they do and where they go. From there it's much like street photography, actually: I notice a good opportunity with good light, and before I get the photo, they are off to another spot.
So I wait till they get back. Maybe I will ask them to show me their race car or something in that spot, and that gives me the chance. Else I just wait because I know three things: 1) They don't want the photo, but they want it; so they will arrange for themself to be captured, 2) They return sooner or later, and 3) When I get them in that spot, it's going to be an awesome picture.

I saw this picture coming and just had to wait for the moment where she looked. I knew she would. Leica M 240 with Leica 50mm Noctilux-M ASPH f/0.95. © 2016 Thorsten Overgaard.
I will see good photo opportunities, and I hurry to photograph them. Sometimes it is too late, sometimes the focus is off, but sometimes it works.
The learning experience in all this is that while you sweat and make 400 photos in 20 minutes, when you get to the computer and edit them, there will be two awesome photographs and 15 that work.
You don't need auto focus to get 400 photos in focus. You just need a few amazing photographs in focus of the kind that will be treasured for a lifetime.
Those who had a dad or someone other in their childhood snapping away photographs with a Leica know what I am talking about.
Amongst the thousands of snapshots of a child growing up, eating burders and watching movies on iPads, taken with iPhone's, small cameras with flash and all, the few really great Leica photographs with great light and a thoughtful expression are the real treasures.

This fellow knew me from two years earlier when I photoraphed him. Now I was back to photograph him and his newborn sister. He would make sure not being interested, but happen to be in front of the camera. Leica M 240 with Leica 50mm Noctilux-M ASPH f/0.95. © 2014-2016 Thorsten Overgaard.
Those are the ones showing the real personality. It's the ones that when a 50 year old family father shows them to you, you recognize their personality in them. Often a good photograph of a child is as seeing them as grown up. At least it's easy to imagine them as 30 years older when you see that photo. It's the same expression, the same level of concentration on the subject they are dealing with, the features of the face is very much the same as it will be.
A photo of a child with ice cream all over the face can be cute, but that isn't their personaity. That's just a phase.
When you photograph children, the composition and storytelling is the important thing. The focus is just one of several technical elements.
Leica M 240 with Leica 50mm Noctilux-M ASPH f/0.95. © 2016 Thorsten Overgaard.
Focusing moving subjects in the street
I use the same method in the street when I see someone approach me. I find a spot on the ground, or a tree or fire hydrant on the side that I can use for focus. Then I wait.
Hong Kong. Leica M 240 with Leica 50mm APO-Summicron-M ASPH f/2.0. © 2014-2016 Thorsten Overgaard.
The moment the person walks into focus, I hold the shutter release down for 2-3 photos.
Some times I like the "stage" so much that I stay longer and snap 2-3 photos every time someone walks into focus. Then later, when I get back to the computer I can decide which one worked the best.
You never know what walks into your focus.
New York. Leica M 240 with Leica 50mm APO-Summicron-M ASPH f/2.0. © 2014-2016 Thorsten Overgaard.
Some times I have chosen a point in front of me that is empty, which I expect people will walk into from the left side and out the right side, or the other way. I set my focus on a precious person or a spot on the ground, and then recompose and hold my focus on an empty space in front of me. When I hear somebody approach - or see them out the corner of my eye - I snap 2-3 photos.
Istanbul, Turkey. Leica M 240 with Leica 50mm Noctilux-M ASPH f/0.95. © 2015-2016 Thorsten Overgaard.
Obviously, I can know very little about who or what walks into the frame. Some times I get three blurry photos, some times they are in the corner of the frame and never in the center where I wanted them.
But I decided for the frame and cross my fingers they walk in the line of focus. I don't change my plan or frame because that would change the whole scenery: The background would change in focus (how blurred out it is), and then I "lost the focus line" for the next persons.
Istanbul, Turkey. Leica M 240 with Leica 50mm Noctilux-M ASPH f/0.95. © 2015-2016 Thorsten Overgaard.
In Oslo I did this. I had one exact point on a line that was in focus. And I had the exposure set manually because (I almost always do for this sort of thing and because) the sun was behind the subject.
Half the skaters would travel on this line, so there was 50% chance they would be in my line of focus. So I just stayed with that exact point and that frame and could hear when they approached.
One of them I was lucky with. He jumped in my exact focusing point, with a tramp passing behind.
It wasn't that I was great at focusing. I was just patient. I sat there for 6 minutes with a few different compositions and did a total of 99 photographs.
Skating in front of the Oslo City Hall in Norway. Leica M 240 with Leica 50mm Noctilux-M ASPH f/0.95. © 2013-2016 Thorsten Overgaard.
6 minutes of waiting and 99 photographs. Here are some of them.

For this shoot of fashion designer Justin Etienne in New York I had him run back and forth a few times to capture this. Leica M 240 with Leica 50mm Noctilux-M ASPH f/0.95. ISO 200, 1/250 second. © 2016 Thorsten Overgaard.

Advertisement:

Toronto, Canada. Leica M 240 with Leica 50mm Noctilux-M ASPH f/0.95. © 2016 Thorsten Overgaard.
Prediction
A lot of what we do in photography is predicting the photograph.
Sometimes we plan a location to go to, which is one way of predicting the outcome.
Sometimes we seek to envision the possible photos based on a description somebody gives us of a place and what's going to happen there.
But often you see something on the street and you know (or hope) something is going to happen. It's the moment of intuition where you see the yellow colors all over the street corner and somehow get the idea that if a yellow raincoat and a red umbrella met in the crossing ... bam!
It often happens then, and sometimes even better things happen.
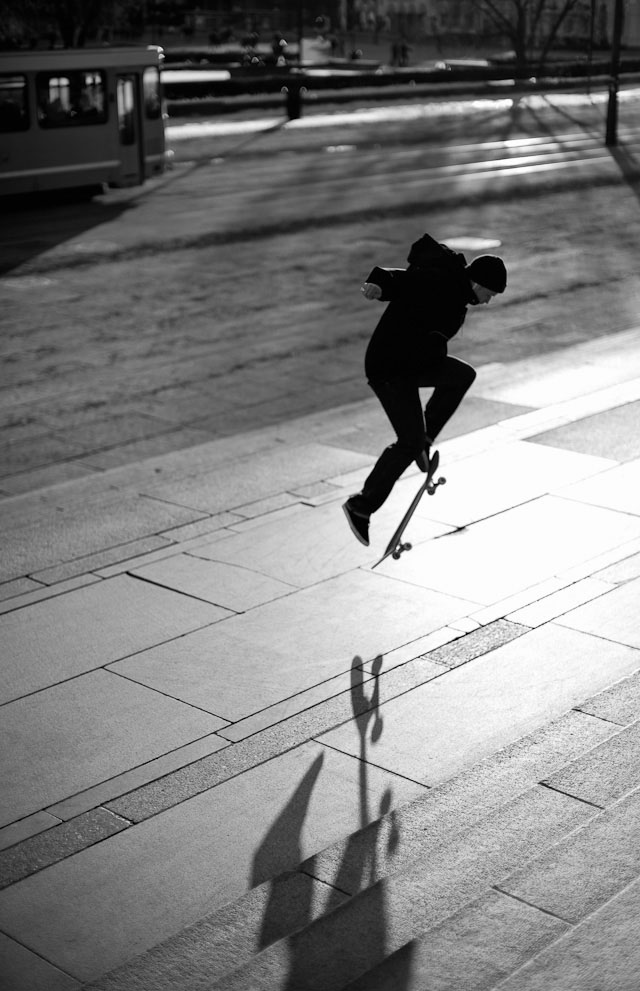
In this photo from Paris I focused on the Vespa scooter and waited for the person to approach the focus. Leica Leica M 240 with Leica 50mm Noctilux-M ASPH f/0.95. © 2014-2016 Thorsten Overgaard.
But exactly that is the proof that you make better photographs with your mind and your imagination than any camera can. That is why you have to have your hands and eyes free and not be obstructed by a camera that beeps and blinks and demands your attention to operate.
The freedom to simply see, imagine, create and capture.
Rolls Royce in New York. Leica M 240 with Leica 50mm Summicron-M f/2.0 II. © 2016 Thorsten Overgaard.
Learning focusing
with
Joeri van der Kloet
Joeri van der Kloet has written the short eBook Work your Leica M that helps train your focusing skills. It's basically the only book that deals with Leica M focusing and sets up drills that will improve your accuracy and speed of focusing over a week or two.
You can buy it here.
Danish recording artist Lukas Graham performing at the Warner/Chappell Grammys afterparty at Milk Studios in Hollywood. Leica M 240 with Leica 50mm Noctilux-M ASPH f/0.95. On this occasion my camera had actually gone out of adjustment and it wasn't till two day later I wondered how come I had so many out-of focus photos. I tested the camera, and yes. It needed adjustment.
The secret trick to focus a Noctilux
I had been using the Leica 50mm Noctilux-M ASPH f/0.95 for a whole workshop. That lens has a razor-thin focus and everything behind it is one artistic blur.
As we sat and edited our photos in the apartment, one of the guys in the workshop stands behind me, and he sighs, "Wow, you must tell us your secret to how you always nail the focus with the Noctilux!"
My answer was prompt, "I don't. The secret is that you don't see the ones that are out of focus".
Which is the simple truth and the only secret in getting sharp Noctilux photos.

I saw this young fellow walk into the store in Istanbul to buy milk for his mother. So I sat my focus and waited for him to come out again, and then took 3-4 photos as he came out. Leica M 240 with Leica 50mm Noctilux-M ASPH f/0.95. © 2013-2016 Thorsten Overgaard.
Where did we come from?
Now back in London, my friend with the Leica M and the Noctilux reported after three hours walking about and photographing that day in London that now he could focus. He was cured!
He didn't have all his photos in focus, but he was now sure his camera was ok and he could get really sharp images.
He didn't use any diopter or 1.25X enlarger on the rangefinder to see better. It is really not about seeing better, it is about believing you can.
And thus you can.
Photographing bicycles and prople on the street in Jakarta. We simply just wait for them to drive into the focus and the intended frame. © 2014-2016 Abiprayadi Riyanto.
Focusing without actually seeing
Actually, most people with prescription glasses can focus without glasses. You just have to match two images, so as soon as the double vision stops the highlights and shadows in the focusing field lay on top, you shoot!
I have screen glasses I used for screen work. Some times I had to take a photo and happened to only have them. Despite things looked blurry, I could see when the two images were on top of each other.
I can also do it without glasses, which is even blurrier.
As a side note, I stopped using reading glasses and screen glasses. I felt my eyes adjusted to the screen glasses well, but then took a while to adjust back to normal glasses later. It hurt my eyes, too.
So I decided to just use one pair of glasses for everything. I find that not changing between different glasses for different things is easier and I can walk, drive, read and work by a computer screen with just the same glasses.
I love glasses, and my optician loves to sell me a lot of them. But I think we both agree this is a better way for me.
New York. Leica M 240 with Leica 50mm Noctilux-M ASPH f/0.95. © 2016 Thorsten Overgaard.
I can see my lens
With a rangefinder you can often see the front of the lens "overshadowing" the lower right corner of the viewfinder. With larger lenses as for example the 50mm Noctilux the lens may takes up 20% of the viewing field.
You get used to it.
Some lens shades have a hole in them so you can "see through" them. Ventilated lens shades are made "ventilated" for that reason.
I don't find that it's an obstruction that I can see the lens shade or the lens. But I do love the look of ventilated lens shades. I think that's the right look for a rangefinder camera and use them more for protection of the lens front than anything else.

My Leica M with Leica 35mm Summilux-M ASPH f/1.4 FLE and the ventilated lens shade and Tie Her Up Rock'n'Roll strap. The ventilated lens shade goes on the outside screw of the lens, leaving the filter screw for filters. You can buy the lens shade in Black Paint ($129) and soon also in Silver ($149) on this page.
The elementary part: Dirt on the focusing
Having clean optics on the camera is rather important. I always have a microfiber cloth in my pocket to clean the viewfinder, the lens and the camera body.
When the focusing window (left) and the viewfinder are dirty, the contrast is reduced. It just makes focusing and composition more of a guess.
That's how it should look. Nice and clean!
It helps a great deal for the vision if the rangefinder is bright and clean. The more dirty the focusing window on the front of the camera is, the less contrasty you will be able to see in the "overlying image".
That's one reason I avoid hand cream, oil and other sticky stuff. As soon as a camera starts to get greased, it's just all over the place. Some times you borrow out a camera to someone and they put their fingers all over it.
When it's crisp and clear, it's easy to focus. It will be visible. I use fiber cloths all the time. Very simple.
Gramercy Park in New York. Leica M 240 with Leica 50mm Noctilux-M ASPH f/0.95. © 2016 Thorsten Overgaard.
When the rangefinder is out of focus
It is rather annoying when the rangefinder is out of focus, which is not an uncommon problem with a rangefinder. It is a mechanical tool that can go off due to humidity, temperature or simply because the camera got a hit.
There are two things to it that can make the whole matter even more confusing. One is that the rangefinder mechanism will go in and out of adjustment for no obvious reason from time to time. The Leica M 240 rangefinder is much more stable than the Leica M8 and Leica M9 rangefinder because Leica Camera AG improve the whole design from the Leica M 240 and onward (including the Leica M-D 262 and Leica M 246 Monochrom).
| |
|
|
|
|
| |
Buy my "New Inspiration Extension Course"
|
|
| |
|
|
|
|
| |
Need more info?
Read this article. |
|
Get inspired and rebooted!
This extension course if made for you! It can be done at home and travel at your own pace. I have taught works hops for years and the Overgaard New Inspiration Extension Course is my experience compressed to a package of training, articles, drills, assignments and video tutorials that will inspire you and take your photography to the next level! For a limited time my course includes something you cannot get anywhere or anytime else:
A portfolio-review by Thorsten Overgaard.
| |
|
|
| |
"The Overgaard
New Inspiration
Extension Course"
For computer and iPad. 181 p eBook. |
|
| |
Only $798 |
|
| |
|
|
| |
|
|
| |
|
|
| |
|
|
| |
|
|
Order now - Instant delivery. |
|
| |
|
|
|
|
I often travel with two or more Leica's and have had one camera going out of adjustment while the other went back into adjustment. When one is out and the other is fine, two weeks later it is opposite. Which means that if a camera is slightly out, it is not the end of the world. It might go back into adjustment.
The other thing that makes it very confusing is that it might or might not be your own fault! You focus and take a picture, and then the focus is wrong. But you are sure you got it! I have tried that many times, and it removes all your fundamental self confidence when you see a photo that is out of focus when you know you got it.
But I must admit it happens, and that it is has turned out more often to be me than the camera that is the source of the trouble.
The reason I know this for a certain fact is that when I started using the EVF-2 with the Leica M 240, I had similar images. I knew I had the focus right, yet there was back focus in the final image. As the EVF sees what the sensor sees, there is no possibility that the final image suddenly changed focus. The sensor doesn't move and there are no other mechanical parts that move during a photo.

Morris who is 95 years old. I did some photos with him and listened to his story. Leica M 240 with Leica 50mm Noctilux-M ASPH f/0.95. © 2016 Thorsten Overgaard.
So the photographer actually moved, or the subject did. It is astonishing how many times that actually happens.
So it is not you it's wrong with. The Earth travels around the Sun with 108,000 km an hour so things might move a bit.
The sure solution to remedy this is to take lots of photographs so at least a percentage of them will be perfectly focused and the few out of focus will not matter. The other possibility is to test the camera, which is actually rather easy:
Guide: The way to test the rangefinder for focus adjustment
The tempered and logical way to test if the rangefinder is in or out of focus is to go outside and point the camera towards a point at infinity and focus on that: If the lens can go beyond infinity or can't focus all the way to infinity, the mechanism is out. And it is mostly (as in 98% of the cases) the camera and not the lens.
The Birdman of New York. Leica M 240 with Leica 50mm Summicron-M f/2.0 II. © 2015-2016 Thorsten Overgaard.
Let me explain. You focus on a mountain chain far away, or a tower far away. If you can't get the rangefinder mechanism to focus on it and it feels like the lens just can't stretch the focus that far, you will have front focus. If you can focus beyond the mountain or the tower, your camera in fact has back focus and all focus is pushed behind the actual subject. For some reason it is more often back focus than front focus.
If the camera focuses correctly, the mountain chain or tower far away is perfectly matched in the viewfinder. The actual photo is not of interest, actually. Just if the rangefinder mechanism works.
Thorsten Overgaard checking focus on Lynn's Leica M rangefinder. Photo by Adam Singer.
The way not to test the rangefinder for focus adjustment
The whole matter can be so frustrating that you never really know if the camera works or not, or if it is you. This can lead to a very unproductive way of photographing where you look at the preview after each photo and zoom in to see if it is in focus.
This of course can be very interesting, but what will the conclusion be?
Well, it will be that sometimes it works, sometimes it doesn't work. But why? What are you going to conclude from that? You can conclude that sometimes it works and sometimes it doesn't, and most likely you or the subject moved in some of the cases, or maybe the camera is out of focus. Or maybe your eyes are getting old.
This leaves the interesting question about the ones that really are in focus: How did that happen?
So you see that will not lead anywhere, except that you spend time doing quality control on each photo.
The way to do it is to photograph as if the rangefinder mechanism worked perfectly and use the pictures that are good. If the number of pictures out of focus is so alarming that you suspect something is wrong, do the above mechanical test of the rangefinder on a point far away.
During the Grammys 2016 I actually had a camera out of focus, and Ididn't know till two days later. The camera was perfectly fine till I borrowed it out to a video crew for just a couple of hours. When I got it back, I didn't suspect anything. It wasn't til I looked at the pictures some days later, I noticed how clumpsy I was. At least, so I thought, till I found out I could blame it on the camera.
It made me decice to check cameras before important events. And when I was photographing a very famous actor some time after, I used EVF on one of the cameras to make sure I could see the right focus at all times.
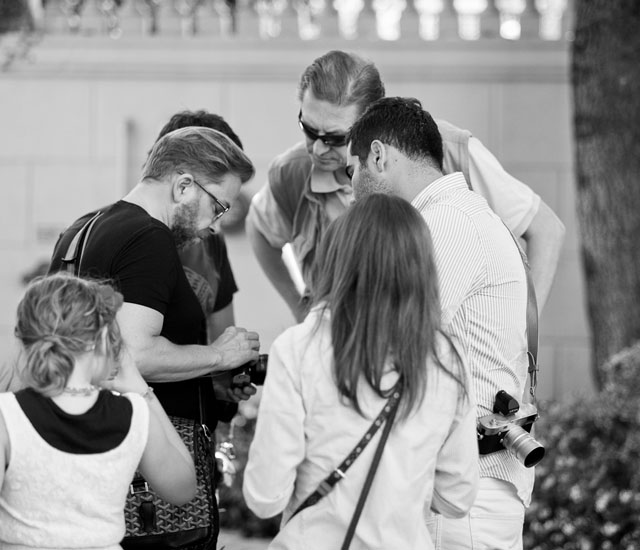
Setting cameras up in th workshop. Leica M 240 with Leica 50mm APO-Summicron-M ASPH f/2.0.
Cause over photography
Simply stated, perhaps the strongest argument for manual focus is that it makes you cause over the photograph and the camera operations, as opposed to being effect of it.
If we bring pre-visualization into it – seeing before the fact; basically the emotional impact of the photograph with a pre-visualization of all the underlying technical and composition decisions one needs to make to get there – then manual focus is an important part of the whole!
It's a good question if a preview on a screen wouldn't be of help in this.
Brooklyn, New York. Leica M 240 with Leica 50mm Noctilux-M ASPH f/0.95. © 2013-2016 Thorsten Overgaard.
The viewfinder in the Leica M rangefinder camera tells you nothing about the final result, other than what you imagine in your head.
That's a burden taken off your shoulders in some ways, and even when the result is different than envisioned that too is often a way to learn new things, some times a way to learn to push the boundaries. Which in so many ways is the artistic aspect of photography.
The electronic viewfinder, on the other hand, is today's Polaroid. A prevision of the image in all details that reveal sharpness, depth of field, exact framing, exposure, tonality and all: a way for the photographer to check if his vision sticks.
Up next, that is my article on manual focus with a rangefinder, using the electronic viewfinder. That will be on Page 44.

Fashion designer Justin Etienne. Leica M 240 with Leica 50mm Noctilux-M ASPH f/0.95. © 2016 Thorsten Overgaard.
A final encouraging note on being perfect
Ansel Adams was a perfectionist and obtained a high degree of perfection in all his photography. His interest in photography started when his parents gave him a Kodak No. 1 Brownie camera at age 14 when the family was on holiday in Yosemite (This was Anssel Adams first visit to Yosemite and he returned every year for the rest of his life).
When he was 15 years old, he traveled to his beloved Yosemite in the summer with both a 4x5 view camera and a Vest Pocket Kodak Autographic Special. He was on fire and read all photographic magazines he could get his hands on.
Two year later, when he was 16 years, he didn't only bring cameras to Yosemite but also his own chemistry and darkroom equipment, as he wasn't satisfied with what the local labs could produce.
And so on went Ansel Adams with perfecting his photographic skills and technique for another 66 years till he left us at age 82.
Despite all he did, knew and passed on in his books, Ansel Adams never made the perfect negative. He always had to crop away a little in the side, darken a tree or a mountainside to get it all as he wanted it.
There was always something.
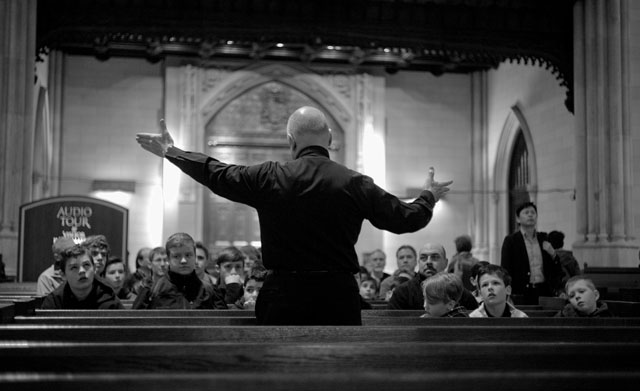
Msgr. Robert Ritchie lecturing guest inside the Saint Patricks Cathedral on 5th Avenue in New York. Leica M 240 with Leica 50mm Summicron-M f/2.0 II. © 2015-2016 Thorsten Overgaard.
Thank you!
With that final note, I leave you for today. As always, feel free to mail me at thorsten@overgaard.dk for advice, suggestions or ideas. If you have any issues with the Leica M focusing, mail me and I will try to help with it.
Enjoy the latest articles on the Leica M 240:
This is a continious user-report by Thorsten Overgaard. See more articles here and make sure to join the mailing list to stay in the know.
|
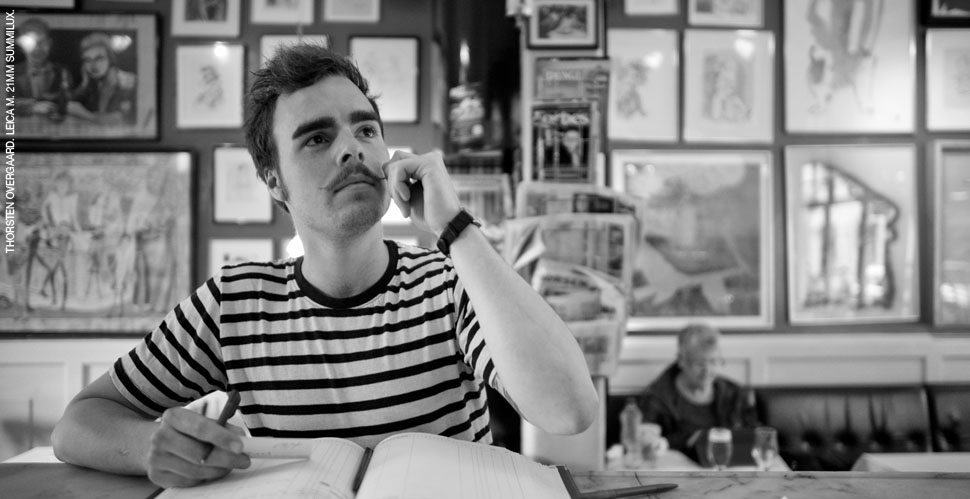
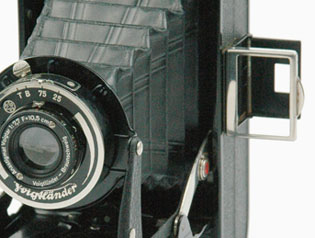

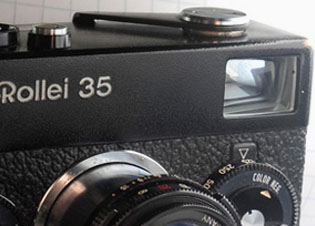
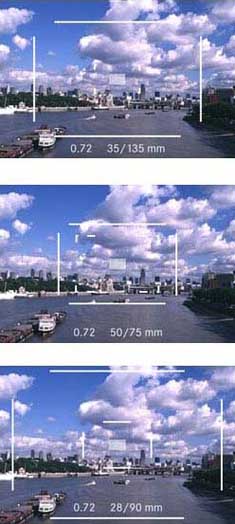


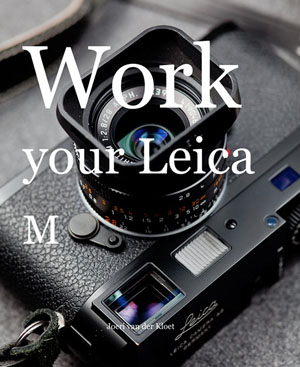


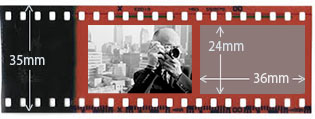
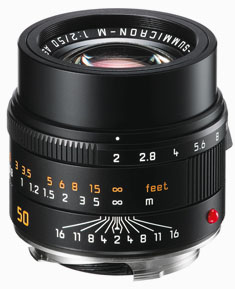
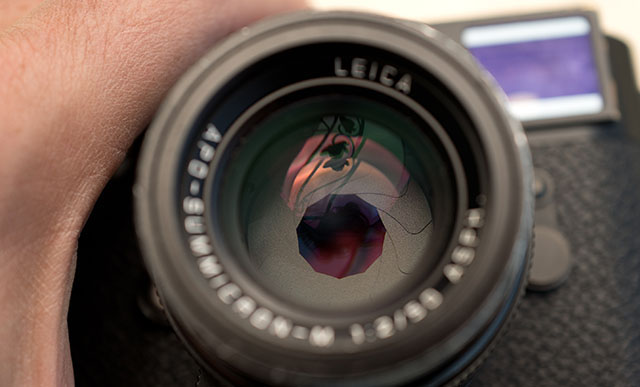
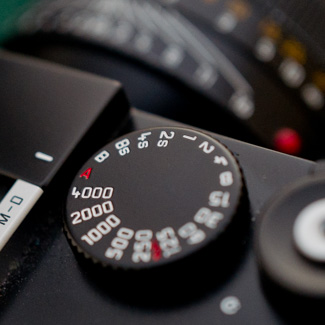
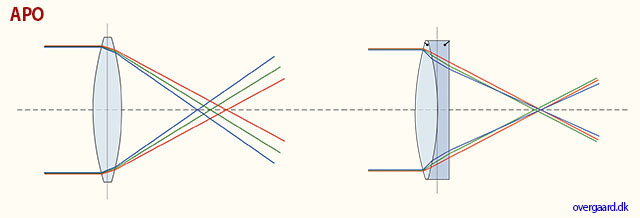
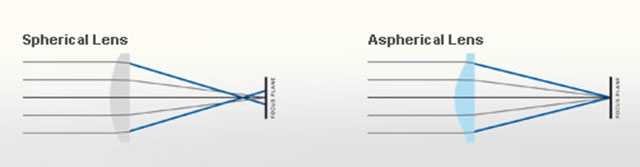
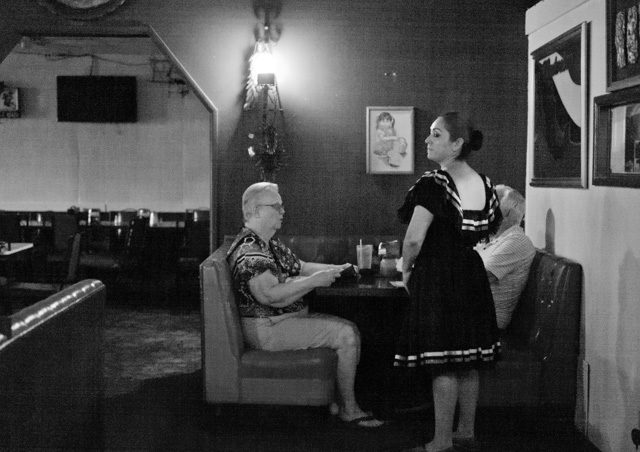
 Bokeh: The visual quality of the out-of-focus areas of a photographic image. Photo at Bar del Fico in Rome.
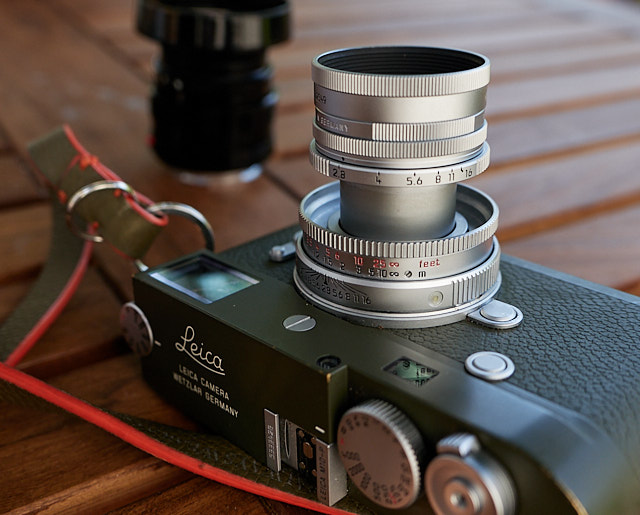
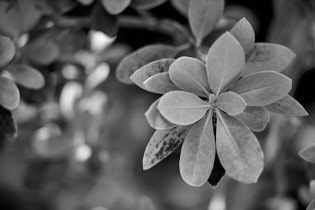

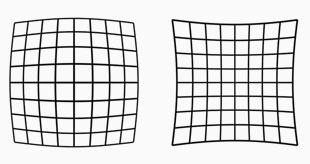
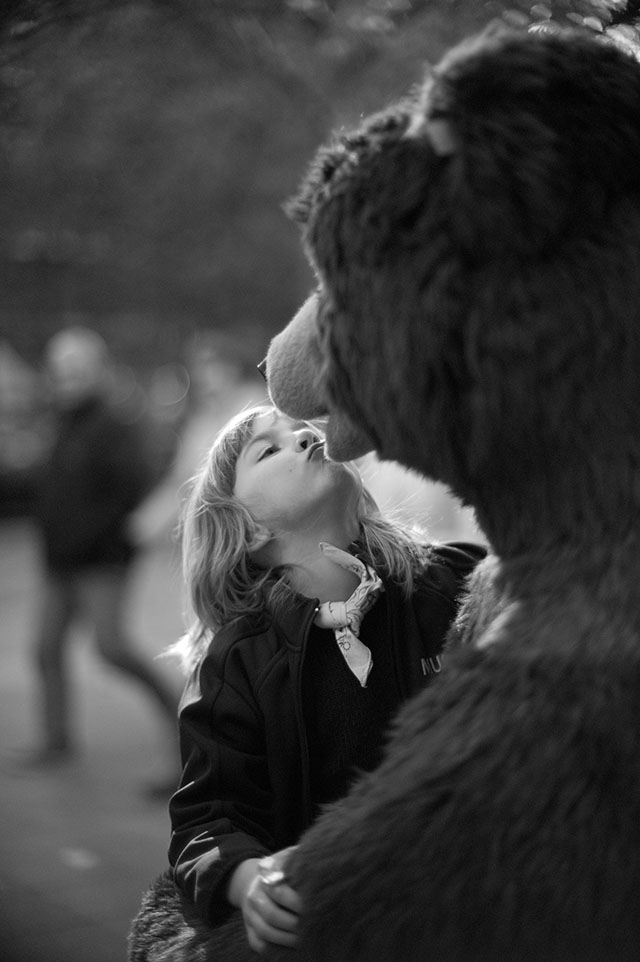

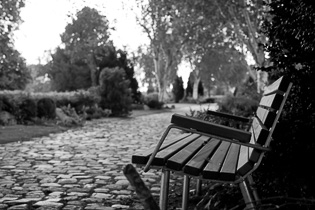
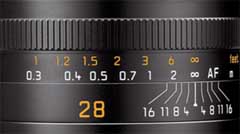
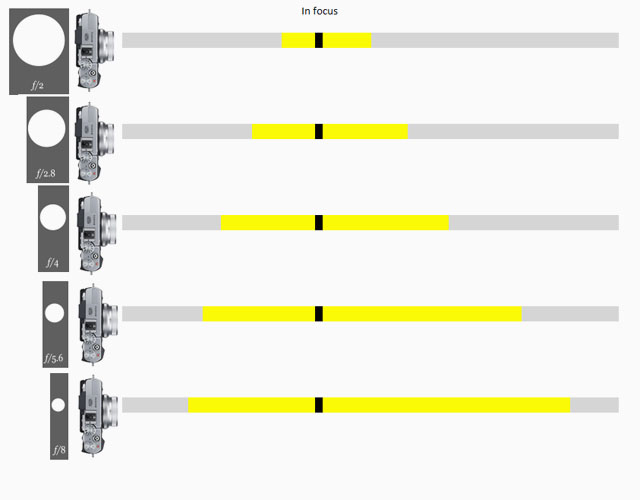
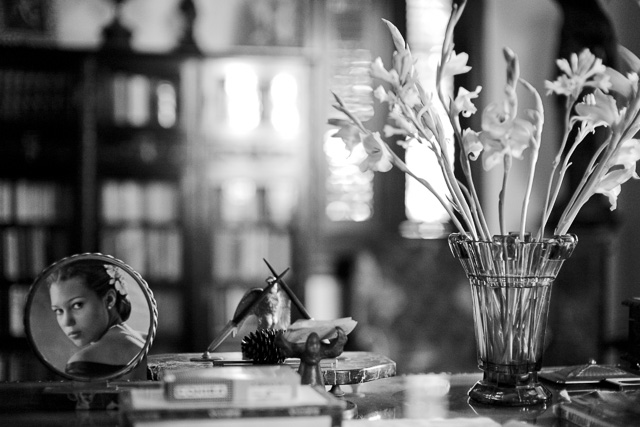

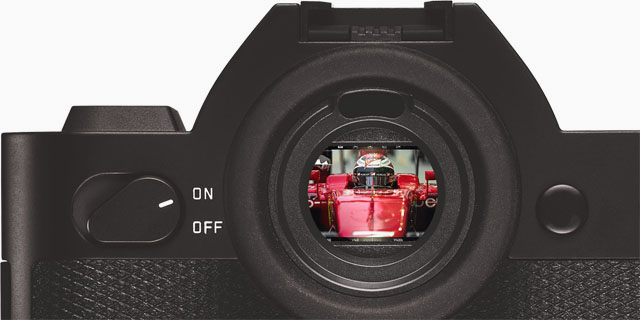
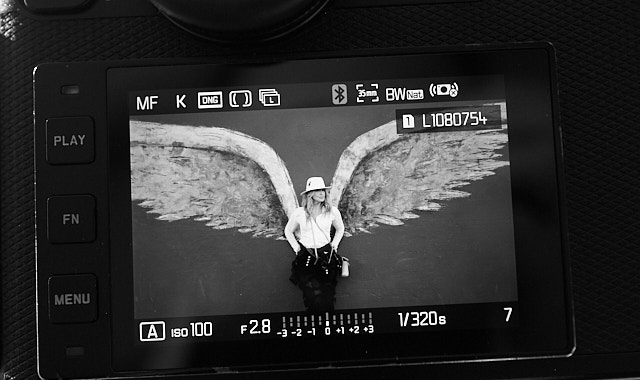


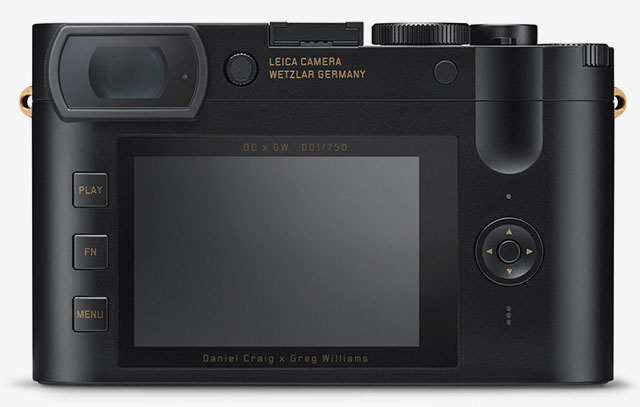

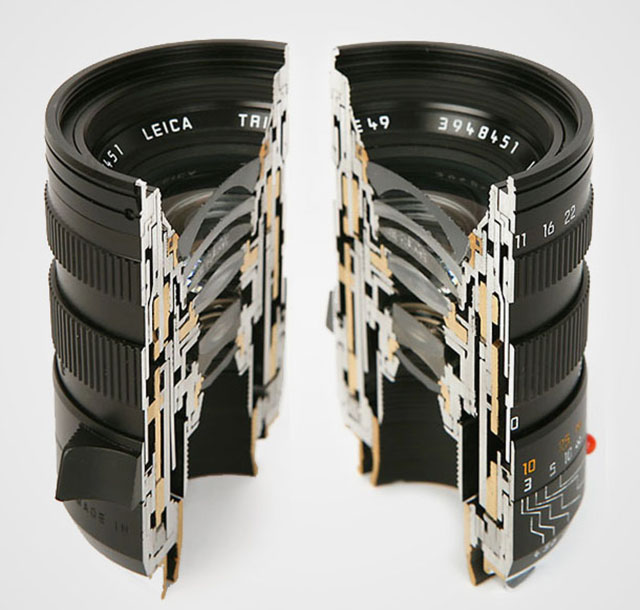
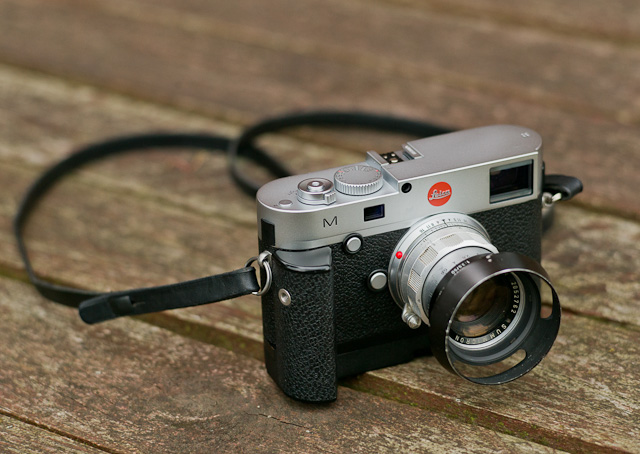

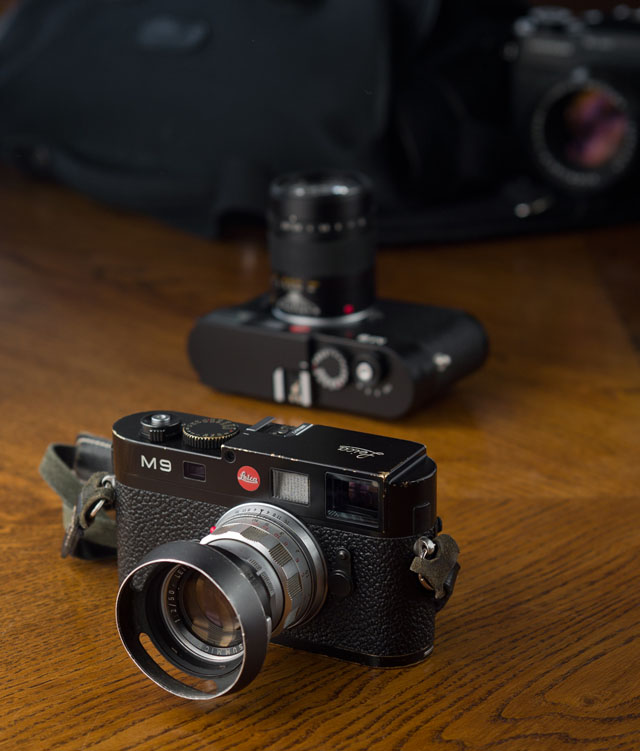
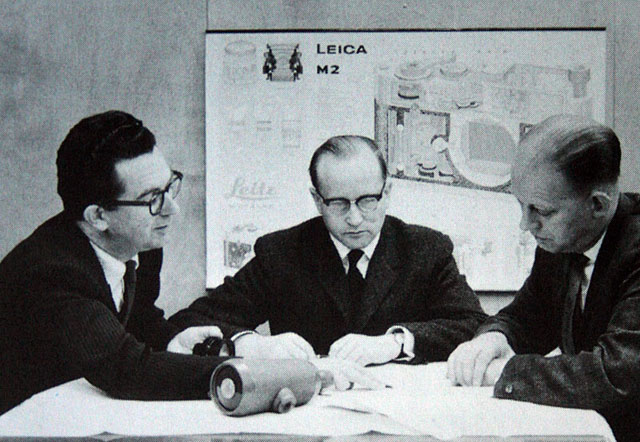
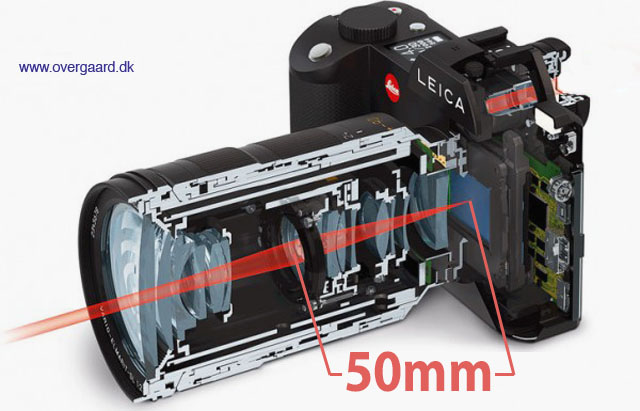

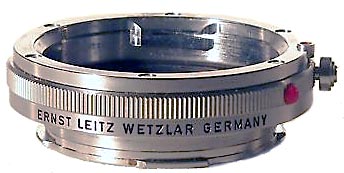
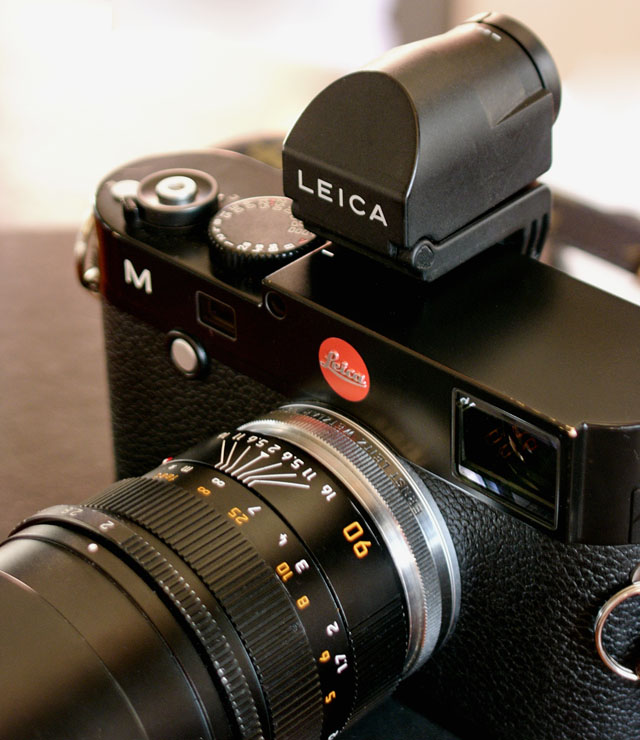 The OUFTO on Leica M Type 240 with Leica 90mm APO-Summicron-M ASPH f/2.0.