By: Thorsten Overgaard. March 24, 2022. Latest update August 3, 2022.
This is a continuous review from Page 1 that continues on Page 3, Page 4, Page 5, Page 6 and Page 8 (Leica M11-D).
My opinion is that you can get almost any camera to work and show the color fidelity that you want and like. The first and most important breakthrough in using any camera, is the decision to make it work.
In this article, I'll talk about the technical side of Leica M11, but just as much I’ll talk about you as the user. After all, it is you who takes the photographs.
Aside from everything that can be analyzed and said about the Leica M11 sensor, let's just for a moment forget all that and simply look at the pictures.
You can actually feel it, and you can see it: There is an aliveness and lightness to the images of the Leica M11. And with lightness, I mean the type of lightness not from being “thin” files, but from being files with so much horsepower behind them - image data and image depth - that they effortless display a crisp and clear image in which you can feel the textures.
We know there is higher resolution, there is a backlit sensor, and then there are great lenses, perfected during the design phase years ago in anticipation of this moment in time where sensors might be able to record what those lenses were capable of seeing.
More megapixels simply means that the closer you go, the more you see. But apparently, without going close at all, you may sense more details, even though your eyes can't see nor separate them. If we compare this to sound, maybe you’ve experienced a great stereo where even without being able to register every detail that makes up the overall acoustic signal, you definitely hear a superior sound clarity. And as with sound, the more detail in a visual recording, the simpler and lighter the overall impression seems to become. That is what I mean with lightness.
The backlit sensor should result in better recording in the dark, in marketing material often referred to as night. It is also very likely that it helps separate details in shadows, and perhaps even helps the sensor see with more clarity and detail overall, in highlights as well .
And then there are the lenses. If I were to state a generality as to where lens design has been moving, it has been in the direction of more control of the light rays. We have APO lenses for 50mm and 35mm, which is a ridiculous idea, because the precision they offer was meant for tele lenses and astronomy telescopes, capturing things at far distances. Nowadays these are applied to near-focus subjects like your cat, six feet away. Who would care for the correction of small imbalances that everybody once agreed only mattered for objects a lightyear away? Well, it seems newer and higher resolution sensors do care about those extra nanometers of precision. And now we feel it, even when we don't see it in detail.
APO basically means that the red, green and blue light (which is all we consider to exist) has been corrected to meet more precisely in the same spot. Clarity of colors and definition of details would be the result, and blurry details and “ghosting” (or echo of details) would be the result of no APO. APO is short for apochromatically, which refers to the fact that colors drift away, a natural consequence of different colors of light traveling with different speeds. When we say APO lenses, we are talking about lenses that’ve been corrected from the colors drifting; they have been disciplined to all meet in the same spot at the same time. A bit like telling George that the meeting is at 9:30pm and telling everybody else that it’s at 10:00pm, because all will be there, including George (who in this analogy is the red light rays, always travelling with slower speed).
Photon is the light particle (phot is Greek for light, and -on is on the pattern of electron. A light particle carries energy.
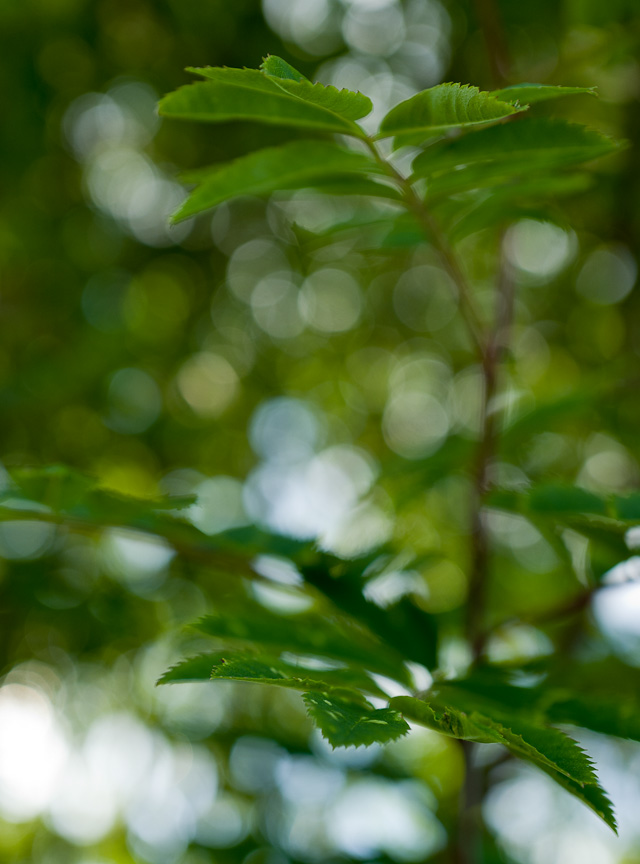
Also in lens design, particularly noticeable in photos made with the 35mm Summilux-M ASPH FLE f/1.4 (2010) and onward, the lenses seem to see more in the shade than previously. Better separation of details in dark areas; and naturally that must go for all areas from dark to bright. After the 35mm FLE, in 2010, came the 50mm APO (2012), the 75mm f/2.0 (2014), the 75mm f/1.25 (2018) and 90mm f/1.5 (2020), then the 35mm APO (2021). These are lenses that seem to be able to collect more photons (light particles) from hidden dark areas than before.
15 video classes with work book
+ 455 page eBook,
+ Styles for Capture One for Leica M11
and Leica M11 Monochrom
+ Lightroom Presets. for Leica M11
and Leica M11 Monochrom
Normal price $897.00
Normal price $897.00
Save 45%
Only $487.00
USE CODE: "ILOVEM11"
PREORDER. Be the first to get this.
100% satisfaction or money back. Leica M11, Leica M11-P
and Leica M11 Monochrom
Item #2150-0222
Leica M11 Know-All-eBook
455 pages illustrated for Computer,
Kindle,
iPad or smartphone.
Only $298.00
PREORDER. Be the first to get this.
100% satisfaction or money back.
Item #2151-0222
This type of lens design started with the 50mm Summilux-M ASPH f/1.4 (2004), which was an APO-design without stating it officially. Since then the lens designers of Leica have escalated the use of extreme precision assembling and APO on a series of Leica L-lenses and M lenses.
All those lenses display clarity, higher contrast, excellent suppression of flare and stray light, and extremely tight control with where the light goes in every detail.
If this sounds like an analysis of the Leica M11 sensor, it is not. I just rattle off some of the reasons why we can have more precision in the details, and why they have impact.
My conclusion is that with the sensor design, the amount of pixels deployed in recording an image, the cleanliness of 64-ISO files, and the lenses available, the Leica M11 images seem generally more alive than before. That's all.
So many of the qualities here you must sense and feel, and just trust your gut, even though no reviewer or laboratory will ever be able to document exactly what it is.
To make clear my point that it really doesn't matter what you can measure, but it matters what you sense and feel, let me in the same breath explain what "the Leica look" is.
In its utmost simplicity, “the Leica look” is what people see when they see a photo made with a Leica. They see that this is different. And they know they want it.
Others may compare prices of lenses and sharpness and argue that this or that lens "can do the same" … and it is never really the case. It's true that some of the things you see a Leica lens do, other lenses can do also.
For example, f/0.95 can be done by other lenses, in that you can produce an extremely blurred background and an overall dreamy look. It's not even a design, it's a fact that if you make a lens f/0.95, it will have exactly that much blurred background and exactly that extremely narrow depth of sharpness. All lenses, stopped down to f/2.8 or f/8.0 have the same depth of sharpness, and so does a lens if opened up to f/0.95or f/0.8.
“The Leica look" is probably best described by the film directors and cinematographers that asked Leica if they could make cinema lenses with "the Leica look", by which they meant the "detailed but not razor sharp images" Leica lenses had become known for. The cinema lenses are now made by Leitz Cine.
Sharpness and contrast of lens design (two sides of the same coin) increased in recent years, just as it has in the receiving mediums (screens, paper and print), which are now able to show more details. Within that trend, Leica has always made lenses that seemed to capture more detail, with more clarity than other lens brands. Go figure.
Sharpness is, in my opinion, best measured, described and compared by looking at clarity. Sharpness in itself is bullshit.
Clarity is another word for sharpness, but also another concept. Because you can make sharp edges that you can admire when you blow up a picture - and this is what most people measure when they measure sharpness. But with sharpness alone you will not see the details of the skin in a face, or the details of the texture that make up a flower. In an analogy, it’s like admiring the borders of countries when what matters is the people, the landscapes and the culture inside those borders.
So, in short, the "Leica look" means that things look alive and real, as if in front of your eyes, without you noticing or even missing the lack of extreme edge sharpness.
If you go back and read what I wrote above, about the aliveness of the Leica M11 pictures, it should all make sense why 60MP and a backlit sensor amplifies "the Leica look" under the right circumstances.
In many other circumstances, 60MP and a backlit sensor means nothing for the image, because it’s the same feel and detail level as if it was made with a 5MP sensor. Many important and historic photos that we like are not depending on detail level, nor sharpness, and thus wouldn't benefit from today's technologies.
Let's be honest. At this point in time, the Leica M11 is a hard cookie to use and review, because there are several things that obviously need to be fixed and finetuned in the firmware. How do you use a potentially perfect camera that is not made final yet?
It adds to the complexity that the camera offers (some would say) too many choices to easily make it your own. It is still too early to determine which choices are the best for you when the firmware is not finalized.
For example, the mechanical shutter has glitches and odd sounds when used in RF mode, but if you use the Live View (screen or EVF) and set the preview to anything other than No Preview, this glitch seem to disappear. This will change with an upcoming firmware update that will be released later than March 2022.
The good thing, perhaps, is that a potentially wider range of different users can set up their own camera to their personal likings. I would prefer if the camera was designed according to a specific philosophy and not as a Swiss army knife. Here are some examples:
60MP files using EVF at all times, set the preview to Standard to get less rich colors in the EVF. Single frames, set light meter to Classic.
37MP files using RF at all times, set the preview to No Preview, continuous speed L(ow), light meter to matrix.
37 MP files, DNG+JPG files, set preview to Monochrome.
The problem with choosing is that you sort of have to know all the (some would say too many) choices in order to make an educated decision. Or you simply follow my settings (on the next page when it comes), or anybody else who recommends a complete setup.
With any camera or lens, you must decide that it is yours, and with that comes the will and ability to make it work. The amount of image data is so plenty you will not be missing out on the Leica M11 or any modern full-frame camera. Unlike a smartphone, where the files are so "thin" there is nothing to work with. It doesn't matter if they call it 24MP or 48MP, smartphone images are still "thin" compared to real raw files from a Leica M11.
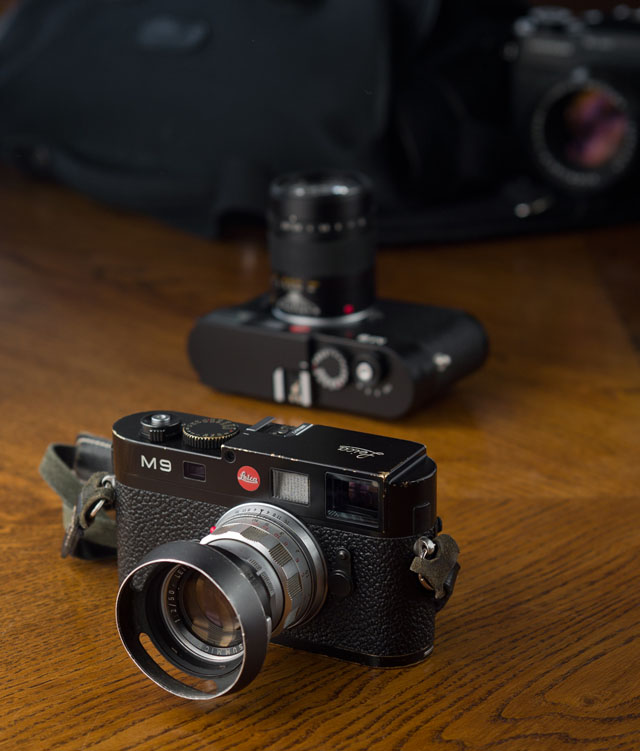
Personally, it took me more than six weeks to decide that I would keep the Leica M11. Until then, I was almost sure I would want to return it. The Leica M11 was just not a camera I connected with immediately. As way of example: The same day I bought the Leica M11, I bought also a Leica M10-R Black Paint from Ken Hansen Inc, which is the limited version of the 40MP camera Leica M10-R. Not that I needed the 40MP or even another M10 camera (I've been using the Leica M10 and Leica M10-P since their introduction in 2017, and am still happy to use them), but I **needed** the black paint! With this camera there was an instant connection, as in "you're mine forever", due to my familiarity with the Leica M10-P. This camera has been my main tool for 4-5 years, and now it has shiny Black Paint with a few design-tweaks that make this digital camera look and feel like the Leica MP film camera (i.e. a silver ring around the shutter release; also, the thumb wheel and speed dial have the same texture as the Leica MP).
Two new cameras in the house. One a familiar friend, the other something else. But after six week or so, the idea of returning the Leica M11 was gone. I had decided to keep it and get it to work, no matter what.
The Leica M11 files are close to finished when you import them into the computer. It wasn't always like that with digital files, but for the Leica M10 and Leica M11, I would say that the image you envisioned, planned to capture, and the one you see on your computer screen is pretty much a straight line of simplicity. To put it in perspective, I remember back when I bought my first Imacon state-of-the-art scanner around 2000 and scanned slide film, how disappointed I was that the scan was so "raw" and "flat" and not at all like the film slide. All that work now had to be done by adjusting the image in the computer, and it never was as fresh nor clear as the original slide. If I travel back in memory through the digital cameras that were presented since then, that vision of simply "making a copy" of something, where the copy looks like the original, has become a reality. With the Leica M11 you can - to a very high degree - simply take the photo, and that is it.
If you like photography, but you dislike the computer work that comes with raw DNG files, a possibility is to just shoot JPG pictures straight out of the camera. It might be frowned upon if you told someone, but in reality it could be done that way. It would mean that once you export the pictures from the camera, you’re done. No editing in Lightroom or Capture One Pro.
It's highly unlikely anybody looking at your final photographs would be able to see or tell that you skipped all the editing work. They would just see what it is, and they would presume you had done the work on the files and this was your result.
Raw DNG straight out of camera
Edited Raw DNG
JPG straight out of camera
The reason it would be frowned upon is that you are “supposed to” optimize the pictures, and there is a general misunderstanding that raw DNG files are better quality or higher resolution than JPG. That is not the case. A JPG file is what you make from a raw DNG file, so you just skipped some of the work to get there. A 60MP raw DNG file is the same as a 60MP JPG file. Every dot is there, just “flattened” in the camera using one of the possible settings of the Leica M11 or whichever camera you use. Just because you paid $9,000 for a camera doesn’t mean you want to enroll in an entire workflow of computer editing.
If you are not entirely happy with the JPG files, then you can go two routes: Either become better at making JPG files, or you can go back to raw DNG files and do the editing work. The point with raw DNG is that it is a recording of all the data the sensor “saw”, and thus allows you to go up and down in exposure, adjust shadow details, improve highlight details, change color temperatures and more; but all based on layers of data. A JPG is a flat strip of data, and while you can edit it in Lightroom or Capture One, it is not based on layers of data contained in the file, but on algorithms (predefined calculations) Lightroom or Capture One make based on the one layer of information. The result is less fine-tuned adjustments, and the more you need to adjust, the more you will see that it would be a finer result if you did it on a raw DNG file.
If you do it right from the beginning (color temperature and exposure settings), not much to adjust.
Raw DNG straight out of camera
Edited raw DNG
JPG straight out of camera
In an analogy, it’s like a Polaroid final print coming out of the camera versus a film you develop and can adjust quite a bit in the darkroom. Except JPG files are finer than Polaroid.
So, the reason I even go here is that if you were to “just do JPG” and be done, for you to be successful in it, you should put your efforts in front of the workflow and know about and be able to control the technical side of photography. This is not difficult, actually, because it is simply setting the exposure correctly (so there is nothing to edit of exposure), and setting the color temperature (the Kelvin) correctly by knowing or by using a colormeter (Lumu for the iPhone can be used for this, or a Sekonic Specto Master) or a white balance card to set the white balance manually (WhiBal).
Most people use the raw DNG as an excuse to not do the work in front of the workflow properly (by which I mean the recording of the picture in the camea), using the often heard slogan that “it can be corrected in the computer” as if this more work was a progress thanks to new technology.
Believe it or not, in “the old days” when we used slide diapositive film, the exposure had to be within ½ stop precision, because there is simply no way to “edit” a positive color slide film. But photography has had a long and proud period where things were just done right, and so of course that can still be done.
Other than that, the JPG will generally have harder contrast and less tonal range than you can edit a raw DNG to have. Nobody might never notice if not given the choice of comparison. You shoot JPG, you show JPG, and they saw “wow”.
I have two criterias for photographs:
If it looks good, it is good.
I decide what looks good (which in short implies that I don’t wonder what the guys in the photo club would think looks better, or what others might have done. I decide for myself what I want to take photos of, which ones I keep, how I crop them, if they are black and white or color, and how I edit them).
If everything else fails, remember what Andy Warhol said: “Art is what you can get away with”.
Presuming you want to have a workflow where you utilize every single possible detail you can get out of a raw DNG photo file, editing software is necessary to "translate" the raw image data recorded by the sensor, into an image on the screen. You could take simply JPG images with the camera and be done, and have a ready file format that can go straight into print, emails and other things. It would be easy, but you would be missing out on fidelity and details that, after all, we are able to achieve with modern sensors and software. With fidelity I mean fidelity as in the very definition of the word; “the degree of exactness with which something is copied or reproduced”. But also, with a reference to high fidelity in music, which is an experience of aesthetics where almost any type of music is a pleasure to listen to. The reason for this, as I see it, is that when there is truth, it becomes aesthetic in itself.
Trueness in photography is a quality. It's not just technical perfection, because you can achieve technical perfection in manipulating reality, colors, movements and more. Remember the scenes of the movie Matrix where they run up the walls, across the ceiling and jump down and kick the bad guys in the face? That is manipulated reality, but it's done really well. That is technical perfection. You can also be impressed by what’s possible to accomplish, not because it looks pretty, but because it is amazing it can even be done.
It might just be me, but maybe you feel the same. I really like the simplicity and trueness of a well-built camera that has not been modified with all sorts of glam or features to make it look smart and advanced. I like the simplicity, the trueness of what there is. You could go further to cars, houses, people, furniture design and plastic operations. Once the trueness, the original simplicity of something, is altered, it might be impressive or create some other effect. But beautiful it is not.
There are technical things to solve creating this trueness in photography, because it's a recording via optics and electronic sensors, through machinery to get the timing of the exposure of light, so as to recreate a copy of what we saw with our eyes. We're pretty close, I believe, to the ability to create imagery that we generally perceive to be the same as what we see with our eyes.
The eyes themselves are a recording device which involve optics and other humanoid features of perspective correction, depth perspective and more. Even though we do not all have the same quality of eyes, we perceive what we see to be true. And it's that truth, when matched by an image, we perceive to be good enough.
But then there are levels of technical expertise in this, and there are levels of trueness. It's very possible that when the world saw the first moving pictures in the 1920's, they were amazed that you could record reality.
To what end do we need a Leica M11. Truth be told, if you go to the Leica forums and look at the photos people have taken with their Leica M11, much of it could be done easier and better with an iPhone, The skills of the photographer are not there, either because they don't see they have to, or they don't know how to. Or, they believe it is the camera is taking the photos, not themselves.
With a tool capable of recording trueness comes the responsibility to do so. Just like freedom of speech (human right number 19) gives you the right to speak up, there is also a responsibility to do so (human right number 29).
You have to be able to recognize beauty when you see it, and then be able to set the camera to record that with focus, exposure, color control and the artistic controls such as framing, composition, timing and more, so as so to achieve that high fidelity result. Why else is there a point in having the ability to capture it, if you don't exercise the controls to make it happen? If you don't want to play the game of applying photography skills, then we're back to the fact that a smartphone might be a better tool. It'll be satisfactory, but high fidelity it is not.
As you see, we're not just talking about a camera review. We're talking also about your ability to choose the tool, and then to get it to work in your hands. And in that context, it has become less demanding for all of us to get the digital raw file to look great in editing. If it was recorded properly, it looks pretty much like that when you import it into the computer.
RAW files from any camera are going to look "flat" - low contrast, colors that are a bit drab and lifeless, etc.
The purpose of a RAW file is to deliver as much visual information as is possible for the photographer to work with, not to present a finished image for display.
Apply
code "UPDATE113" on checkout to get this complete version 11.3 update.
$298.00
Updates all previous Surival Kit versions since 2009.
Buy the complete new
Lightroom Survival Kit 11.3
The Legendary Tutorial for Photographers
Brand-new JUNE 2022-version.
Now with brand-new 4+ hours of video tutorials.
New sections on compostition and storytelling.
How to edit color photos.
How to edit black & white photos. How to do keywords logical and easy.
The most successful photo editing kit ever
Photographer Thorsten Overgaard first released the Lightroom Survival Kit in 2009 and have honed it with new and fresh updates. This Version 11 is the most radical updated and renewed version ever, four years in the making.
Professional workflow experience made simple, logical and easy to use.
Master editor makes it simple to understand
The Survival Kit is unique and one-of-a-kind being made for photographers for photographers. When someone understands their subject, they can explain it so it is easy to understand. The hallmark of Thorsten Overgaard is to make expert knowledge shown and told in a way so anyone can apply it.
Hands-on advice that works
With a 450 pages workbook and 4+ hours of video, every element of digital photography is touched on, in handy chapters and pre-flight checklists. Editing of color vs black and white photos, keywording, cropping of images, fine-tuning of tones, color balance and color control, export of originals, printing, archiving and backup, and much more.
Comes with the Overgaard Leica Presets (Value $48)
The Lightroom Survival Kit comes with Thorsten Overgaard's special-made Lightroom Presets for all digital cameras and for Leica digital cameras.
Understand all from camera to the final print
Chapters in this version goes over the background for High Dynamic Range (HDR), digital raw files and how to set up a professional photography workflow, from calibrating the screen to editing in Lightroom, and to making a final print. And more ...
10+ years experience in one package
No need to spend years figuring out the smartest way to do things when you can tap into the best way of doing things right here. The workflow of Thorsten Overgaard as been refined through years of field work with more than a thousand workshop attendees.
This method of workflow now used by thousands
The Survival Kit has been taught to thousands in workshops and in this Survival Kit. What does it do? It make you enjoy taking and making photos, and it increases your production considerabely. Most important of all, it'll give you back ownership of your files (which you will understand why is so important, once you have bought the Survival Kit and started applying its methods).
"Thorsten's methodology is perhaps not what hardware-, software- and cloud-companies want us to do, but as a former IT engineer I can only acknowledge his views about preserving our digital heritage. This workflow explained is for me the best I have ever seen".
★★★★★
Video tutorials, image files, presets, checklists, definitions, tutorials of Lightroom, that boils down years of experience to a workflow you can implement in less than one day.
Generally for most of the raw DNG files I take, I have a few things I do. I use the same few tools, with a varied graduation so as to make up a realistic and pleasant look in the individual pictures:
1) I adjust the exposure if needed. Sometimes I reduce the exposure slightly to get a slightly underexposed image so as to leave room for what I almost always do:
2) I increase the shadow details of the image, which lifts the shadow areas so you see more details in them. This give an apparent increase of exposure, and it also washes out the image in that is has less contrast. To remedy this:
3) I increase Black so as to get back the contrast from increasing the shadow details. As a result, I now have the blackness and contrast of the original file, but with more details in the darker areas. You could say higher dynamic range, but my goal is to look natural, closer to the high fidelity that the eye sees. The eye always sees with a wider dynamic range than a camera - details in shadows and highlights at the same time. Not because they eye has higher dynamic range, because it doesn’t, but because we have humanoid features that enable us to compose what we see with the eye at different “exposures” into one perception of reality.
4) If there are areas of extreme highlights, I might bring down Brightness so as to get more details in the highlights.
5) Then I will adjust the white balance. Now that the photo mostly looks close to final. I will either pick a spot in the image to measure the color temperature (the white in the eyes, a grey surface, or such) or simply slide the Kelvin ruler to a desirable look. Fundamentally, I know that for the colors to be correct, if it is in sunshine, it has to be 5400 Kelvin, and if it is shadows, it has to be around 7300 Kelvin. It's not so much a matter of correctness as it is a matter of desirable atmosphere.
6) I can then add more hardness, if I wish, by (a) bringing down the Exposure, to make space for (b) bringing up Brightness, and then (c) increasing Contrast as well. This will result in the same exposure overall, but a different harder look (often perceived to be more crisp or sharp; but when over-done it makes it look cheap).
7) Now I have a final color edition of my file, and then I can make a virtual copy (in Lightroom) or a Clone Variant (in Capture One Pro) so as to have a copy of this final color version to work on:
8) I can apply one of my own Leica Styles to this version, and then I am basically done with the editing of it. There are a few versions of my Styles that translate skin tones and reds and such differently, and I'll pick the one I feel best presents the atmosphere and message of the photo. If not using my Presets for the black and white conversion, I would just Desaturate the photo 100% and then increase Brightness and Contrast a bit.
I also have Leica Styles for colors, and some of them will do simply what I did above in step 2-7 without any further adjustment needed.
To be able to edit a photo, you of course have to know where you want it to end. If you are new to editing software, you might have an idea of how you want it to look, but you don't know how to get there. The only way to learn how to get there is to use the sliders (exposure, black, shadow details, brightness, contrast, etc.) to a point where you see what happens with each. After some time it sits in the fingers.
This will allow you to prevision what you want, while knowing how to get there, which sliders to move where to get the desired result. It's a bit like looking at an arrangement of chairs for the first time. You have to examine if they are clinched to the floor or how they can be moved. Once you find out you can simply move them, you do so, but you still lack the experience as to where to put them, so you move them, look at it, move them again, and then finally you get something that looks right. With experience you would look at the arrangement of chairs, know where they should all be to look right, then move just the chairs that need to be moved, and you're done. So while you struggle with editing, remember that is how easy it will be once you have the feel of the sliders as part of your muscle memory. You simply know what to do when you see the picture, in order for it to be how you want it.
But the ideal of a photograph is that it looks like reality, for me. Same brightness and same colors as what you saw with your eyes. If you edit photos with people as the main subject, their skin tone is the key you edit for. The brightness/darkness of the skin in the photo has to be like their real skin. Editing black and white photos is very easy, because the first thing you adjust for is the skin tone of faces and people that are the center of interest in the photo (usually the ones in focus).
A fundamental for getting a high fidelity photo, a high level of trueness, is you have to know the basics of a camera and the basics of light.
I'm sorry to have to talk to you like I'm your mother, but I happen to also teach these things in my workshops, books, extension course and videos.
The great thing is that it is not only very easy to learn how to do, it is also fun and extremely rewarding to do. I'm sure you can think of examples where you did something really well in school, at work or in relations with other people, and it always is a pleasure moment when something is done well and right. So it is in photography, with the added benefit that in photography you not only have a great memory of doing it right, you also have a photo to show for it.
If the photo was correctly exposed when you took it, and if you set the Kelvin color temperature correctly, then what you see on your screen is pretty close to perfect.
Add to that your artistic ability to recognize a great scene to be photographed, to recognize the right angle to take it from ("A good photograph is knowing where to stand" as Ansel Adams would say), how to capture the light sparkling and beautiful, and to time it so you capture the essence of the moment ("The decisive moment" as Henri Cartier-Bresson would say), what to frame so distracting elements are not in the picture and it has balance, harmony and aesthetics. Then you made a real photograph.
There's the quality of the technical stuff (exposure and color temperature, but also the optics of the lens and the digital sensor of the camera), and then there is the aesthetic quality of what you captures, including the message of the photo. There is not much more to it.
It's your darn responsibility to get the equipment that can help you do this (rather than prevent it), to learn how to get that equipment and technology of photography to work for you, and then to actually get out there enough to create a good selection of image files that you can edit on the computer into final photographs.
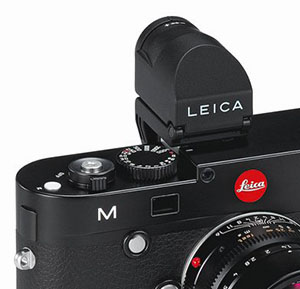
Don't count on the EVF to tell you the truth about colors
The EVF or the screen of the Leica M11 is not a precise guide as to how the final colors will look. The EVF and screen should be used as a guide to focusing and exposure. The minute details of a photo, you won't be able to tell anyways until you get the image imported into a computer with a proper screen.
The Visoflex 2 electronic viewfinder (EVF) on the Leica M11.
For reasons of simplicity, I generally set my preview to Monochrome, which happens if you go into the camera menu page 2 > JPG Settings > Film Style > and choose BWnat Monochrome. No matter if you photograph DNG or JPG or both, the preview will now be in black and white. As all I need from the preview is an idea of exposure and focus, the black and white preview will do just that - without depressing or worrying me about the colors which in the EVF always look too blue and saturated, and with too hard contrast.
On a side note, the EVF and LCD should be set to -4 Brightness to simulate the actual exposure. I will get into that in my article on Menu Settings of the Leica M11, as well as possible color settings of the EVF.
Purple fringing/chromatic aberration on the Leica M11
Without worrying you too much, one of the issues the Leica M11 still has with the new sensor (and the current firmware that was released January 28, 2022), is that many Leica lenses (wide lenses in particular, and any low light lens f/1.4 or f/0.95) produce more noticeable purple fringing than is seen with previous Leica M models.
Purple fringing is an edge of most often purple light where high contrasts meet. If you photograph in soft light and don't have the meeting of high contrast edges in the frame, you have no problem. If you take a photo of a person or a tree against the light, you will have high contrast between the face or tree and the light in the background; and in those cases you have a purple edge where the contrast happens.
Purple fringing is not an uncommon thing, it's seen with high contrast edges when using the 50mm Noctilux f/1.0 or 50mm Noctilux f/0.95 on any camera, and older wide angle lenses. It's normally lessened by the use of coating on the lens surfaces (in modern lenses), APO and ASPH elements, and in overall lens design. If your lens is f/2.8, you won't really see it unless the optics are made of plastic.
The "new" matter is that the way the Leica M11 sensor handles the light has not been finetuned, particularly light coming in from a sharp angle, as it does in wide angle lenses. Chromatic aberration is usually the lens, but here it seems to be a sensor finetuning matter.
With a 60MP sensor that "sees everything" and a lot of enthusiastic customers who love to examine every feature in detail, Leica couldn't have picked a better stage to show off their unpreparedness of this camera.
In any case, long story short. Not much to conclude on this until we get a firmware update that most likely will put this purple fringing behind us.
Though, some lenses, used in certain situations, will always produce some purple fringing. It can be handled in Lightroom and Capture One by De-Fringing the photo, which mostly works well. (Or one can pick the purple color with a color picker in Capture One and desaturate that color, which will remove the purple fringing and make it into a light grey or white edge. Both Lightroom and Capture One further have de-fringing tools, that I mostly find don’t work that well).
I have done color chart comparisons of the Leica M11 to previous Leica M models, which is of more value to myself than meant as a scientific clinical study for others. I use it to understand how the Leica M11 sensor may "exaggerate some colors" so I get a feel for the sensor and can an address that in my general editing.
My first impression of the Leica M11 colors, based upon photos made before Lightroom and Capture One presented camera profiles, and based upon looking at other people’s posted photos from around the world, was that the blue and orange colors were too strong.
I look at a photo someone took, or one of my own photos, and I see that there seems to be a layer of blue added on skin tones, green leaves of the trees, white coffee cups in a photo, and so on. It's not unusual that you have a blue layer on things because they pick up reflections from the blue sky. And particularly in cold weather, you will see sunshine photos with a layer of cold blue on some surfaces, which is simply the reflection of what is in the sky and air.
I wouldn't say it is wrong, it is something I would see in both Kodachrome slide film and Fuji Astia slide film when I photographed in Scandinavia in cold weather in the spring: There’s sunshine, but it's cold in the shadows at the same time. This blue layer on things is something you can even see with your eyes if you try. However, in a photo it is disturbing, it comes across as noise or overtone: You know that sidewalk in the shadow is supposed to be grey, but it is blue-gray in the image file. In editing, you can simply choose the blue channel and desaturate only the blue channel 10% - 40% in such photos.
At the same time of the blue layer, I found the yellow-orange warm tones a bit too saturated, making the skin tones and the general Kelvin balance of a photo seem too warm.
The extra blue, together with too warm yellow-orange and red tones gives an odd and dirty look to things. They are too warm in color temperature, yet a cold blue tint. A disharmony that has to be fixed somehow. You can decide that you love this look of blue amongst warm tones, because after all that’s how some film would present, but I personally dislike it. Maybe because I know I can do something about it (which you couldn’t with slide film; that was just how it was).
All this is opinion and taste, of course. When one talks of "Japanese colors" or a "digital look", it usually means that blue tones are too saturated and bright, and yellow-orange is too warm and saturated. The so-called "digital look" further has the look of exceedingly clean colors, or simply that the colors generally are turned up too loud and it looks like plastic or a cheap advertisement; often because the texture of surfaces seem replaced with even color.
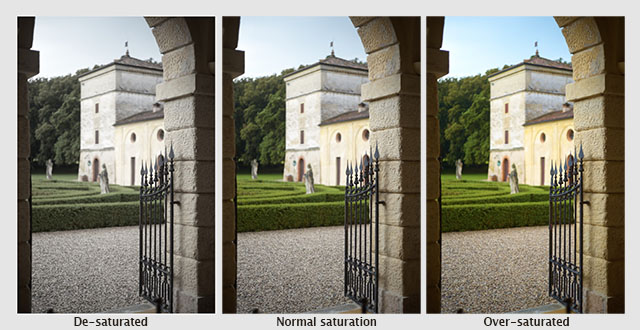
My ideal is that things look natural. By which I mean it looks like real skin, real textures, real grass and so on. A teak tree table looks like teak tree, not red plastic, and often I will prefer things to be a bit less saturated than real life, rather than more saturated in the photo than in real life. A photo and its colors shouldn’t "jump on you" buy should remain on the paper or screen for you to admire it.
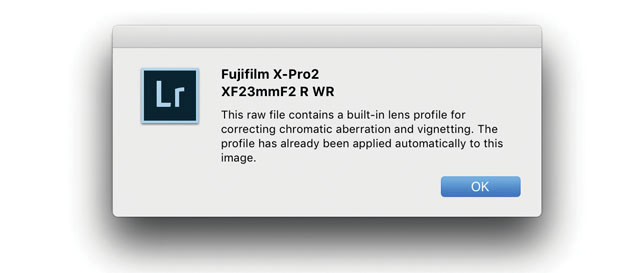
Adobe RAW update page and how to install Adobe RAW
Editing Leica M11 pictures in Adobe Lightroom Classic
As of this moment, Adobe Lightroom doesn't have a final, official Leica M11 profile, and I wouldn't hold my breath to wait for one, because the PROFILE M11 in Lightroom 11 is very saturated and too colorful in my opinion. You can use it, but then maybe desaturate it a bit. You may get some more insight into this after reading the review of Sean Reid who’s used this profile for his excellent (and very nerdy and very scientific comparison) of the Leica M11 colors.
You find the profiles in the top right of the Develop module of Lightroom Classic. If you "Browse" you will find PROFILE M11.
But none of that really matters if you ask me, because the Adobe Standard profile works well in my opinion. This presents more muted colors, or natural if you like, and that is how I would want them. And then I might even desaturate the blue and orange channels a tiny bit.
I will obviously get back about Lightroom editing of the Leica M11 pictures as soon as there is an official Leica M11 Adobe RAW camea profile available. The Adobe RAW is the system of camer profiles that supports the "translation" of camera colors into what theys hould look like in theAdobe Lightroom and Adobe Photoshop. That profile hasn't been released yet, and as Adobe have had a Leica M11 profotype from early on, the question is how much it will affect the look once released.
In the tech talk a week after the release of the Leica M11, product manager for the Leica M, Jesko von Oeynhausen, said: “The PROFILE M11 is the embedded profile (in the raw DNG file) that we have developed and it differs quite significantly from the Adobe Standard: The PROFILE M11 is more saturated and I would recommend to try both out to see, which profile matches your taste the best. It depends on which settings you have in Lightroom, which profile opens first (as the default). As the PROFILE M11 is highly saturated, I would recommend to use the Adobe Standard profile for high ISO files, to get a lower ground noise. And yes, as for profiles you just have to try it out to see which one is best for your needs.”
Editing Leica M11 pictures in Capture One Pro
You find the Capture One profiles in the top left of the Color section. Capture One recognizes automatically which camera and applies the Leica M11 ProStandard profile.
Capture One Pro released their Leica M11 ProStandard profile in Capture One Version 22 at the same time as the Leica M11 was launched. It works pretty well and has more control with the colors than their Default profile, which is a tad more saturated. (The ProStandard profiles that Capture One has made for some cameras renders color more naturally).
Then there is also the possibility of setting it to "Film Extra Shadows" which renders colors and an overall look closer towards film. It's a bit dull and unimpressive, but maybe that is exactly what I would want: A picture on print or on the screen where the colors don't "jump at you" – you look at the picture and not the colors. If I wasn't that dedicated to examine the M11 files from every angle, I could have just chosen that film look from the first file and stayed with it.
NEW VERSION 22.3
490 pages easy-to-understand
workflow logics, checklists, Styles
and 3+ hours of videos.
Packed with help and tools for all questions on digital photography workflow.
Black and White Photography
Editing Color Photographs
Special Effects
Organizing files
Organizing Old Archives
Keywords
How to do safe backup
Hardware setup
Screens and Calibration
Printing Workflow
Capture One on iPad
Capture One Live
Publishing
+ Export Formats
+ Free Overgaard Styles
+ Preflight Checklists
The one and only method
The Survivel Kit is the only of it's kind, made by photographers for photographers.
The Brand New June 2022
"Capture One Survival Kit 22"
By Thorsten Overgaard
The complete workflow of Thorsten Overgaard,
made easy with pre-flight checklists and step-by-step instructions on how to set up and use a professional
photo editing software like Capture One Pro.
Laid out in a way that is easy to understand
and everyone can apply. Works for Capture One Pro 22
and all previous versions.
New revised version
This is the most revised version ever of the
best-selling Surival Kit by Thorsten Overgaard. This new
version includes many new chapters, on Capture One on iPad and how to add keywords better, as well as more
than 3+ hours of videos tutorials with
Thorsten Overgaard.
Simple and to-the-point tools on how to use select tools, how to do backup and how to manage and organize pictures archives so they don't get lost and doesn't have to be reorganized again and again.
Expanded and simplified
Also: Specialized first-help chapters on how to
sync your entire photo archive with the smartphone,
how to escape Apple Photos, how to empty photos out
of an iPhone, how to get out of Lightroom CC, what to do with iPad editing ... and more on how to not survive the digital age and perhaps even outsmart it.
Now comes with
Overgaard Leica Styles for FREE
Special black & white conversion, better skintones
and a CMOS sensor color correction.
(Value $48.00. FREE with this kit).
Thorsten Overgaard
Capture One Survival Kit 22.3 For computer, iPad, smartphone and Kindle.
Buy Now
Instant download.
Price $798.00
100% satisfaction or money back.
Released June, 2022.
UPDATE
VERSION 22.3 UPDATE Compatible with all previous versions.
Simply use
code: "UPDATE22"
Only $298,00
#2131-1222-3
Comparison of the color charts
I also did a color MacBeth test of the different sensors using available light outdoor. It can be an interesting chart to read for myself to understand how the Leica M11 sees the colors.
The idea of the MacBeth color chart is that long before digital, you would do test photos of this chart outdoors with a new film stock (film type) and get an idea thereby of how the film coupled with development and print in the darkroom would affect the colors. Then you could tweak it by using a different developer mix, or more likely, a different type of paper. You could also use filters in taking the photos, or change the color filter settings in printing the film in the color darkroom.
The most touchy colors on the chart are the two top left ones, which are skin tones. You hear professional photographers rave, "Look at those beautiful skin tones", and that is (almost) the essence of color management. That the skin tone of the subject matches the final print.
A correctly exposed skin tone in the correct colors is like watching a Norwegian river flow. It's the basis of beauty. It's "trueness", as we learned today.
If you are an expert on colors, you know your MacBeth by heart. But for us who haven't judged every scene on a movie set and every still we ever took by a MacBeth chart, it can be done by simply buying a MacBeth chart on Amazon, taking photos of it, and then having the chart next to the computer or final print in order to see how the colors translate from the real-world MacBeth chart to your final image. There are things to be learned from that, and that's all I personally use them for.
Ok, let’s nerd out on this for a moment: Below is the MacBeth chart in "web colors", which is to say colors generated and defined by web codes (the closest to the colors a website can show by using the limited asset of 216 "webs safe colors"), just to give you the names of the colors. Using a photograph on a website, you have many more colors available.
As a side-note, the "NATural" setting of the Leica M11 camera (in the Menu > Screen 2 > JPG Settings > Film Type > NATural) is the setting that comes closest to reality, in my opinion, when viewed in the EVF or on the LCD on the back of the Leica M11. By reality, I mean that if you edit in Capture One Pro using the Leica M11 ProStandard profile, or if you edit in Adobe Lightroom using the Default profile.
I decided to go travel around the world and offer my free sunset walks the last couple of years. Under the slogan “Walk with Me” I got to meet a lot of people and walk the streets with fellow enthusiasts in New York, Istanbul, Paris, London, Zagreb, Copenhagen, Berlin, Belgrade and many other cities to offer some relief for the mind and something for the camera to record. See the dates of my upcoming photo workshops and masterclasses here.
London, Sunday November 21, 2021 at 7:30 AM: The Thorsten Overgaard "Walk with Me" group in Soho, London.
The Leica M11 Know-All eBook, Video Masterclass and Presests
By Thorsten von Overgaard
Full Leica M11 Pack
15 video classes with work book
+ 455 page eBook,
+ Styles for Capture One for Leica M11
and Leica M11 Monochrom
+ Lightroom Presets. for Leica M11
and Leica M11 Monochrom
Normal price $897.00
Normal price $897.00
Save 45%
Only $487.00
USE CODE: "ILOVEM11"
PREORDER. Be the first to get this.
100% satisfaction or money back. Leica M11, Leica M11-P
and Leica M11 Monochrom
Item #2150-0222
Leica M11 Know-All-eBook
455 pages illustrated for Computer,
Kindle,
iPad or smartphone.
Only $298.00
PREORDER. Be the first to get this.
100% satisfaction or money back.
As of January 28, 2022 the first Leica M11 firmware update (46MB file size)was available, simply updating a bug with the FN (Function) button as some cameras experienced a problem with the FN button being nonresponsive.
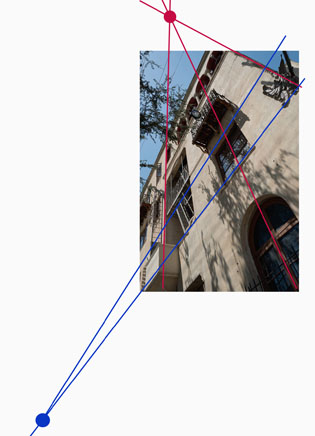
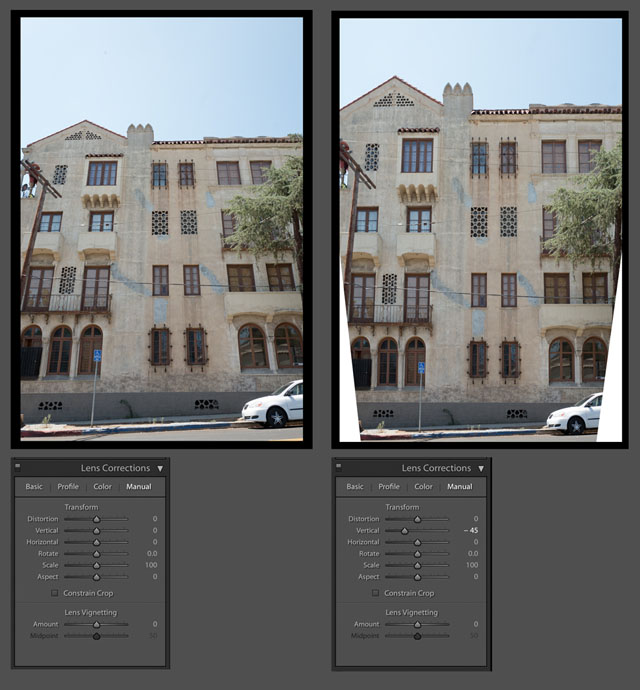
Firmware 1.3.0.0: The March 29, 2022 firmware update 1.3.0.0 (52MB file size) featured perspective control (straightening tilted lines in-camera), a new light metering method with highlight-based metering, additional storage options (save DNG to SD card and JPG versions to internal memory), and then not further specified bug fixes (hoped to fix shutter related glitches, too slow continious shooting when not using Live View, CR of the sensor (purple fringing), and more ...).
The Leica M11 firmware update 1.3.0.0 can currently be found here, and I also have firmware releases on my Overgaard Camera Compendium for update at a later time if/when they are not available from the the Leica website.
Firmware 1.4.0.0: May 25, 2022. Exposure metering method Highlight-weighted improved algorithm. No more shutter delay between shots and bugfixes in the firmware.
(A new firmware for M10 versions released same day) enable the use of the Visoflex 2 on Leica M10 models, but not yet the EVF2 to be used on the Leica M11.
Firmware 1.5.0.1: August 3, 2022 is a small update athat fixes incorrect JPG tone curves in connection with some lenses caused the contrasts in dark areas to be displayed too strong. Non-coded lenses were displayed incorrectly in the user profiles.
The Leica M11 firmware update 1.5.0.1 can currently be found here, and I also have firmware releases on my Overgaard Camera Compendium for update at a later time if/when they are not available from the the Leica website.
How to download and install a Leica M11 Firmware update :
1. Download the firmware and copy it to your SD card (on the car, not in any folders).
2. Turn on the camera with the card in, make sure you have a full battery.
3.
Press MENU > Main Menu > Camera Information > Camera Firmware Version
4. Select Firmware Update > YES (save profiles with YES if you haev any, NO if you do not care).
Remove the firmware from the SD card, or else ...
Delete the firmware from the SD card after update. Else the Leica M11 won’t start (as long as there is a any FW update on the SD card, it seems. I like to keep previous updates on cards so as to be able to update other cameras of the same models. Mine or workshop students).
The Leica M11 does not come with a User Manual. The Leica M11 User Manual can be downloaded from the Leica website in English or German, or simply order a printed manual here: Leica M11 User Manual English Order Form.
Single Continuous - Low Speed (3 fps)
Continuous - High Speed (4.5 fps)
Interval Recording
Yes
Self-Timer
2 or 12 Second Delay
No video
Focus
Focus Type
Manual Focus
Viewfinder
Viewfinder Type
Bright-line rangefinder with automatic parallax compensation.
(Suitable for -0.5 dpt; optional corrective lenses available: -3 to +3 dpt).
Viewfinder compensation:
The horizontal and vertical difference between viewfinder and lens is compensated automatically in line with the relevant focus setting.
Congruence of viewfinder and actual image.
The size of the bright-line frame matches the distance: – at 2 m: the exact sensor size of approx. 23.9 x 35.8 mm – at infinity: (depending on focal length) approx. 7.3% (28 mm) to 18% (135 mm) – less than 2 m: less than sensor size
Viewfinder Coverage
>100%
Viewfinder Magnification
Approx. 0.73x
Diopter Adjustment
None
Electronic Viewfinder "Visoflex 2"
Acessory
Visoflex 2 (model no 24028)
Resolution
3.7 MP
Viewfinder Coverage
100%
Diopter Adjustment
-3 to +3
Adjustment
Swirls 90 degree upwards.
Brightness adjustment
-5 to +5 in camera menu settings.
Monitor
Size
2.95” Active Matrix TFT with Gorilla Glass.
Resolution
2,332,800 Dot
Display Type
Fixed Touchscreen LCD
Brightness adjustment
-5 to +5 in camera menu settings.
Flash
Built-In Flash
No
Maximum Sync Speed
1/180 Second
Dedicated Flash System
TTL
External Flash Connection
Hot Shoe
Interface
Media/Memory Card Slot
UHS-II (recommended)
UHS-I, SD/SDHC/SDXC memory card (SDXCup to 2 TB)
Connectivity
USB 3.1 Gen1 Typ-C
ISO accessory flash shoe with additional control contacts for
Leica flash units and Leica Visoflex 2 viewfinder.
Wireless
Bluetooth
Wi-Fi
GPS
Via Leica Fotos App
Environmental
Operating Temperature
Physical
Battery
1 x BP-SCL7 Rechargeable Lithium-Polymer), 7.4 VDC, 1800 mAh (Approx. 700 Shots to 1700 shots (Leica adapted shooting cycle).
Manufacturer: Fuji Electronics (Shenzhen) Co., Ltd. made in China
Dimensions (W x H x D)
147.2 x 80.3 x 38.45 mm
Weight
Black: 530g (with battery, magnesium and aluminium body)
Silver:640g (with battery, magnesium and brass body)
Acessory
Power pack ACA-SCL7
Manufacturer: Dee Van Enterprises Co., Ltd.., made in China
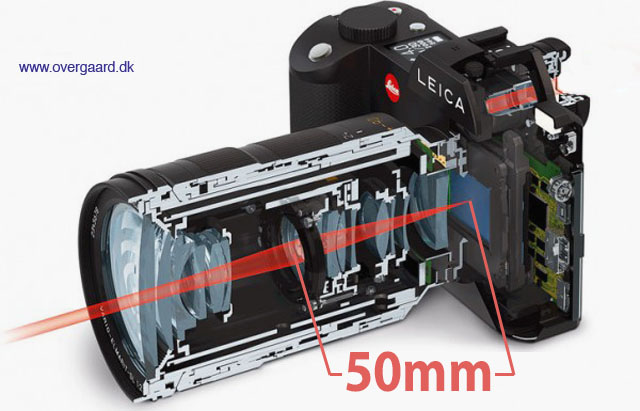
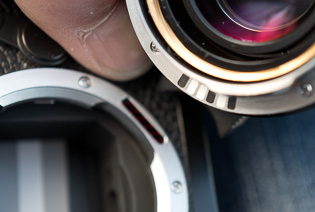
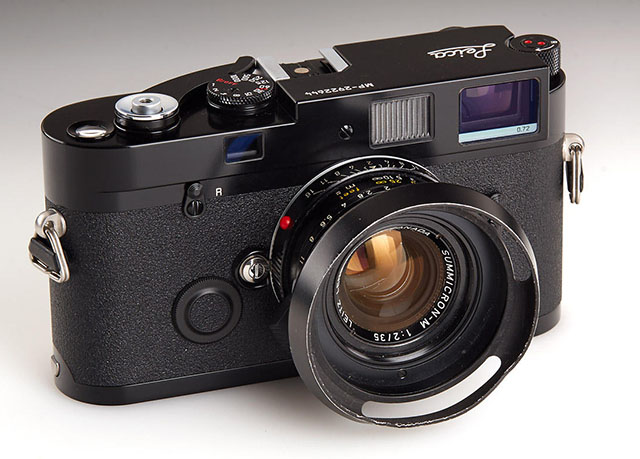
1:2/50 the description says.
But what does it mean?
1: = Basically means 1 divided with. On the lens to the right, it means that the diameter of the hole throught he lens is 25mm.
We would normall call it
a 50mm f/2.0 lens. The writing of 1:2/50 is a tradition from the 1800's of specifying a lens, which reveals quite a bit about the construction: Focal length 50mm simply means that the distance from center of focus inside the lens to the focusing plane (the sensor or film) is 50mm, and the aperture of f/2 or 1:2 means that the diameter of the hole the light comes throught is 25mm (50mm divided with 2 = 25mm).
In traditional lens design, one could usually tell from looking at the length of a lens if it was a 400mm, 100mm or 35mm. Newer designs with mirrors (in tele lenses) and more corrections (in wide lenses) can make the size of the lenses shorter or longer, but the distance from center of focus to sensor in a modern 50mm lens will still be 50mm for a 50mm and 400mm for a 400mm, and so on.
See Focal length and Aperture further down for more.
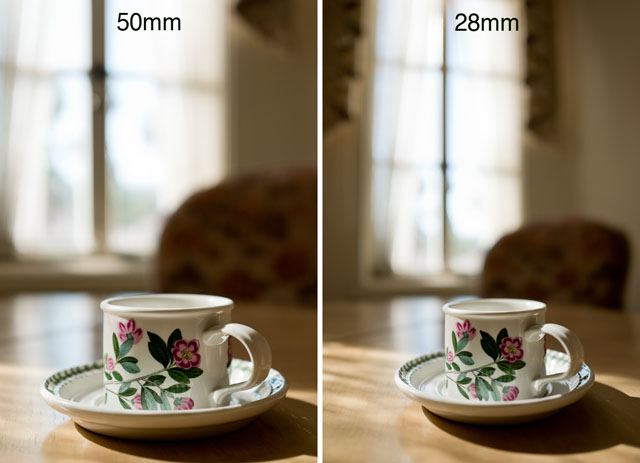
35mm
a) 35mm lens is a lens that has a viewing angle of view is 63°vertically, 54° horizontally and 38° vertically within a 35mm film frame or "full-frame" 24x36mm digital format. See Focal length further down.
b) 35mm focal length: the distance from center of focus inside the lens to the focusing plane (the sensor or film) is 35mm.
35mm film format (also known as full-frame)
c) 35mm film format (also known as full-frame in digital sensors) was a standard film format that came about in 1892 where the width of the film roll was 35mm, and it's been the most used format ever since. Only a format of 24 x 36mm is used for the photo on the film roll.
35mm film format was first used in 1892 by William Dickson and Thomas Edison for moving pictures with frames of 24 x 18mm, using film supplied by George Eastman (Kodak), and this became the international standard for motion picture negative film in 1909. Later other motion picture formats came about, such as Academy Ratio (22 x 16 mm), Widescreen (21.95 x 18.6 mm), Super 35 (24.89 x 18.66 mm) and Techiscope (22 x 9.47 mm).
The inventor of the Leica camera, Oskar Barnack, built his prototype Ur-Leica in 1913 as a device to test film stock and\ motion picture lenses and had it patented. Putting 35mm film format into a small camera gave him the idea "small negative, large print" and he decided to increase the size of each frame on the 35mm film to 24x36mm (for more detail and sharpness), and then invented an enlarger to make large prints from the small negative. The length of a film, 36 pictures, is said to have become the standard because that was how far Oskar Barnack could stretch his arms (when cutting film from larger rolls to put them into film rolls for the Leica camera).
d) 35mm equivalent is often given as a standard when talking about lenses in small compact-cameras or large format cameras with other sensor/film format than the 24 x 36mm frame. Example: A camera with a 12 x 18 mm sensor has a 14mm lens on it, and even the lens is actually a 14mm, it is specified as a 28mm lens because the viewing angle that ends up on the sensor is equivalent to a 28mm lens on a 35mm of full-frame camera.
The Leica 50mm APO-Summicron-M
ASPH f/2.0 lens
50mm
a) 50mm lens is a lens that has a viewing angle of view is 47° vertically, 40° horizontally and 27° vertically within a 35mm film frame.
b) 50mm means there is 50mm from the center of focus inside the lens to the focal plane (sensor or film).
c) 50mm lens is often compared to the human eye. Not because of viewing angle (how wide it sees) but because of size ratio (how it sees). The 50mm lens is the lens that comes closest to the size that the human eye see things. Whereas the human eye has a much wider angle of view [120-200°] than the 50mm lens [47°].
AEL = Auto Exposure Lock. This is a function that can be used when you want to reframe the scene, but keep the current exposure from changing.
AF = Auto Focus. The idea is that the camera does the focusing itself (the word auto comes from Greek "self").
AOV - angle of view = Is the angle a lens 'see'. A 35mm lens has a 54° angle of view horizontally. Each human eye individually has anywhere from a 120-200° angle of viewn ags.
Aperture = The same function as the iris and pupil has in the eye. The pupil in the eye is the dark circular opening in the center of the iris of the eye, varying in size to regulate the amount of light reaching the retina (the sensor area inside the eye).
Aperture on a camera is the f/ stop on the camera that regulates how much light passes through the lens by increasing or decreasing the hole through the lens. On a f/2.0 lens the lens is fully open" at f/2.0. At f/2.8 the aperture inside the lens make the hole through the lens smaller so only half the amount of light at f/2.0 passes through. For each f/-stop (4.0 - 5.6 - 8.0 - 11 - 16) you halve the light. The aperture of the lens is basically the focal length divided with the f/-stop = size of the hole (50mm divided with f/2.0 = the hole is 25 mm in diameter).
Besides regulating the amount of light (so as to match the correct exposure), the aperture also affects the dept of field: , which is how deep the sharpness is. To get the sough-after photos with narrow depth of field where the background is blurry, the lens has to be wide open at f/2.0 or so. Stopping the lens down to f/8 or f/16 will result on more depth of field, meaning the background will start becoming in focus. To maintain narrow depth of field, one can use the ISO sensitivity and/or the shutter speed to match the correct exposure (as aperture is only one of three ways to control the exposure; the correct amount of light). ORIGIN: Late Middle English : from Latin apertura, from apert- ‘opened,’ from aperire ‘to open’.
Aperture Priority Mode = When the shutter speed dial on top of a Leica M camera is set to A, it is short for “Aperture Priority” and allows the user to set a specific aperture value (f-number) while the camera selects a shutter speed to match it that will result in proper exposure based on the lighting conditions as measured by the camera's light meter. In other words, you set the aperture as priority (f/1.4 for example), and the camera calculates a shutter speed (1/250 of a second) that matches that. If you change the aperture to f/2.0 by changing the aperture ring on the lens, the camera will re-calculate the speed to 1/125 so as to get the same amount of light to hit the sensor (f/2.0 is half the light through the lens as f/1.4 and 1/125 if twice the amount of light on the sensor as 1/250).
APO corrected basically means that the red, green and blue has been corrected to meet more precisely in the same spot. Clarity of colors and definition of details would be the result.
APO = in lens terminology stands for "apochromatically corrected". In most lenses, optical design concentrates the focus of blue light and green light into a single plane, but red light falls slightly into another plane of focus. In APO lenses, the design and expense has been put in to making red light focus on the same plane as blue and green. Under a microscope you would see that all light subject is now in focus, creating a sharper image overall. Many manufacturers offer APO designs, but in most of these only the very center of the lens is APO corrected. Leica prides itself on making most of the frame APO corrected.
APo-correction has traditionally been used for long tele lenses (and periscopes), but in recent years APO-correction has been applied to 50mm and wide angle lenses as well. One will notice that the colors are really bright and alive, almost more real than to the eye, in lenses like the Leica 90mm APO-Summicron-M ASPH f/2.0 and 50mm APO-Summicron-M ASPH f/2.0.
Apochromat; ORIGIN early 20th century, made of the two words; apo (Greek origin, away from) and chromatic (Latin origin, meaing relating to color).
spherical (ball)
a-spherical (non-ball)
ASPH = (Aspherical lens) stands for "aspheric design".
Most lenses have a spherical design - that is, the radius
of curvature is constant. These are easy to manufacture by
grinding while "spinning" the glass. This design
however restricts the number of optical corrections that can
be made to the design to render the most realistic image possible.
ASPH lenses (a-spherical, meaning non-spherical), however, involve usually 1 element that does
*not* have a constant radius of curvature. These elements
can be made by 1) expensive manual grinding, 2) molded plastic,
or 3) Leica's patented "press" process, where the element
is pressed into an aspherical ("non-spherical")
shape. This design allows Leica to introduce corrections
into compact lens designs that weren't possible before. Practically,
the lens performs "better" (up to interpretation)
due to increased correction of the image, in a package not
significantly bigger than the spherical version.
There is another Aspherical lens manufacture technique: an uneven coating layer is applied to a spherical lens. The coating is thicker on the edges (or on the center, depending). Canon "Lens Work II" calls these "simulated" aspherical lenses. Simulated and Glass-Molded (GMo) asphericals show up in non-L Canon lenses, while the L lenses have actual ground aspheric elements.
A- means non, or without.From Latin, ex. Sphere: ORIGIN Middle English : from Old French espere, from late Latin sphera, earlier sphaera, from Greek sphaira "ball".
Normal spheric lens (grinded)
ASPH (note the shape of the glass as result of pressing rather than grinding)
Auto- means “self”. The idea is that when a camera has auto-(something), it does that (something) by itself.
Banding = Noise in digital images. Horizontal lines in a horizontal picture (if the camera is in portrait mode/vertical, the lines will obviously be vertical). It's simply noise; the result of uncontrolled algorithms working overtime with an image the sensor really can't see because it's very dark. (If your image has vertical lines in it, it is more likely that the sensor needs remapping).
This image at 6400 ISO, underexposed and then brought up to correct exposure in Lightroom, displays banding: Horizontal lines in the image. Leica M-D 262 with Leica 50mm APO-Summicron-M ASPH f/2.0.
Base ISO = The ISO the digital sensor was born with. Even a digital sensor goes from say 50 ISO to 25,000 ISO, it only has one base ISO. Any other setting is an algorithm that figures out how the image whould look if there was 64 times more light, or half the light, etc.
When you go down from Base ISO (for example 200 to 100 ISO), you can expect a
decrease in quality. When you go up, the decrease is much less. For some sensors, you loose 2-3 stops by going down 1 step in ISO, but can go 8 steps up and only loose 1 stop in dynamic range. Basically, your ISO range should be from Base ISO and as far up as you can, before you see visible decrease in quality (mostly 3200 ISO - 6400 ISO).
Base ISO for Leica M9 is 160 ISO, for Leica M240 it is 200 ISO. For Leica M10 it is around 160 ISO.. For Leica M11 it is 64 ISO. For Leica M Monochrom it is 320 ISO. For Leica Q and Leica Q2 it is around 100 ISO. For Panasonic Lumix S it is 200 ISO. For most Canon cameras the base ISO is around 100, for most Nikon cameras it is around 200 ISO.
Max Berek (1886-1949) was lens designer who joined Ernst Leitz Optische Werke in 1912 and became the head of the microscope development where he also designed the first lenses for the company's new adventure into photography, the Leica introduced in 1925. In particular, he calculated the Elmax 50mm f/3.5 lens for the so-called Ur-Leica.
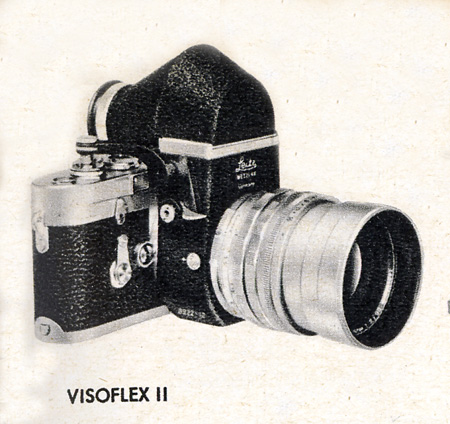
Bizofurex = A Leica Visoflex electronic viewfinder name for the new electronic viewfinder thatr was planned to be made for the Leica M10 introduction in 2017. Dues to too high expenses molding a new viewfinder, Leica decided to stay with the Leica visoflex EVF 020 that was originally med for the Leica T.
Bokeh = The visual quality of the out-of-focus areas of a photographic image, especially as rendered by a particular lens: It's a matter of taste and usually photographers discuss a 'nice' or 'pleasant' bokeh (the out-of-focus area is always unsharp, which is why the quality discussed is if one likes the way it renders or not by a particular lens). The closer you get to something, the 'more' bokeh' you get (in that the focus becomes less for the background and foreground at close distances than at long distances). ORIGIN from Japanese 'bo-ke' which mean 'fuzzines' or 'blur.'.
BSI = Backlit sensor = Back-Illuminated Sensor (also known as BI = Backside Illumination) sensor that uses a novel arrangement of the imaging elements to increase the amount of light captured and thereby improve low-light performance. These sensor types were first used for low-light security cameras and astronomy sensors, and then was brought into wider use, in the A7 II (2015), Nikon 850D (2017), Leica SL2-S (2021) and Leica M11 (2022), to increase the cameras performance in low light (high ISO).
Camera comes from Chambre, mostly in relation to Spanish soldiers’ rooms. Obscura means 'dark', so a dark room is basically the derivation for the word camera.
Camera -is today’s short name for Camera Obscura (meaning “a dark room”). CamerameansChambre and was used only as a Latin or alien word, actually only for Spanish soldiers’ rooms, until popularized in connection with photography in 1727: “Camera Obscura”. In 1793 the slang term “camera” was used by Sterne Tr. Shandy: “Will make drawings of you in the camera” and by Foster (1878), “The eye is a camera”. Camera Obscura was described by Iraqi scientist Ibn-al-Haytham in his book, “Book of Optics” (1021) and by Leonardo da Vinci in 1500; popularized and made widely known in 1589 by Baptista Porta when he mentioned the principle in his book “Natural Magic”. Johannes Kepler mentions Camera Obscura in 1604.
Camera = chambre (room), Obscura = dark (or cover).
Why is it called a "camera"..?
The word Camera is today's short name for Camera Obscura (which originally means “a dark room”).
Origin of the word Obscura means "dark" or "covered", and the word Camera meansChambre and was used originally only as a Latin or alien word, actually only for Spanish soldiers' rooms, until popularized in connection with photography in 1727: “Camera Obscura”.
In 1793 the slang term “camera” was used by Sterne Tr. Shandy: “Will make drawings of you in the camera” and by Foster (1878), “The eye is a camera”.
Ibn-al-Haytham mentioned Camera Obscura in his "Book of Optics" in 1021.
The concept of Camera Obscura was described by Iraqi scientist Ibn-al-Haytham in his book, “Book of Optics” (1021) and by Leonardo da Vinci in 1500; popularized and made widely known in 1589 by Baptista Porta when he mentioned the principle in his book “Natural Magic”. Johannes Kepler mentions Camera Obscura in 1604.
Camera = chambre (room), Obscura = dark (or cover).
CCD sensor (as used in Leica M8, M9, Leica S)= (Charged Coupling Devices) - The first digital cameras used CCD to turn images from analog light signals into digital pixels. They're made through a special manufacturing process that allows the conversion to take place in the chip without distortion. This creates high quality sensors that produce excellent images. But, because they require special manufacturing, they are more expensive than their newer CMOS counter parts.
CLA
An acronym for "(C)lean, (L)ubricate & (A)djust", whereby the item is merely re-lubricated, fine-adjusted and calibrated rather than repaired. "I just got my equipment back from CLA at Leica"
CMOS sensor (as used in Leica CL, Leica T/TL/TL2, Leica M10, Leica M 240, Leica M11, Leica M Monochrom Typ 246, Leica S Typ 007, Leica SL, Leica Q, Leica Q2, Leica M10, Leica X, Leica D-Lux, etc.) = (Complimentary Metal Oxide Semiconductor) chips use transistors at each pixel to move the charge through traditional wires. This offers flexibility because each pixel is treated individually. Traditional manufacturing processes are used to make CMOS. It's the same as creating microchips. Because they're easier to produce, CMOS sensors are cheaper than CCD sensors. CMOS allow Live View and use less energy than CCD.
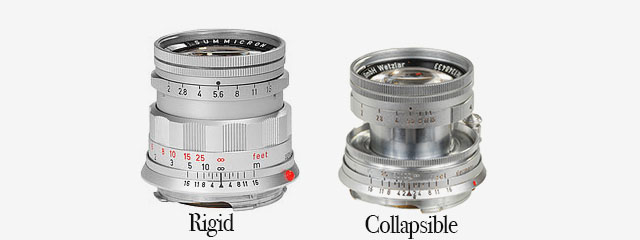
Collapsible - Usually refers to a collapsible lens such as the Leica 50mm Elmarit-M f/2.8 Collapsible, or Leica 90mm Macro Elmar-M f4.0 Collapsible, etc. A collapsible lens is one that can collaps into a compact lens when not in use.
Compact Camera - A camera that is compact, usually the same as a point-and-shoot or beginners camera. See my article Leica Compact Cameras.
Contrast - The degree of difference between tones in a picture. Latin contra- ‘against’ + stare ‘stand.’
Normal to low contrast
High contrast
Depth - Distance between front and back. Distance from viewer and object. See DOF in this list.
Digilux (Digital Lux) = A series of compact digital cameras by Leica Camera AG developed with Fuji from 1998, and then with Panasonic since 2002. The first models, Leica Digilux (1998) and Leica Digilux Zoom (2000) and Leica Digilux 4.3 (2000). With Panasonic, Leica Camera AG made the Leica Digilux 1 (2002), Digilux 2 (2004) and Leica Digilux 3 (2006). See my article Leica Digital Compact Cameras for more. Lux comes from Latin and means Light.
Digital rangefinders= The Leica M camera originates from 1925 and have been existing as film camera in many models. From 2006, the first Leica M digital rangefinder was launched, Leica M8. The Leica M7 (2002) is a film camera, so the new mode was Leia M8 and the main difference was that it had a crop digital sensor. The Next Leica M9 had a full-frame 24x36mm sensor. The Leica M240 had many features supposedly requested by users, the most noticeable was live view via a CMOS sensor, electronic viewfinder and video recording. Leica M10 was a return to the original Leica simplicity, including being a smaller body resembling the film cameras, and video and other features and buttons had been removed, a simplified menu created, and most noticeable an ISO dial to set the ISO on a wheel on the top left of the camera, very similar to the similar looking dial on older Leica film cameras where this dial was a rewind function for the film. Leica M11 (2022) was simplified even further, with a new sensor design that was designed to resemble classic color photography closer (Kodachrome and Leica M9 colors), yet featuring new technology such as triple-resolution sensor (where the sensor as a fourth function is also used as light meter), digital shutter and a new design where the battery is part of the bottom plate (no battery door, and no more bottom plate).
Digital Shutter = Electronic Shutter (see in this list).
Lens distortion looks like this. The lines are not straight. Our eye uses distortion correction. Lens designers can design lenses so they have very little distortion, or they can make less complicated lens designs and "fix" the distortion in software.
Distortion = In photo optics/lenses: When straight lines in a scene don't remain straight because of optical aberration.
Lens designers can correct for distortion to a degree so the whole image field is perfect corrected and all lines remain straight. In modern lens design many designs rely on Software Distortion Correction (SDC).
The eye adjusts for distortion so we always see vertical and horizontal lines straight when we look at things. Even when you get new prescription glasses (if you use such), you will often experience distortion in your new glasses. After a few days they eyes have adjusted for the glasses and the distortion you saw to begin with is now gone. Software Distortion Correction (SDC) is far behind what the human eye can perform of adjustments. (Also see my definition on Perspective for more on the eye and optics)
DNG = Digital Negative, an open standard developed by Adobe. It is a single file that contains the raw image data from the sensor of the camera as well as date, time, GPS, focal length, settings, etc.
The alternative is a RAW file + XMP file where the RAW file contains the image information and the XMP contains the rest of information about where, how and when the picture was taken, as well as editing data when the photo is edited in Lightroom or Capture One.
A Camera Raw profile (that is specific for that camera) in the computer helps the software program, for example Adobe Lightroom, to translate the RAW data into the image. Camera producers provide a Camera profile with their camera, and Adobe makes their own 'refined' Adobe Raw camera profile for all new cameras.
A raw file (or DNG) is simply the full recording of digital data (1's and 0's) from the sensor. In the computer, the sensor data is translated into the exact colors, via a camera profile.
The lines on this 28mm lens indicates the DOF. Here the focus is on infinity, and if the lens is stopped down to f/1.6, objects from 1.8 meter to ininity will be 'acceptable sharp'.
DOF = Depth of Field (or Depth of Focus), an expression for how deep the focus is, or (more often use to express) how narrow the area of focus is. This is how much of the image, measured in depth or ditance, will be in focus or "acceptable sharp".
The appearance of the DOF is determined by:
1) aperture (the smaller the aperture hole is, the deeper is the depth of field, and opposite, the wider open a lens you se, the more narrow will the DOF be) and
2) distance to the subject (the farther away, the larger area is sharp; the closer the subject in focus is, the more narrow the DOF gets)..
The DOF scale measurement on top of the Leica lenses shows lines for each f-stop that indicates from which distance to which distance the image will be sharp. Shallow DOF is a generally used term in photography that refer to lenses with very narrow focus tolerance, like f/1.4 and f/0.95 lenses, which can be used to do selective focus; making irrelevant subjects in the foreground and background blurry so only the subjects of essence are in focus and catches the viewers eye).
in modern cameras like the Leica SL2, the camera has a DOF scale inside the viewfinder. As DOF is the same for all lens brands and designs, only depending on focal length, distance and aperture f-stop, the camera can calculate it and show a 'digital DOF scale" in the viewfinder.
Depth Of Field scale from Fujifilm, same lens with different aperture settings from f/2.0 to f/8.0.
Leitz Summicron DR (Dual Range) f/2.0 (order no SOOIC-MN).
DR = Dual Range lens. This is a type of Leitz/Leica lens that works as macro (near focus range) and normal lens, and comes with googles/"Eyes" for the macro function. The 50/2 Dual Range Summicron was made from 1956 to 1968, only in chrome, with a near-focusing range as close to 478mm.
You mount the googles/"Eyes" to focus at close range. If you use the lens in normal range, you can take off the googles/"Eyes"
The googles/"Eyes" can be critical for which camera the lens fits on. the Leica M6 TTL requires that the plastic tab onthe eyes is removed; and other Leica M models likewise. It fits on the Leica MP, M2, M3 and oterh models. .
Dynamic range. The grade of ‘contrast range’ (or number of tones) a film or sensor, or simply a photograph, possess between bright and dark tones. The human eye is said to have a dynamic range of 10-14 ‘stops’ (but because we scan area by area and compile a concept of the overall scene, they eye is often thought to have a much higher dynamic range), Film used to have 7-13 ‘stops’ and some modern sensors have up to 15-17 ‘stops’.
E - Diameter in Leica filters and screw diameter, as in E46 which means that the filter diameter is 49mm for this lens. In general language, one would see Ø46 used, as Ø is the general symbol for diameter.
Electronic Shutter = A shutter that operates silently by turning the cameras imaging sensor on and off to control exposure, rather than a traditional shutter where a foldable metal curtain keeps the sensor in the dark and goes up for a brief moment moment, like 1/125th of a second, and exposes the sensor to light. In the Leica TL2 (2017), there is a mechanical shutter curtain from 30 sec. to 1/4000 shutter times, and digital shutter from 1/4100 to 1/40,000 shutter speeds. In the Leica M11 (2022) an electronic shutter can be activated from 60 seconds to 1/16000th second while a mechanical shutter goes from 60 minutes to 1/4000th second..The word shutter simply means to close something, like with a curtain. It comes from "desist from speaking" (14th century).
Electronic ViewFinder = See EVF.
Elmar = Refers to the maximum lens aperture - here f3.5 . Historically derived from the original 1925 50mm f3.5 Elmax lens, which was an acronym of (E)rnst (L)ieca and Professor (Max) Berek, designer of the original lenses. Later that year the 50mm f3.5 Elmar superceded the Elmax, which was discontinued due to its complexity and high cost of manufacture.
Elmarit = Refers to the maximum lens aperture - here f2.8 . The name is obviously derived from the earlier (and slower) "Elmar" designation. Not every f/2.8 lens is called an "Elmarit" though, the most obvious current exception being the 50mm f2.8 Elmar-M collapsible lens which for nostalgia and marketing reasons has kept the original 1930's Elmar name (the 50mm f3.5 collapsible Elmar, manufactured 1930-59, was one of Leica's most famous and popular lenses). Vario-Elmarit (and Vario-Summicron, etc) is Leica Camera AG's name for zoom lenses.
Elmax
Elmax lens named after = Ernst Leitz + Max Berak. Ernst Leitz was the founder of Ernst Leitz Optical Industry which later became Leica. Professor Dr.Max Berak was employed at Leica in 1912 and was the architech of the first Leica lens which Ernst Leitz asked him to design for the "Barnack's camera" (the 1913-prototype named after Oscar Barnack who invented it). The lens was a f/3.5 50mm and was known as the Leitz Anstigmat and later the Elmax.
The Leitz Elmax 50mm f/3,5 (1925-1961) on the Leica A camera (1925) camera. Photo by Marco Cavina.
EVF = Electronic ViewFinder. A viewfinder where you look at a small screen through optics/prisms. The advantage is that you see what the sensor sees. Some cameras have built-in EVF (Leica CL, Leica SL, Leica Q, etc), others you can attach an EVF (Leica TL2, Leica M240, Leica M10, Leica M11).
Traditionally a viewfinder is adeviceon a camerashowingthe fieldofviewofthe lens, used in framing and focusing the picture. Some rangefinder cameras simply have optics that show an area in front of the camera with frames indicating what will be recorded on the film or sensor. SLR cameras have mirror and prisms so you see theough the lens of the camera. Electrnic viewfinders show on a small display inside the viewfinder what the sensor see.
The EVF (Electronic Viewfinder) on the Leica SL.
EXIF =Exchangeable Image File, a file generated in camera and enclosed in the image file that contains recording information on the image such as shutter speed, exposure compensation, what metering system was used, aperture setting, ISO setting, date and time the image was taken, whitebalance, which lens was used, camera model and serial number. Some images may even store GPS information so you can see where the image were taken. The data from the EXIF file continues to follow any later editions of the image and can be read in photo editing software such as Capture One and Lightroom, as well as Photoshop (go to the menu File > File Info). There is also software available that can read EXIF data from any file, like Exifdata.com.
The EXIF data is all the information about shutter speed, metering method, ISO, etc. - and then some more that you don't see on the screen (such as camera model, serial number, lens used, etc).
Exposure Bracketing = The possibility to set the camera to automatically record a series of images where the exposure is above and below what the camera measures. The idea is that at least one of the images will be correctly exposed.
f/ (f-stop, also known as aperture).
f- (focal length). Often given in mm, for example 90mm. In the past they were often given in cm or inch, for example 9.5 cm or 3.2 inch.
f/1.25 is the size of the "hole through" the lens, the aperture. f/1.25 means focal length divided with 1.25. In the Leica 75mm NoctiluxM ASPH f/1.25, the "hole through" the lens at f/1.25 is 60mm in diameter. At f/1.4 the "the hole through" is 53.5mm in diameter. At f/4 the "hole through" is 18.75mm in diameter.
Each step smaller from f/1.4 to f/2.0 to f/2.8 to f/4.0 and son on is a reduction ofthe light to half for each step. The Noctilux f/1.25 therefore lets 50% more light in through the lens than a 75/1.4 Summilux.
f-stop = the ratio of the focal length (for example 50mm) of a camera lens to the diameter of the aperture being used for a particular shot. (E.g., f/8, indicating that the focal length is eight times the diameter of the aperture hole: 50mm/8 = 6,25 mm); or the other way around, the hole is the focal length divided with 8).
ORIGIN early 20th cent.: from f (denoting the focal length) and number.
One f-stop is a doubling or halving of the light going through the lens to the film, by adjusting the aperture riing. Adjusting the f-setting from f 1.4 to f.2.0 is halving the light that goes through the lens. Most Leica lenses has half f-stops to enable the photographer to adjust the light more precicely.
Filters = Glass filters you put in front of the lens. A much used filter is the claer UV filter that is supposed to protects the front of the lens. Other filters are color filters that add effects to black and white photography by changing the color balance. Other filters are ND (Neutral Density) filters that reduce the amount of light coming through (used for for example video recordings as video is usuallu filmed at 1/50th second shutter speed and thus most lenses are too bright wide open. Or they are used for long exposure photography in order to record for example stars movements over the sky. Other filters are filters that create star effects, or blur the view, and almost any effect you can think of.
A traditional Yellow filter in 49mm diameter to screw onto the front of the lens. The yellow filter is used for black and white photography where it slightly darkens skies, helps to cut through haze, and improves overall contrast. Yellows and reds within the scene are also lightened.
Flare = Burst of light. Internal reflections between (and within) lens elements inside a lens. Mostly, flare has a characteristic "space travel" look to it, making it cool. Particularly in older lenses with less or no coating of the glass surfaces to suppress this, it can be a really cool effect. In newer lens designs, the coatings and overall design try to suppress flare and any reflections to a degree, so that there is seldom any flare to be picked up (moving the lens to pick up a strong sunbeam), but instead a "milking out" (or "ghosting") of a circular area of the frame; meaning simply overexposed without any flare-looking flares.
Sunlight creating (fairly supressed) flare in the bottom right quadrant of the image of a modern lens.
Lens Flare in Star Trek (2013). JJ Abrams famously said, "I know there's too much lens flare ... I just love it so much. But I think admitting you're an addict is the first step towards recovery (ha ha)"
FLE = See "Floating Elements"
Flickering = blinking light. This may result in "banding like" horizontal stripes in an image, or simply that the light you see isn't in the picture, or it looks different. For example, you take a photo in light, and the result you get is darker. You take another, and now it is all right. The reason is that some light blinks. Here's the difference within one second (notice how the light in the room, the wall light and the sign light all flicker):
Flickering light causing different result in each frame becasuse the light blinks faster than the eye sees, but slow enough to be caught on camera. Here at shutter time 1/1500 sec, four pictures within a second.
Often you will see that you take a portrait indoor in an office, and from frame to frame the person has shade on one side of the face in one photo, but not the next.
Flickering ligh is a new challenge that photographers face, which is flicering light that looks good to the eye, but result in different results in a photo. Through cinema and photography history, the three standard high-quality light soruces have been daylight (from the sun), daylight HMI (5400 Kelvin Hydrargyrum medium-arc iodide lamps) and tungsten lamps (3200 Kelvin). When I say high-quality, it's because those are the light types that ensure high color quality (see the definition of CRI - Color Rendering Index in my "Leica and Photography Definitions page") and how quality light traditionally has a score above 90 CRI).
In recent years we have seen "light that flickers" because it has a pulse, such as stage light, photo lamps, video lights and of course indoor and outdoor late night lamps using LED (Light-emitting diode), compact fluorescent lightbulp-shaped lamps and other low-energy lamps (such as halogen). These light also generally have lower CRI (Color Rendering Index) below 90, and even lamps that are stated to have 90 CRI or higher, may mis out on the important red and blue tones, which will make it impossible to get the colors right, espoecially skin tones). If a stage has one or more low-quality lights (which they thend to have), these will pollute the colors of the scene to some degree.
Banding as result of electronic shutter, and often also if the ISO is high.
Flickering horizontal stripes (or "banding"-looking stripes) may appear when you use electronic shutter, and you are photographing with one or more light sources that flickers.
When the electronic shutter is on, you are usually at higher shutter speeds than 1/2000, which means there it would be possible to go down to a lower ISO, and to activater the mechanical shutter. (In some cameras you can choose to use electronic shutter throughout the entire range, which would make the camera completely silent; and this alone may cause horizontal stripes/banding if one or more lights in the room flickers).
Flickering in the EVF is very normal and will apear often without the vertical lines you see in the EVF will be in the picture.
Floating elements (a group of lenses or can also be s aingle lens element). .
Floating Elements (FLE) = Near focus correction in a lens by having a single lens or a group of lenses floating independently of the other lenses. Most lenses are born with poor performance at their closest focusing distance. Center sharpness may be good, but aberrations and corner softness increase when you’re shooting closeups. Floating elements are lens elements outside of the primary focus group that change position when the lens is focused on a close object, correcting aberrations and improving close up performance. Floating Elements originally was coined by Canon in the 1960's and quickly became the general term for this feature. Other brands came up with new names for the same thing, Minolta called it Floating Focusing, Nikon used the term Close-Range Correction (CRC), Leica call it FLE/Floating Elements.
Floating elements are for close-focus improvement of image quality and not for reducing "focus shift". Floating elements by themselves cannot reduce focus shift, but by reducing the impact of focus distance on performance, they give the designers more freedom in other areas - which could include minimising focus shift.
(As a side-note, when a lens "rattler when moved, it is not the floating elements "floating around" but can be the IS (Image Stabilization) elements for elense that has that, AF elements for auto focus lenses, or the aperture cage that rattles (as in the case of the Leica 35mm Summilux-M f/1.4 FLE - if you stop down the Summilux to f/16, the sound is usually not there).
Fn = Short for Function. It's a function button or wheel on a camera that you can program (focus zoom, turning acessories on/off, one-click to set white balance, one-click to call up a particular menu setting).
The Leica M11 has a Fn button on top.
The Leica TL2 and Leica CL has two Fn wheels (wheels you can program to different functions after your likings).
A 28 mm lens has a 74° viewing angle
Focal length = Originally focal length referred to the distance from the sensor (or film in older days) to the center of focus inside the lens (28mm, 50mm, 400mm, etc). Today one call it effective focal length (EFL) as a 400mm lens is not nessesarily 400mm long due to optical constructions that can make it shorter. The 35-420mm zoom on the Leica V-Lux 1 is for example only ca. 135 mm long. Nobody uses that measurement, except those who construct lenses! For users of lenses, focal length refers to how wide the lens sees. The viewing angle, which is often given in for example 90° viewing angle for a 21mm lens, 74° viewing angle for a 28mm lens, 6° viewing angle for a 400mm lens, etc.
Each human eye individually has anywhere from a 120° to 200° angle of view, but focus only in the center.
Focus, in - Sharp and clear in appearance. Focus - “The burning point (of a lens or mirror)”. In Latin the word focus meant fireplace or hearth. The word was probably first employed outside of its Latin literal use as “the burning point of a lens or mirror” in optics, and then came to mean any central point. The German astronomer Johannes Kepler first recorded the word in this sense in 1604.
Focus shift = That the focus of a lens shifts as the aperture changes. For example, if one focus a 50mm lens at f/2.0 and then stop the aperture down to f/8, the focus may change, especially noticeable in close focusing. Modern lenses with floating elements (FLE) where the floating elements adjust for image quality in close-focusing may also help avoid focus shift.
Frame lines = the lines inside a viwfinder that indicates the edger of the frame. In a Leica M, the viewfinder always is as wide view as 24-28mm. A mechanical contach on the lens (triggers the camreas frame selector) so the viewfinder shows the frame line of that lens. In the Leica M, the frame lines comes in sets, so there are alwaus twop sets of frame lines shown at any time (see illustration below).
(This is different than in most cameras where you only see what the lens captures: SLR cameras was the evolution in 1940's where the image from the lens was displayed directly onto a matte screen inside the camera via a mirror.
Later mirrorless cameras, the viewfinder shows the exact picture that the sensor sees through the lens).
Frame lines of the Leica M, here showing the set of 35mm and 90mm framelines.
Full Frame is "king of photography"
Full Frame (FF) = The size of the sensor is 24 x 36mm which is the format Oskar Barnack and Leica Camera AG invented with the first Leica that was introduced in 1925. Many other formats invented since, such as APS, APS-C and all usually refer to Full Frame ratio, by which it means what size they have compared to Full Frame. The "full frame" technically deifinition thouhg is a sensor that camtures the full frame in one go (as the early sensors as in Leica S1 scanned the image/senor over a period of time). The 24 x 36mm Full Frame format is so "king of photography" that it has continued to be the ideal for all cameras. Besides this, there exists Large Format cameras such as 4x5" (100 x 125 mm) and Medium Format 6x6 (60 x 60mm amongst other sizes in that area).
Ghosting = Secondary light or image from internal reflections between (and within) lens elements inside a lens. The reflected light may not always be in focus, so overall it looks like a "milked out" image. A subject in focus has brightened patches in front of it that come from reflections inside the lens. the most elementary look of ghosting is when you look in a rear-view mirror in a car at night and you see doubles of the headlights behind you (a strong one and a weaker one), because the headlights are reflected in a layer of clear glass on top of the mirror glass.
Degrees of ghosting from strong sunlight entering from outside the frame. To the right the outside light has been shielded with a shade.
ISO = Light sensitivity of the camera sensor is given in ISO (International Organization for Standardization). It's a standard that was used in film and is now used in all digital cameras also. The base ISO for the Leica TL2 sensor is around 100-150 which means that this is what the sensor "sees". All other levels are computer algorithms calculating the effect as if the sensor could "see" more (hence noise at higher ISO levels).
ISO goes in steps of doubling: When the ISO is raised from 100 ISO to 200 ISO, the camera only need half the amount of light to make the same picture. For each step in ISO to 400, 800, 1600, 3200, etc. the light sensitivity is doubled for the sensor (and the camera sensor only need half the light of the previous ISO to record the same image).
Also see Base ISO in this list.
JPEG = A standard for picture format made in the 1990's by Joint Photographic Experts Group). Mostly referred to as JPG as in L1003455.JPG which would be the name for a JPG file from the camera.
Leica L-mount bayonet.
L-mount = Lens bayonet mount introduced by Leica for the Leica T in 2014 and used for Leica TL, Leica CL and Leica SL. Since 2019 the L-mount has also been shared with Panasonic, Sigma and others who produce cameras and lenses that are compatible with Leica L cameras and lenses lenses, and vice versa.
The L-mount has a diameter of 51.6 millimeter which is big enough for any design we could wish to design, and at the same time compact enough for the L-mount to be used on compact cameras such as Leica TL and Leica CL with APS-C sensor sizes. Leica chief lens designer Peter Karbe spent years calculating this ideal size, large enouhg for any design, yet as compact as possible. Read my article "Small Camera, Large Print" (2019) with interview with lens designer Peter Karbe for more.
After Leica introduced this new bayonet mount in 2014, Nikon (Z-mount 55mm), Fuji (G-mount 65mm) and Canon (RF-mount 54mm) followed with similar new bayonet mounts, but with bigger diameter, making them less able to produce compact lenses.
LCC = acronym for Lens Cast Correction, which is a tool in phtoo editing (Capture One) that can help correct common issues that arise when using wide angle lenses. The "cast" is typical color cast, meaning that the color goes in an unwanted direction; snow in a photo has too much blue, so you correct it to have less blue and look like white snow. In Copture One, one create an LCC master profile which contains adjustment of color cast, dust spot removal and more, and then that LCC file can be applied to any photo in a series (of for example landscapes or architecture photos).
A screen on a camera is often referred to as "LCD Screen" for no particular reason (illustration is the back of the Leica Q2 special limited "James Bond/Daniel Craig & Greg Williams" version (2021).
LCD = Screen. LCD itself means liquid crystal display, which is slightly irrelevant (what it is made of) as the expression is mostly used to simply mean "screen".
Leica = A compound word derived from " (Lei)tz" and "(ca)mera". Apparently they were originally going to use "LECA", but another camera company already used a similar name in France, so they inserted the 'i' to prevent any confusion. The Leica name and logo is owned by Leica Microsystems GmbH.
Leicaflex was Leica's first single lens reflex (SLR) camera, released in 1964. It is a very solid, fully manual SLR with an exceptionally bright viewfinder. The Leicaflex SL and Leicaflex SL2 and Leicafles MOT (enabling attachment of motor winder) came after, and then Leica went onto Leica R3 that it developed with Minolta, then Leica R4, Leica R5, Leica R6.2, Leica R7, Leica R8, Leica R9.
My Leitz Leicaflex SL (1973) film camera in black, here with 50 mm Summicron-R f/2.0 from Canada.
The word lens derives from lentil, because of the similar shape.
Lens - A piece of glass or similarly transparent material (like water or plastic) that has a shape so that it can direct light rays. The word “Lens” is used both for single piece of glass as well as a camera lens with several lenses that works together. From ‘lentil’ because similar in shape.
A camera lens consists of several shaped lens elements of glass. The lenses can also be made of simple cheap plastic as in "kit lenses" (sold with a camera as a kit to make a workable cheap package), but it is mostly very exotic glass (that can be heavy or light in weight, very hard or very soft in surface (esay to scratch or very resistant) with each optical glass recipe made to develop very specific qualities in how the glass and final lens treats light. As a general rule, high quality glass is soft, which is why some lenses has as their front and back element, a non-optical lens element that is there to protect the actual optical glass from scratches. As a side noite, Leica made their own glass laboraty, The Leitz Glass Laboratory, from 1949-1989, which deveopled 35 new glass types and took out more than 2,000 patents of glass recipes from more than 50,000 experimental melts of glass. These designs, or recipes, are still used today by the lens designers to obtain very specific optical results. Other lens manufacturers in the world of course have had their glass laboratories, and today one will find an interchange of glass patents amongst production facilities that service Leica, Nikon,, Fuji and so on with optical lens elements.
Lens hood = (also called a Lens shade or Ventilated Shade). A tube or ring attached to the front of a camera lens to prevent unwanted light from reaching the lens and sensor. In the past where lenses were not coated to prevent internal reflections inside the lens, the lens hood was often essential. These days where lenses are coated, the shade serves just as much as decoration and protection (bumper) as well. ORIGIN Old English hod; related to Dutch hoed, German Hut 'hat,' also to hat.
Lens hood or Lens shade or ventilated shade. In the picture is a ventilated shade with clip-on mount to a 50mm f/2.0 lens. Ventilated means it has openings that allow for view from the viewfinder.
Lens names of Leica distinguish which widest aperture the lens has:
Noctilux
f/0.95 - f/1.25
Nocticron
f/ 1.2 (Leica-designed Panasonic lens)
Summilux
f/ 1.4 - f/1.7
Summicron
f/2.0
Summarit
f/2.4 - 2.5
Hektor
f/1.9 - f/6.3 (used 1930-1960 for screw mount lenses only)
Elmarit
f/2.8
Elmar
f/2.8 - f/4.5
Elmax
f/3.5 (only used 1921-1925 for the 50mm Elmax f/3.5)
Telyt
f/2.8 - f/6.8 (used for tele lenses)
Bubble Level Gauge to mount onto the flash shoe.
Level Gauge = This is a tool in the viewfinder to see if you hold the camera 100% horizontal and/or vertical. You can turn it on in the Menu > Photo Live View Setup > Level Gauge > On.
Before level gauge was integrated as a digitized feature in modern digital camers, it was a Bubble Level Gauge / Spirit Level you put on top of the camera.
The idea is to be able to get 100% vertical and horizontal lines (because if you tilt the camera slightly, the horizon will not be horizontal, and of you tilt the camera forward or backwards, the lines of for example vertical buildings will not be vertical.
Digitized level gauge in a Leica M10-P. You tilt the camera up and down (front/back and left/right) till the level is completely straight.
Light = Tiny particles called photons that behaves like both waves and particles. Light makes objects visible by reflecting off of them, and in photography that reflecting off of subjects is what creates textures, shapes, colors and luminance. Light in its natural form (emanating from the sun) also gives life to plants and living things, and makes (most) people happier. So far, nobody has been able to determine exactly what light is. The word photography means “writing with light” (photo = light, -graphy = writing). Read more about light in my book Finding the Magic of Light.
The "light balance" scale in the camera menu.
Light Balance = That the amount of light is correct, or is under-exposed or over-exposed. Not a common expression, but is used in camera manuals for the scale that shows how the exposure compensation is set, or indicates a scale that shows what the camera thinks the exposure should be adjusted to.
Live View = This is the ability to see the image the sensor see, live, via the screen on the back of the camera, or via an electronic viewfinder (EVF).
LMT - Leica Thread-Mount: Also known as M39, is the screw mounted lenses for Leica cameras. It’s a simple as that; you screw on the lens, and back in 1932, the possibility to change the lens was the big news hwen introduced by Leica on the Leica III. The M39 system was updated with the M Bayonet from 1954 for the Leica M3. The M bayonet is a quick way to change lenses and is the current mount for Leica M digital rangefinders.
M (as in "M3", "M6", "M7" etc.)
A) The M originally stands for "Messsucher", which is German "Meßsucher" for "Rangefinder". The "3" in M3 was chosen because of the three bright line finders for the 50, 90 and 135 mm lenses. Later the numbers of the M cameras were more or less chosen to follow each other.
M-body evolution in chronologic order:
M3 - MP - M2 - M1 - MD - MDA - M4 - M5 - CL - MD-2 - M4-2 - M4-P - M6 - M6 TTL - M7 - MP - M8 - M8.2 - M9 - M9-P - MM (black and white sensor) - ME (Type 220) - Leica M (Type 240) - Leica M-P 240 - Leica M 246 Monochrom - Leica M-A (type 127, film camera) - Leica M 262 - Leica M-D 262 (without a screen) - Leica M10 - Leica M10-P, Leica M10 Monochrom, Leica M10-R, Leica M11.
B) M also refer to M-mount as the M bayonet that couple the Leica M lenses to the Leica M camera. Before the M bayonet the coupling between the camera and lens was screwmount.
C)
M nowadays refer to the Leica M line of cameras rather than the "Messsucher".
The Leica M bayonet on the Leica M10.
M-mount: The Leica M-mount is a bayonet that was introduced with the Leica M3 camera in 1954 and has been used on all subsequent Leica M cameras, as well as on the Epson R-D1, Konica Hexar RF, Minolta CLE, Ricoh GXR, Rollei 35RF, Voigtländer Bessa, and Zeiss Ikon cameras (2019).
Compared to the previous screw mount (M39), the M
mount requires a quick turn of the lens, and ithe lens is mounted. The patent for the M-bayonet ("Bajonettvorrichtung für die lösbare Verbindung zweier Kamerateile") was registered by Ernst Leitz GmbH 10 February 1950 (patent number DE853384). Hugo Wehrenfennig was credited with the invention.
M9
Leica M9 is a model name for the Leica M9 that was introduced on September 9, 2009 (as the first full-frame digital Leica M). It was the latest model designation using the M and a number. From their next model, Leica Camera AG introduced a new model system so each camera would simply be a Leica M but then with a model designation like Typ 240, Typ 246, Typ M-D 262 and so on. The idea was inspired from Apple who name their computers for example MacBook Pro and then it has a sub- model number designation which model it is (and which would define speed of processor, etc).
MACRO = Macro lens. The Leica 60mm APO-Elmarit-Macro-R ASPH f/2.8 is a 60mm lens for portraits, landscapes, etc. as well as a near focus macro lens. The Leica Q lens can be turned to Macro which enables you to go close so as to enlarge smaller subjects. The Leica M cameras becomes Macro when you add a Macro ring "Oufro" or "Leica Macro M Adapter" that increases the lens' distance to the sensor. The word macro comes from Greek makros ‘long, large.’
Maestro III - A processor developed first as Maestro for the Leica S2 (Maestro) and upgraded to Maestro II for the Leica S (Typ 007). The Leica Q and Leica Q2 has a Mestro II (Leica Q edition) processor developed by SocioNext Inc. based on Fujitsu's Mibeault architecture. Leica M10 also has a Maestro II processor, but seemingly developed further for this model. The Leica M11 (2022) has a Maestro III processor.
Mandler, Dr. Walter (1922 - 2005)
Legendary Leica lens designer and CEO of Ernst Leitz Canada (ELCAN) 1952-1985. Read more inLeica History.
Dr. Walter Mandler (center) at the Ernst Leitz Camera factory.
Megapixel (or MP) - Millions of pixels. See pixel further down. How many units of RGB is recorded by a given sensor by taking height x widt. A Leica M10 delivers a 5952 x 3968 pixel file = 23,617,536 piexls. On a screen the resolution you choose determines the size of the image. Say you have a 5000 pixel wide file and your screen is set for 8000 pixels wide. Then the image will fill only the 5000 pixels fo the 8000 and the rest will be empty, If you then change the screen resolution to 5000 wide, the image would be able to fill out the whole screen.
Meßsucher = (rangefinder or distance finder) = Mess = range, sucher = finder. It is always correctly written with the "ß". There are technically not three "s", rather the "ß" and one "s" because it is a word constructed by the combining of two precise words.
mm = millimeter(s), as in a 50mm lens. (Earlier in lens history lenses focal length was given in cm = centimeters; as in a 5 cm lens). For anyone used to centimeters and millimeters, it’s no wonder. But if you grew up with inches, feet and yards, you may have had a hard time grasping what a 50mm lens was. But as lenses were designed first in Europe, the metric system with centimeters and millimeters was used to describe lenses.
(Leica and others made lenses for a while with either meter scale or feet scale; but then eventually started including meter and feet on all the lenses (two scales, usually distinguished with different colors). However, the lens' focal length remained always 50mm, 75mm and so on).
The reason a 50mm lens is a 50mm lens is that there is 50mm from the focus plane (the film or sensor surface) to the center of focus inside the lens. When photography was a young subject, it was engineers who made it all, and the users were expected to understand. The engineers were so into the making of the lenses, that it apparently never dawned upon them that today’s users would think of a 21mm lens as a wide angle lens rather than a lens where there is 21mm from the sensor to the center of focus inside the optics.
MP
a) Stands for Mechanical Perfection, as in the Leica M-P.
b) Megapixels (millions of pixels).
c) Megaphotosites (millions of photosites).
ND
Neutral Density filters are grey filters function as 'sunglasses' for lenses. They simply block the light so that a lens can work at for example f/0.95 or f/2.0 in sunshine.
If a camera is set to 200 ISO and the maximum shutter speed is 1/4.000, this will usually result that the lens has to be at f/2.8 or smaller aperture in sunshine. Else the image will over-exposed. So in order til stay within the maximum shutter speed of 1/4.000 and still use a lightstrong lens wide open, one mount a ND-filter that reduce the light with 3 stops (8X) or 6 stops (64x).
For video ND-filters are used quite a lot (as the shutter speed for video is 1/60), and ND-filters are also used to reduce the light for really long multi-exposures at night (stop-motion video and stills).
ND-filters also exist as variable ND-filters so one can adjust the amount of light going through from for example 1 stop (2X) to 6 stops (64X).
ND-filters also exist as graduated ND-filters where the top of the filter is dark and then gradually tone over in no filter (so as to reduce the skylight in a landscape for example).
The ND filters are called Neutral because it is a neutral filter. It doesn't change colors, only the amount of light.
ND-filters / gray-filters.
Noctilux = Also known as "King of the Night" because "Nocti" means Night and "Lux" means Light. The f/1.0 lenes from Leica are named "Noctilux". The first Leica Noctilux lens was the 50mm Noctilux f/1.2 which shortly after it's introduction was improved to the 50mm Noctilux f/1.0. In the current model the f-stop has been improved further to f/0.95.
"Noctilux" refers to the maximum lens aperture - here f1.0 . "Nocti" for nocturnal (occurring or happening at night; ORIGIN late 15th cent.: from late Latin nocturnalis, from Latin nocturnus ‘of the night,’ from nox, noct- ‘night.), "lux" for light. The Leica Noctilux 50mm f1.0 is famous for enabling the photographer to take photos even there is only candleligts to lit the scene. See the article "Leica Noctilux - King of the Night"
The Noctilux "King of the Night" lens. From left the f/0.95 in silver (same on the camera, in black), the f/1.0 in the back and the rare and expensive first model, the f/1.2 in the front.
No.
Number, on this site Leica catalog numbers or order numbers. Some the numbers changed depending on the number of cams in the lens: The Elmarit-R f2.8/135mm started life as No. 11 111, however when fitted with 2 cams for the SL became No. 11 211, yet another No. for the 3 cams lens and a fourth number for 3 cam only at the end of its life. Number changes also applied to M lenses depending on whether they were screw-thread, bayonet or for M3 with “spectacles”. Thus the No. in the Thorsten Overgaard Leica Lens Compendium list is a guideline but not a comlete list of existing catalog numbers.
OIS = Optical Image Stabilization. This is used in tele lenses where blurring motion of the camera from inevitable vibrations are adjusted by the lens. At low shutter speeds and/or with long lenses, any slight movement would result in a picture with "motion blur" unsharpness. The Leica TL2 supports optical image stabilization when A) OIS is turned on in the camera menu, and B) when you use lenses with OIS (the Leica SL longer lenses has OIS). An alternative is EIS = Electronic Image Stabilization, which the Leica T has. Here the problem of "motion blur" is corrected electronically after, which might lead to image degradation. However, the larger the sensor resolution, the less one will notice small 'degradation'.
Optic = Eye or vision. From French optique or medieval Latin opticus, from Greek optikos, from optos ‘seen.’
OSPDAF (sensor type) = On Sensor Phase Detect Autofocus, which is a digital sensor where the main imaging sensor has "focus pixels" added in a layer on top of the traditional image pixels that are used for autofocus. First introduced in 2010 by Fujifilm on F300EXR and used in the first smartphone in 2014, Samsung Galaxy S5.
PASM on a cameras 'program wheel'
PASM = is short for P = Program Mode / A = Aperture Priority Mode / S = Shutter Priority Mode / M = Manual Control Mode. On some cameras, these P, A, S and M are choices on a wheel on top of the camera, or in the menu.
PDAF = Phase Detect Autofocus. Used in canon EOS 5D Mark IV in 2016 where a dSLR camera use mirrors to reflect copies of the main sensor’s light at a dedicated phase detection sensor. Compact cameras and smartphone cameras has the AF sensors built on to he sensor itself so as to be more compact (OSPDAF = On sensor Phase Detect Autofocus). The alternative to PDAF is CDAF (Contrast Detection Auto-Focus).
Perspective = The way objects appear to the eye; their relative position and distance. Also, selective focus (foreground and background out of focus) can change the perception of perspective (also see Three-dimensional). A wide angle "widens" the perspective and makes objects further away appear smaller than they are to the eye; and objects closer, relatively larger than they are to the eye. A tele lens will "flatten" the perspective and often objects further away will appear relatively larger than close objects than they are in real life. A 50mm lens is the one closest to the perspective and enlargement ratio of the human eye.
The word Perspective comes from the latin word for optics (perspicere, per- ‘through’ + specere ‘to look’), and so-called Renaissance painting is simply painting done within the framework of optics and the linear perspective it presents.
Perspective is relative position and distance. The objects nearby are larger than objects far away. This is how the eye and the mind calculate distance. The eye and the camera automatically captures perspective. In darwing and painting one would see "stupid" two-dimensional drawings 500 years B.C where elements were thrown into the mix without considering that a an object far away must be smaller than if close to the viewer. The word "perspective" comes from "to look through (optics)". Pier 7 in San Francisco by Thorsten Overgaard. Leica M11 with Leica 50mm Noctilux-M ASPH f/0.95.
Vanishing points are the points where lines meet. This is how you make perspective in paintings and drawings (and some times make movie sets or theatre stages appear more three-dimensional than they are)
Painters works with vanishing points, which is where the lines meet, so as to create an illusion of perspective and three-dimensional effect on a two-dimensional painting or drawing.
The human eye corrects for perspective to an extreme degree. We always see vertical lines vertical and horisontal lines horisontal: The eye has a angle of view equivalent to an 8mm wide angle lens, a size ratio equivalent to a 50mm lens and we focus on relatively small area of the viewing field - one at the time. Three things happens that are worth paying attention to:
1) We compile areas of our view that we focus on, to one conceptual image that "we see". Ansel Adams, the great American landscape photographer pointed out that a large camera used for landscape photography capture every detail in focus and sharp so you can view it in detail after; but the eye does not see everything in focus when you try to compose the landscape photography, the eye scans only one part at a time and stitch the idea together. This makes composing or prevision of a landscape photography challenging.
2) We compile areas of our view that we individually adjust the exposure of. A camera adjust the exposure of the whole image frame to one exposure. That's why what looks like a nice picture to the eye of houses in sunshine with a blue sky above, becomes a photograph of darker buildings with a bright white sky: The camera simply can't take one picture that compare to what we "compiled" with our eyes, adjusting for each type of light.
3) Objects (on a table, for example) in the bottom of our viewing field will appear 100% perspective corrected - to a degree that it is impossible to correct in optics, with or without software correction. A wide angle lens, even with little distortion, will exaggerate the proportions of the closet part so it - to the eye - looks wrong.
Perspective correction - In software like Adobe Lightroom and Capture One Pro there is often a feature to correct perspective (and distortion) like seen below. You can change perspective this way, or at least make believe: If you correct a tall building on teh vertical lines, you will notice that the height of the windows doesn't match the perspective. If the building is with straight lines, the windows should all be of the same size. But a tall building seen from below and corrected with software will have taller windows (closer to camera) in the bottom than in the top (further away from the camera originally).
A graphic illustration of the typical Bayer Color Filter Array on an RGB sensor. It's called a Bayer filter because Bryce Bayer of Eastman Kodak invented the technology of filtering incoming light into RGB and distribute it into the the photosites that each read just one color (R/G/G/B).
Photosite - The unit in a digital camera sensor that records intensity of either red, green or blue. Unlike the output of a sensor, measured in pixels (and where each pixel contains RGB), the photosite records only one color each, and it's intensity (how bright it is). A photosite can not distinguish colors, which is why there is a Color Filter Array (basically a prism) above them to filter the colors and send information to the photosite if 's a R, G og B color. See illustration below. In a monochrome sensor (as in the Leica M Monochrom and the Phase One Achromatic), all photosites are recording intensity of light only as there is no concern which color it is, and there is no color filter.
The ratio of photosites to pixels is not a given. Each block of 4 contiguous photosites contains one photosite sensitive to low wavelengths (blue), one photosite sensitive to high wavelengths (red), and two identical photosites sensitive to medium wavelengths (green). So four photosites would be the minimum to create one 'full-color' pixel. Apart from that, depends on the sensor specifications, which is different from brand to brand. Sometimes four photosites (two Green, one Red and one Blue) makes up one pixel, at other times it's more photosites to one pixel; and there is also pixels sampled from photosites across (sort of overlapping patterns).
Pixel - Made up word from Pix (picture) and el (element). A pixel is the smallest full-color (RGB) element in a digital imaging device. The physical size of a pixel depends on how you've set the resolution for the display screen. The color and tonal intensity of a pixel are variable, meaning that each pixel contains RGB. This is different from a camera sensor's small eyes (photosite) that are an intensity of either red, green or blue. You could say that the digital sensor's photosite (where each unit collects just one color; red, green or blue) is the input technology, whereas the pixels on a screen (where each pixel contains red, green and blue) is the output device. So while sensors are measured in megapixels (mega = million), it's their output unit of pixels, and not the input unit of photosites that is measured and stated. See illustration below.
Q - The Leica Q model was released in 2015 as a full-frame 24MP digital compact camera featuring a fixed auto-focus and 28mm f/1.7 lens with macro, amd upgraded with a larger 51MP sensor (same concept) Leica Q2 in 2019. See my article Compact Leica Cameras for more.
R = Resolution, in the name Leica M10-R camera model (2020).
R - Reflex: The Leica R cameras (2009) is the SLR cameras from Leica. The first Leicaflex (1964) feels like a Leica M, built as a tank, and with reflex and fits Leica R lenses. Over the production time of the Leica R system, a number of magic lenses from fisheye to 800mm were made for this system (as well as a made-to-order 1600mm lens for a prince in Qatar). Also a number of zoom lenses was made for the Leica R system. Many of the lenses are being used for cinema in their next life, especially the wide angle and the 50/1.4, but also the 280mm APO f/2.8 tele lens was retrofitted with a PL mount and used for the Joker movie in 2019.
The Leicaflex series (1964 - 1976) was modernized with the Leica R3 (1976) that was made together with Minolta , and then Leica went on with Leica R4, Leica R5, Leica 6.2, Leica R7, Leica R8 and Leica R9. The latter two models got a digital 10MP back made as an accessory in 2004 (CCD-sensor made with Imacon and Kodak). You simply took off the film back and mounted a digital back (and could change back to film if you wanted to). See my Leica DMR article. The Leica R system was retired in 2009 when the production of new lenses stopped. Leica Camera AG said then that the plans fot the R10 camera had been retired as it was not feasible to maintain an SLR system. Though, in 2016 Leica opresented the Leica SL system which is a SLR camera without reflex and instead is mirrorless cameras, and with a new series of L-mount lenses. The Leica SL (and Leica M) can use Leica R lenses via adapter.
"Rattle" = Noise from something moving around inside a lens when moved or shaken, as if something is loose: When a lens "rattle" when moved, it is not the floating elements "floating around" but can be the IS (Image Stabilization) elements for elense that has that, AF elements for auto focus lenses, or the aperture cage that rattles (as in the case of the Leica 35mm Summilux-M f/1.4 FLE - if you stop down the Summilux to f/16, the sound is usually not there).
Rigid - Refers usually to the Leica 50mm Summicron-M f/2.0 "Rigid" of 1956.
It is called "Rigid" because, unlike the 50mm Collapsible, this one is not able to be changed.
Rigid means stiff, uable to be forced out of shape. Not able to be changed. From Latin rigere, "be stiff".
The name is a little confusion nowadays as all or most lenses are rigid today, but back in 1925-1956, many lenses were collapsible so the camera was compact when not in use. Just like compact cameras today often has a lens that extrudes when the camera is turned on, and collaps into the camera body when the camera is turned off.
RF
(R)ange (F)inder - the mechano-optical mechanism which allows M Leicas to focus.
Alternative meaning - RF is also shorthand for Hexar RF , Konica's motorised "M-lens-compatible" rangefinder camera released in 2000.
S = Single image. When the ring by the shutter release on top of the camera (or in the menu of a digital camera in case it does not have this ring on the ourside) is moved from OFF to S, the camera takes only one photo at the time (Single). The other possibility is Continuous where the camera takes pictures continiously as long as the shutter release button is helt down. (see above).
Saturation: How colorful, intense or pure the color is. Less saturation would be less colorful, more saturation would be more colorful. In today’s photography, de-saturating a photo on the computer will gradually make it less and less colorful; and full de-saturation would make it into a black and white photo.
Sensor = A device that detects a physical property (like light) and records it. A camera sensor is a plane plate with thousands of small “eyes” with (photosites) a lens in front of each (CFA, Color Filter Array), which each individually records the amount of red, green and blue light rays that comes through the lens. Together, Red, Green and Blue form all colors of the spectrum, which becomes a pixel. Sensor comes from Latin sens- ‘perceived’.
SDC = Software Distortion Correction. A correction of lens distortion (not straight lines) applied in the camera and which is part of the DNG or RAW file. In Lightroom or Capture One Pro the SDC of the camera file is applied automatically (and cannot be removed), in software like AccuRaw one can open the DNG file without the SDC correction. Sean Reid Reviews have written a good article on what SDC is and does in "Software Distortion Correction".
SDC (Software Distortion Correction): In Lightroom the correction profile for the Fujinon 23mm is applied automatically and cannot be turned off.If you go into Develop mode in Lightroom and look under Lens Correction > Profile, you will see a message in the bottom with an exclamation mark. When you click on that, you get the message above.
Sharpness - See “Focus”
Shutter speed dial - The dial on top of the Leica M where you can set the shutter speed manually. It can also be set to A which stands for Aperture Priority (where the camera suggests a shutter speed; or when you move the dial away from A, the camera will show arrows in the viewfinder, suggesting which direction to change the Aperture to, to get the correct exposure).
The number on the dial refers to the shutter speeds. "4000" is 1/4000th of a second (one second divided with 4,000).
Shutter speed dial set to A (Aperture priority where the camera automatically suggest an shutter speed based on the aperture of the lens). The other settings are manual shutter time settings. "B" is short for Bulb where the shutter is open for as long as the shutter release is pressed (max 60 minutes in the Leica M11). The little "thunder symbol" between number 250 and 135 is a symbol indicating that this is the flash synchronizing setting (1/180th of s a second).
Six-bit code (6-bit code) - An engraving on the flange of M-lenses that makes it possible for digital M-cameras to recognize the lens that has been mounted. The camera can include information on the attached lens and its focal length in EXIF data and make digital corrections for lens-specific flaws, such as color-cast or vignetting. Six-bit coding was introduced for all M-lenses sold since 2006, but many older lenses can be retrofitted with the code at Leica Camera AG in Wetzlar.
SL = Abbreviation for Single Lens (used by Leica for theeir Leica SL (2015) digital cameras. The point is that there is no Reflex mirror (See SLR in the list).
SLR = Abbreviation for Single-Lens Reflex; the lens that forms the image on the film/sensor also provides the image in the viewfinder via a mirror. Newer camera models has aen EVF (Electronic Viewfinder) that displays in the viewfinder what the sensor sees in real-time.
Leitz Wetzlar Mikro-Summar 42mm f/4.5 lens anno 1910 might be the first lens carrying the name Summar.
Summar - (or a story of name development) The 1933 lens 50mm f2.0 Summar: It started out as Summar(f2.0), then the Summitar (f2.0 in 1939), then the Summarex(f1.5 in 1948), then the Summaron(35mm f.2.8 in 1948, then later f2.0, f3.5 and f5.6 lenses), then the Summarit (f1.5 in 1949 and used again for the 40mm f2.4 on the Leica Minilux in 1995, then again for the 35mm, 50mm, 75mm and 90mm Summarit f2.5 in 2007) then the Summicron(f2.0 in 1953 for the collabsible 50mm) and finally the Summilux(50mm f1.4 in 1959).
ORIGIN of Summar is unknown.
Summarex
The great thing about being a lens designer is that you get to name the lens. Dr. Max Berek who worked for Leitz from 1912 till his death in 1949 named lenses after his two favorite dogs. One was Sumamrex named after his dog Rex, the other Hektor named after his dog Hektor.
Summarit
Refers to the maximum lens aperture - here f/1.5.
Summicron = Refers to the maximum lens aperture - here f/2.0 . There are many guesses how this name came about, a popular one being that the "summi" came from "summit" (summit means the highest point of a hill or mountain; the highest attainable level of achievement) while the "cron" came from "chroma" (ie. for colour). Not so: The name (Summi)cron was used because the lens used Crown glass for the first time, which Leitz bought from Chance Brothers in England. The first batch of lenses were named Summikron (Crown = Krone in Deutsch). The Summi(cron) is a development from the orignal Summar (the 50mm f2.0 lens anno 1933). Vario-Summicron, Vario-Elmarit is Leica Camera AG's name for zoom lenses, for example the Vario-Summicron f/2.0 as the one that is on the Leica Digilux 2.
Summilux = Refers to the maximum lens aperture - here f/1.4 , "-lux" added for "light" (ie. the enhanced light gathering abilities). In Leica terminology a Summilux is always a f/1.4 lens and a Summicron is a f/2.0 lens.
Telyt
Lens nomenclature - short-hand for " telephoto " (tele- is a combining form, meaning to or at a distance) and used in names of instruments for operating over long distances : telemeter. The name has been used for a number of tele lenses from Leica.
ORIGIN: from Greek t?le- ‘far off.’
Thambar Leitz Thambar 90mm f.2.2. At most about 3000 were made, originally, probably in eight batches, starting with 226xxx (built in 1934) and going through 283xxx, 311xxx, 375xxx, 416xxx, 472xxx, 511xxx, and 540xxx (about 1939/1940). But then the Thambar was re-launched in 2018, exactly the same lens.
Three-dimensional = Having the three dimensions of height, width and depth. In photography and lens design, three-dimensional effect is also the perception of even small micro-details; the texture of skin can appear flat and dead or three-dimensional and alive. Also, selective focus (foreground and background out of focus) can change the perception of depth. Also see Perspective.
Leica T is the compact camera developed by Leica Camera in 2014 as a touch-screen operated camera that can take the Leica L mount lenses made for this camera and the Leica SL and Leica CL. This camera series was names Leica TL later. See my article Compact Leica Cameras for more.
TTL
(T)hrough (T)he (L)ens light metering, usually WRT the flash metering capabilities built into the R6.2, R8, R9, M7 & M6TTL cameras.
V-Lux is a series of compact SLR-like digital cameras by Leica Camera AG developed with Panasonic since 2006, starting with the Leica V-Lux 1 (2006), V-Lux 2 (2010), V-Lux 3 (2011), V-Lux 4 (2012), V-Lux Typ 114 (2014), V-Lux 5 (2018). See my article "Compact Digital Leica Cameras".
To add confusion, Leica also made a Leica V-Lux 20 in 2010, V-Lux 30 in 2011 and a Leica V-Lux 40 in 2012 that was a temporarily renaming of the Leica C-Lux series.
Vario- is the Leica Camera AG name for zoom lenses. Vario-Elmarit, Vario-Elmar and Vario-Summicron and so on.
Ventilated shade on a 35mm of Elliott Erwitt's Leica MP camera.
Ventilated Shade - A shade is a hood in front of a lens that provides shade from light going straight onto the lens from outside what you are photographing, which could cause internal reflections like flare, which would make the picture less contrasty.
The ventilated shade has holes so it doesn't obstructs the view from the viewfinder. In many of today’s mirrorless cameras where there is no viewfinder looking ver the lens, so there is no actual need for a ventilated shade; but they are considered classic or vintage looking and are still in high demand. It makes no difference for the purpose of the shade (to create shadow) if it is ventilated or not.
Ventilated Shade for the Leica Q. I make ventilated shades for most lenses and sell them from here.
Viewfinder a device on a camera showing the field of view of the lens. Also known as the German word "Messucher" (or Meßsucher).
1) A built-in viewfinder in a camera that simply show the frame you get when you look through the viewfinder.
2) A rangefinder viewfinder which is also used to focus the lens. In Leica M cameras two pictures has to meet and lay 'on top of each other' for the picture to be in focus.
3) An external viewfinder, usually on top of the camera in the flash shoe, so as to show the field of view of lenses vider than what the built-in viewfinder can show (15mm, 21mm, 24mm, 28mm etc viewfinders exist)
4) Very simple "aiming-devices" on top of a camera that is simply a metal frame without any optics. Just a frame, as for example very old cameras (the original Leica), or when using cameras in diving where you can't look through the camera.
5) A Electronic Viewfinder (EVF) that shows what the sensor sees "live".
Visoflex
A device mounted between the Leica M camera and a lens, containing a mirror mechanism like in a SLR camera, thus allowing the M user to 'preview' a picture using a tele lens larger than 135mm which is the maximum covered by the framelines in the Leica viewfinder. In 2012 Leica made the electronic Visoflex for the Leica M240, which is an electronic viewfinder (see EVF in this list).
Leica Visoflex EVF2 electronic viewfinder.
You can also use the Olympus VF-2 which essentially is the same.
The Leitz VisoFlex came out in 1951 as a way to implement a mirror on a Leica M. The first version exist for screw mount lenses and M mount lenses.
Vulcanite
The black rubberized, textured material used to cover Leica camera bodies prior to the 1980s. It actually was made of vulcanised rubber (hence the name) and was and remains much loved by professionals because of its solid, sure grip.
WLAN = German short for WiFi. In camera menus, Leica may refer to WLAN, which is simply German for WiFi, (and for some reason they refuse to believe that the rest of the world doesn't call it for WLAN like they do). WLAN stands for wirelesslocal area network.
X1 - The Leica X1 was released in September 2009, the Leica X2 in 2012, and Leica X Typ 113 was released in September 2014, all with a fixed 23mm f/1.7 lens. Leica X Vario Typ 107 and Leica X-E Typ 102 was released later. A Leica X-U underwater edition was released in 2026. See my article Compact Leica Cameras for more.
Ø - Diameter. As in Ø49 for example which means that the filter diameter is 49mm for this lens (or if a filter is Ø49, it is 49mm in diameter and fits that Ø49 lens). Leica uses E to express their filters sizes, as in E49 for a 49mm filter size.
Index of Thorsten Overgaard's user review pages on Leica M9, Leica M9-P, Leica M-E, Leica M9 Monochrom, Leica M10, Leica M10-P, Leica M10-D, Leica M10-R, Leica M10 Monohcrom, Leica M11, Leica M11-D, Leica M 240, Leica M-D 262, Leica M Monochrom 246, Leica SL, Leica SL2, Leica SL2-S, Leica SL3, Leica SL3-S as well as Leica TL2, Leica CL, Leica Q, Leica Q2, Leica Q2 Monochrom, Leica Q3 and Leica Q3 43:
Leica Digital Camera Reviews by Thorsten Overgaard
Thorsten Overgaard reviews the Leica M11 digital rangefinder and provides real-world user report. Here in Miami. Photo by Luke Devey.
Thorsten von Overgaard is a Danish-American multiple award-winning photographer, known for his writings about photography and Leica cameras. He travels to more than 25 countries a year, photographing and teaching workshops to photographers. Some photos are available as signed editions via galleries or online. For specific photography needs, contact Thorsten Overgaard via email.
You can follow Thorsten Overgaard at his television channel magicoflight.tv.
I am in constant orbit teaching
Leica and photography workshops.
Most people prefer to explore a
new place when doing my workshop.
30% of my students are women.
35% of my students dotwo or more workshops.
95% are Leica users.
Age range is from 15 to 87 years
with the majority in the 30-55 range.
Skill level ranges from two weeks
to a lifetime of experience.
97% use a digital camera.
100% of my workshop graduates photograph more after a workshop.
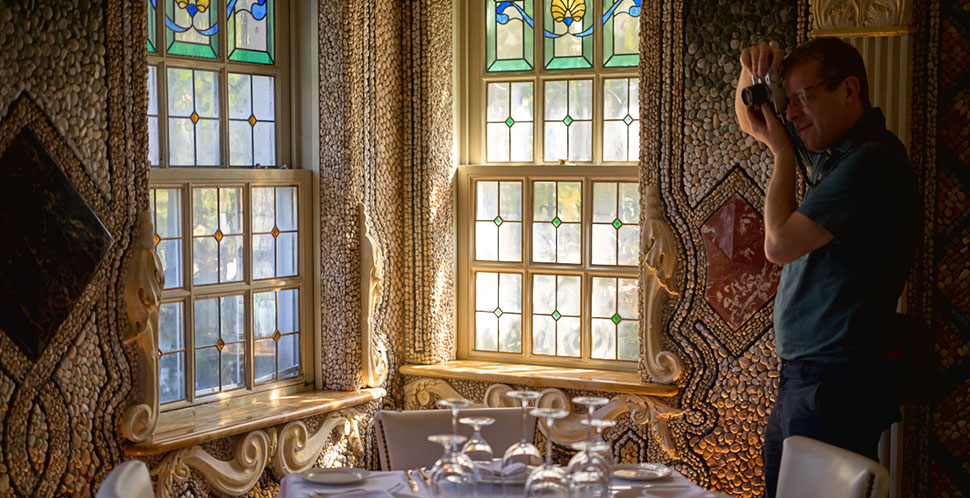
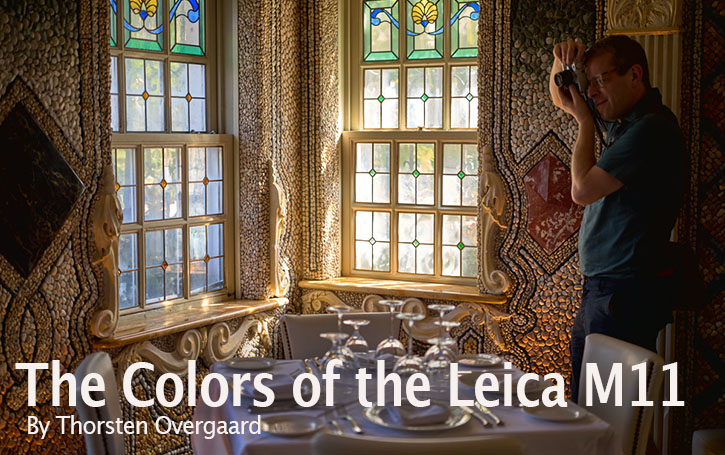


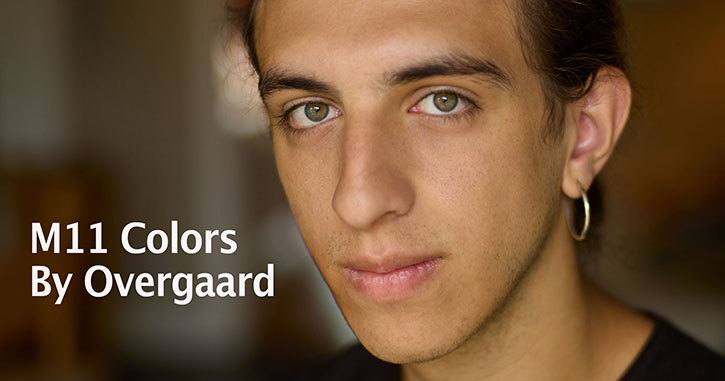

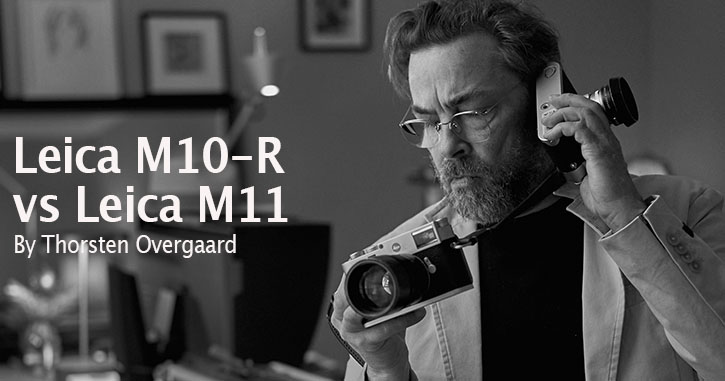


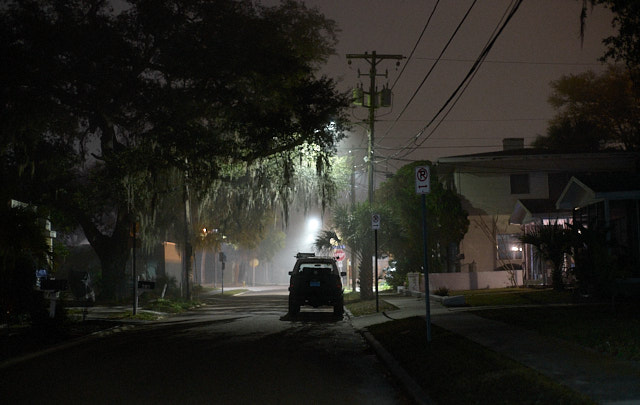

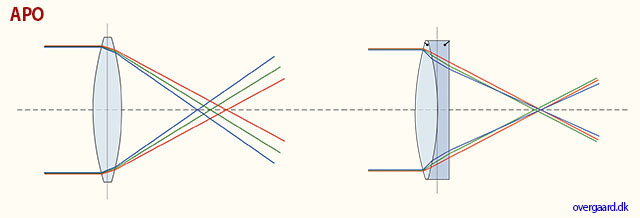
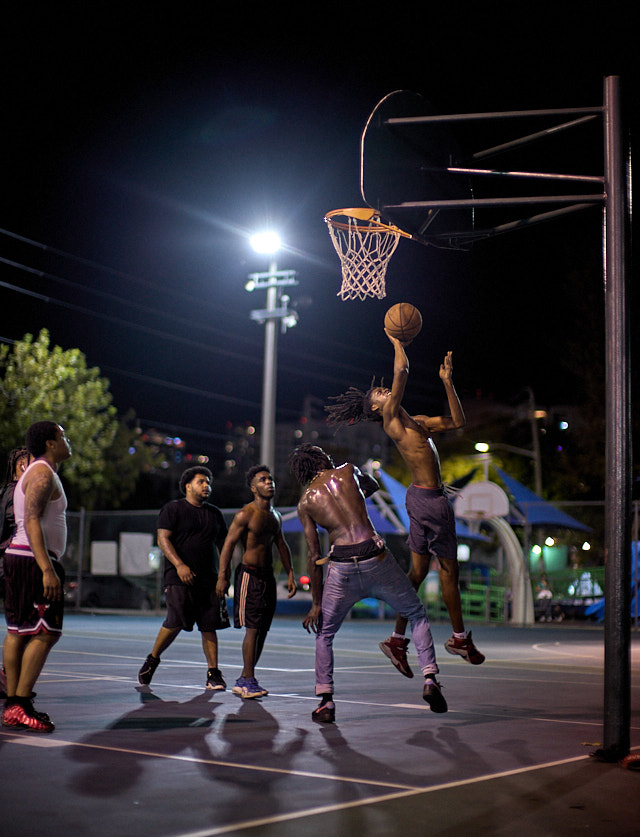


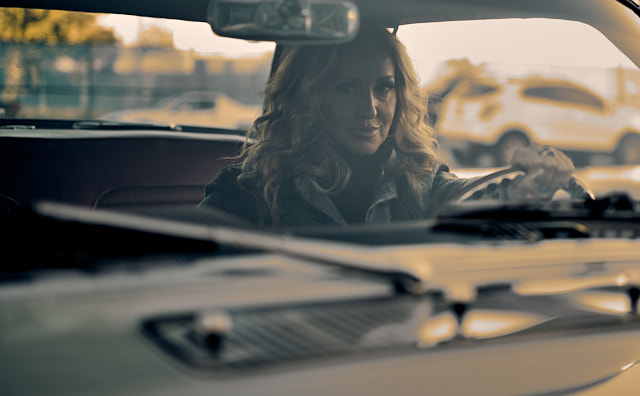
 Workshop in Miami. Leica M11 with 50mm APO-Summicron-M ASPH f/2.0 © Thorsten Overgaard.
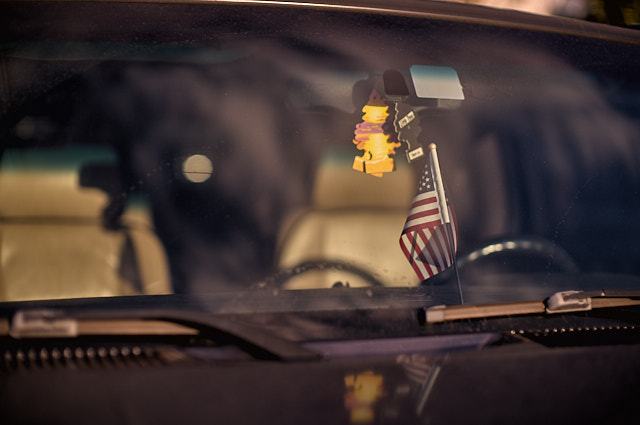
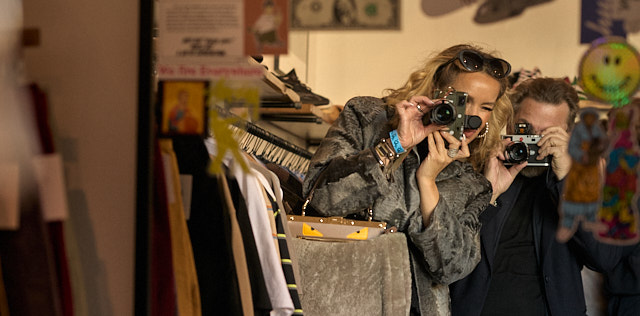
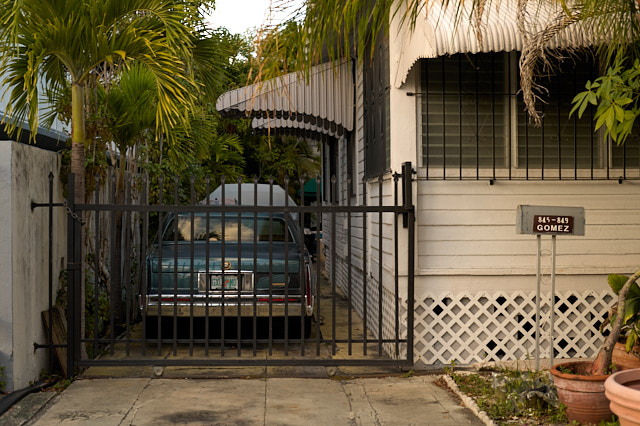
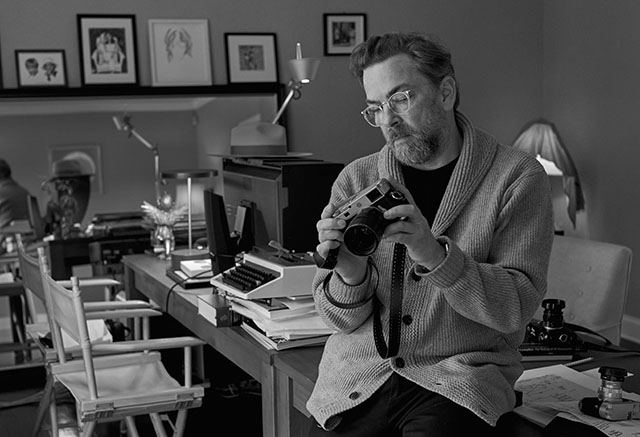


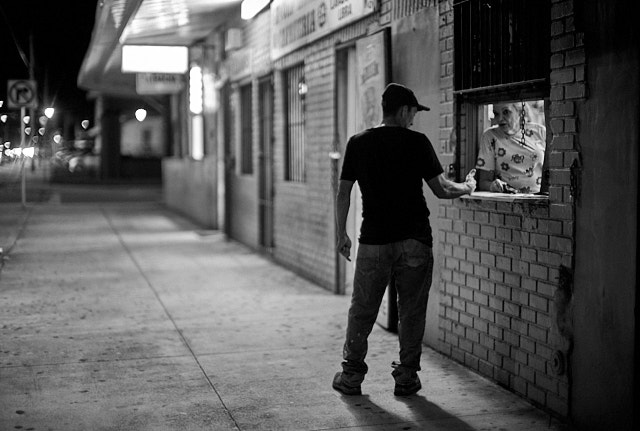
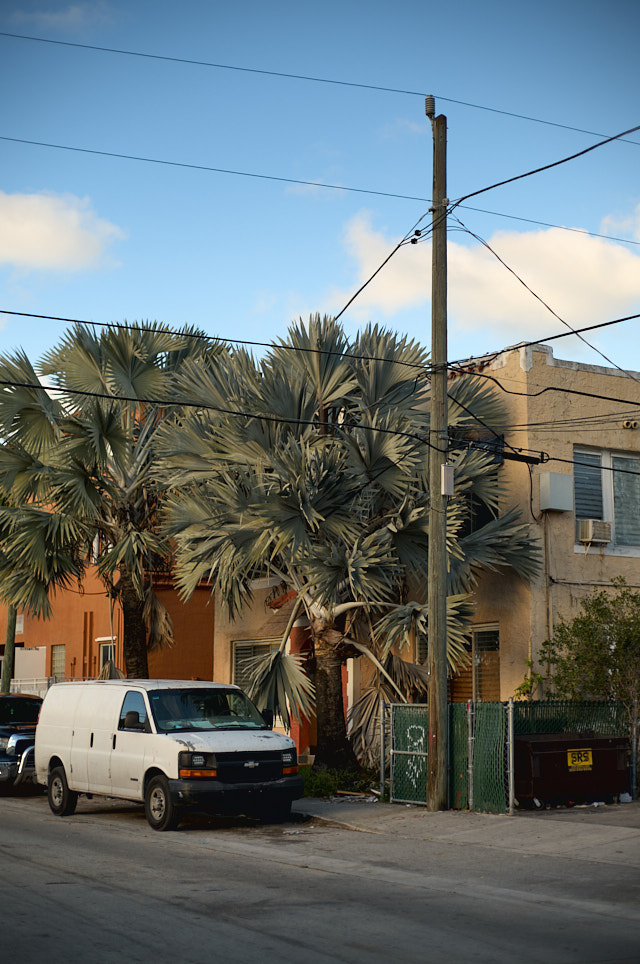


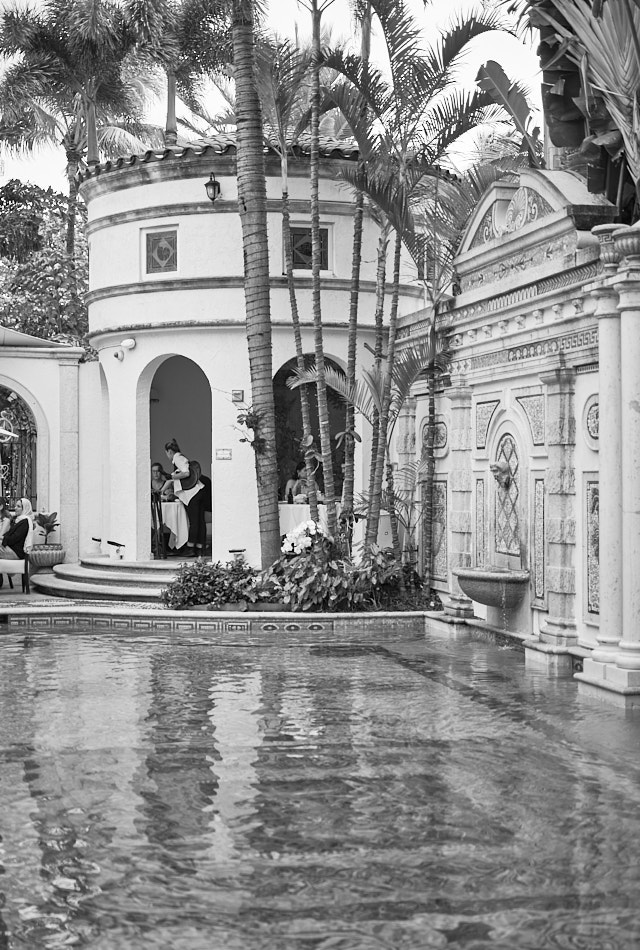
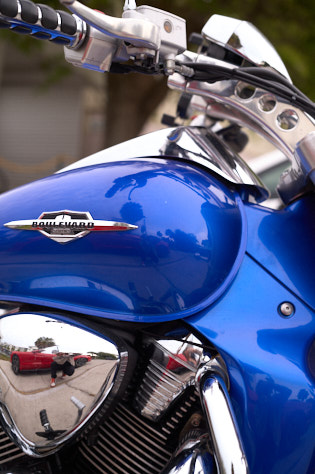


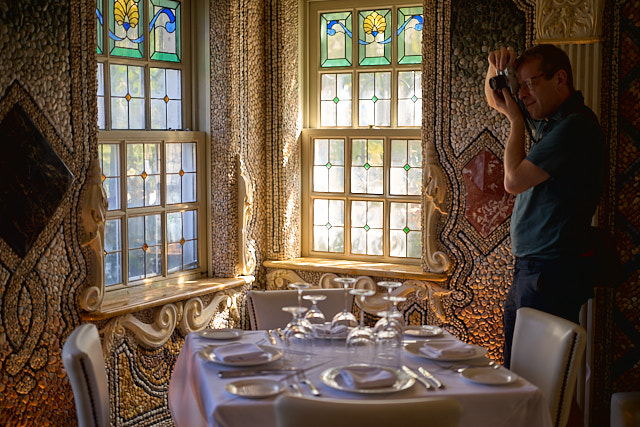

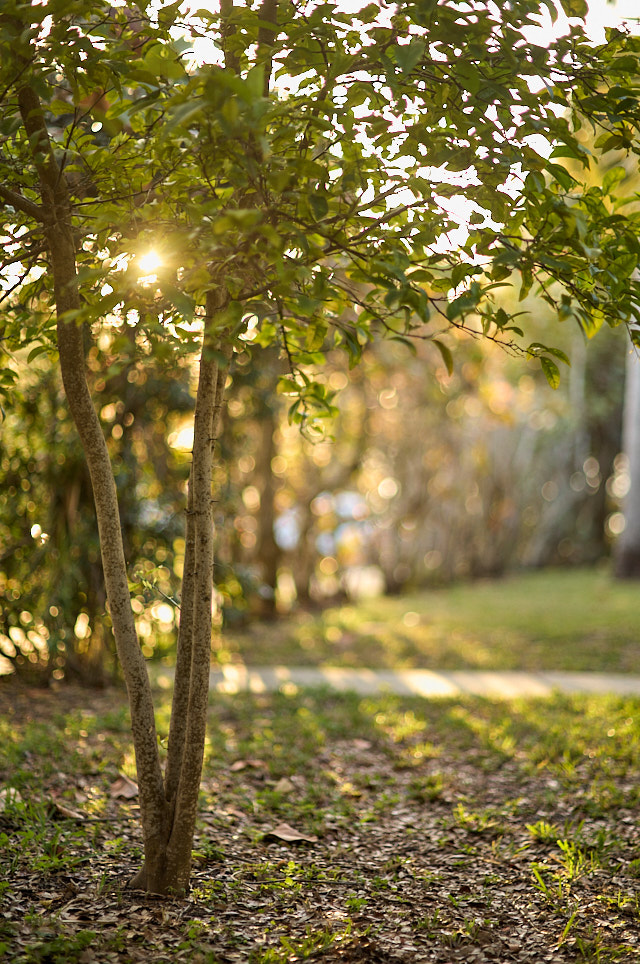
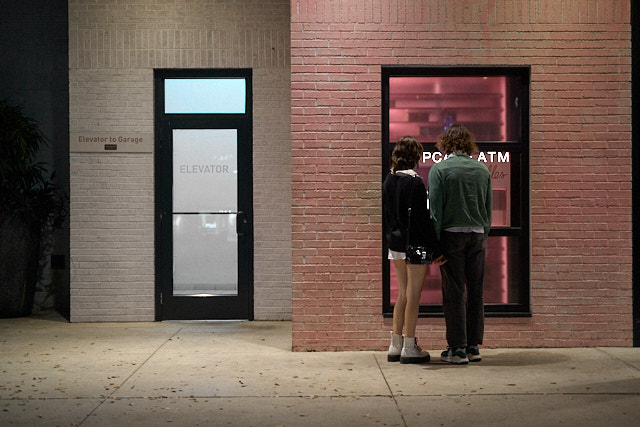
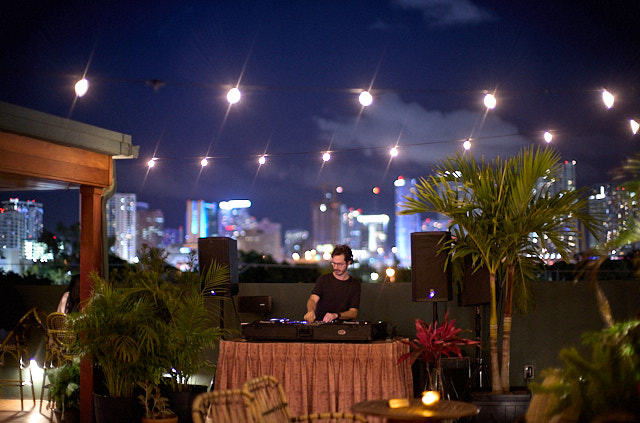


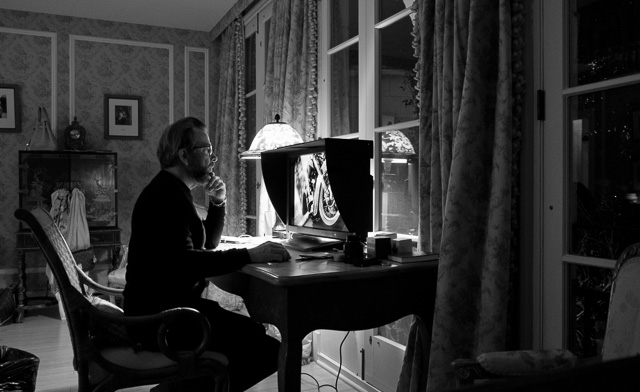
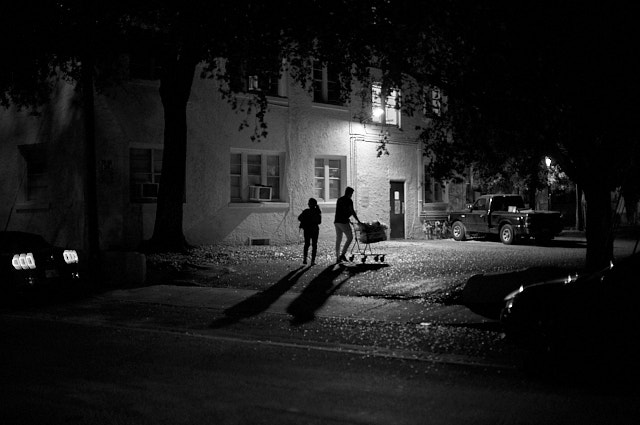

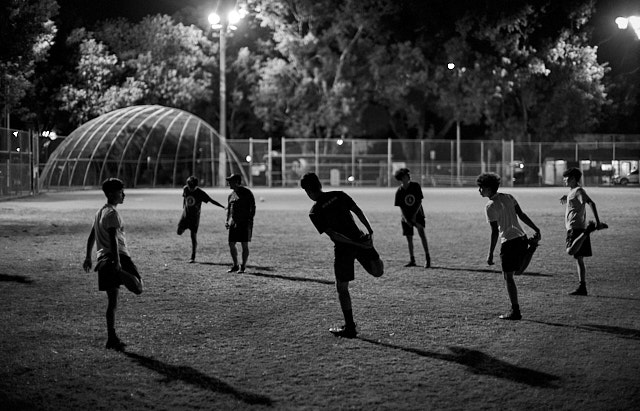
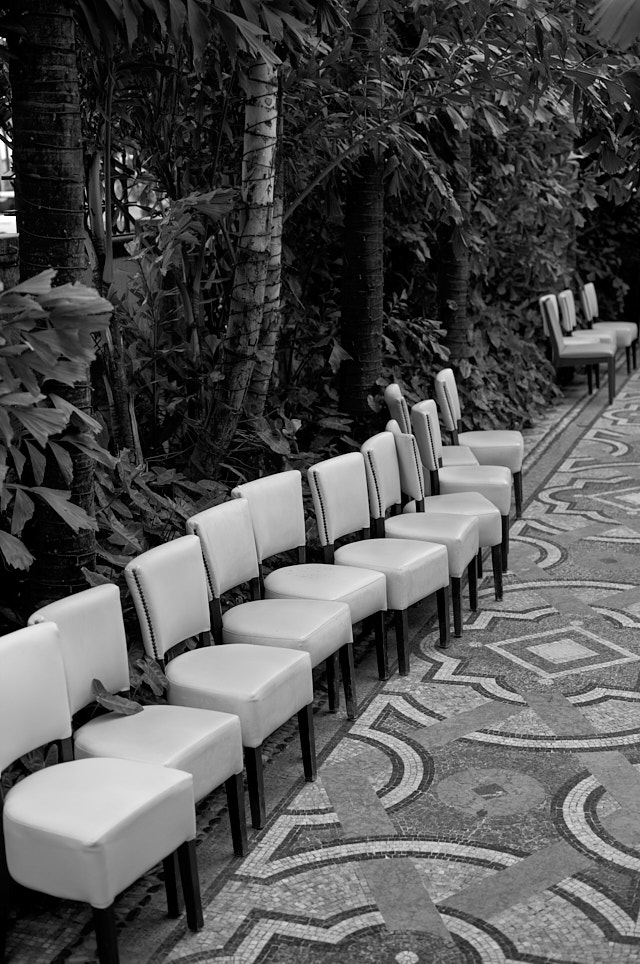

 Join an Overgaard Workshop in your own city, or somewhere in the world. See tour schedule here
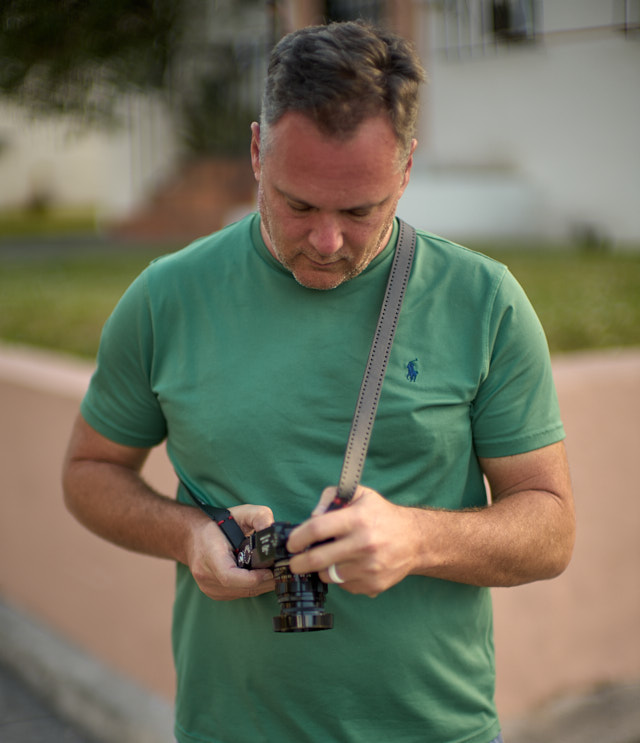
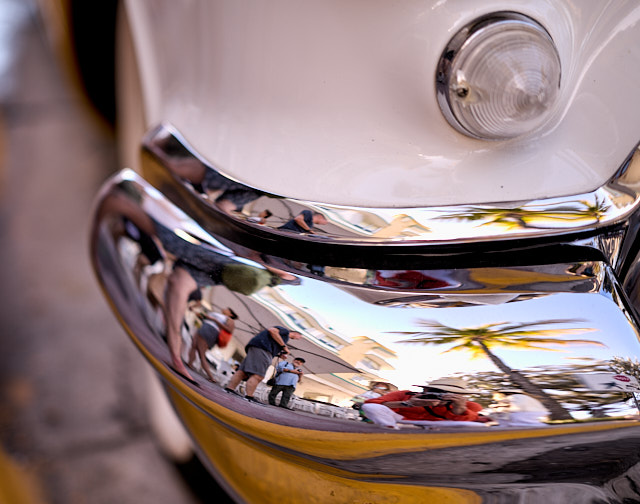
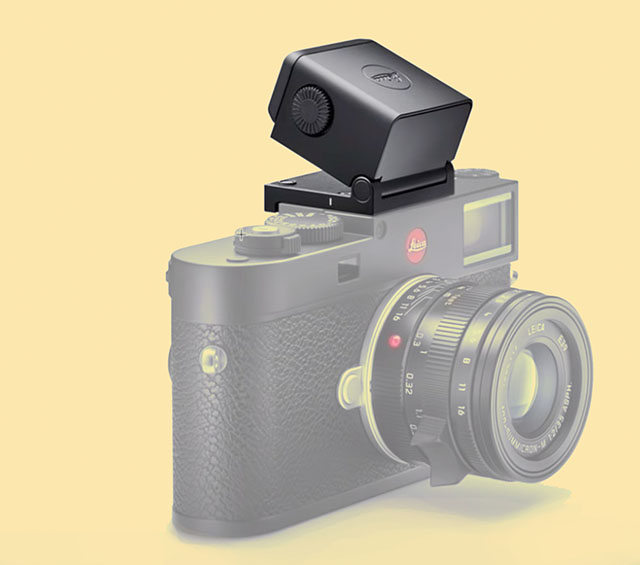

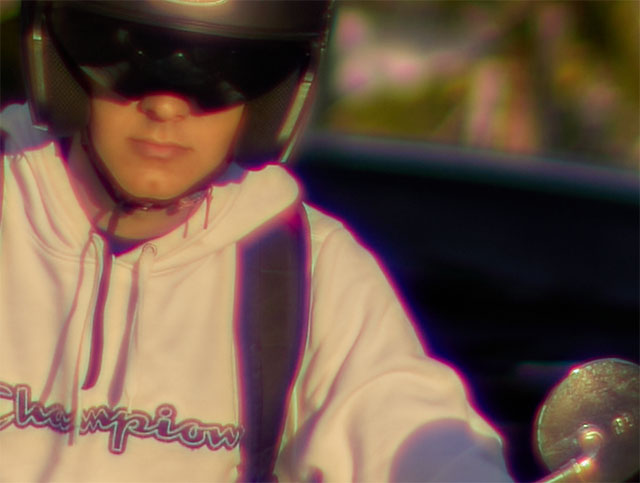
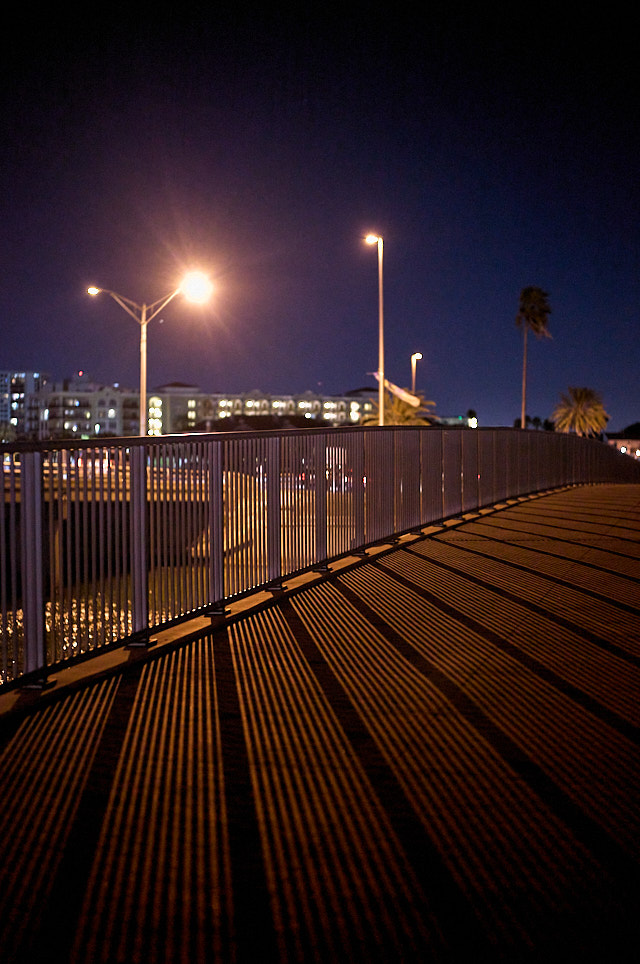

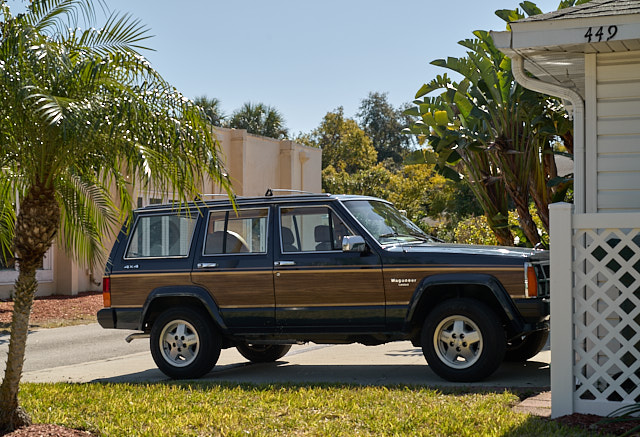
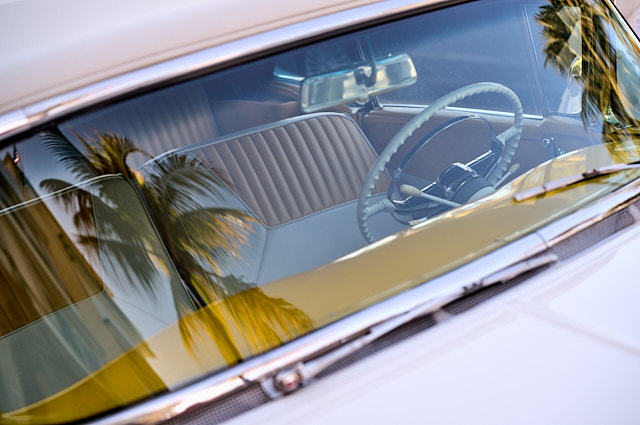
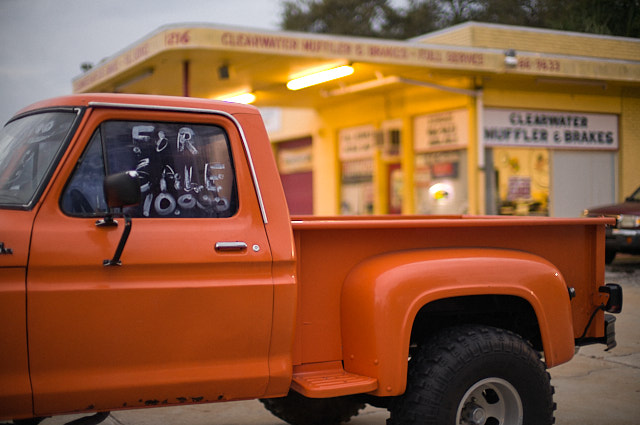
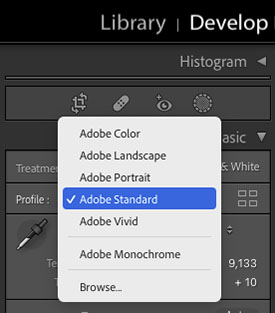
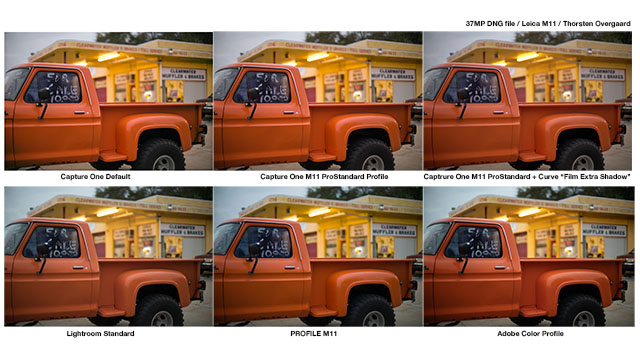
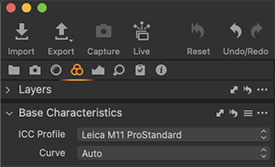

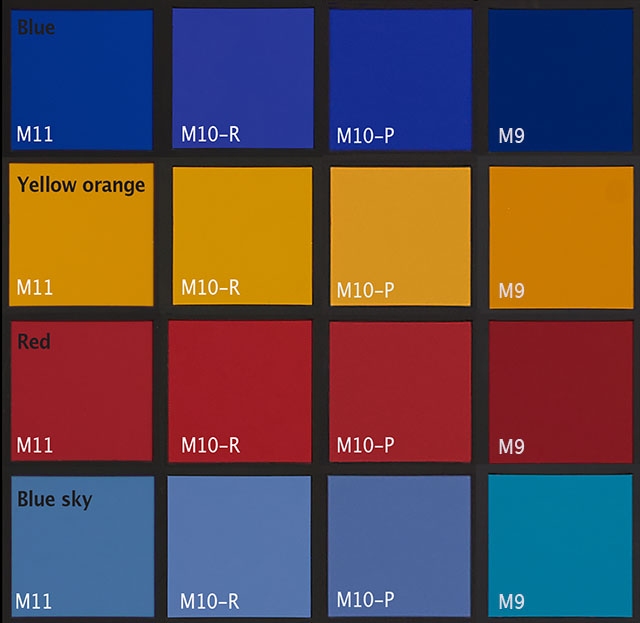

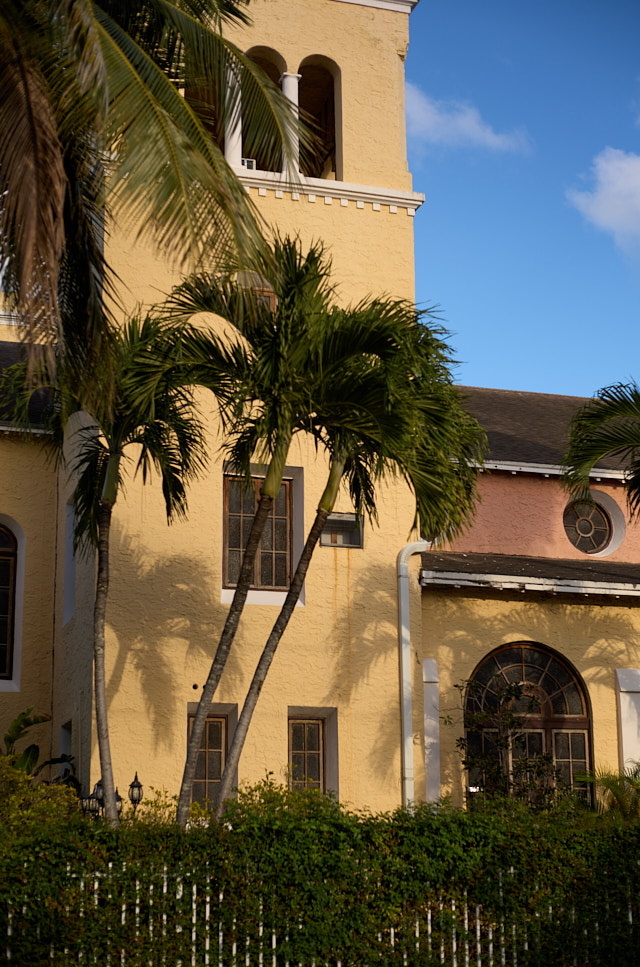
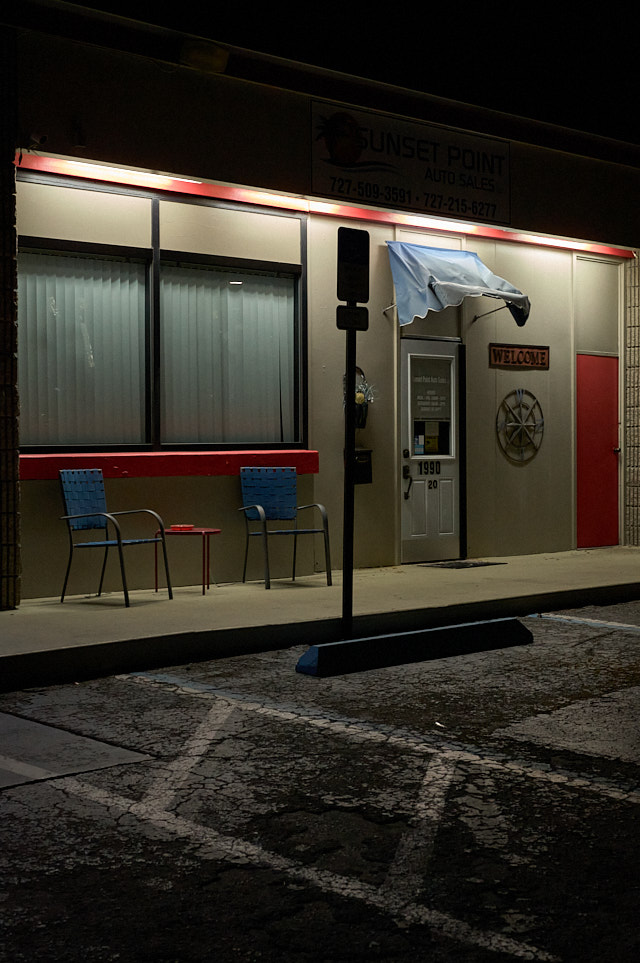
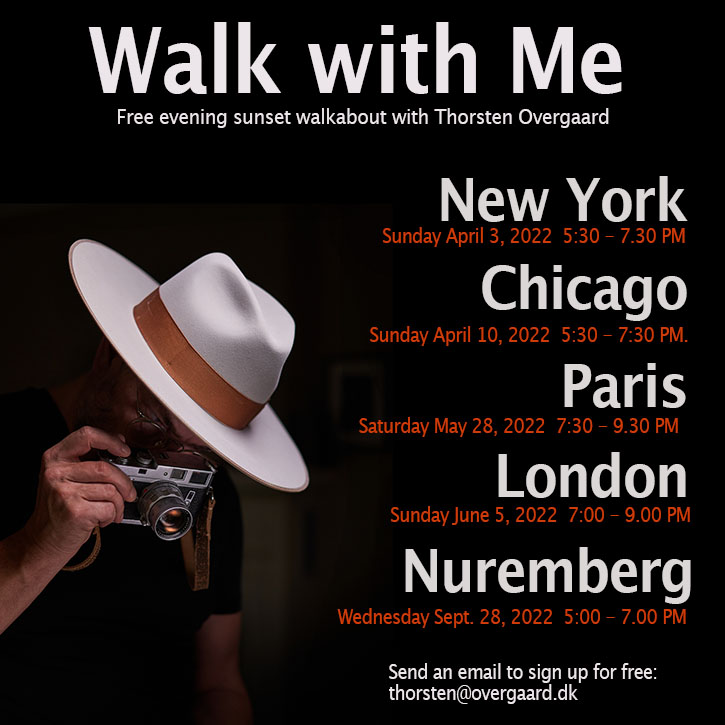
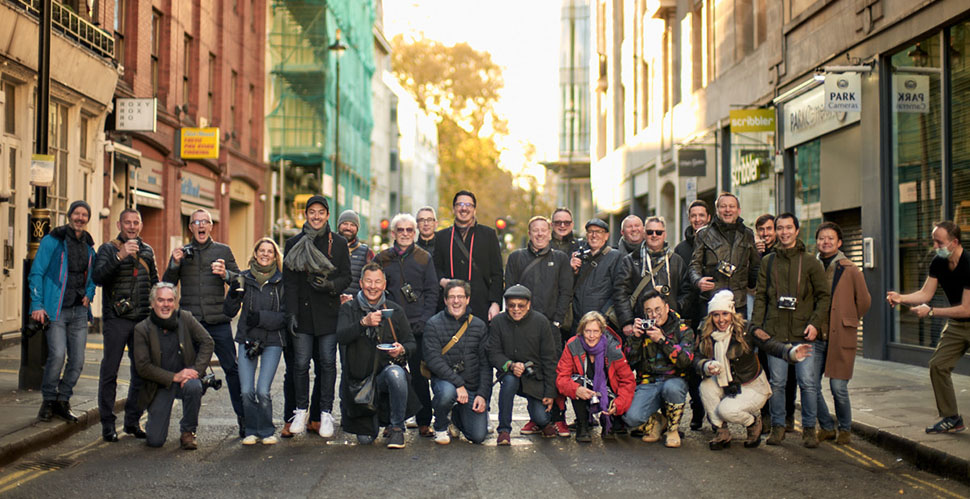


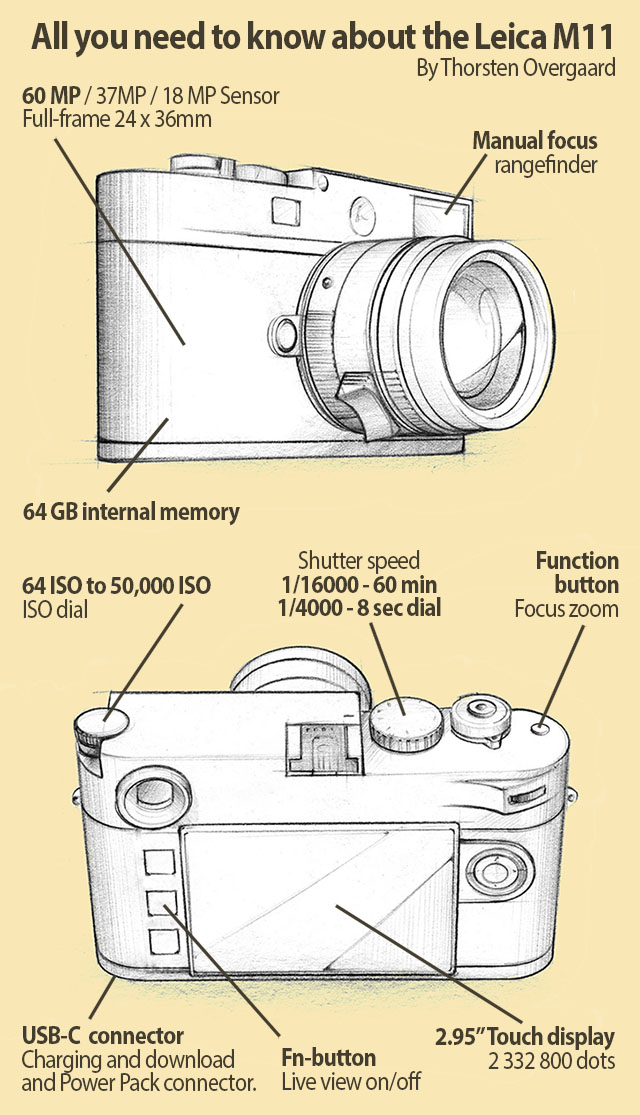


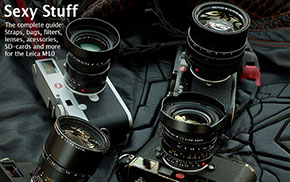


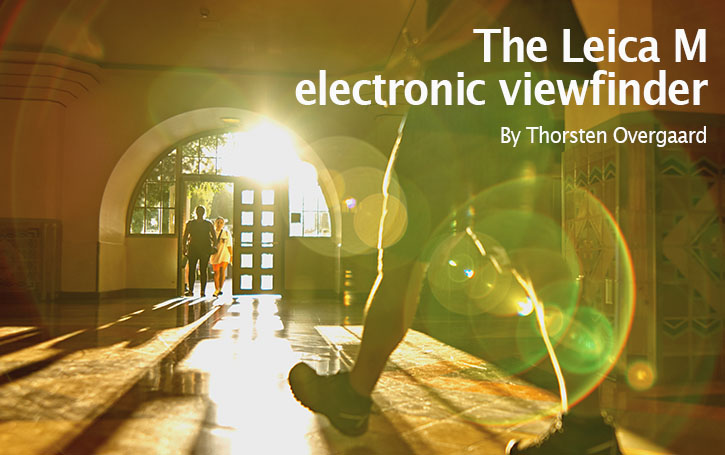
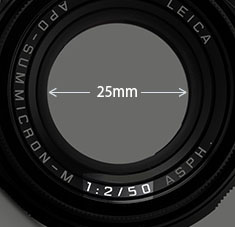
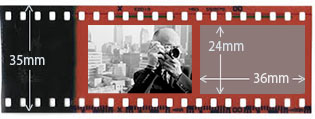
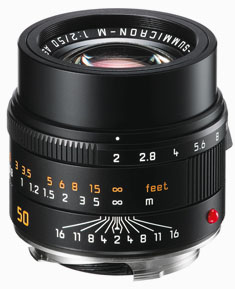
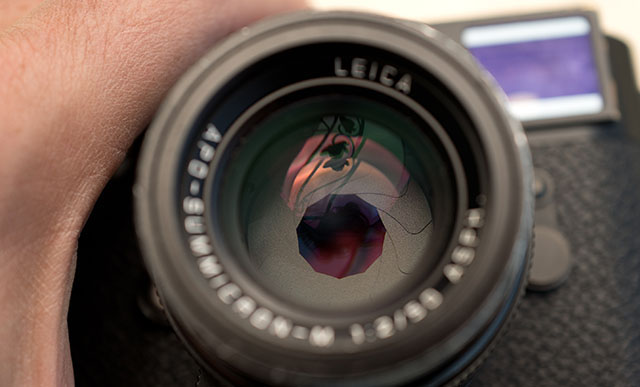
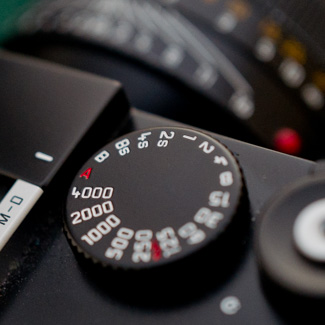

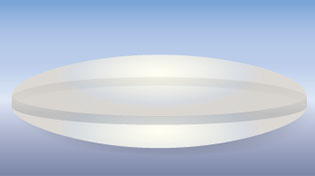
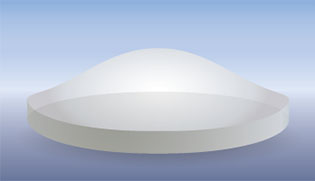
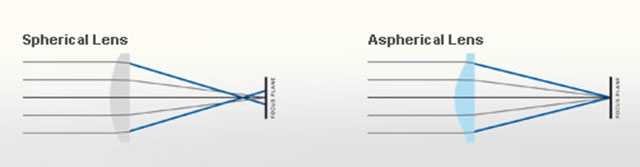
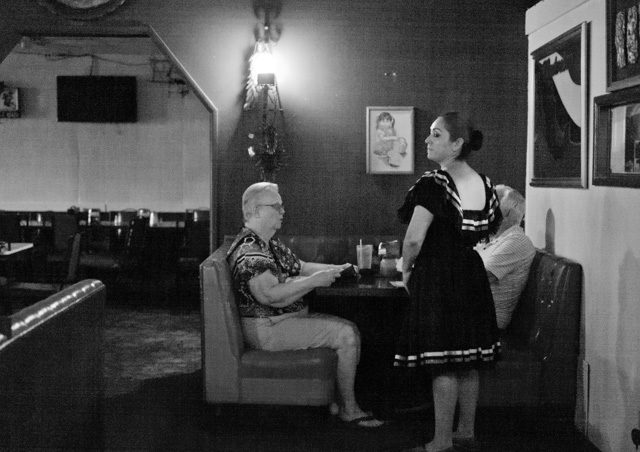

 Bokeh: The visual quality of the out-of-focus areas of a photographic image. Photo at Bar del Fico in Rome.

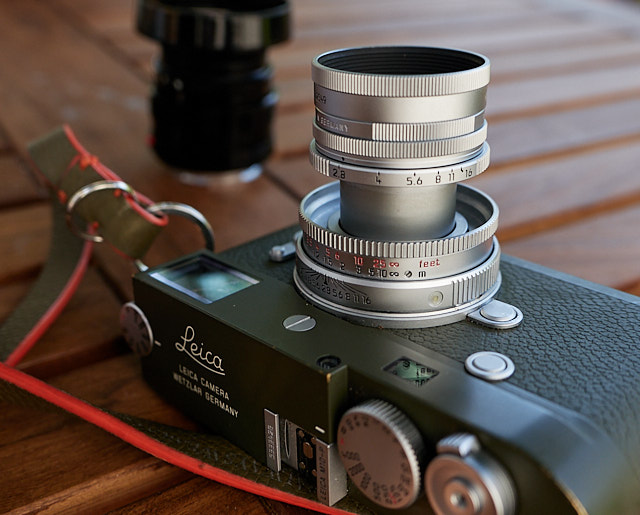
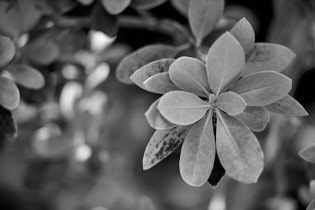
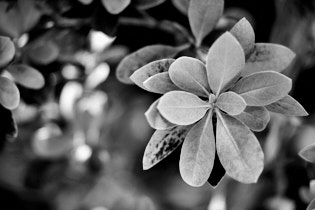
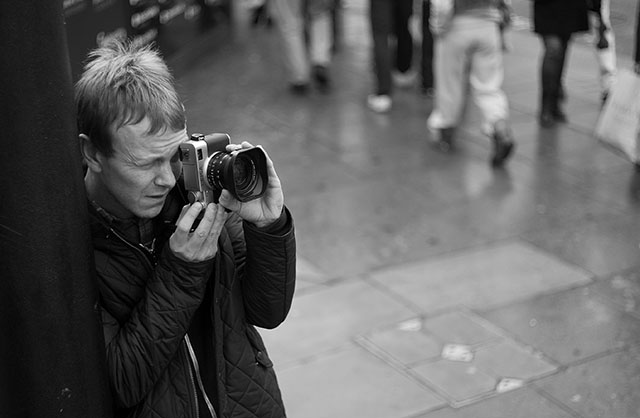
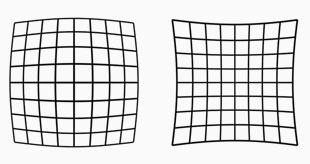
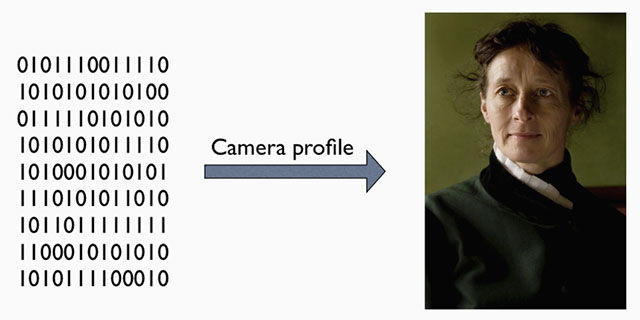
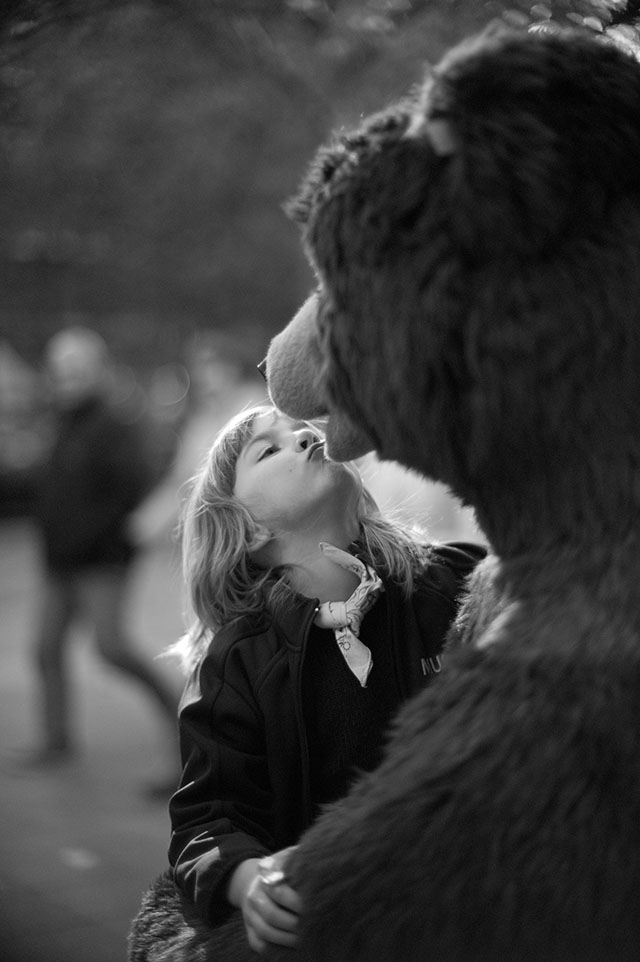

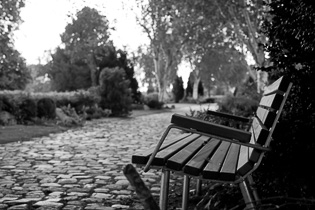
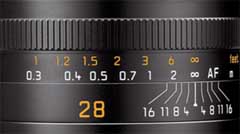
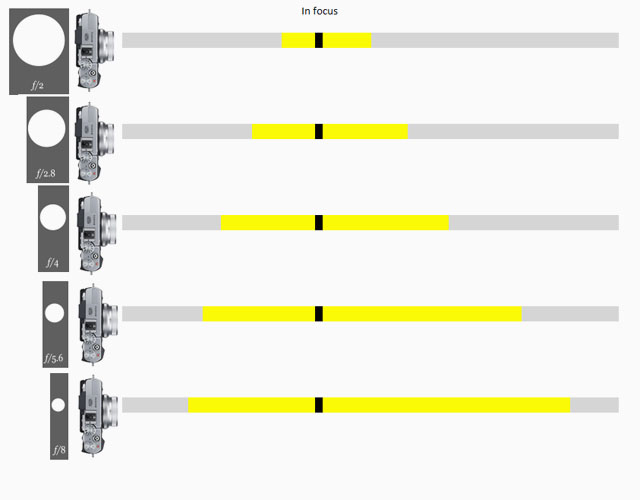

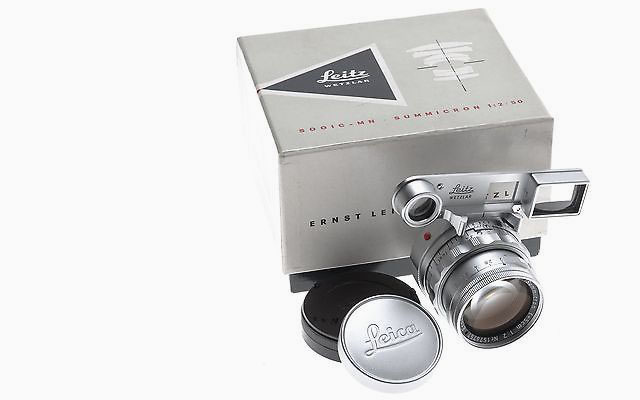 Leitz Summicron DR (Dual Range) f/2.0 (order no SOOIC-MN).
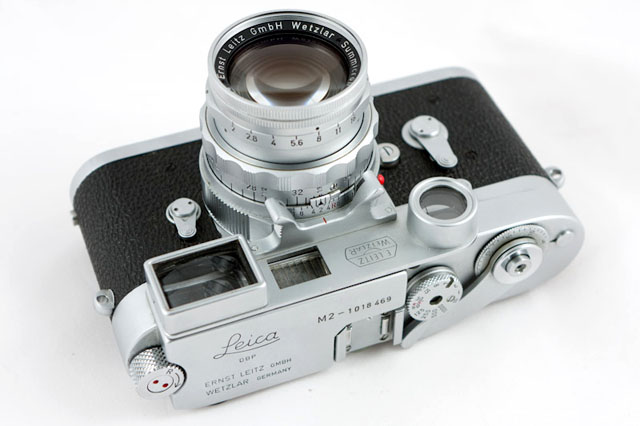

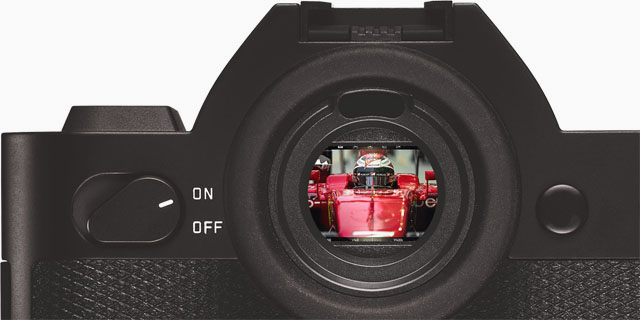
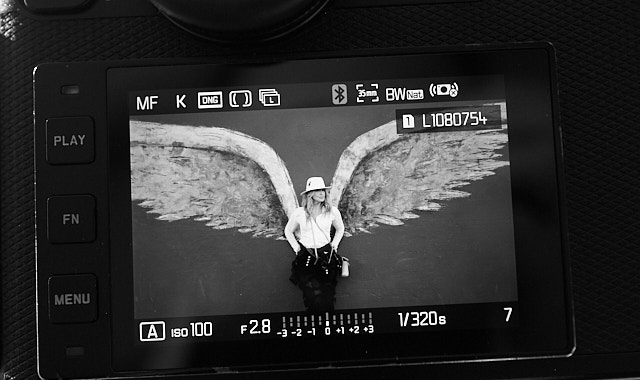


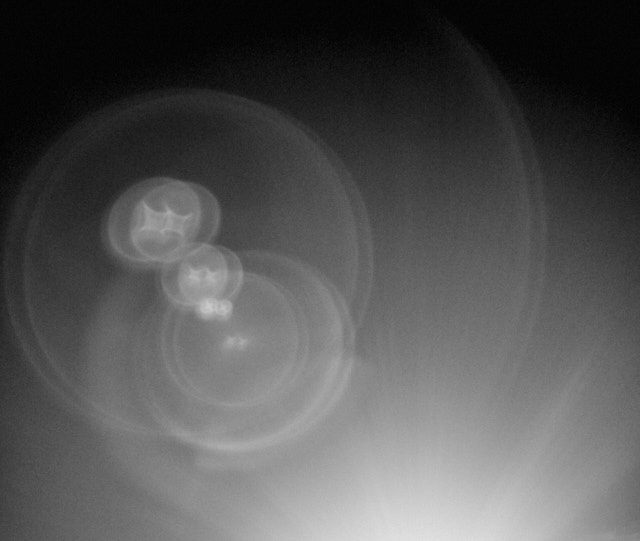
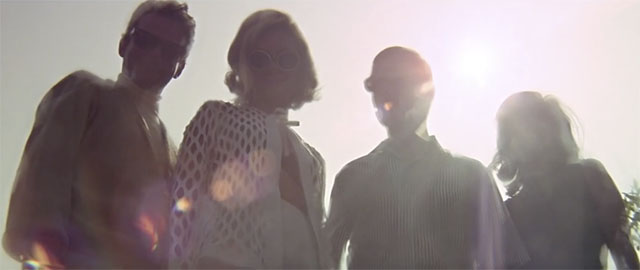
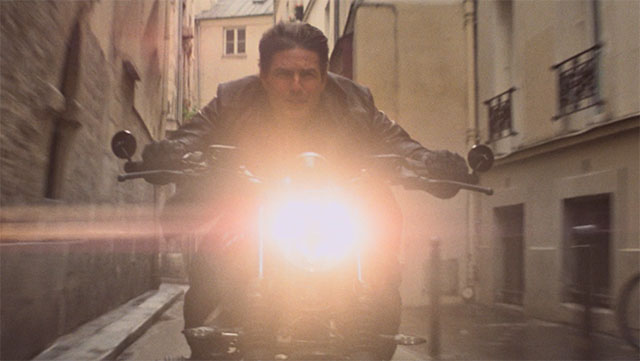


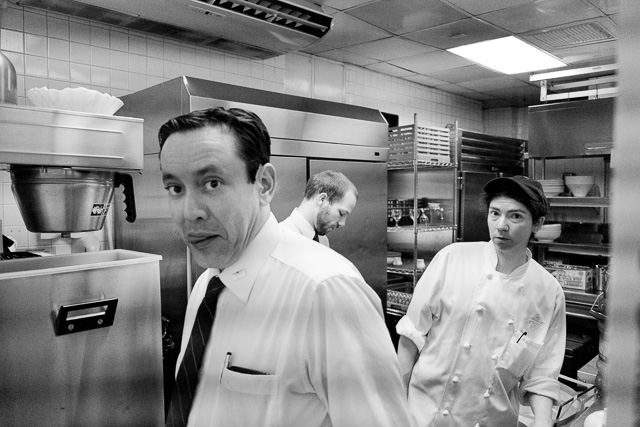
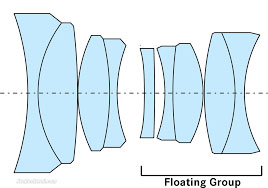

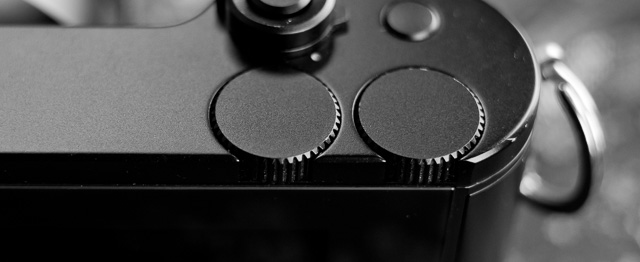
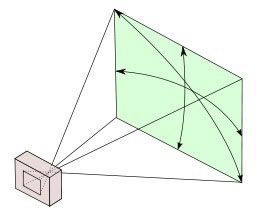
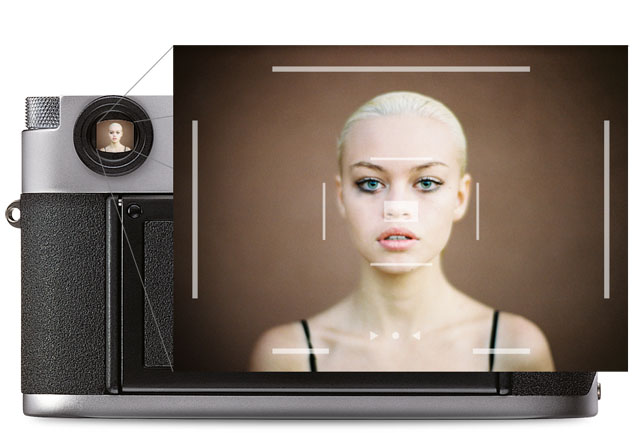
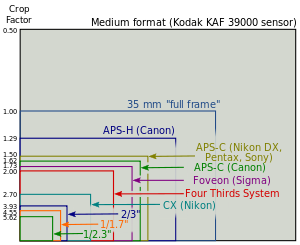

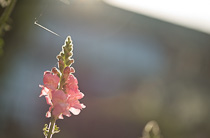
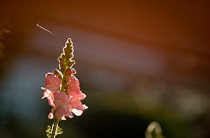

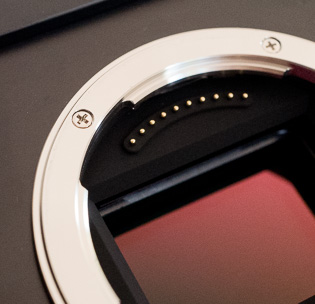
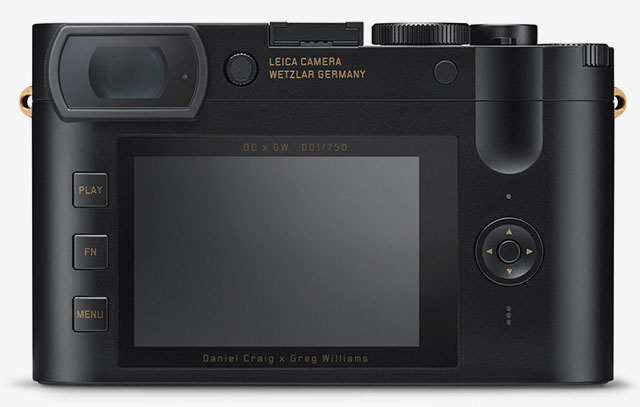
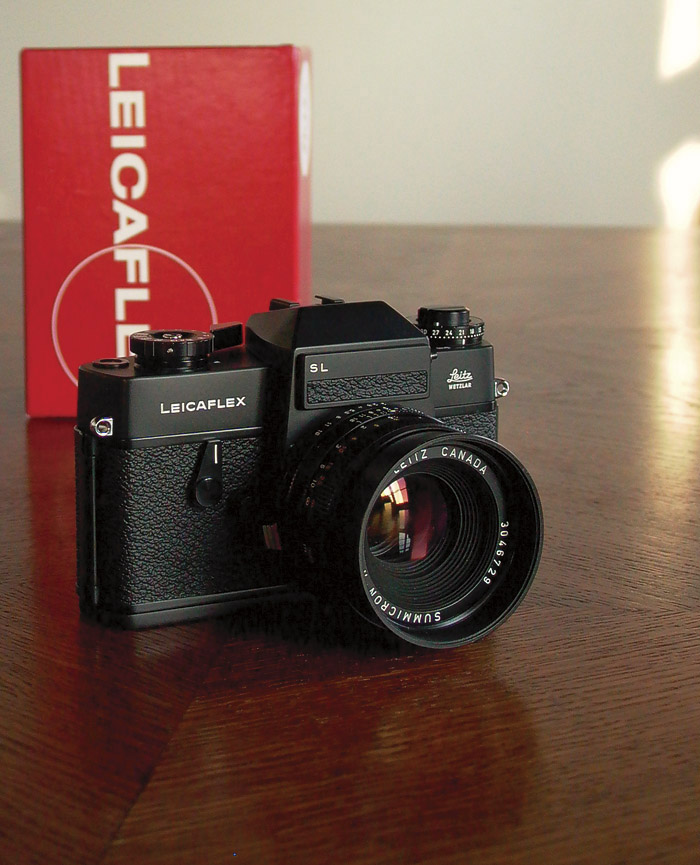

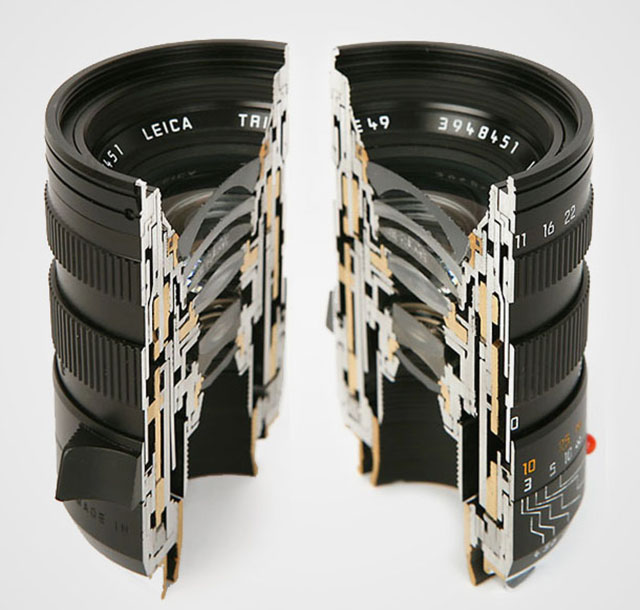
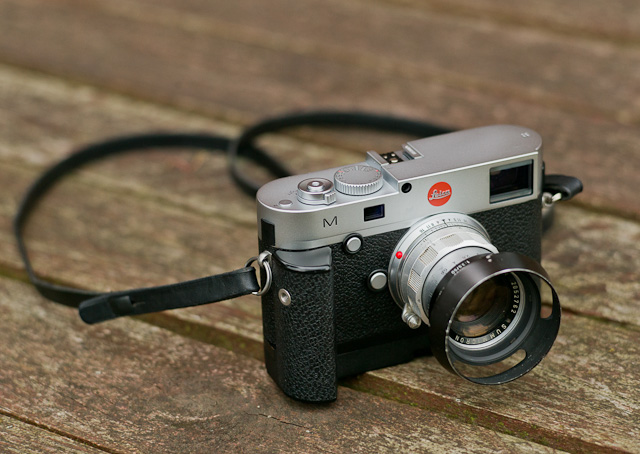
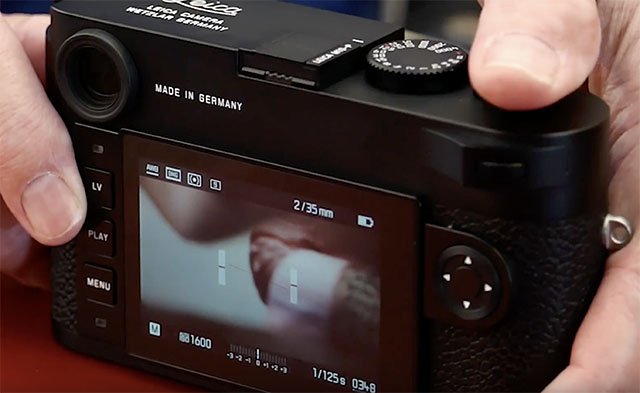 Digitized level gauge in a Leica M10-P. You tilt the camera up and down (front/back and left/right) till the level is completely straight.